81 Set Up Statement Messages
This chapter contains these topics:
To print a personalized message on your A/R statements, you must first set up the text.
From Accounts Receivable (G03), choose Statement/Reminder Processing
From Statement/Reminder Processing (G0322), choose Revise A/R Print Messages
When you add or revise a statement message, the system creates a key for generic statement message text. This key is stored in the Generic Text Index Key table (F00163) and the actual message in the Generic Text Entry table (F0016).
81.1 Entering Messages for A/R Statements
You can enter messages for a specific customer or for all customers within a company.
For example, you might enter the message We appreciate your business for all customers within company 00100. But you might also enter Thank you for doing business with us for 10 years for customer 1001 and Your business is appreciated for customer 3001. Therefore, when you print all statements for company 00100, We appreciate your business will appear on the statements except those for customers 1001 and 3001.
To enter messages for A/R statements
Figure 81-1 Revise A/R Print Messages screen
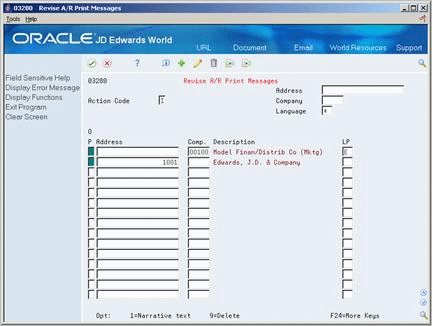
Description of ''Figure 81-1 Revise A/R Print Messages screen''
-
Complete one of the following fields on the first available blank line:
-
Address (customer number)
-
Company
-
-
Complete the following optional field:
-
Language Preference
-
-
Press Enter or click Add to create record.
-
Locate the customer or company you just added.
-
Choose the Narrative Text option next to the customer or company.
Figure 81-2 A/R Statements Print Message Text screen
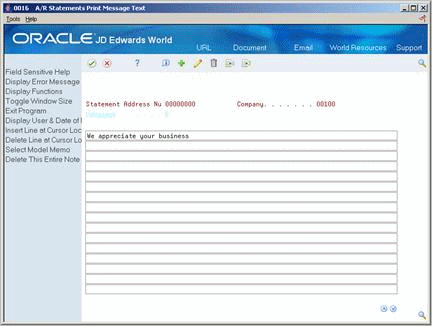
Description of ''Figure 81-2 A/R Statements Print Message Text screen''
-
On A/R Statements Print Message Text, complete the message to appear on the statements.
81.1.1 What You Should Know About
81.2 Setting Up Model Messages for Statements
To print the same statement message for several customers or companies, set up a model message.
To set up model messages for statements
On Revise A/R Print Messages
-
Choose the Narrative text option next to an existing message to access A/R Statements Print Messages Text.
-
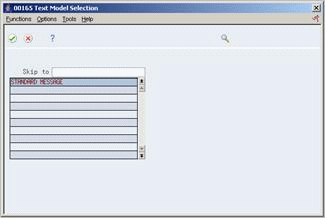
On A/R Statement Print Messages Text, choose the Models function to access Text Model Selection.
-
On Text Model Selection, choose a blank line to add a model.
-
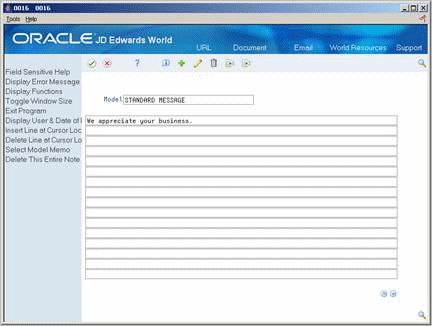
On A/R Statements Print Message Text, complete the following field:
-
Model
-
-
Enter the model message text.
When you exit, the new model appears on Text Model Selection.