36 Deploying Gadgets and the Dashboard
This chapter provides information and instructions about deploying a single gadget and the dashboard on a web page.
This chapter contains the following sections:
36.1 Overview of Deploying Gadgets and the Dashboard
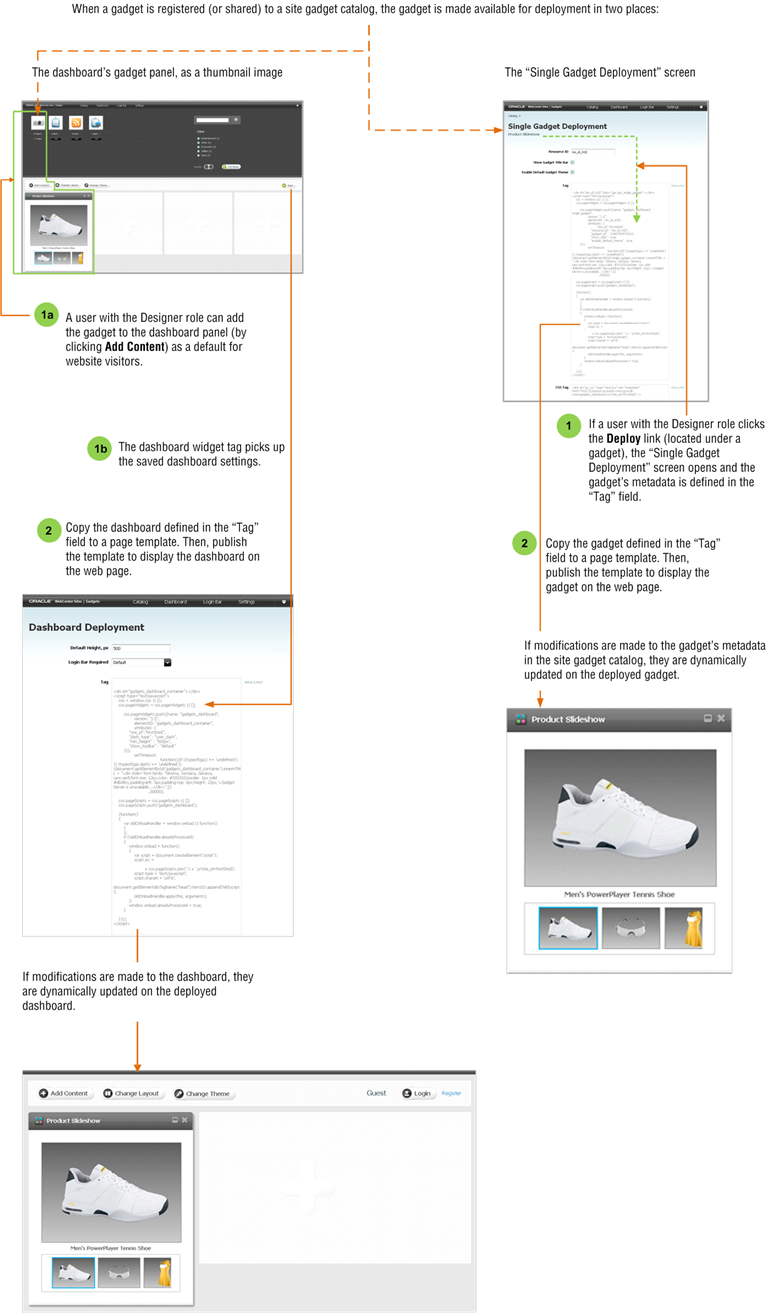
To deploy gadgets, you insert the dashboard tag or the tag for a single gadget into a template asset and then publish that template. Once the dashboard or the individual gadget instance is deployed, any modifications made to either the gadget's metadata (by your administrators) or the dashboard are dynamically updated on the website. Therefore, you do not need to re-deploy the gadget instance or dashboard, unless you want to display the gadget or dashboard on other web pages.
Figure 36-1 provides an overview of the process of deploying a single gadget and the dashboard.
Figure 36-1 Basic Details for Deploying Gadgets and the Dashboard
Description of "Figure 36-1 Basic Details for Deploying Gadgets and the Dashboard"
36.2 Deploying the Dashboard
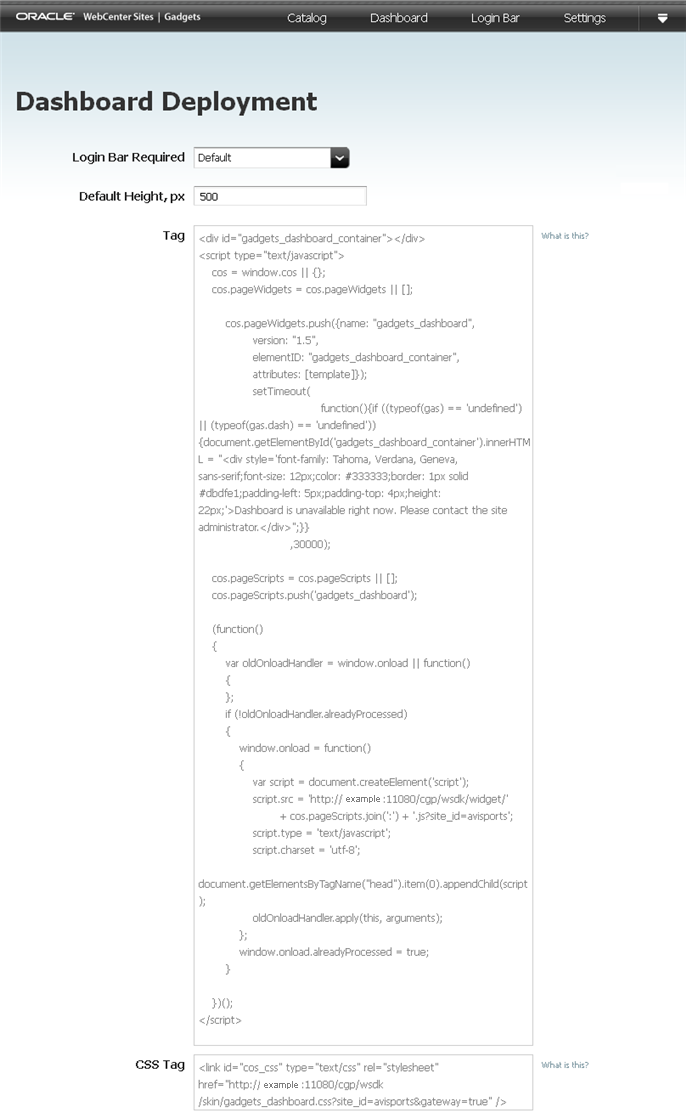
The dashboard's deployment tag is located in the "Dashboard Deployment" screen. The tag specifies the dashboard's current gadgets, layout, color theme, appearance settings, authorized domain (if any), and language preference.
When the dashboard tag is deployed, visitors who access the dashboard are given their own instances of the dashboard. Each visitor can then personalize her own instance in the same way that the Gadgets application's users configure the dashboard (as shown in Section 35.1, "Configuring Dashboard Defaults").
Note:
Keep in mind the following:
-
To deploy the dashboard tag to a template, you will access the WebCenter Sites Admin interface (Admin). Ensure the Admin interface is assigned to the same site as the Gadgets User interface.
-
If Community-Gadgets is integrated with WebCenter Sites, you can also deploy the dashboard directly from the WebCenter Sites Contributor interface. For more information, see Chapter 12, "Working with Widgets and Gadgets in the Contributor Interface."
-
Log in to WebCenter Sites with designer credentials, select the site on which the Gadgets User interface is enabled, and then select the Gadgets icon.
-
In the menu bar, select Dashboard and then select Deploy.
The "Dashboard Deployment" screen opens (shown in Figure 36-2).
Figure 36-2 'Dashboard Deployment' Screen
Description of "Figure 36-2 'Dashboard Deployment' Screen"
-
In the "Dashboard Deployment" screen, do the following:
-
Enter values for the following fields:
-
Default Height, px – Specify the height (in pixels) in which to display the dashboard on the website.
500pixels is the minimum height that can be specified to render the dashboard properly on a web page. -
User Session Bar – Specify whether or not this instance of the dashboard will display a "Login" link to site visitors. For example, if your site already has a dedicated user session bar, you can hide the dashboard's user session bar by selecting the check box.
-
-
In the "Tag" field, copy (Ctrl+C) the dashboard tag.
-
-
Access the WebCenter Sites Admin interface, and insert the tag into the desired template:
Note:
The dashboard requires a minimum page width of 980 pixels to render properly. Therefore, the template into which you wish to insert the dashboard tag should only call the site's header and footer, and not a side navigation.
-
In the menu bar, point to the down-arrow icon, located at the extreme right of the screen, to render the applications bar.
-
In the applications bar, click the WebCenter Sites Admin icon.
The WebCenter Sites Admin interface opens.
-
In the WebCenter Sites Admin interface, locate the template into which you wish to insert the dashboard's tag:
-
From the start menu options, click Search.
-
In the "Search" results list, select Find Template.
-
In the "Search for Templates" form, click Search.
-
In the "List of Templates" screen, select the template into which you wish to insert the dashboard tag.
-
-
In the template's "Inspect" form, click the Edit icon.
-
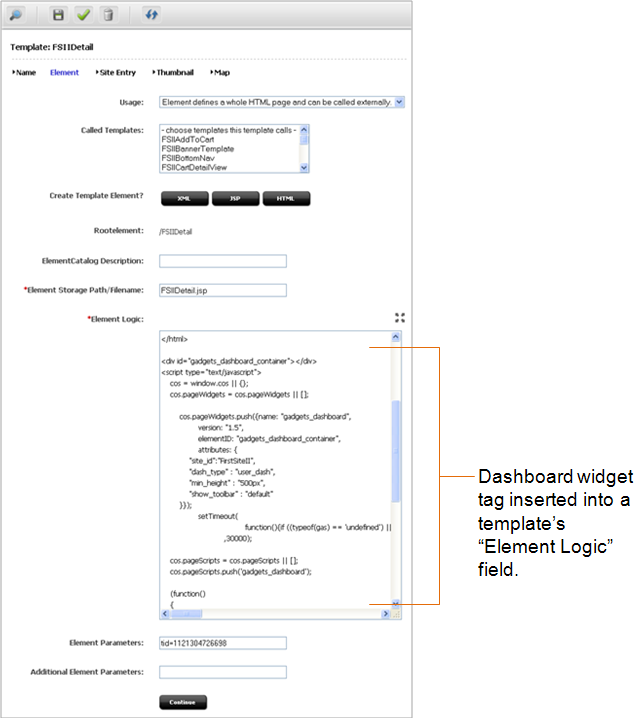
In the template's "Element" screen, insert (Ctrl+V) the widget tag into the "Element Logic" field in the exact location you want to display the dashboard.
Figure 36-3 Dashboard Tag Pasted Into a Template's "Element Logic" Field
Description of "Figure 36-3 Dashboard Tag Pasted Into a Template's "Element Logic" Field"
-
In the asset's toolbar, click the Save icon.
-
-
If you inserted the dashboard tag into a template that also contains multiple gadgets and/or community widget tags, deploy the CSS tag. The CSS tag loads all widget CSS files along with the dashboard and gadget CSS files at the same time, decreasing the load time of a page on which multiple widgets and gadgets are deployed. For instructions, see the Oracle Fusion Middleware WebCenter Sites Developer's Guide.
-
Preview the dashboard to ensure it is properly rendered on the website:
-
Switch to the WebCenter Sites Contributor interface. In the menu bar, point to the down-arrow to open the applications bar. In the applications bar, select the Contributor icon.
-
Find a Page asset that is rendered by the template containing the Dashboard tag. In the Search field, enter the desired search criteria and then click the magnifying glass button.
A "Search" tab opens listing the results of your search.
-
In the search results list, right click the desired Page asset and select Preview from the context menu.
The Page's preview opens displaying the deployed dashboard.
-
-
Publish the template. For instructions, see the Oracle Fusion Middleware WebCenter Sites Administrator's Guide.
-
Access the website to view the dashboard on the page.
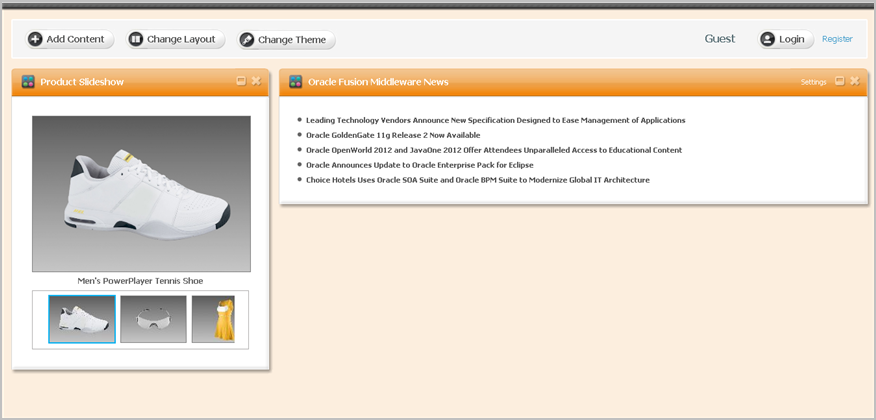
The dashboard you deployed should look similar to the dashboard in Figure 36-4.
Figure 36-4 Dashboard Displayed on a Web Page
Description of "Figure 36-4 Dashboard Displayed on a Web Page"
For instructions on customizing the dashboard on the website, see Section 37.2, "Working with the Dashboard as a Visitor."
36.3 Deploying a Single Gadget
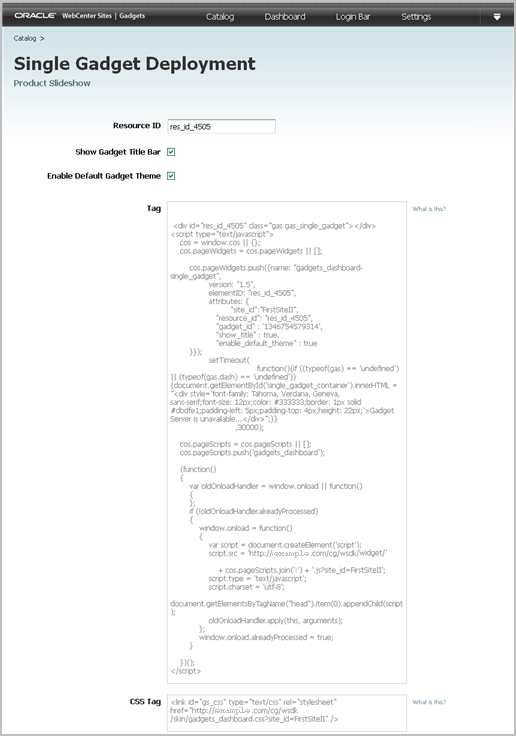
A gadget's deployment tag is located in its associated "Single Gadget Deployment" screen. The tag specifies the gadget's metadata, appearance and language settings, and authorized domain (if any). When you insert a gadget tag into a template, and publish that template to the website, any asset rendered by that template will display the deployed gadget's content.
Note:
Keep in mind the following:
-
To deploy an individual gadget to a template, you will access the WebCenter Sites Admin interface (Admin). Ensure the WebCenter Sites Admin interface is assigned to the same site as the Gadgets User interface.
-
If Community-Gadgets is integrated with WebCenter Sites, you can also deploy a gadget directly from the WebCenter Sites Contributor interface. For more information, see Chapter 12, "Working with Widgets and Gadgets in the Contributor Interface."
-
Log in to WebCenter Sites with designer credentials, select the site on which the Gadgets User interface is enabled, and then select the Gadgets icon.
-
In the "Catalog" screen, navigate to the gadget you wish to deploy and click the Deploy link, located under the gadget.
The "Single Gadget Deployment" screen opens (shown in Figure 36-5).
Figure 36-5 'Single Gadget Deployment' Screen
Description of "Figure 36-5 'Single Gadget Deployment' Screen"
-
In the "Single Gadget Deployment" screen, fill in the following fields:
-
Resource ID – Specify a unique identifier for this particular gadget instance. The resource ID you assign to the gadget becomes the gadget's unique identifier on the website. If you want to deploy the same gadget with different settings on the same site, assign the gadget a different resource ID.
-
Show Gadget Title Bar – Specify whether this gadget will display a title bar along with its content.
-
Enable Default Gadget Theme – Select this checkbox if you want the gadget's content to be displayed on the website with a visible border, title bar, and so on. If this checkbox is not selected, only the gadget's content will be displayed.
-
-
Copy (Ctr+C) the gadget's widget tag.
-
Access the WebCenter Sites Admin interface, and insert the tag into the desired template. Preview how the gadget will be displayed on the website, publish the template, and access the website to view the gadget on the page. For instructions, see steps 4 – 8 in Section 36.2, "Deploying the Dashboard."
-
If you inserted the gadget tag into a template that also contains a dashboard, multiple gadgets, and/or community widget tags, deploy the CSS tag. The CSS tag loads all widget CSS files along with the dashboard and gadget CSS files at the same time, decreasing the load time of a page on which multiple widgets and gadgets are deployed. For instructions, see the Oracle Fusion Middleware WebCenter Sites Developer's Guide.
36.4 Modifying the Deployed Dashboard
If you modify the appearance of the dashboard after its deployment, your changes are automatically propagated to the dashboards of new visitors and anonymous visitors who have reset their browsers. Because authenticated visitors can save their personal settings, their dashboards remain unaffected by your changes.
To modify the deployed dashboard's defaults
-
Log in to WebCenter Sites with designer credentials, select the site on which the Gadgets User interface is enabled, and then select the Gadgets icon.
-
In the menu bar, select Dashboard, and then select Preview.
-
Make the necessary changes to the dashboard's default gadgets, layout, and color theme. For instructions about modifying the dashboard's defaults, see Section 35.1, "Configuring Dashboard Defaults."
-
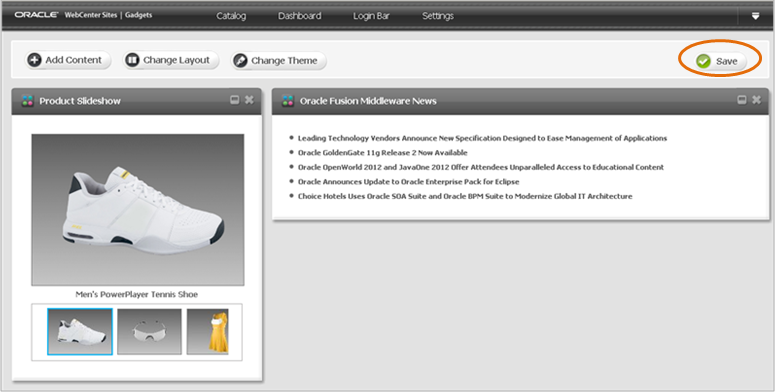
In the dashboard's toolbar, click Save (shown in Figure 36-6).
Figure 36-6 Save Changes to Deployed Dashboard
Description of "Figure 36-6 Save Changes to Deployed Dashboard"
The modifications you made are automatically propagated to the dashboards of new visitors and anonymous visitors who have reset their browsers.