Version 9.0.2
Part Number A92180-01
Home |
Solution Area |
Contents |
Index |
| Oracle9i Discoverer Administrator Tutorial Version 9.0.2 Part Number A92180-01 |
|
It will probably take you about 20 minutes to complete this lesson.
In this lesson you will set up items in a hierarchy to enable end users to drill up and down the hierarchy to view related information.
Drilling between items in a hierarchy usually involves displaying a lesser or greater detail of aggregated information. For example, drilling through the sales figures of an entire company from a region level to a district level and finally to the level of a single store. Each level of the hierarchy reveals a greater detail of aggregated information. End users can perform either filtered or unfiltered drill downs. For example, end users might select either a specific data value for an axis item (e.g. the year 2000), or all data values for the axis item (e.g. all years) and then drill down.
As the Discoverer manager, you can provide end users with several methods of drilling into related information. In this section, you will enable the drill up/down capability.
This lesson consists of the following exercises:
In this exercise you will create a new hierarchy in the New Video Stores business area.
Some of the data in a business organization is hierarchical in nature. Store sales naturally fold into city sales, city sales fold into regional sales, and so on until the top of the hierarchy is reached.
You define a hierarchy to provide end users with an easy way of drilling into aggregated information without having to know exactly what items make up the hierarchy.
To create a new hierarchy:
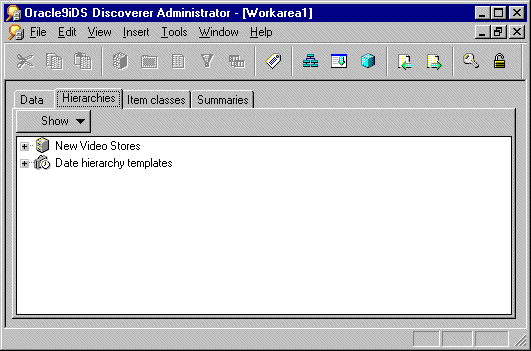
This enables you to work with hierarchies in the New Video Stores business area.
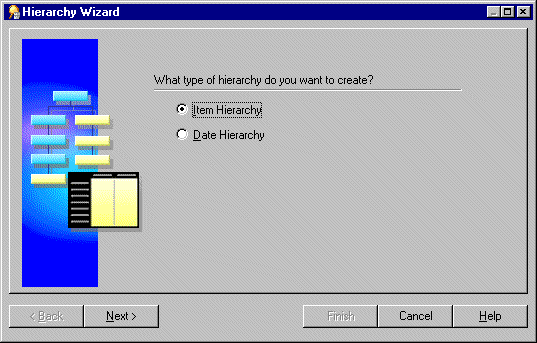
Note: An item hierarchy enables you to drill up and down through character and numeric items. A date hierarchy enables you to drill up and down through date items (e.g. Year, Quarter, Month, Week, Day).
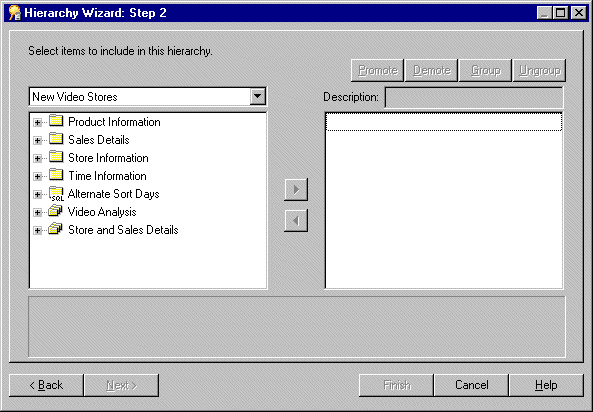
The steps that follow enable you to choose the items that you want end users to see in their drill hierarchies. The position of each item in a hierarchy reflects how the drill is displayed in Discoverer Plus.
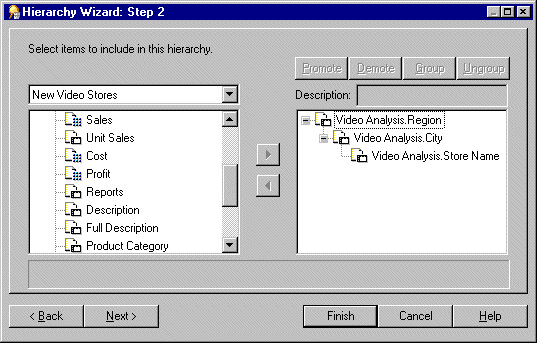
To select more than one item at once, hold down Ctrl while you click on the items.
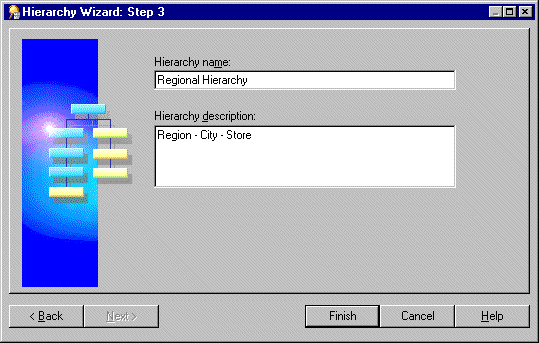
Regional Hierarchy in the Hierarchy name field.
Region-City-Store in the Hierarchy description field.
This now lists the new Regional Hierarchy in the New Video Stores business area.
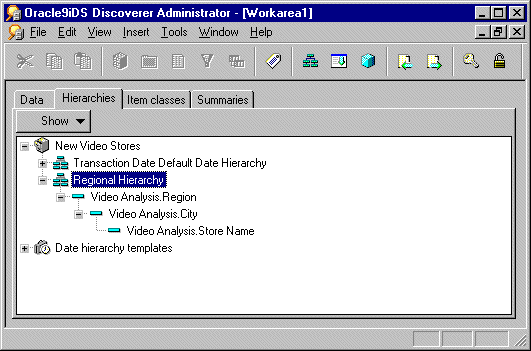
End users can now navigate through all the levels of the hierarchy, skipping levels if necessary.
In this exercise you created a new hierarchy in the New Video Stores business area.
The figure below shows the three levels of the hierarchy you just created (i.e. Region, City, and Store Name) in a Discoverer Plus worksheet.
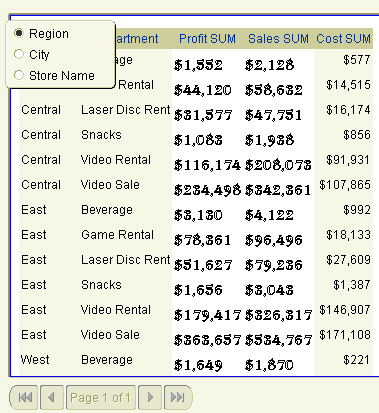
The Discoverer Plus user does not have to explicitly set up a hierarchy. When an item is selected for a workbook that is part of a hierarchy, the user can navigate to any other element in the hierarchy using a popup menu.
In this exercise you will create a more complex item hierarchy where the end user can drill into product details.
To create a more complex item hierarchy in the New Video Stores business area:
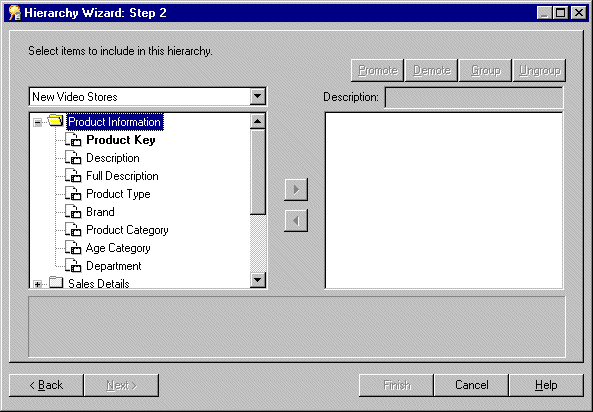
You do this by selecting the first item, then hold down the Ctrl key and highlight the second item.
Highlight both of the following items:
Grouping items in this way causes them to be drawn simultaneously into an end user query in Discoverer Plus. When you drill down from Product Category Discoverer will display Description and Full Description at the same level.
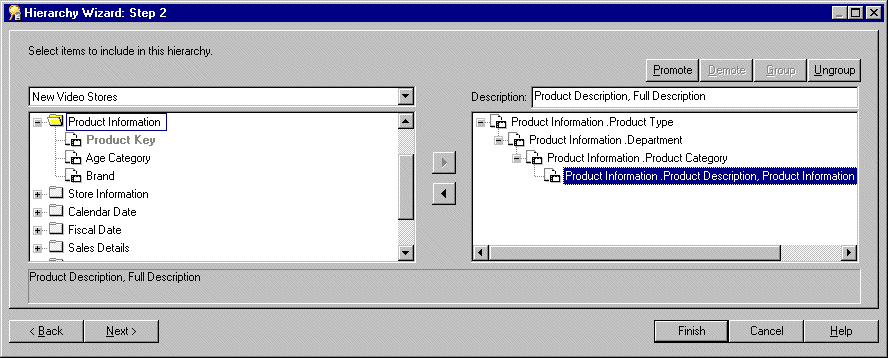
Product Hierarchy in the Hierarchy name field.
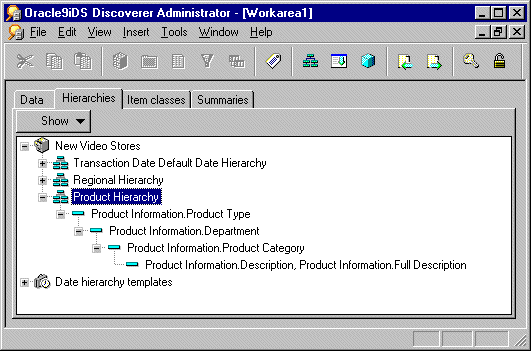
In this exercise you created a more complex item hierarchy that the end user can use to drill into product details.
In this exercise you will create a new date hierarchy template in addition to the existing date hierarchy templates.
Date hierarchy templates enable date hierarchies to be automatically associated with date items. For example, a date hierarchy template can be created that defines a drill from year to month to week to day. When you associate a date hierarchy template with a date item, Discoverer automatically creates new items for each date (e.g. year, month, week, day) and defines drill relationships between them.
Discoverer Administrator already uses a standard date hierarchy template which includes the hierarchy of year to quarter to month to day. If that template does not meet end user requirements, you can create a new date hierarchy. For example, you might want to drill from year to week rather than month, or even drill to hours minutes and seconds for time based data.
To create a date hierarchy template:
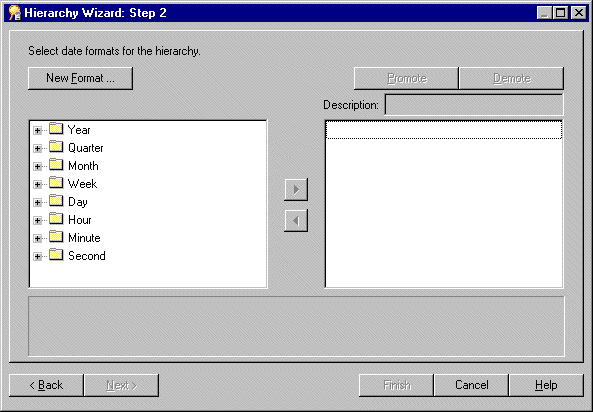
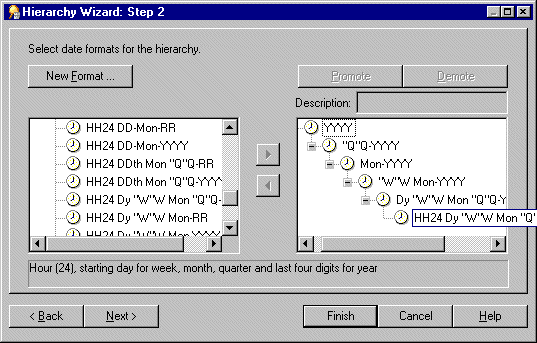
This is where you assign the date hierarchy (that you have just created) to items in the business area.
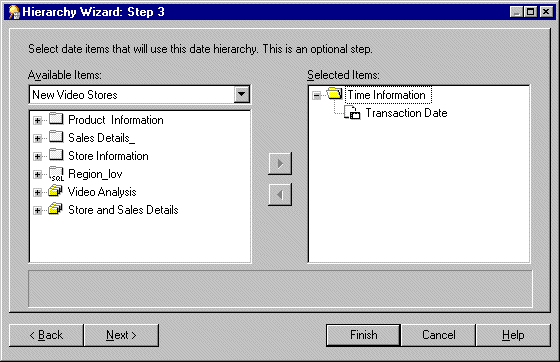
Y-Q-M-W-D Hierarchy into the Hierarchy Name field and leave the Description field blank.
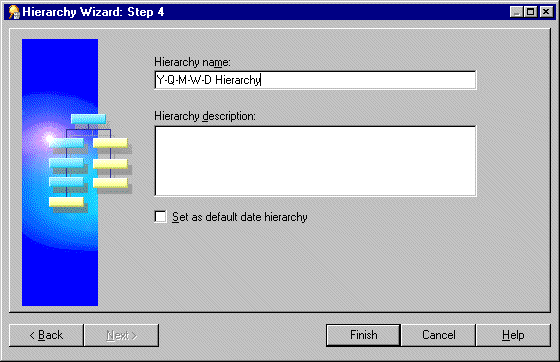
Discoverer creates the new date hierarchy template (Y-Q-M-W-D Hierarchy) and applies the hierarchy items to the Transaction Date item in the Time Information folder. Discoverer displays the new date hierarchy items in the Time Information folder.
Note: When you apply a date hierarchy template to a date item that already has a date hierarchy applied, Discoverer creates additional date items for the new date hierarchy but does not remove date items from the old date hierarchy. If you want to remove the unused date items you must manually delete them from the folder.
In this exercise you created a new date hierarchy template in addition to the existing date hierarchy templates.
In Discoverer Plus, end users can navigate through all levels of the hierarchy, skipping levels if necessary. The figure below is a Discoverer Plus worksheet that shows the levels of the date hierarchy that you created in the previous exercise. The end user does not have to explicitly set up a date hierarchy. When a date that is part of a hierarchy is selected for a workbook, the user can navigate to any other element in the date hierarchy using a pop-up menu.
For more information about date hierarchies, click Help.
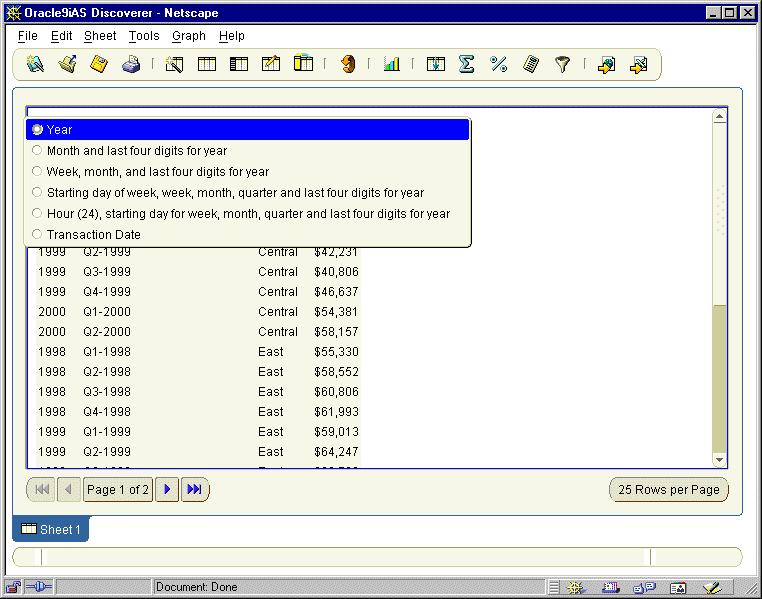
In this exercise you created a new date hierarchy template in addition to the existing date hierarchy templates
In this exercise you will modify the content type property of some items.
The content type property determines how Discoverer Plus treats items that it displays in a workbook.
Discoverer Plus displays items in one of two ways:
For example, product names, regions, sales figures, calculation results. Discoverer displays the data directly in a workbook.
For example, the name and path of a video file stored in the local or network file system (e.g. d:\salesfilms\january.avi). For Discoverer to display the data contained in this file a video application must run.
Where an item contains a reference to a file that requires another application to run, Discoverer finds and loads the application that displays the contents of the file.
The content type item property can have one of the two following values:
Discoverer displays data about the file in a cell in a workbook. When the end user clicks the cell, Discoverer launches an application appropriate to the file extension (defined on the end user machine) and the application displays the contents of the file.
Discoverer displays the data from the database in a cell in a workbook.
The table below lists some applications and the file extensions that are used to launch them.
| Application | File name extension |
|---|---|
|
MS Word |
.doc |
|
Media Player |
.avi |
|
MS Excel |
.xls |
|
Lotus Screencam |
.scm |
|
Web Browser |
.html |
In the New Video Stores business area, the Store Information.Reports item refers to a MSWord document and the information in the database column is the directory path and filename. The Product Information.Full Description item refers to a Web page containing HTML code and the information in the database column is also the directory path and filename. The Reports document must be opened by a word processor, and the Full Description document by a Web browser.
The following exercise shows how you modify the content type of an item so that Discoverer Plus will pass the contents of the item (i.e. the directory path and file name) to the operating system, which will launch the appropriate application to view the contents of the file.
How to modify the content type of an item:
In this exercise you modified the content type property of some items.
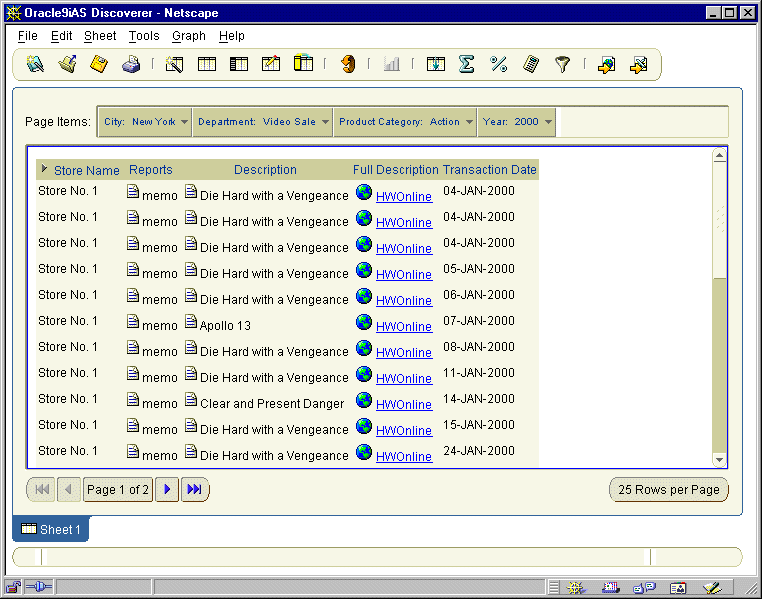
When you display these items in Discoverer Plus, the information is displayed in the appropriate word processor application or Web browser.
The end user can tell which items need external applications to run based on the icon displayed in the worksheet. The figure below shows an example of a worksheet that can invoke Microsoft Word and an HTML page.
In this exercise you will edit a list of values item class that is also used for drill-to-detail.
In Discoverer Plus, end users can use the hierarchies that you create to drill up or down to view different levels of aggregated data. End users want to drill to detail, that is jump to related information details in the aggregated data. For example, an end user reviewing daily sales figures from a number of video stores might want to see the detail transaction records that make up the daily total.
To enable an end user to drill to the detail data, you need to create a drill-to-detail item class. A drill-to-detail item class enables end users to select an aggregated detail item in a worksheet and drill directly to the source data that was aggregated to produce the result.
You can drill to any item in an item class and the items in an item class can be from different folders. These two conditions mean that a link exists between the items, and end users can easily drill to detail to any folder which has an item in the same item class.
The following steps show how easy it is to edit an item class that drills from aggregated information into more detailed information, and for viewing a list of unique values from the Region folder. (i.e. an item class created by the Load Wizard at the start of this tutorial. for more information, see Chapter 3, "Exercise 2: Creating a new business area using the Load Wizard")
To edit a drill-to-detail item class:
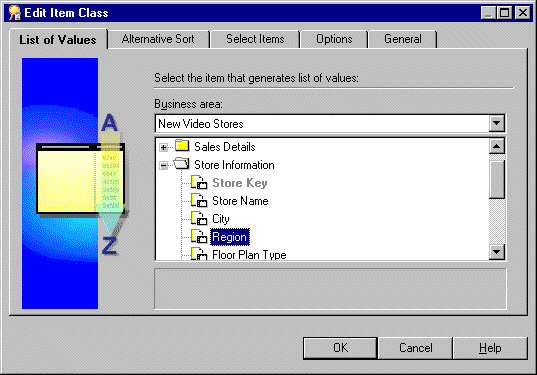
The next steps define a list of unique values in the Region item.
This determines that the item class can be used in drills-to-detail.
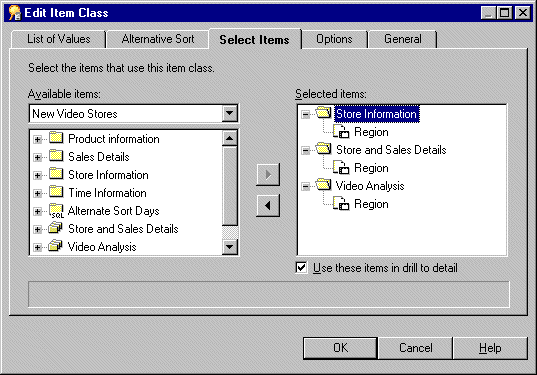
Note: Because a list of values is associated with the Region item, Discoverer displays a + symbol next to it in the Workarea: Data tab. End users can view the list of unique values referenced by the item.
For more information, click Help.
In this exercise you edited a list of values item class that is also used for drill-to-detail.
In this lesson you set up items in a hierarchy to enable end users to drill up and down the hierarchy to view related information.
In this lesson you completed the following exercises:
In the next lesson you will create summary folders. Summary folders help reduce the time taken to retrieve data for Discoverer Plus and Discoverer Viewer users.
|
|
 Copyright © 2002 Oracle Corporation. All Rights Reserved. |
|