Release 2 (v9.0.2)
Part Number A95949-01
Home |
Solution Area |
Contents |
Index |
| Oracle9i Warehouse Builder User's Guide Release 2 (v9.0.2) Part Number A95949-01 |
|
This chapter describes how to start using Warehouse Builder. It also introduces you to the Warehouse Builder Console and some basic Warehouse Builder tasks.
This chapter includes the following topics:
The following instructions show you how to start the Warehouse Builder client.
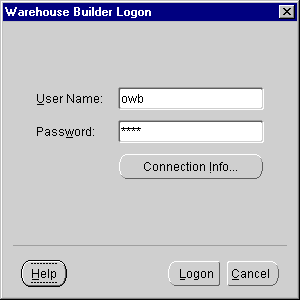
To log on to a repository:
The Warehouse Builder Logon dialog displays.
Warehouse Builder displays the Project dialog.
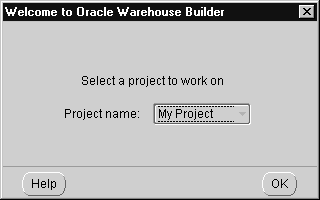
This repository contains only the shell project My Project.
When a repository contains multiple projects, you can select a project from the drop-down list. This list includes all projects in the repository.
Warehouse Builder displays the console window in the Project view. This window remains open during the session.
The Warehouse Builder console has the following components:
Figure 2-3 shows the console in the Project view.
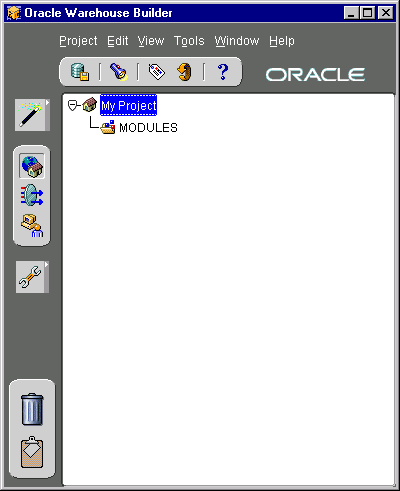
From the console toolbar, you can:

You can also perform these actions from the menus.
The Warehouse Builder console has the following views:

When the Warehouse Builder client starts, the console begins in the Project view and displays the navigation tree for the project selected when you logged on. To change views during a session, click one of the view buttons.
In the Project environment, you can:
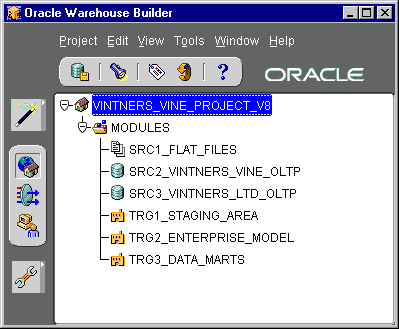
You can create transformation libraries and transformations within libraries when the console is in the Transformation environment. Figure 2-7 shows the navigation tree for the Transformation Library.
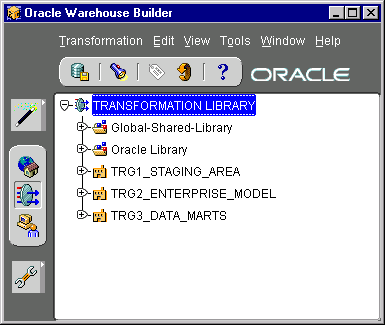
The tree provides access to the built-in Oracle Library as well as the transformation operations created by developers for your warehouse.
In the Administrative environment, you can:
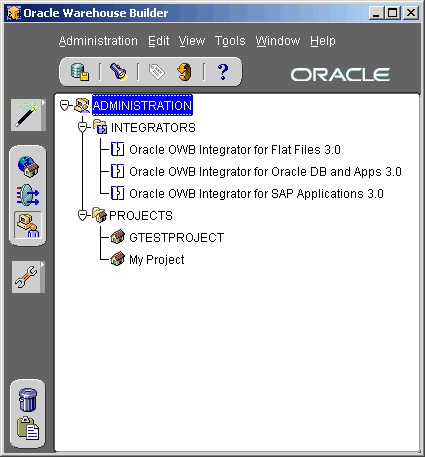
Figure 2-8 shows the Administration tree. The tree contains Projects and the Integrators supplied with Warehouse Builder. The Integrators can retrieve metadata from applications based on relational databases, flat files, and proprietary systems.
Utilities are executables that are separate from Warehouse Builder. You can run a utility from the Warehouse Builder console using the Utilities icon.
To run a utility from the Warehouse Builder console:

The Utilities Drawer is configured with the following utilities:
You can configure these icons to refer to the utilities installed at your site.
The following instructions describe how to display utility properties, add a new utility, update the configuration of an existing utility, and delete an existing utility.
The Preferences sheet contains utility properties.
To display the Preferences sheet:
Warehouse Builder displays the Preferences dialog.
Warehouse Builder displays the Utility sheet.
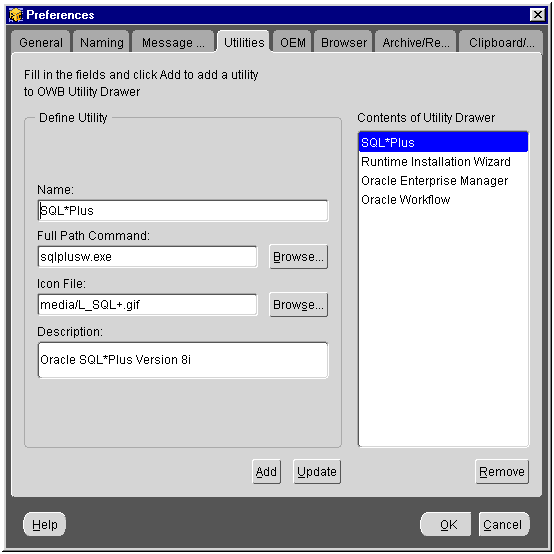
To add a utility to the Utilities Drawer:
To update the configuration of a utility:
Warehouse Builder displays the configuration information.
To remove a utility from the Utilities Drawer:
Warehouse Builder removes the utility from the Utility Drawer.
The Recycle Bin and Clipboard buttons are located in the lower left corner of the Warehouse Builder Console. The Recycle Bin stores deleted objects with the option of restoring them at a later time. The Clipboard stores one cut or copied object in Warehouse Builder that can be pasted at a later time.
Use the Clipboard/Recycle tab from the Preferences dialog to specify how to handle the contents of the Recycle Bin and Clipboard when you exit Warehouse Builder. For more information, see "Clipboard/Recycle Preferences".

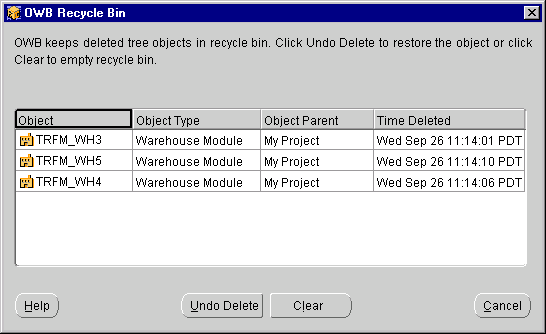
The Recycle Bin stores objects you delete from the navigation tree. Use the Recycle Bin dialog to restore deleted objects back to the navigation tree (repository), or to clear all the objects from the Recycle Bin.
You can also restore deleted objects into a different repository as a way of moving objects across repositories. In order to do this, your Recycle Bin preferences must be set to persist the Recycle Bin contents across multiple sessions. When you open the new repository, the Recycle Bin contents are the same. Select an object and click Undo Delete. The object will be added to the current repository. An object that is restored using the Undo Delete function retains its unique object identifier (UOID) but loses its foreign key references.
Because the Warehouse Builder Recycle Bin is stored on the client machine, it cannot be shared by multiple users. You can set up how to handle the contents of your Recycle Bin across sessions by setting up your Recycle Bin Preferences. For more information, see "Clipboard/Recycle Preferences". The Recycle Bin is not affected by commit and rollback actions.
Table 2-1 lists the actions available for the Recycle Bin.
Warehouse Builder enables you to use cut, copy, and paste to edit objects in your repository. When you select an object and choose Cut or Copy from the Edit menu, the object is stored in the clipboard. You can then choose to Paste that object within the same repository or in a different repository. When you click the clipboard icon, the clipboard contents display in the Clipboard dialog.
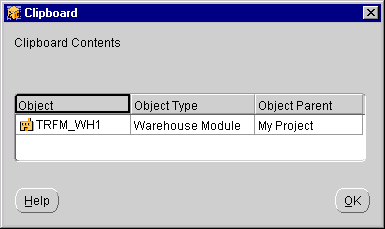
You can either use the Edit menu to select these actions or use the quick keys listed in Table 2-2.
To set Clipboard/Recycle preferences:
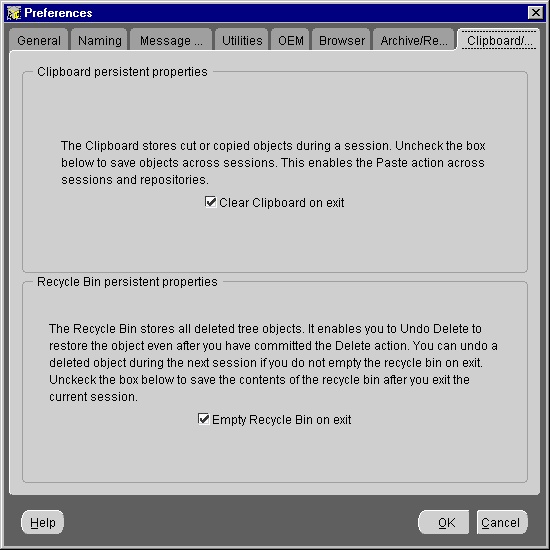
Clipboard persistence properties: the clipboard stores the object you last cut or copied from the Warehouse Builder tree. Because the clipboard is specific to your Warehouse Builder client, you can set a preference indicating whether you want the object stored in it for only one Warehouse Builder session or across all Warehouse Builder sessions. The default setting is to empty the clipboard each time you log out of a session.
If you want to paste the cut or copied object into another repository, or during your next Warehouse Builder session, you must uncheck the Clear Clipboard on exit box.
Recycle bin persistence properties: the recycle bin stores all the objects you delete from the Warehouse Builder tree. Because the recycle bin is specific to your Warehouse Builder client, you can set a preference indicating whether you want the objects stored in it for only one Warehouse Builder session or across all Warehouse Builder sessions. The default setting is to empty the recycle bin each time you log out of a session.
If you choose to persist the deleted objects in the recycle bin, you can restore them to the repository during another session. The recycle bin is unaffected by Commit and Rollback actions. To preserve the objects in the recycle bin across sessions, you must uncheck the Empty Recycle Bin on Exit box.
A Warehouse Builder Project is a repository structure that stores and organizes the definitions of a data warehouse. These definitions include data sources, target warehouse objects, mappings of source data to various targets, transformation operations, and configuration parameters.
Warehouse Builder projects are divided into containers called modules. Modules contain objects. Figure 2-15 shows the structure of a Project.
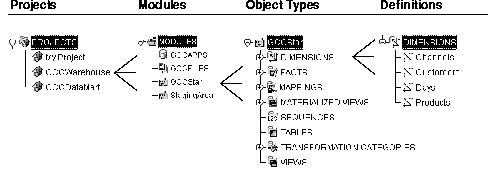
The navigation tree shows the modules within the project. A project contains the following types of modules, represented by different icons:
The initial Warehouse Builder repository contains the following:
The project shell is required for the initial logon sequence and can be deleted after you create your own projects.
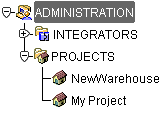
To create a new project:
Warehouse Builder displays the Administration tree.
Warehouse Builder displays the Projects and Integrators branches in the tree.
Warehouse Builder displays the welcome page for the New Project wizard.
Warehouse Builder displays the Name page.
Warehouse Builder creates a project and inserts its name under PROJECTS.
Source modules contain definitions of:
Target warehouse modules contain definitions of:
Multi-user access ensures that only one user has write privileges to an object while allowing read-only access on the object to other users. The lock is maintained for the duration of any transaction started by the write-privileged user. The lock is released when the user commits the changes or performs a rollback and closes all editors associated with the object.
You lock an object when you open the editor, property sheet, or dialog for the object. You acquire a folder-in-use lock when you access an object in a Warehouse Builder hierarchy. This lock prevents other users from deleting a higher object in the hierarchy. For example, if you are editing an object in a module, other users cannot delete the module.
To enter read/write mode for an object and lock the object, you open an editor, property sheet, or dialog. By default, you access objects in read/write mode.
Editors, property sheets, and dialogs indicate in the title bar that the object is in read/write mode.

To end the read/write mode for an object and unlock the object for others, do one of the following:
If you attempt to open an object that is locked by another user, Warehouse Builder displays a message that prompts you either to cancel the request or access the object in read-only mode.
If you choose to continue in read-only mode, the editor indicates in the title bar that the object is locked and shows the ID of the user locking the object. You can move objects around on the editor canvas or expand and collapse the object icons. You cannot edit the object in read-only mode. If you try to edit an object in read-only mode, an error message dialog displays. On a property sheet opened in read-only mode, the OK button is disabled.
Whenever a Warehouse Builder object is locked by a user, other users can view the changes by using synchronize.
Warehouse Builder includes the following synchronization:
This section describes:
Warehouse Builder provides wizards for creating objects. You open a wizard by right-clicking on an object type and selecting Create. Wizards contain pages. The first page is the welcome page. This page lists the number of pages in the wizard and describes the task performed on each page.
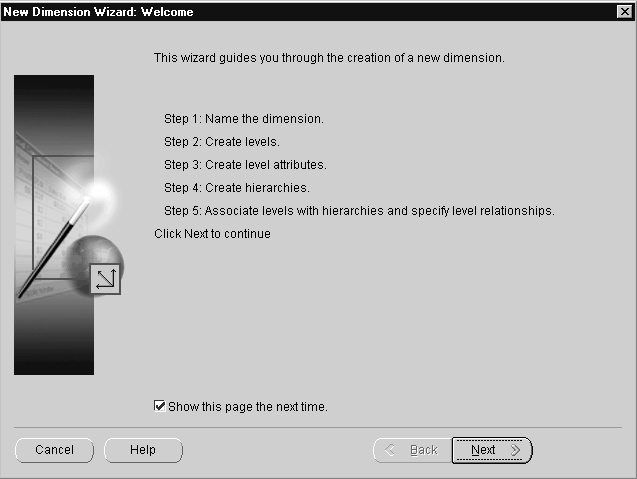
You can configure wizards to skip the welcome pages by unchecking the Show this page the next time check box. To re-enable the welcome page, open the Preferences sheet from the Project menu and check the Display Welcome page on all wizards box.
To navigate through the pages of a wizard, click the Back and Next buttons. Click Cancel to exit without saving your work. You can move around a page using a mouse or using the Tab key. Use Control-Tab to move the cursor out of a long description text box.
For help on a specific topic in a wizard, click Help at the bottom of the wizard page.
Warehouse Builder maintains a logical and a physical name for each object stored in the repository. A logical name is a descriptive business name for an object.
When you generate DDL scripts for a named object, the physical names are used. Physical names must conform to the syntax rules for basic elements as defined in the Oracle8i/9i SQL Reference.
Because project names are not used in SQL code generation, their names need not conform to the syntax rules for physical names. The length of a project name must not exceed 30 characters.
Names must be unique within their category:
You can create a logical name for an object or change the logical name of an existing object when Warehouse Builder is in logical name mode. Warehouse Builder editors, wizards, and property sheets display the logical names of objects in this mode.
A logical name must conform to these rules:
When you create a logical name, Warehouse Builder generates a valid physical name that resembles the logical name. If you create a logical name that duplicates an existing physical name, Warehouse Builder appends an underscore and a number to the logical name.
You can create a physical name for an object or change the physical name of an existing object when Warehouse Builder is in the Physical name mode. Warehouse Builder editors, wizards, and property sheets display physical names of objects in this mode. Physical names are converted to uppercase.
A physical name must:
Warehouse Builder prevents you from entering an invalid physical name. For example, you cannot enter a duplicate name, a name with too many characters, or a name that is a reserved word.
To create or change a logical name for an object, Warehouse Builder must be in logical name mode. To create or change a physical name for an object, Warehouse Builder must be in physical name mode.
The default naming preferences for Warehouse Builder are:
Icons for the name and propagation modes are located in the lower-right corner of the editors. These icons indicate the current mode.
To set the name mode:
Warehouse Builder displays the Preferences dialog.
Warehouse Builder displays the Naming sheet.
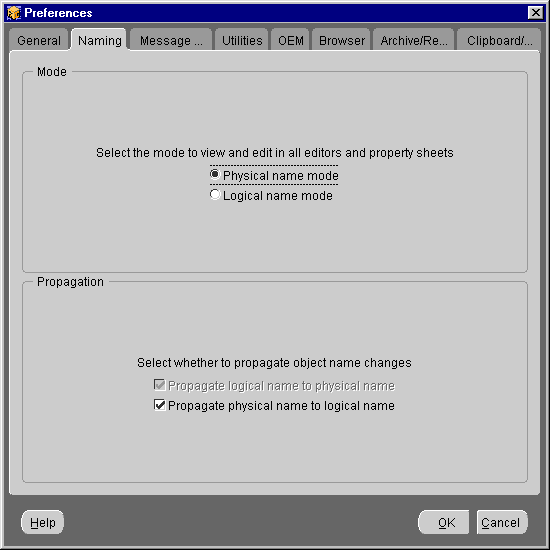
You can switch the naming mode at any time during a session.
Warehouse Builder saves your naming preferences across sessions. The name mode preference is stored in a file on the client workstation. If you use Warehouse Builder from another workstation, your preferences will be different.
After you create modules and objects, you can edit them using editors and property sheets.
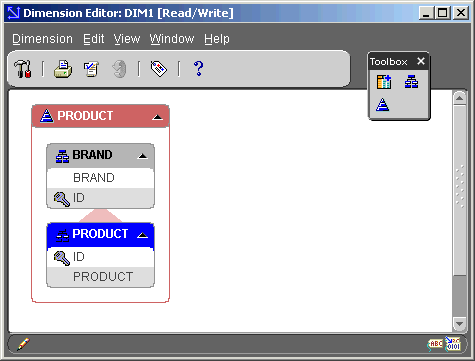
Object editors provide a separate window with menu items and a toolbox to edit the object. To display an editor, right-click on the object and select Editor. Figure 2-20 shows an example of a Dimension Editor.
Selecting the Property icon from the console toolbar displays the property sheet for the selected object. Each object stored in a project has a property sheet that defines the object. Property sheets vary by object. Figure 2-21 shows an example of a property sheet for a dimension.
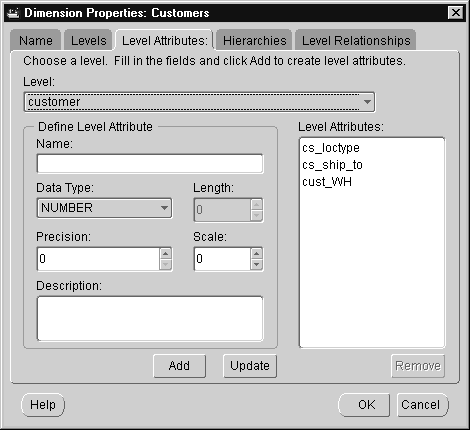
Definitions for objects such as dimensions, tables, facts, and mappings are created using a wizard or imported from an external source. After a definition has been created for an object and stored in a project, you can update the definition by editing its property sheet.
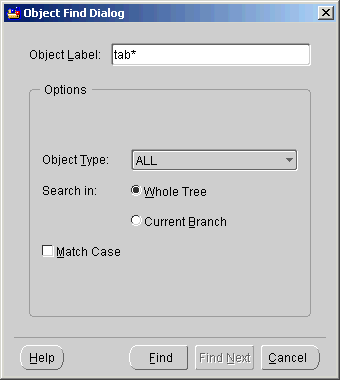
Objects stored in a Warehouse Builder repository are organized in a navigation tree. To find an object in the repository, you can click Find and type the name to search for. Use the asterisk (*) as a wildcard character to match zero or more characters.
To end a Warehouse Builder session, you commit your work and exit Warehouse Builder.
Warehouse Builder does not commit newly created objects or modifications to the repository until you click the Commit icon on the toolbar, or exit Warehouse Builder and click Yes on the Commit Confirmation dialog.
You can commit changes at any time during a Warehouse Builder session or when you end your session.
To commit changes during a session, go to the console window and click the Commit icon on the toolbar. Warehouse Builder displays the Commit Confirmation dialog. Click Yes to commit the changes.
To exit Warehouse Builder:
If you have not committed your changes when you exit Warehouse Builder, the Commit Confirmation dialog displays. Click Yes to commit any changes you have made.
|
|
 Copyright © 1996, 2002 Oracle Corporation. All Rights Reserved. |
|