Release 2 (9.0.2)
Part Number A95438-01
Home |
Contents |
Index |
| Oracle9iAS InterConnect Adapter for SAP R/3 Installation and User's Guide Release 2 (9.0.2) Part Number A95438-01 |
|
This chapter provides an overview about SAP-specific information to assist you in working with the SAP adapter. The following topics are discussed:
An exception field is added by the SAP adapter when a function is imported into iStudio.
If an error happens during a call, the exception field generally contains a detailed description of the error that occurred. You can then propagate this error string to the calling application.
Consider an example where you have a setup with SAP on one side, an Oracle9iAS InterConnect hub in the middle and a Web front end the other side. Suppose the Web front-end tries to add a record to the SAP side, however the a record with the same primary key already exists in SAP. In this case, you have a non-retryable error. The exception field contains the exception data. This data may be propagated back to the Web front-end. The following is an example of an exception message:
exception: E-OAI0003: Exception occurred during call to AddWidget@OAI://Messages/WidgetStore User defined exception Exception occurred:Source: WidgetStore::AddWidgetCause: OAI://Messages/exception=MsgAgentException (Unique ID none)Exception occurred: Source: WidgetStore::AddWidget Cause: OAI://Messages/exception=MsgAgentException (Unique ID none)Exception data:struct MsgAgentExceptionData = String Source = OAIsgProcessMessage(WidgetStore::AddWidget) String ErrorText = Row exists in ADD or DATAENTRY mode (81,10) String Explanation = The specified search keys resulted in an existinglevel 0 row found when in ADD or DATAENTRY mode.
Sending messages inbound means the SAP adapter is the client and SAP is the server. To send messages to the SAP adapter, ensure that the host definition and login information is set for connecting to the SAP system using the Configuration Editor.
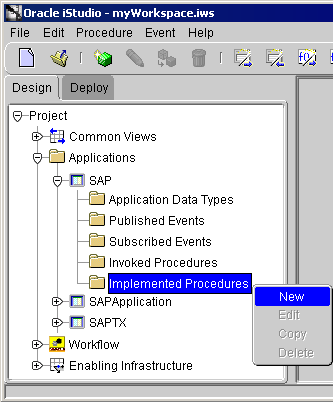
Text description of the illustration newimplementedprocedure.gif
The Implement Wizard--Select a Procedure dialog displays.

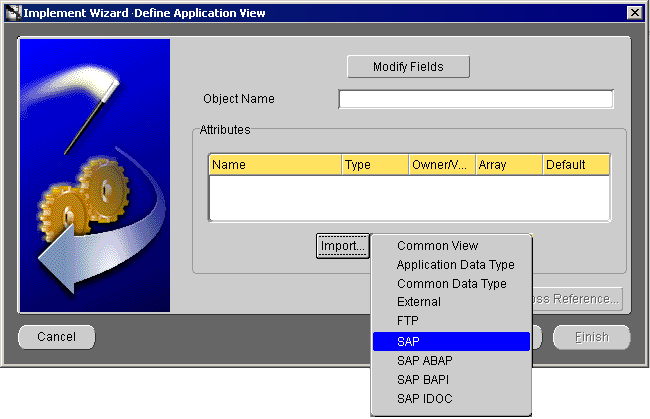
The Implement Wizard--Define Application View dialog displays.
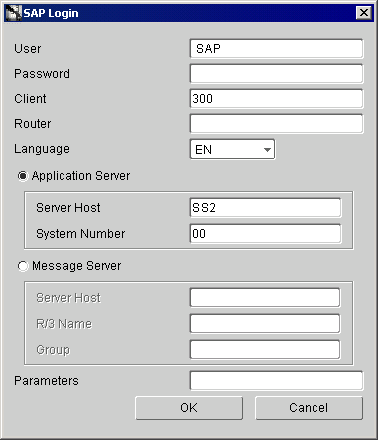
The SAP Login dialog displays.
If this is the initial login for this machine, enter the correct information.
If this machine has been logged in to SAP before, enter the password on the SAP Login dialog and click OK.
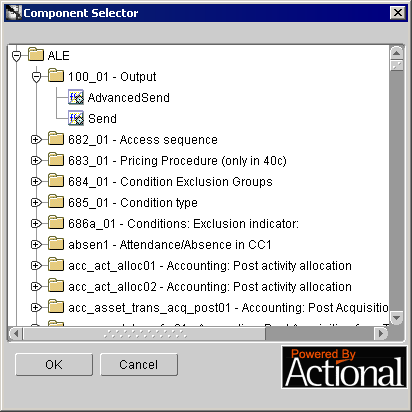
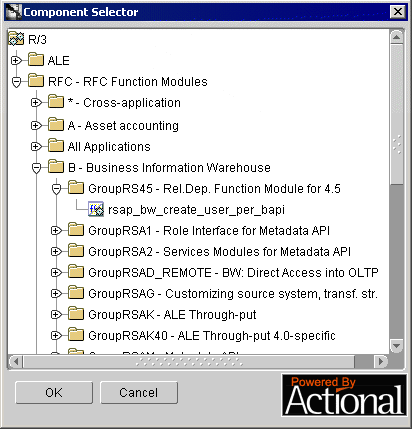
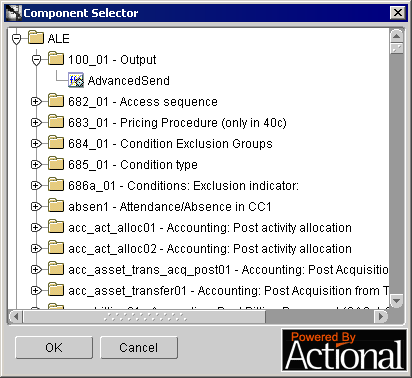
Once logged in to SAP, the Component Selector dialog displays.
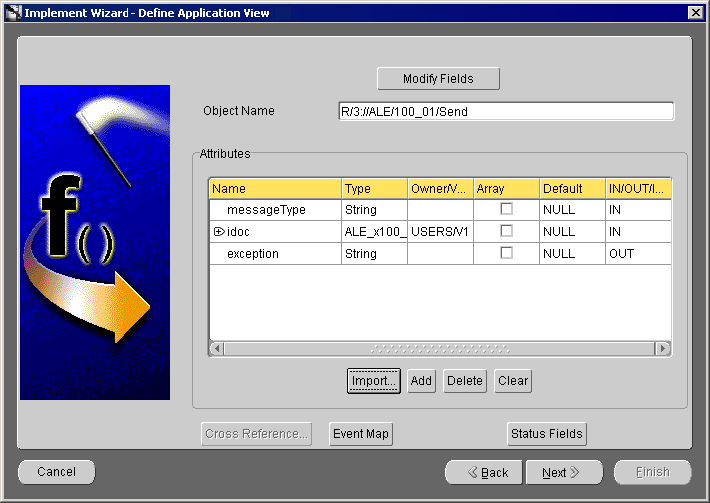
The Send method populates the control record of the intermediate document from the parameters set up in the SAP R/3 configuration editor. The AdvancedSend method allows more flexibility. When you use this method, you must pass the control data to the method.
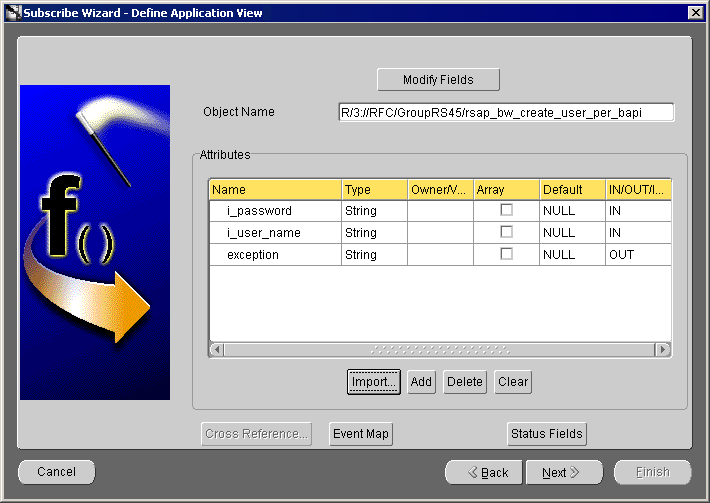
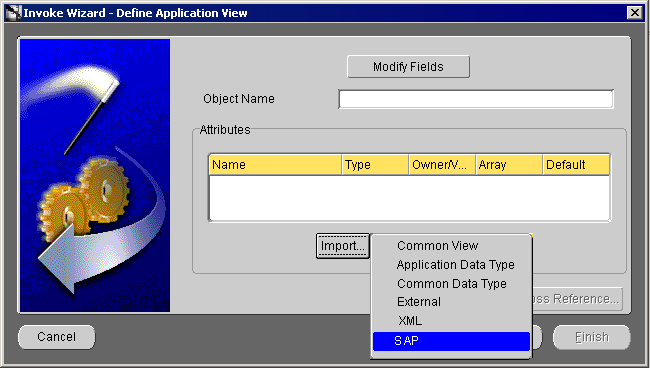
The Define Application View dialog displays with the selected component and its attributes.
The Define Mappings dialog displays.
The new populated procedure displays in the right panel.
When you use iStudio to import attributes from SAP, you must first log in to SAP. When logging into SAP from iStudio, the login fields automatically populate, leaving the Password field the only field that requires input.
To import attributes from SAP:
The SAP Login dialog displays.
The first time you log in from a new workstation, you are required to enter information in every field that is required for your setup. Every subsequent login from that workstation only requires a password to log in. For every iStudio session, only one login is required.
/H/UNICENTER/H/204.79.199.5/H.
System Number further identifies the Host to a specified Service level. The service is the TCP/IP service name (a port number through \winnt\system32\drivers\etc\services). For example, using ss1:00 as the connecting host in the browser, the 00 is what SAP calls the system number. When specifying a service name, sapgw00, the 00 also represents the system number. That is, if an SAP R/3 system uses system number 23, then ss1:23 is in the login dialog and uses sapgw23 as the service number for the SAP Agent. sapgw is a name assigned on installation to identify the gateway machine.
hs0016.WDF.SAP-AG-DE.
D15.
PUBLIC.
A route string that contains a substring for each SAP router and for the target server. The route string syntax is: /H/host/S/service/W/pass that is, it comprises any number of substrings of the form /H/host/S/service/W/pass. For example, a connection from hostA to hostB, port 3333 via the saprouter host hostR with SAProuter password summer has the route string /H/hostR/S/3299/W/summer/H/hostB/S/3333.
Table 3-1 lists the possible host identification keys and definitions extracted from Remote Function Call 4.0 documentation.
To create an Application Link Enabling subscribed event using iStudio:
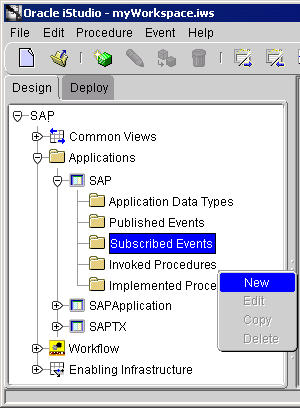
The Subscribe Wizard--Select an Event dialog displays.

The Define Application View dialog displays.

The SAP Login dialog displays.
If this is the initial login for this machine, enter the correct information.
If this machine has been logged in to SAP before, enter the password on the SAP Login dialog and click OK.
The Component Selector dialog displays.
The Send method populates the control record of the intermediate document from the parameters set up in the SAP R/3 configuration editor. The AdvancedSend method allows more flexibility. When you use this method, you must pass the control data to the method.
The populated Define Applications View dialog displays.
The Define Mappings dialog displays.
The created event displays in the right panel of iStudio.
To create a Remote Function Call implemented procedure:
Text description of the illustration newimplementedprocedure.gif
The Implement Wizard--Select a Procedure dialog displays.
The Define Application View dialog displays.
The SAP Login dialog displays.
If this is the initial login for this machine, enter the correct information.
If this machine has been logged in to SAP before, enter the password on the SAP Login dialog and click OK.
The Component Selector dialog displays.
The populated Define Application View dialog displays.

The Define Mappings dialog displays.
The new populated procedure display in the right panel of iStudio.
To create a Remote Function Call subscribed event:
The Subscribe Wizard--Select an Event dialog displays.
The Define Application View dialog displays.
The SAP Login dialog displays.
If this is the initial login for this machine, enter the correct information.
If this machine has been logged in to SAP before, enter the password on the SAP Login dialog and click OK.
The Component Selector dialog displays.
The populated Define Application View dialog displays.

The Define Mappings dialog displays.
The new populated event displays in the right panel of iStudio.
Outbound from R/3 is used when the SAP R/3 system is sending messages to your application. The Remote Function Call Program ID must be set. The Remote Function Call Program ID is used to register with the SAP R/3 system.
The Invoke Wizard--Select a Procedure dialog displays.

Text description of the illustration invselectaprocedure.gif
The Define Application View dialog displays.
The SAP Login dialog displays.
If this is the initial login for this machine, enter the correct information.
If this machine has been logged in to SAP before, enter the password on the SAP Login dialog and click OK.
The Component Selector displays.
The populated Define Application View dialog displays.

The Define Mappings dialog displays.
The new populated event displays in the right panel of iStudio.
The Publish Wizard--Select an Procedure dialog displays.

Text description of the illustration pubselectaprocedure.gif
The Define Application View dialog displays.

The SAP Login dialog displays.
If this is the initial login for this machine, enter the correct information.
If this machine has been logged in to SAP before, enter the password on the SAP Login dialog and click OK.
The Component Selector displays.
The populated Define Application View dialog displays.
The Define Mappings dialog displays.
The new populated event will display in the right panel in iStudio.
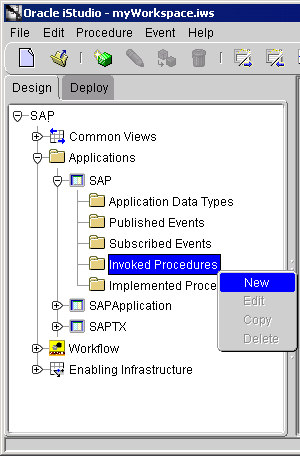
To create a Remote Function Call invoked procedure in iStudio:
The Invoke Wizard--Select a Procedure dialog displays.
Text description of the illustration invselectaprocedure.gif
The Define Application View dialog displays.
The SAP Login dialog displays.
If this is the initial login for this machine, enter the correct information.
If this machine has been logged in to SAP before, enter the password on the SAP Login dialog and click OK.
The Component Selector displays.
The populated Define Application View dialog displays.

The new populated event displays in the right panel of iStudio.
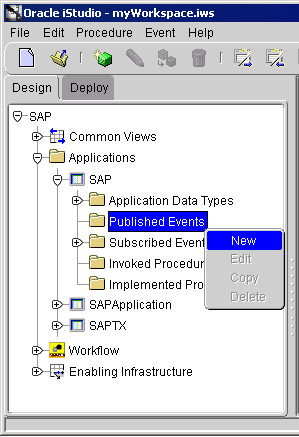
To create a Remote Function Call published event in iStudio:
The Publish Wizard--Select a Procedure dialog displays.
Text description of the illustration pubselectaprocedure.gif
The Define Application View dialog displays.

The SAP Login dialog displays.
If this is the initial login for this machine, enter the correct information.
If this machine has been logged in to SAP before, enter the password on the SAP Login dialog and click OK.
The Component Selector displays.
The populated Define Application View dialog displays.

The new populated event displays in the right panel of iStudio.
|
|
 Copyright © 2002 Oracle Corporation. All Rights Reserved. |
|