Release 2 (9.0.3)
Part Number B10063-01
Core |
Platform |
Contents |
Index |
| Oracle9iAS TopLink Mapping Workbench Reference Guide Release 2 (9.0.3) Part Number B10063-01 |
|
The Mapping Workbench is separate from Oracle9iAS TopLink - it allows you to graphically configure descriptors and map your project. The Mapping Workbench can verify the descriptor options, access the data source, and create the database schema. With the Mapping Workbench you can define TopLink descriptors without using code.
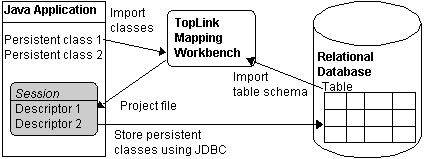
Use this procedure to start the Mapping Workbench.
For Windows environments: From the Start menu, select Program Files > Oracle9iAS TopLink > Mapping Workbench.
or
For non-Windows environments: Execute the <INSTALL_DIR>toplink\workbench\workbench.sh file.
The splash screen appears, followed by the workbench window.
The Mapping Workbench interface includes these parts:
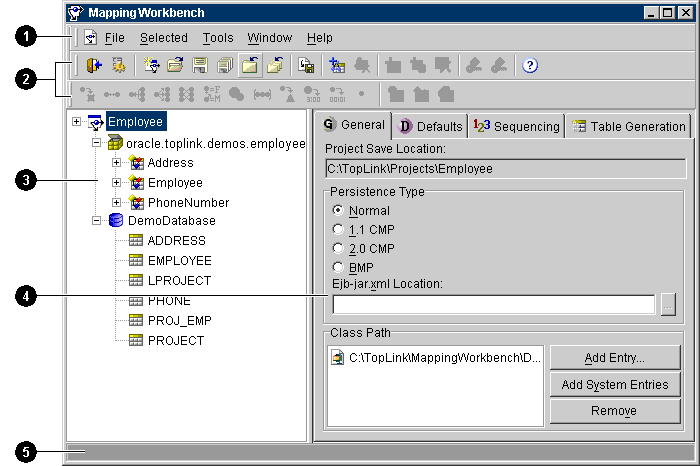
User-interface components called out in Figure 1-2:
The TopLink Mapping Workbench contains two types of menus:
The menu bar provides pull-down menus for each TopLink Mapping Workbench function. Some menus (such as Selected) are context-sensitive - the available options may vary, depending on the currently selected object.
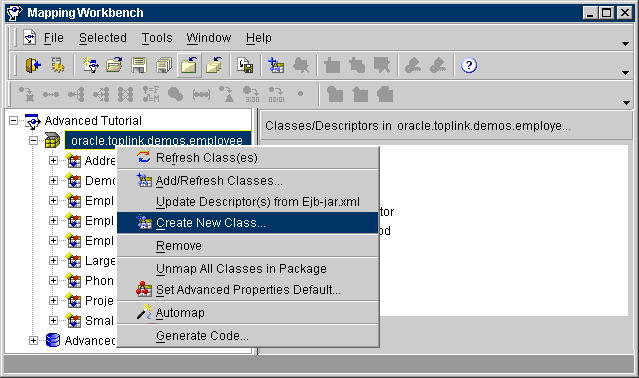
When you right-click on objects in the Project Tree pane, a pop-up menu appears with functions specific to the selected object.
The Mapping Workbench contains two types of toolbars:
Use these toolbars to select options and functions.
The standard toolbar provides quick access to the standard (File, Edit, Selected, etc.) menu options.

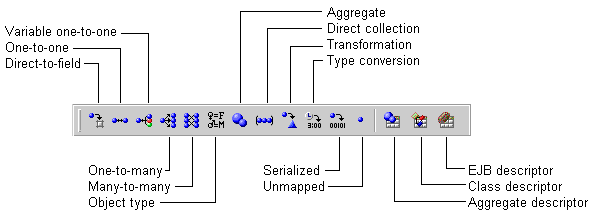
The mapping toolbar provides quick access to create mapping and descriptor types. You can specify a mapping or descriptor type by selecting the object from the Project Tree pane then clicking on the appropriate button in the mapping toolbar.
You can also right-click on the object and select the appropriate mapping from the pop-up menu.
To move a toolbar, click on a blank area of the toolbar and drag it to your desktop. To re-dock the toolbar to the Mapping Workbench, click on the toolbars's move handle
 and drag the toolbar back to the Mapping Workbench.
TopLink displays each project's descriptors, mappings, and database tables in the Project Tree pane on the left side of the workbench.
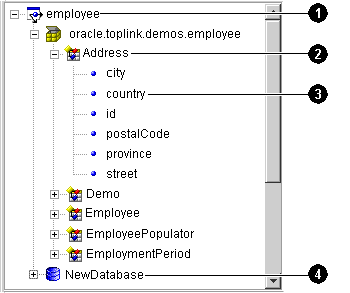
User-interface components called out in Figure 1-6:
Click on the +/- next to the item, or double-click the item name, to expand/collapse the item.
When you select an item in the Project Tree pane, its properties appear in the Properties pane (see "Using the Properties Pane").
You can perform specific functions for an item by selecting the item in the Project Tree pane and:
Inactive descriptors appear dimmed in the Project Tree pane. Inactive descriptors do not get registered with the session when the project is loaded into Java. This allows you to define and test subsets of descriptors. To activate or inactivate a descriptor, right-click on the descriptor and select Activate/Deactivate Descriptor from the pop-up menu.
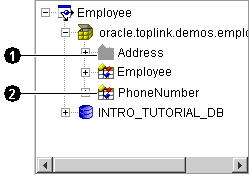
User-interface components called out in Figure 1-7:
If a descriptor contains an error (sometimes called a "neediness" message), a warning icon
![]() appears beside the descriptor's icon in the Project Tree pane and a message displays in the status bar detailing the error. The Oracle9iAS TopLink: Troubleshooting Guide contains complete information on each Mapping Workbench error message.
appears beside the descriptor's icon in the Project Tree pane and a message displays in the status bar detailing the error. The Oracle9iAS TopLink: Troubleshooting Guide contains complete information on each Mapping Workbench error message.
The Properties pane, on the right side of the Mapping Workbench, displays the properties associated with the currently selected item in the Project Tree pane.
The properties of the selected item are displayed using tab pages, grouped according to their subject.
You can customize several aspects of the TopLink Mapping Workbench.
Use this procedure to customize the "look and feel" (the graphical user interface) of the Mapping Workbench.
 in the toolbar. The Preferences window appears.
You can also display the preferences window by selecting Tools > Preferences from the menu.
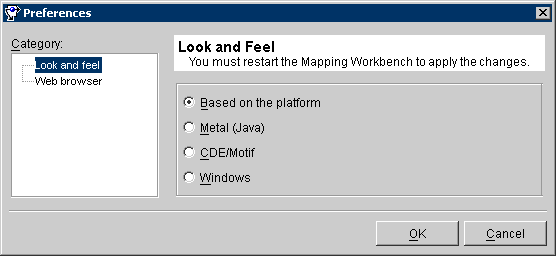
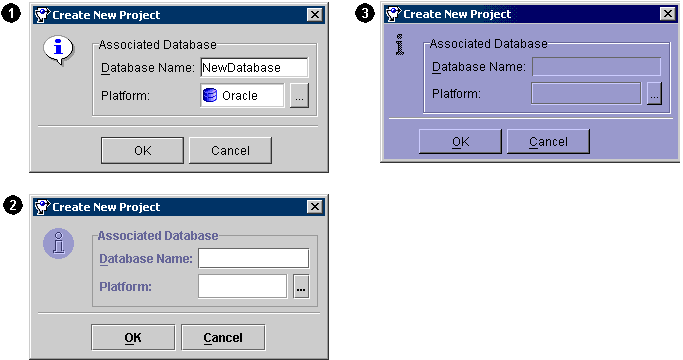
User-interface "look and feel" samples in Figure 1-9:
Use this procedure to specify a web browser to use with the Mapping Workbench. You must specify a web browser to use the online help and web-based support.
 in the toolbar. The Preferences window appears.
You can also display the preferences window by selecting Tools > Preferences from the menu.
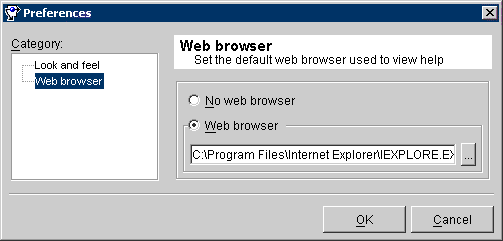
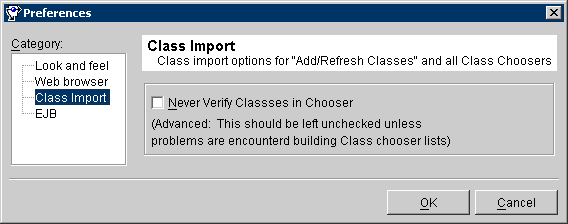
Use this option to specify if the Mapping Workbench verifies classes on import, when using the Add/Refresh Class function (see "To Update Classes from Available Packages and Classes:").
 in the toolbar. The Preferences window appears.
You can also display the preferences window by selecting Tools > Preferences from the menu.
Use this procedure to specify how the Mapping Workbench updates the ejb-jar.xml file when saving projects.
 in the toolbar. The Preferences window appears.
You can also display the preferences window by selecting Tools > Preferences from the menu.
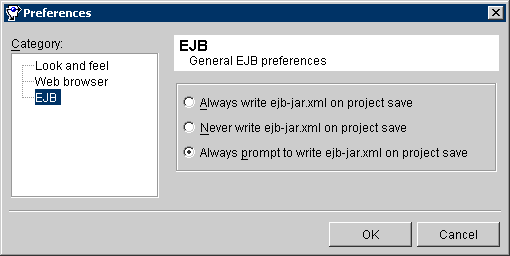
ejb-jar.xml file when you save the project.
When using a Mapping Workbench project in a team environment, you must keep your changes "in-sync" with the other developers. See "Merging Files" for more information.
You can use the Mapping Workbench with a source control system (see "Using a Source Control Management System") to facilitate enterprise-level team development. If you have a small development team, you can manage the changes from within XML files (see "Sharing Project Objects").
If you use an enterprise, file-based, source control management system to manage your Java files, you can use the same system with TopLink Mapping Workbench. The Mapping Workbench source files are edited by the Mapping Workbench and are written out in XML file format.
The source control system's check-in/out mechanism defines how to manage the source (i.e., the XML source and Mapping Workbench project file) in a multi-user environment.
The most difficult aspect of team development is merging changes from two (or more) members that have simultaneously edited the same file. If one developer checks in their changes a merge condition exists. Usually, this condition exists in one of the root objects in the Mapping Workbench project.
Use a file comparison tool to determine the merged aspects of the project. The files to edit will vary, depending on the type of merge:
Because a typical project may involve many changes (especially in a team environment), merging your project before checking it in may require quite a bit of development time.
These files contain references to the objects that they hold onto. The root files are:
<projectName>.mwp (one for each project - holds database, packages, and repository)
<databaseName>.xml (one for each project - holds tables)
<packageName>.xml (one for each package - holds descriptors)
repository.xml (one for each project - holds classes)
Changes in these files are normally caused by adding, deleting, or renaming a Table, Class, or Descriptor.
Another developer has added a descriptor and checked-in the project while you were adding or removing descriptors from the same project.
<packageName>.xml file in merge status. The file comparison shows the addition of the descriptor XML tag and an element inside the tag.
<packageName>.xml file (inside the Package element). This brings your local code up to date to the current code in the code repository.
Another developer has added and checked in a new Employee class descriptor to the com.demo package while you were working with the package. To merge your work with the newly changed project:
com.demo.xml file located in <projectRoot>/Package/ directory that is in merge status
The file comparison shows the addition of the descriptor XML tag and an element inside that tag:
<descriptor>
   <descriptor>com.demo.Employee.ClassDescriptor</descriptor>
</descriptor>
com.demo.xml file (inside the Package element) to bring it up to date to the current code in the code repository.
Developers simultaneously changing the Mapping Workbench that have altered the contents of an aggregate file will also cause a merge condition. Aggregated files include:
<className>.xml (one for each class)
<descriptorName.type>.xml (one for each descriptor)
<tableName>.xml (one for each table)
The Mapping Workbench changes these files when saving a project if you have changed any of the contents within them (such as a mapping added to a descriptor, an attribute added to a class, or a field reference changed in a table).
If another developer has added a mapping to a descriptor and checked-in the project while you were changing a different mapping on that same descriptor:
<descriptorName>.xml file in merge status. The file comparison shows the addition of the Mapping XML tag and elements inside the tag.
<descriptorName>.xml file (inside the Mappings element). This brings your local code up to date to the current code in the code repository.
Another developer has added and checked in the firstName mapping to the Employee class descriptor while you were changing a different mapping on that same descriptor.
com.demo.Employee.ClassDescriptor.xml file located in <projectRoot>/Descriptor/ that is in merge status
The file comparison shows the addition of the <Mapping> XML tag and elements inside that tag:
<Mapping><comment></comment><descriptor>com.demo.Employee.ClassDescriptor</descriptor><usesMethodAccessing>false</usesMethodAccessing><inherited>false</inherited><readOnly>false</readOnly><instanceVariableName>firstName</instanceVariableName><defaultFieldNames><defaultFieldName>direct field=</defaultFieldName></defaultFieldNames><fieldHandle><FieldHandle><table>EMPLOYEE</table><fieldName>F_NAME</fieldName></FieldHandle></fieldHandle><classIndicator>BldrDirectToFieldMapping </classIndicator></Mapping>
com.demo.Employee.ClassDescriptor.xml file (inside the <Mapping> element) to bring it up to date to the current code in the code repository.
You can also share project objects by simply copying the table or descriptor file(s) into the appropriate directories in the target project.
After copying the file(s), insert a reference to the table or descriptor in the appropriate <databaseName>.xml or <packageName>.xml file. All references contained within these files must refer to an existing object in the project.
When working in a team environment, manage the ejb-jar.xml file similarly to the .xml project files. The Mapping Workbench will edit and update the ejb-jar.xml file, if necessary, when working with an EJB project.
If you use a version control system, perform the same check-in/out procedures. For merge conditions, use a file comparison tool to determine which elements have been added or removed. Modify the file as necessary and check-in the file to version your work.
|
|
 Copyright © 2002 Oracle Corporation. All Rights Reserved. |
|