Release 2 (9.0.3) for Microsoft Windows
Part Number B10005-01
Core |
Platform |
Contents |
Index |
| Oracle9i Application Server Installation Guide Release 2 (9.0.3) for Microsoft Windows Part Number B10005-01 |
|
This chapter provides information about how to start installing Oracle9i Application Server Release 2 (9.0.3) (Oracle9iAS 9.0.3). The topics include:
Verify that you have completed the items listed on the following preinstallation summary before you install Oracle9iAS 9.0.3.
| Preinstallation Task | Details |
|---|---|
Table 2-2 shows the hardware requirements for installing Oracle9iAS 9.0.3. Table 2-3 shows the minimal installation requirements and recommendations for production environments. Note that optimal sizing for an Oracle9iAS 9.0.3 installation depends on:
Increasing the amount of hardware resources can improve the performance of your Oracle9iAS 9.0.3 installation and the number of supported concurrent users.
| Information | Minimum Requirements |
|---|---|
|
CPU |
An Intel Pentium 300MHz processor |
|
Disk SpaceFoot 1 |
500 MB |
|
Total Pagefile Size (Virtual Memory) |
512 MB (1 GB recommended for clustering or in production environment) To change the total pagefile size (virtual memory):
|
|
TEMP Directory |
275 MB of free space |
|
Monitor |
256 color viewing capability |
|
1
The disk space must be available on a single drive. Oracle9iAS 9.0.3 does not support spanning the installation over multiple drives. |
Table 2-3 Oracle9iAS 9.0.3 Requirements and Recommendation
| Information | Minimum Installation Requirement | Production Environment Recommendations |
|---|---|---|
|
Memory |
256 MBFoot 1 |
512 MB or greater |
Oracle9iAS 9.0.3 does not support the following network configurations and scenarios:
Oracle9iAS 9.0.3 runs on the following operating systems:
To install Oracle9iAS 9.0.3, you must be a member of the Windows Administrators group. If you are not a member, you need to get someone who is a member of the group to add you to the group.
To check if you are a member of the Administrators group:
Windows NT:
Windows 2000:
Installing and operating Oracle9iAS 9.0.3 requires a Web browser. A complete list of certified software for Oracle9iAS 9.0.3 is located at the OracleMetaLink site:
http://metalink.oracle.com
Perform these tasks before installing Oracle9iAS 9.0.3:
Oracle recommends reading the Oracle9i Application Server 9.0.3 Release Notes prior to installing Oracle9iAS 9.0.3. Oracle9i Application Server 9.0.3 Release Notes are available with Oracle platform-specific documentation and are available at the OTN Web site at:
http://otn.oracle.com/products/ias/content.html
Verify the requirements for the following directories before starting Oracle Universal Installer:
Oracle home is the directory in which Oracle software is installed.
Oracle homes are identified by name. The Oracle home name identifies the program group associated with a specific Oracle home and the installed Oracle services associated with the home.
Your Oracle home name must not contain spaces and cannot be longer than 16 characters.
Your Oracle home path must not contain spaces and cannot be longer than 127 characters.
Do not install Oracle9iAS 9.0.3 into any existing Oracle home directories. For example:
If you want to migrate applications and configuration data from an existing Oracle9iAS 9.0.2 J2EE and Web Cache mid-tier, you install Oracle9iAS 9.0.3 in a separate directory, then migrate your applications from 9.0.2 to 9.0.3. You cannot migrate by installing 9.0.3 in the 9.0.2 directory. See the Oracle9i Application Server Migrating to Release 2 (9.0.3) guide for details.
The Oracle9iAS 9.0.3 installation requires an instance name and an administrative password (for the ias_admin user) during initial installation on a host. The ias_admin user's password enables Oracle9iAS 9.0.3 instance management through the Oracle Enterprise Manager. If Oracle9iAS 9.0.3 or another Oracle9iAS product has already been installed on the host, then a unique instance name and the existing ias_admin user's password must be provided before continuing with the installation. An Oracle9iAS 9.0.3 installation in a different Oracle home on the same host requires a unique instance name and the existing ias_admin user's password before continuing with the installation.
|
See Also:
|
During installation, Oracle Universal Installer uses a temporary directory for writing temporary files. This directory must meet the requirements listed in Section 2.2, "Hardware Requirements" before installing Oracle9iAS 9.0.3. The installation may fail if you do not have sufficient space.
Oracle Universal Installer requires that the fully qualified host name information appear in the configuration files for your computer. A fully qualified host name includes both the name of the system and its domain.
Verify that your system's network configuration has the correct host name file configuration by completing the following steps:
Windows NT
Also verify the hosts file located in your Winnt directory located on your hard drive. Locate the following file:
C:\Winnt\System32\drivers\etc\hosts
where "C" is the letter for your hard drive.
Windows 2000
If the host name and domain are not listed or listed incorrectly, then click More button to enter the correct host name and domain.
After you have properly configured the hostname information, reboot your computer before starting Oracle9iAS 9.0.3 installation.
Oracle Universal Installer requires specific conventions for the host domain name. If the host domain name does not conform to the following requirements, the Oracle9iAS 9.0.3 installation will fail:
Following installation, Oracle Universal Installer creates a file showing the port numbers assigned during installation of Oracle9iAS 9.0.3 components. The installation process automatically detects any port conflicts and selects an alternative port in the range allocated for that component. Appendix B, "Default Port Numbers and Port Ranges" lists the default port ranges. The portlist.ini file is located at:
This file lists component entries as "port_name = port_value". For example:
Oracle HTTP Server port = 7777Oracle HTTP Server SSL port = 4443Oracle HTTP Server listen port = 7778Oracle HTTP Server SSL listen port = 4444Oracle HTTP Server Jserv port = 8007Enterprise Manager Servlet port = 1810
You can also view the port numbers by pointing your browser to the Oracle9iAS Welcome page and selecting the Ports tab.
|
See Also:
|
This section describes how Oracle9iAS 9.0.3 uses Oracle Universal Installer for installation. It includes the following topics:
Oracle9iAS 9.0.3 uses Oracle Universal Installer to guide you through each step of the installation process.
The Oracle Universal Installer provides the following features:
Oracle Universal Installer fails to appear if the display uses less than 256 colors. Oracle Universal Installer uses JRE 1.3.1, which supports display drivers with 256 colors or more.
Note:
The Oracle Universal Installer automatically checks your computer prior to installation to verify that your system meets operational requirements. Table 2-4 lists the prerequisite checks that are performed.
| Prerequisite Checks | See Also |
|---|---|
|
Verify Operating System Requirements |
|
|
Check for enough disk space for Oracle home installation |
|
|
Check for TEMP Space |
|
|
Check that the install host has enough RAM |
Table 2-3, "Oracle9iAS 9.0.3 Requirements and Recommendation" |
|
Verify Total Pagefile Size |
|
|
Verify existence of Windows Systems files |
|
|
Check the hosts file configuration |
|
|
Prohibit installation of Oracle9iAS 9.0.3 into an existing Oracle home |
|
|
Ensure that the name of |
|
|
Verify the monitor has 256 color viewing capability |
|
|
Verify operational requirements of the CPU |
|
|
Port detection and resolution |
The Oracle Universal Installer creates the Inventory directory the first time it is run on a computer. The Inventory directory keeps an inventory of products that the Oracle Universal Installer installs on your computer, as well as other installation information. If you have previously installed Oracle products, then you may already have an Inventory directory.
The default location of the Inventory directory is:
C:\Program Files\Oracle\Inventory
Do not delete or manually alter the Inventory directory or its contents. Doing so can prevent the installer from locating products that you have installed on your system.
Oracle Universal Installer creates log files at the following location:
C:\Program Files\Oracle\Inventory\logs\installActionsdate_time.log
date_time is the date and time of installation.
A complete listing of log files is included in the Oracle9i Application Server Administrator's Guide.
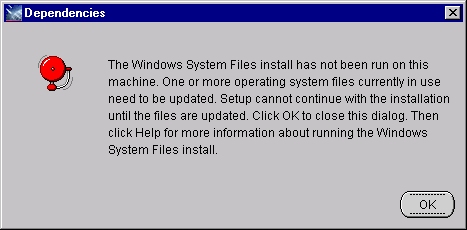
Oracle9iAS 9.0.3 requires several files to be present in the Windows System folder. During the installation, these files are examined to ensure that they are up-to-date. If any file has an outdated version, it will be replaced with a compatible version.
Normally, replacement can be done during the installation, but if the file to be replaced is in use by another process at the time of installation, then the installation will halt and an error dialog will appear. This is because Windows needs to restart for the updated file to take effect, and the installation routine cannot be interrupted by a system reboot during installation.
Oracle9iAS 9.0.3 includes a supplementary installation for the required Windows System Files. This Windows System Files installation will automatically reboot the system if necessary at the conclusion of the system files installation.
If you encounter a Windows System Files error during the installation, click OK to close the error dialog, then use the following instructions to run the Windows System Files installation. You cannot proceed with the Oracle9iAS 9.0.3 installation if you do not run the Windows System Files installation.
To run the Windows System Files installation:
Click Next to start the file copying process.
When wsf.exe is complete, it restarts Windows automatically, if required; otherwise the Windows System Files installation will end without displaying any Installation Finished dialog.
Follow these steps to start Oracle Universal Installer and install Oracle9iAS 9.0.3:
The following sections describe the installation screen sequence, installation considerations, and additional installation information for Oracle9iAS 9.0.3. This section contains the following topics:
Oracle recommends reviewing the installation sequence for a better understanding of the Oracle9iAS 9.0.3 installation process.
The following screens appear during installation of Oracle9iAS 9.0.3:
orcladmin).
If you are associating Oracle9iAS 9.0.3 with an Infrastructure, you must provide the username and password for the Oracle Internet Directory associated with that Infrastructure.
After the installer finishes, you must perform the tasks in Section 3.2, "Postinstallation" to complete your Oracle9iAS 9.0.3 installation.
Note:
Please review the following installation considerations for Oracle9iAS 9.0.3:
If you want to migrate applications and configuration data from an existing Oracle9iAS 9.0.2 J2EE and Web Cache mid-tier, you install Oracle9iAS 9.0.3 in a separate directory, then migrate your applications from 9.0.2 to 9.0.3. You cannot migrate by installing 9.0.3 in the 9.0.2 directory. See the Oracle9i Application Server Migrating to Release 2 (9.0.3) guide for details.
Oracle9i Application Server Administrator's Guide for more information on clustering and associating an instance with an infrastructure.
See Also:
If you will be using Oracle9iAS 9.0.3 on the same host or farm as Oracle9iAS 9.0.2, then you must install the Oracle9i Application Server 9.0.2.1 patch. You must apply the 9.0.2.1 patch to all Oracle9iAS 9.0.2 instances, either before or after your installation of Oracle9iAS 9.0.3.
You can download the patch from:
http://metalink.oracle.com
Select the Patches link. On the patch download form, select Oracle9i Application Server in the Product Family field and then submit the form.
Oracle recommends reviewing the following before performing additional Oracle9iAS 9.0.3 installations on the same host:
Inventory directory for all Oracle9iAS 9.0.3 installations.
|
|
 Copyright © 2002 Oracle Corporation. All Rights Reserved. |
|