10g (9.0.4)
Part Number B10457-01
Home |
Solution Area |
Contents |
Index |
| Oracle® Application Server Integration Adapter for VSAM Installation and User's Guide 10g (9.0.4) Part Number B10457-01 |
|
Modeling interactions for Oracle Application Server Integration Adapter for VSAM involves defining the data source and an Oracle Connect for VSAM backend adapter using Oracle Studio. All the definitions specified in Oracle Studio are written to the OS/390.
This chapter contains the following sections:
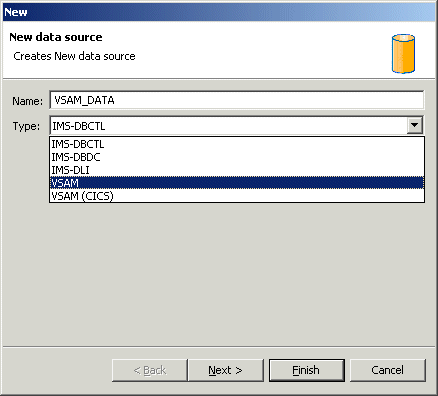
Oracle Connect for VSAM requires you to specify the VSAM data source as the first step in setting up the adapter.
You must not delete the NAV binding configuration since it also contains Oracle Connect for VSAM system settings.
Caution:
Type field as follows:
If you chose VSAM (CICS), the following window opens:
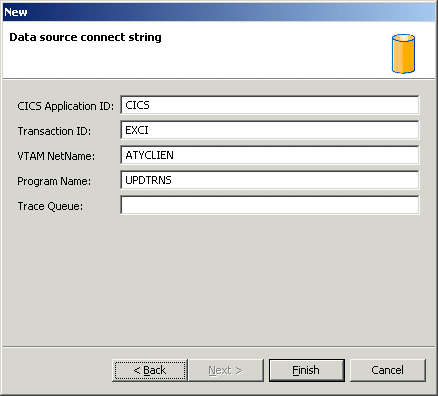
where:
CICS Application ID - The VTAM applid of the CICS target system. The default value is CICS. This parameter is used when updating VSAM data. You can determine this value by activating the CEMT transaction on the target CICS system. On the bottom right corner of the screen appears the legend APPLID=target_system.
Transaction ID - The mirror transaction within CICS that receives control through MRO, which transfers the transaction from the Oracle Connect for VSAM environment to CICS. The default value is EXCI.
VTAM NetName - The VTAM netname of the specific connection being used by EXCI (and MRO) to relay the program call to the CICS target system. For example, if you issue to CEMT the following command:
CEMT INQ CONN
you see on the display screen that the netname is BATCHCLI (this is the default connection supplied by IBM upon the installation of CICS). The default value is ATYCLIEN.
Program Name - The UPDTRNS program that is supplied by Oracle Connect for VSAM to enable updating VSAM data.
|
See Also:
"VSAM Running Under CICS" for details about the adapter metadata |
Trace Queue - The name of queue for output which is defined under CICS when tracing the output of the UPDTRNS program. When not defined, the default CICS queue is used.
If you chose VSAM, the following window opens:
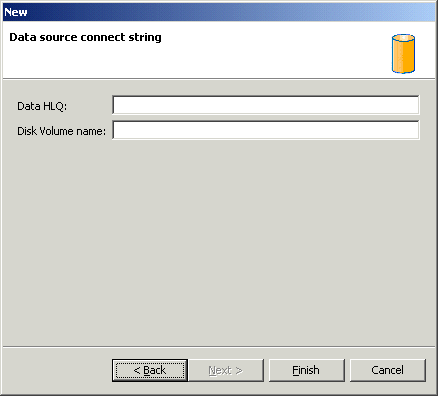
where:
Data HLQ - The high-level qualifier where the data files are located. If a value is not specified in this field, the data files are written to the DEF high-level qualifier where Oracle Connect for VSAM is installed.
Disk Volume name - The high-level qualifier (volume) where the data resides.
The data source you just defined now appears in the Configuration Explorer list.
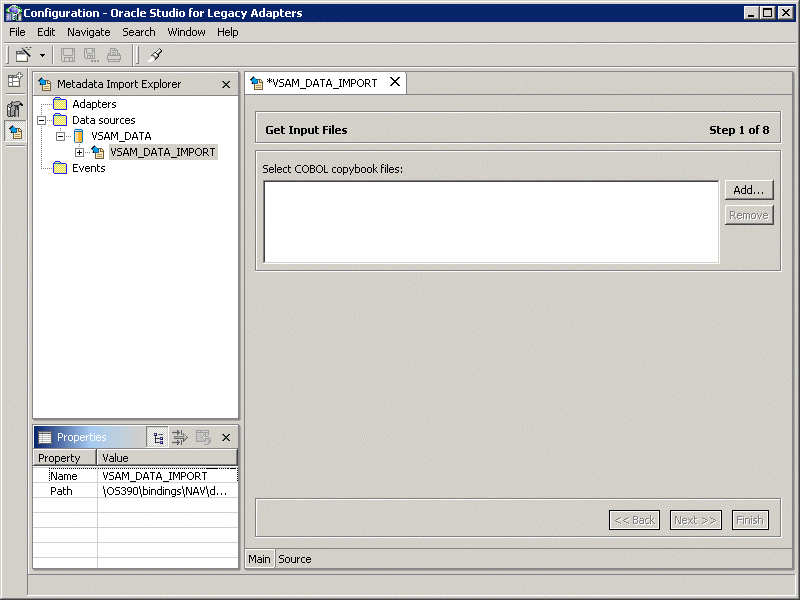
Oracle Connect for VSAM requires metadata describing the VSAM data source records and the fields in these records.
Use the Import Metadata perspective in Oracle Studio to import metadata for the VSAM data source from COBOL copybooks, which describe the data. To import the metadata involves the following tasks:
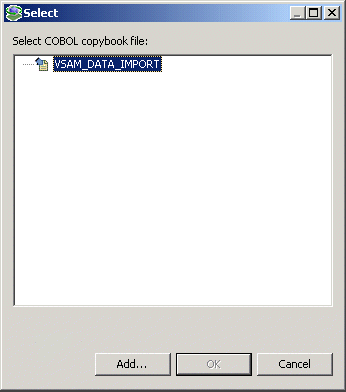
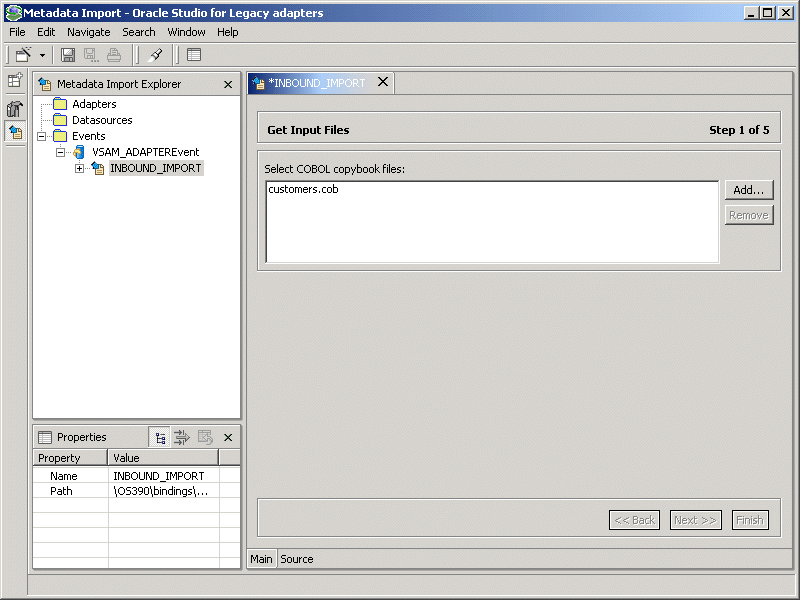
After defining an import as described in the preceding task, the metadata import wizard opens in Oracle Studio. COBOL copybooks are used to create the metadata.
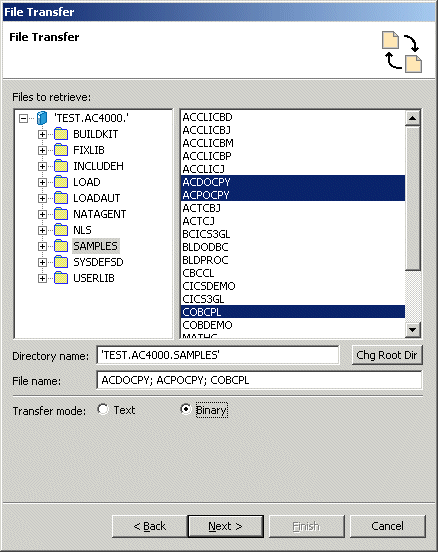
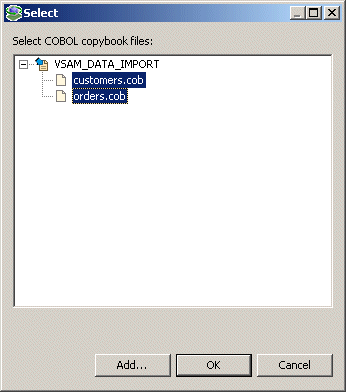
A Select window opens. This window lists any files selected.
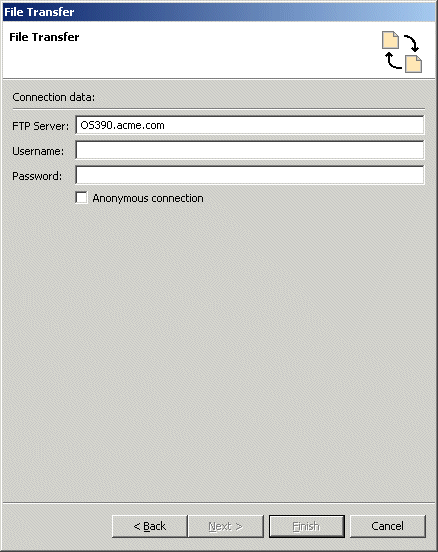
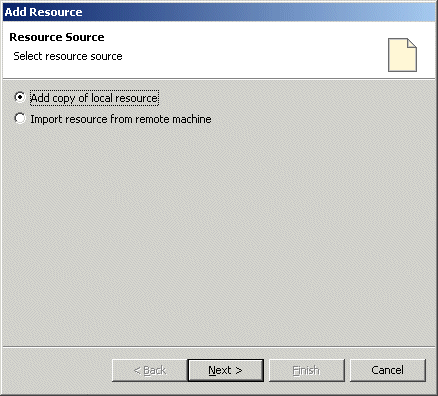
The Add Resource window opens, which provides the option to select files from the local machine or FTP the files from another machine.
You access the OS/390 machine at the high-level qualifier for the user name. To change the high-level qualifier, enter the name of the high-level qualifier in the Directory name field and click the Chg Root Dir button.
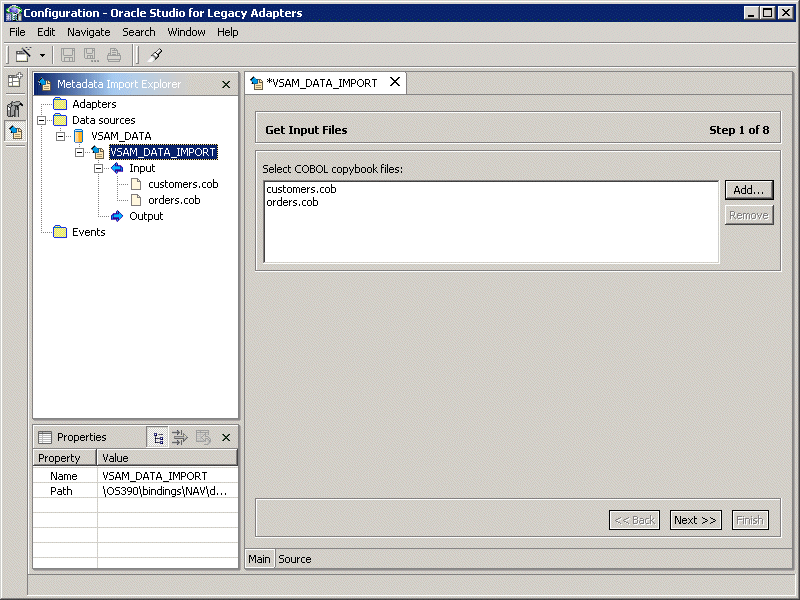
The files selected are displayed in the wizard. In the Metadata Import Explorer the files used for the input and created for the output can be seen under the Input and Output nodes respectively.
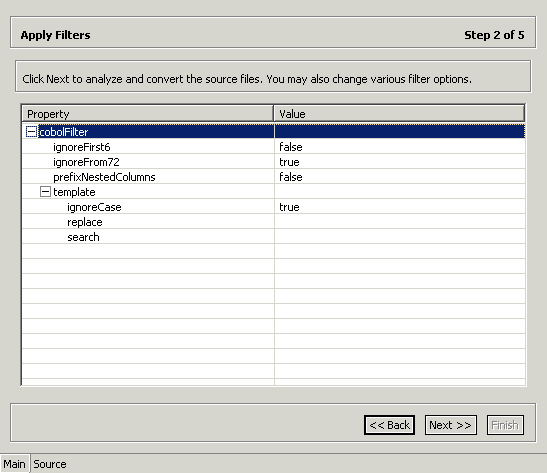
The following filters are available:
ignoreFirst6 - Ignore the first six columns in the COBOL copybook.
ignoreFrom72 - Ignore columns 73 to 80 in the COBOL copybook.
prefixNestedColumns - Prefix all nested columns with the previous level heading.
In addition, you can specify a search string and the string that will replace this search string in the generated metadata, and whether the replacement is dependent on the case of the found string.
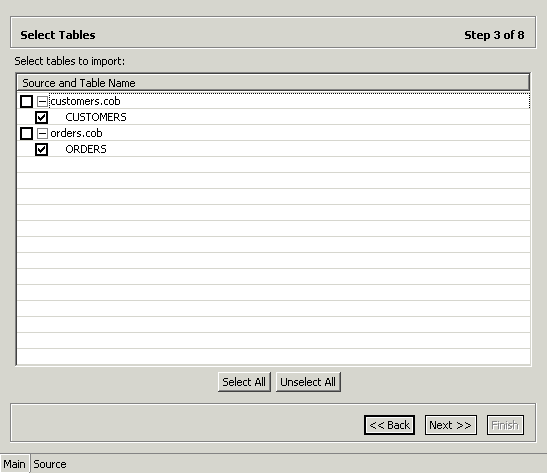
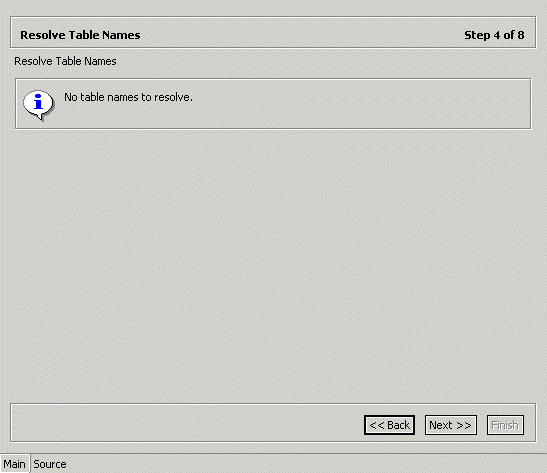
The import manager identifies the names of the records in the COBOL copybooks that will be imported as tables. If the names are unique, the following window is displayed:
However, if there are multiple records with the same name, the following window is displayed:
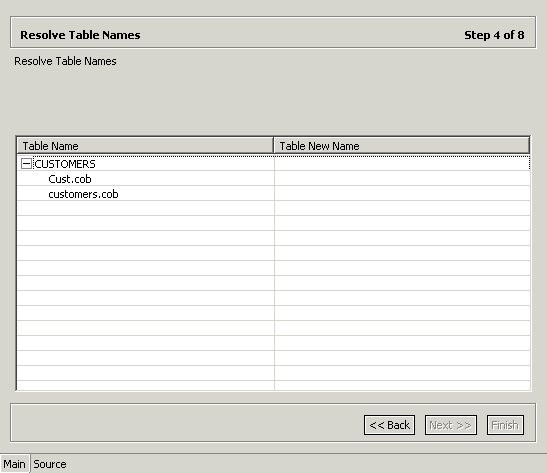
In this case you have to specify a table name you want to use for each of the names displayed, according to the COBOL copybook where the record is defined.
If the VSAMCICS Import Manager is used, specify both physical file name and the logical file name for each record listed.
If the VSAM Import Manager is used, specify the physical file name for each record listed, including the high-level qualifiers.
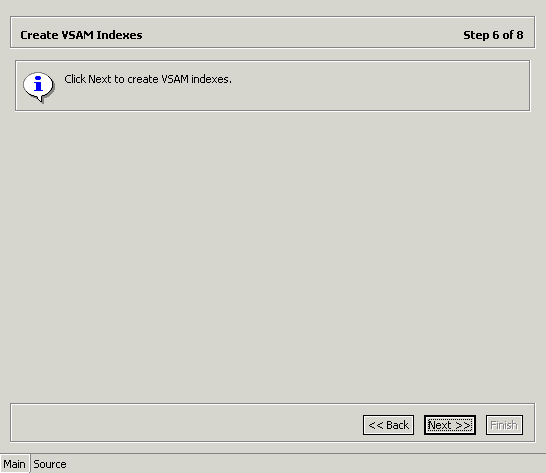
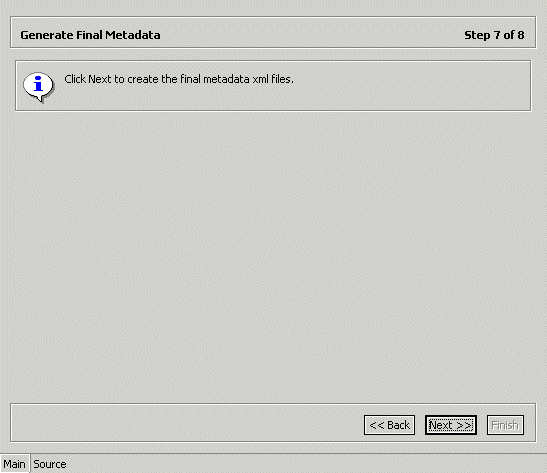
If you try to build the indexes and the step fails for any reason (such as the OS/390 machine is temporarily not accessible), a warning message similar to the following message is issued and you continue to the next step.

Click Continue to go to the next step.
|
Note: If the indexes are not generated, you can define them manually in the Metadata perspective of Oracle Studio. For details, refer to "Metadata for the VSAM Data Source". |
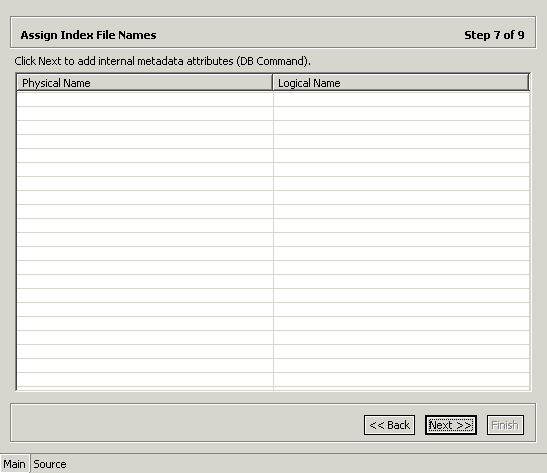
For each table listed, specify next to the alternate indexes for the table the logical file name for the index.
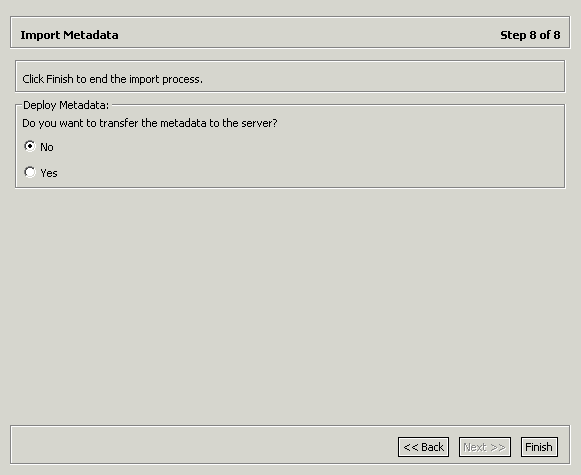
The metadata is imported based on the options specified and it is stored on the OS/390 machine with the data source. An XML representation of the metadata is generated. This XML file can be viewed by expanding the Output node.

After performing the import, you can view the metadata in the Metadata perspective in Oracle Studio. You can also make any fine adjustments to the metadata and maintain it, as necessary.
|
See Also:
"Metadata for the VSAM Data Source" for details about the data source metadata |
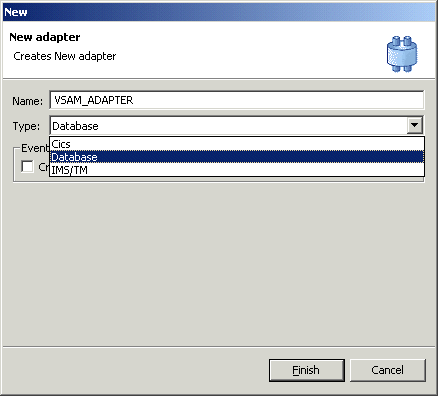
To work with Oracle Connect for VSAM, you need to set up an adapter definition on the OS/390 machine to handle the interactions to and from VSAM. You use Oracle Studio to specify these definitions.
The name specified for the adapter is also the name specified setting up the delivery channel in Oracle Application Server ProcessConnect. For details see, "Setting Up the Delivery Channel".
Note:
Database adapter type from the Type drop-down list:
Checking this box enables you to generate inbound interactions, as described in Generating Inbound Interactions.
Note:
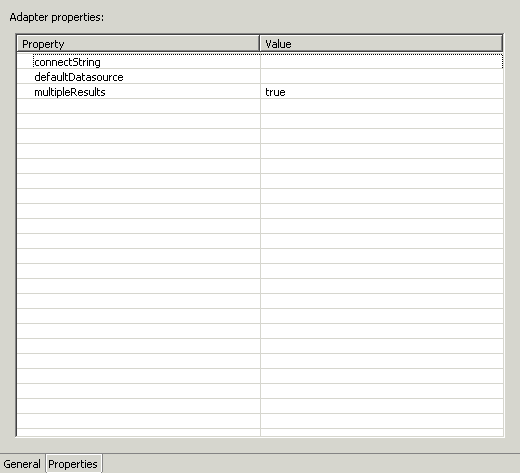
| Property | Value | Description |
|---|---|---|
|
connectString |
- |
For internal use only |
|
defaultDatasource |
For example, VSAM_DATA |
The name of a data source in the binding configuration defined in "Setting Up the VSAM Data Source" |
|
multipleResults |
true |
For internal use only |
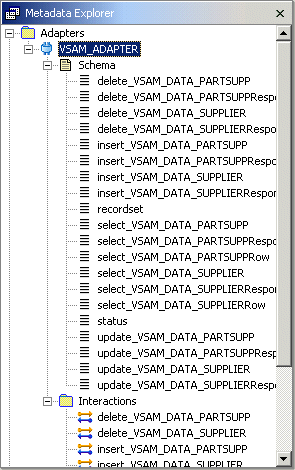
Oracle Connect for VSAM requires metadata describing the adapter interactions, including the structures used to pass information to and from the adapter.
Use the Metadata perspective in Oracle Studio to generate interaction metadata for the adapter.
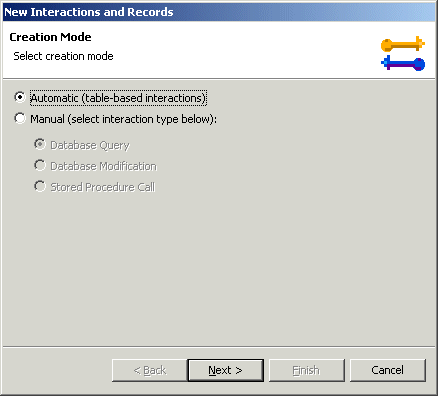
The New Interaction wizard opens with two options displayed, to create interactions:
SELECT
INSERT
UPDATE
DELETE
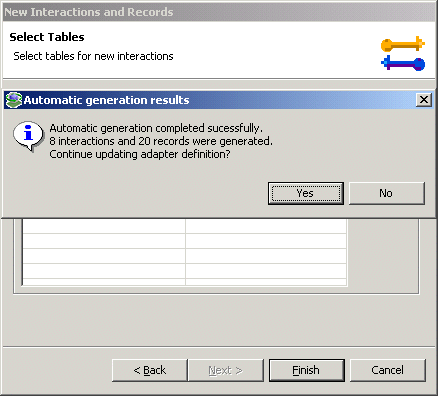
It is recommended that you choose the automatic mode to create interactions.
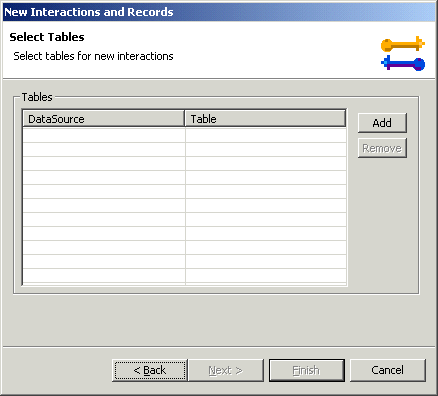
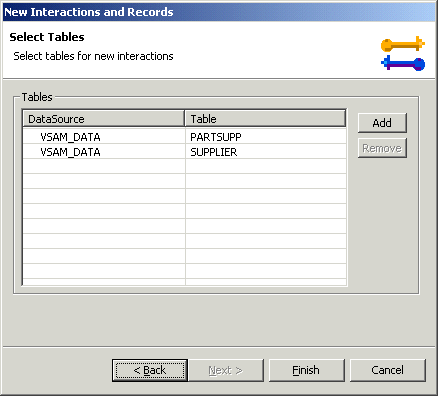
The data sources that have been defined and all the tables, for each data source, that have had metadata defined for them are displayed.
Select the tables that you want to access with the interaction and click the right arrow to move these tables into the right pane.

The SQL used in the interactions can be modified to the exact application requirements using the Metadata perspective, as described in "Task 3: Modifying the Generated Outbound Interactions".
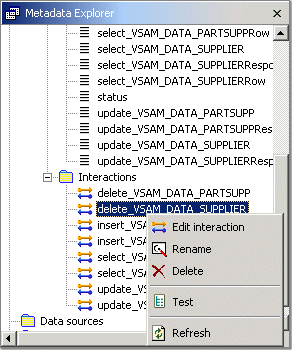
You can modify the interaction definitions to the exact requirements of the application in the Metadata perspective. The following example uses the DELETE interaction generated in the previous task to describe how the interactions can be modified.
The adapter metadata editor opens, displaying the Interaction General tab.
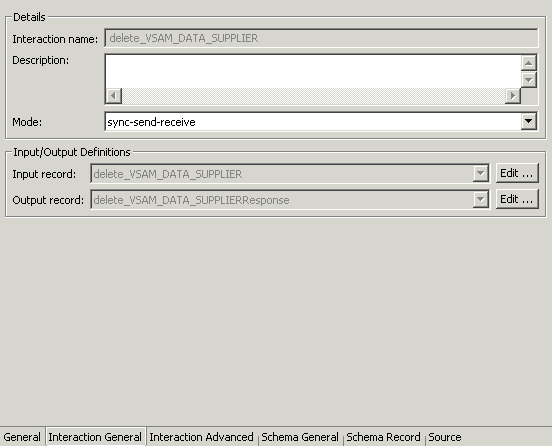
The Interaction General tab displays general information about the way the interaction is executed. You can add a description of the interaction and define the mode of operation for the interaction. The following modes are available:
The information for a request is passed in the input record. The information for the response from the VSAM data source is passed in the output record.
As, required, change the SQL and the parameters associated with the SQL.
Parameters are specified in a SET clause or in a WHERE clause with the following format:
:parameter_name
Specify the adapter from the list and check the Update interaction-related records checkbox. Any changes that need making to the record structures in the schema part of the metadata are done automatically.
|
See Also:
"Interaction Metadata for the Adapter" for details about the adapter metadata |
Inbound interactions are defined as events in Oracle Studio. When you defined the Oracle Connect for VSAM backend adapter with the Create event queue for the adapter box checked, as described in "Task: Setting Up the Adapter", an event adapter was defined automatically. The event adapter is defined with the same name as the backend adapter with the word event appended to it. The backend adapter and the event adapter are linked by Oracle Studio. You can jump from one adapter definition to the other by right-clicking the adapter or event in the Configuration Explorer list and choosing the Linked Event or Linked Adapter option respectively.
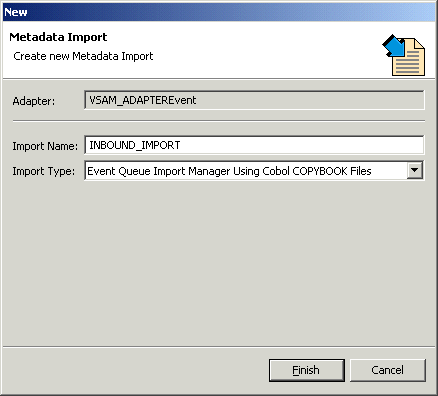
The event adapter requires metadata describing the inbound interactions, including the structures used to pass information to and from the adapter.
Use the Import Metadata perspective in Oracle Studio to generate interaction metadata for the adapter.
Import Type.
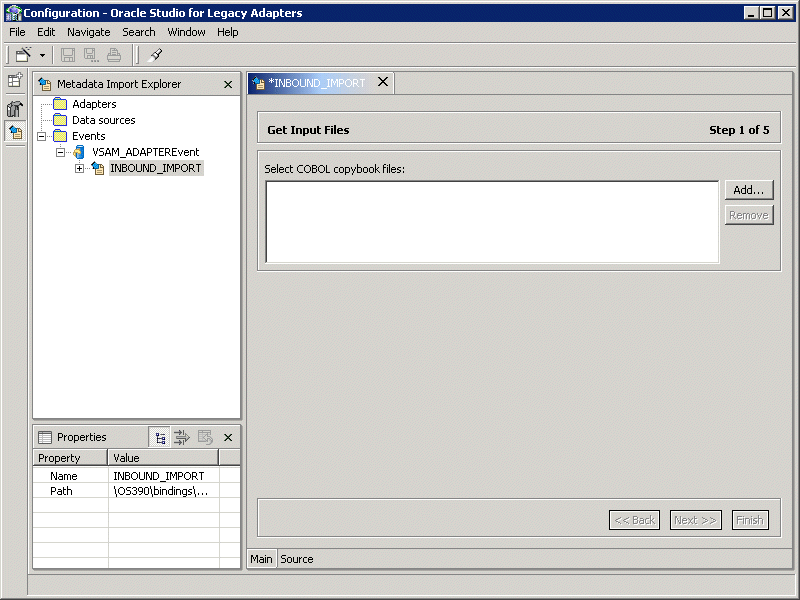
After defining an import as described in the preceding task, the metadata import wizard opens in Oracle Studio. COBOL copybooks are used to create the metadata. The import wizard generates record structures, which are used for the record structures for inbound interactions.
|
Note: The generation of inbound interactions involves similar steps to the steps described in "Task 2: Generating Metadata for the VSAM Data". |
A Select window opens. This window lists any files selected.
The Add Resource window opens, which provides the option to select files from the local machine or FTP the files from another machine.
You access the OS/390 machine at the high-level qualifier for the user name. To change the high-level qualifier, enter the name of the high-level qualifier in the Directory name field and click the arrow button.
The following filters are available:
ignoreFirst6 - Ignore the first six columns in the COBOL copybook.
ignoreFrom72 - Ignore columns 73 to 80 in the COBOL copybook.
prefixNestedColumns - Prefix all nested columns with the previous level heading.
In addition, you can specify a search string and the string that will replace this search string in the generated metadata, and whether the replacement is dependent on the case of the found string.
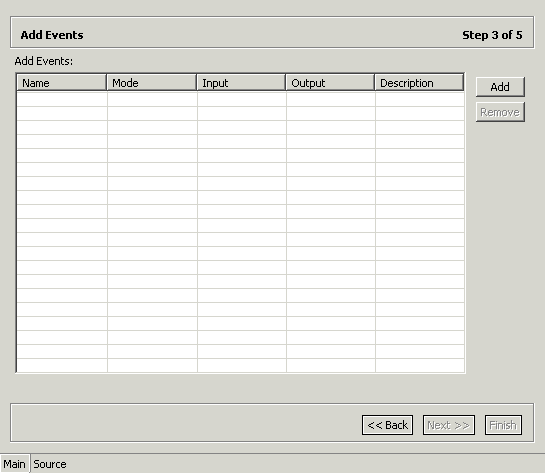
Interaction name - The name of the interaction.
Mode - The interaction mode:
async-send - The inbound interaction sends a request and does not expect to receive a response.
Input - Identifies an input record. The input record is the data structure for the inbound interaction. The records generated from the COBOL programs specified at the beginning of the procedure are listed in a drop-down list. Select the relevant record for the interaction.
Output - For internal use. You cannot enter a value in this field.
Description - Free text describing the interaction.
The metadata is imported based on the options specified and it is stored on the OS/390 machine. An XML representation of the metadata is generated. This XML file can be viewed by expanding the Output node.
After performing the import, you can view the metadata in the Metadata perspective in Oracle Studio. You can also make any fine adjustments to the metadata and maintain it, as necessary.
|
See Also:
"Interaction Metadata for the Adapter" for details about the adapter metadata |
|
|
 Copyright © 2003 Oracle Corporation. All Rights Reserved. |
|