|
Oracle® Business Intelligence Discoverer Plus User's Guide
10g Release 2 (10.1.2.0.0) Part No. B13915-01 |
|
 Previous |
 Next |
|
Oracle® Business Intelligence Discoverer Plus User's Guide
10g Release 2 (10.1.2.0.0) Part No. B13915-01 |
|
 Previous |
 Next |
This section describes how to improve productivity using Discoverer's scheduling facilities, and includes the following topics:
A scheduled workbook is a read-only copy of a workbook that Discoverer processes at a particular time and frequency. For example, you might want to process worksheets in a workbook called Monthly Sales Report at midnight on the first day of each month.
You typically use scheduled workbooks to produce regular reports or to produce complex reports that must be processed at off-peak times.
Each time a scheduled workbook is processed (or run), Discoverer produces a scheduled workbook results set. A scheduled workbook results set is a version (or snapshot) of the source workbook made at a particular time. You can schedule a whole workbook or particular worksheets in a workbook. For example, if you choose to process Worksheet A and Worksheet B in a workbook, the scheduled workbook results set will contain a copy of worksheet A and a copy of worksheet B.
In the example below, Discoverer processes the Sales Report workbook once per month, which produces a set of scheduled workbook results each month.
When you create a scheduled workbook, Discoverer makes a copy of the workbook that you schedule and processes this copy. If you update the original workbook, you need to create a new scheduled workbook to implement the updates. For example, you create a scheduled workbook to process Workbook 1 once per month. Discoverer takes a copy of Workbook 1 and processes it once per month. If you update Workbook 1 (e.g. add an item to a worksheet) you need to create a new scheduled workbook to process Workbook 1.
Once Discoverer processes a workbook, you can use the scheduled workbook results sets produced just like an ordinary Discoverer workbook. For example, you can:
open scheduled workbook results sets in Discoverer Plus Relational and Discoverer Viewer
print and export scheduled workbook results sets
save scheduled workbook results sets in the database with a new workbook name
share scheduled workbook results sets with other Discoverer users
Note: If you share scheduled workbook results sets with other Discoverer users, each user can see all of the data in the results set, regardless of the database access privileges they have been granted. For more information about sharing and security, see "About sharing workbooks and security".
You manage scheduled workbooks using the Scheduling Manager (choose File | Scheduling Manager to display the "Scheduling Manager dialog").
You do not have to running Discoverer for Discoverer to process scheduled workbooks. For more information about how workbooks are processed, see "About how scheduled workbooks are processed".
Notes
You must have the required privileges to schedule workbooks. Contact the Discoverer manager for more details.
If you share a workbook with a Discoverer user and then create a scheduled workbook based on that workbook, you need to explicitly share the scheduled workbook with that user. For example, you create a workbook called Workbook 1 and share Workbook 1 with Discoverer user A. If you create a scheduled workbook based on Workbook 1 that you want Discoverer user A to access, you must share the scheduled workbook with Discoverer user A.
Typically you schedule workbooks in any of the following circumstances:
If a workbook will take a long time to process. Scheduling a workbook to be processed at off-peak times avoids overburdening the server during peak times.
If you want to archive or produce a snapshot of data at specific points in time.
If you process a large or complex workbook or worksheet that exceeds the time limit set by the Discoverer manager. When this happens, a schedule option is displayed informing you that the worksheet query time exceeds the time limit. You can then click the Schedule button and schedule the workbook to process the workbook at off-peak times that are not restricted by the time limit.
If you want to process a workbook at regular intervals (e.g. a weekly report of sales figures).
If the Discoverer manager has specified that you can only open scheduled workbooks results sets (i.e. you are not allowed to open ordinary workbooks).
If you want to share workbooks with Discoverer users without those Discoverer users having to have explicit database access privileges to the data. For more information about sharing and security, see "About sharing workbooks and security".
In this example, you want to process a workbook called Sales Report once per week at 1.00 A.M. You want to keep all scheduled workbook results sets so that Discoverer users can access reports for any week.
In the Schedule Wizard, you specify the following:
In the When do you want to schedule this workbook? field, you specify the date on which you want to process the workbook for the first time. In the time area of the field, you specify 1.00 AM.
In the How often do you want to repeat this schedule? field, you specify 1 and Weekly in the Repeat every fields to specify once per week.
In the Do you want to keep all versions of results? field, you select the Yes, keep all results check box.
The figure below shows how you use the Schedule Wizard to schedule a workbook to be processed once per week at 1.00 A.M, and keep all scheduled workbook results.
The figure below shows how to use the "Open Workbook from Database dialog" dialog to open a scheduled workbook results set.
Scheduled workbook results sets can be opened in Discoverer Plus Relational or Discoverer Viewer. You can open scheduled workbook results sets at any time when connected to Discoverer.
Hint: When you connect to Discoverer, Discoverer can inform you when scheduled workbook results sets have been processed and are ready to open. To enable this automatic alert, make sure that the Don't show the new results window after initial connection check box is cleared on the "Options dialog: General tab".
Discoverer processes scheduled workbooks as follows:
Once workbooks are scheduled, the workbook processing is done automatically in the database.
You do not need to have Discoverer Plus Relational running or connected to process scheduled workbooks.
Scheduled workbook results sets are saved in the database and are available when you start Discoverer.
Discoverer does not display non-aggregable values for scheduled workbooks (i.e. Discoverer processes scheduled workbooks as if you selected the Show <Non-aggregable label>, the "values that cannot be aggregated as" option on the "Worksheet Properties dialog: Aggregation tab"). For more information about setting worksheet properties, see "About choosing aggregation options".
You schedule a Discoverer workbook when you want Discoverer to process a workbook at a particular time and frequency (e.g. weekly). For example, you might want to process a workbook called Monthly Sales Report at midnight on the first day of each month (because that is when your computer system has spare capacity).
Note: You must have the required privileges to schedule workbooks. Contact the Discoverer manager for more details.
To schedule a workbook:
Choose Tools | Manage Schedules to display the "Scheduling Manager dialog".
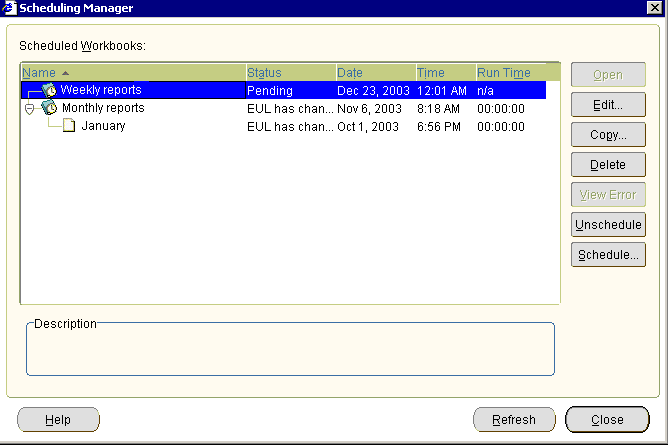
Click Schedule to display the "Select Workbook from Database dialog", which displays a list of workbooks to which you have access.
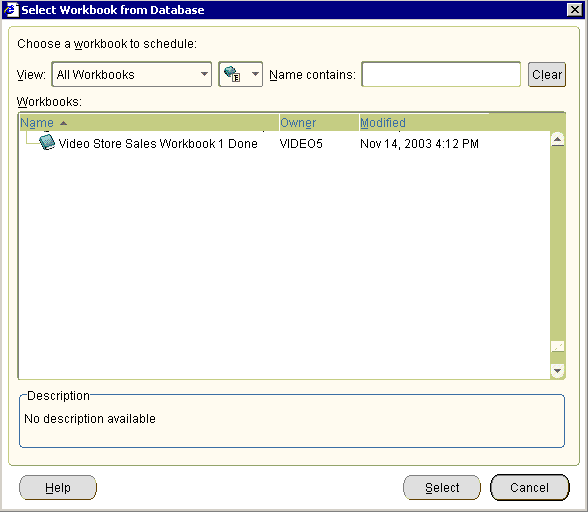
Description of the illustration sw10.gif
Select the workbook that you want to schedule in the Workbooks list and click Select to display the "Schedule Wizard dialog: General tab".
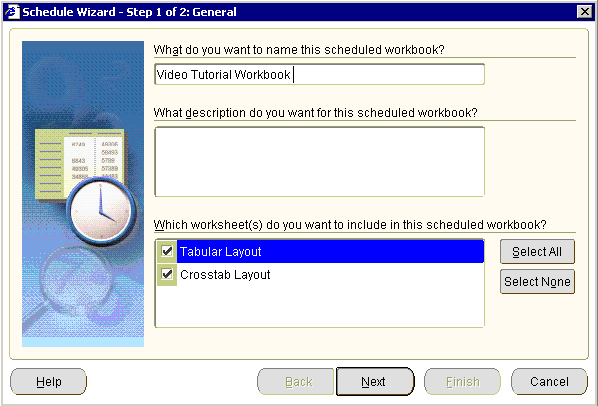
Description of the illustration sw1.gif
Note: If you want to process the currently opened workbook, you can also choose File | Schedule to display the "Schedule Wizard dialog". You can schedule the currently opened workbook even if it is not saved in the database.
Use the "Schedule Wizard dialog: General tab" to define a name and description for the scheduled workbook, and specify which worksheets you want to process.
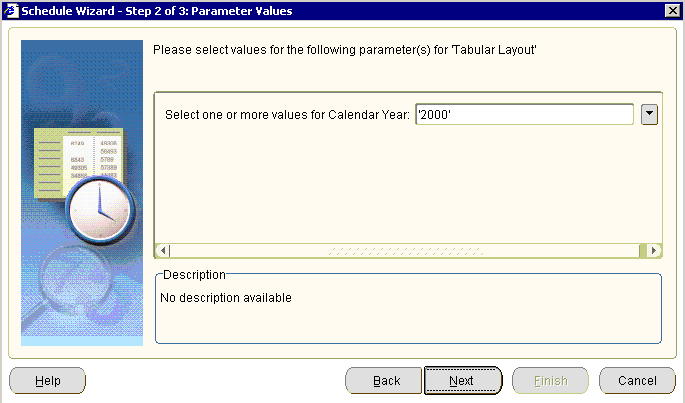
If parameters are required for the worksheets that you have selected, use the "Schedule Wizard dialog: Parameter Values page" to specify values for parameters.
Use the "Schedule Wizard dialog: Schedule tab" to specify when to process the workbook and how frequently it is processed.
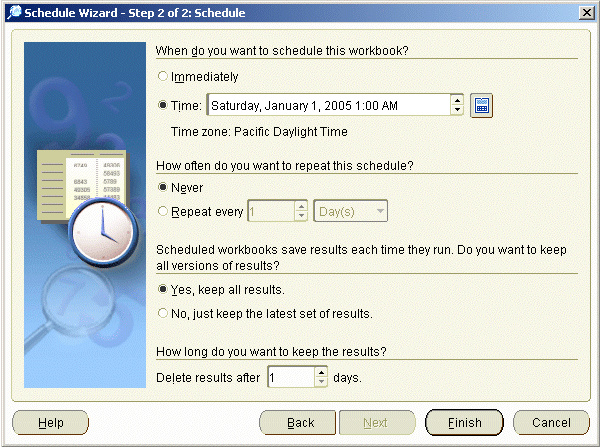
Hint: Click the calendar icon to the right of the When do you want to schedule this workbook? field to specify a date using the graphical "Calendar dialog".
Click Finish to create the scheduled workbook.
Discoverer will process the workbook at the specified time and frequency.
Each time the workbook is processed, Discoverer creates a new scheduled workbook results set. To open a scheduled workbook results set, choose File | Open to display the "Open Workbook from Database dialog" and look for workbooks with a clock icon in the workbooks list. For more information, see "How to open workbooks".
Notes
If you want to publish scheduled workbook results sets to other users, you must share the scheduled workbook (for more information, see "About sharing workbooks").
To monitor the progress of scheduled workbooks, choose Tools | Manage Schedules to use the "Scheduling Manager dialog".
You edit a scheduled workbook when you want to change the instruction to process a workbook. For example, you might want to change the frequency of a scheduled workbook from weekly to monthly.
You cannot edit the read-only copy of a workbook that Discoverer processes.
Note: Changing the instruction does not affect the Discoverer workbook that is being processed.
To edit a scheduled workbook:
Choose Tools | Manage Schedules to display the "Scheduling Manager dialog".

Description of the illustration sw3.gif
Select the scheduled workbook that you want to edit in the Scheduled Workbook list.
Click Edit to display the "Schedule Wizard dialog: General tab".
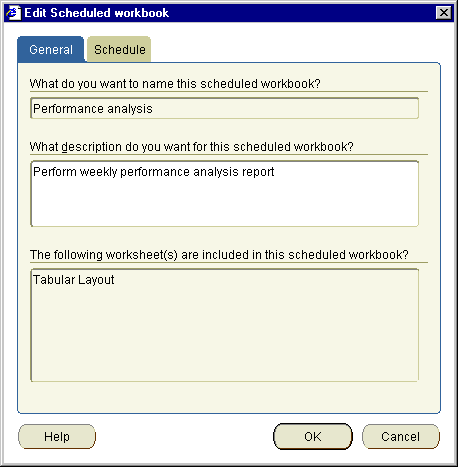
(optional) Use the "Schedule Wizard dialog: General tab" to change the description of the scheduled workbook.
If parameters are required for the worksheets that you specify, use the "Schedule Wizard dialog: Parameter Values page" Values tab page to specify values for parameters.
Use the "Schedule Wizard dialog: Schedule tab" to change the instruction to process the workbook (e.g. change the time or frequency).
Click OK to save changes to the scheduled workbook.
Hint: To monitor the progress of scheduled workbooks, choose Tools | Manage Schedules to use the "Scheduling Manager dialog".
You copy a scheduled workbook when you want to quickly create a new instruction to process a workbook based on an existing scheduled workbook. For example, if you want to process the same workbook and worksheets as an existing scheduled workbook.
To copy a scheduled workbook:
Choose File | Scheduling Manager to display the "Scheduling Manager dialog".

Description of the illustration sw3.gif
Select the scheduled workbook that you want to copy in the Scheduled Workbooks list.
Click Copy to display the "Schedule Wizard dialog: General tab".
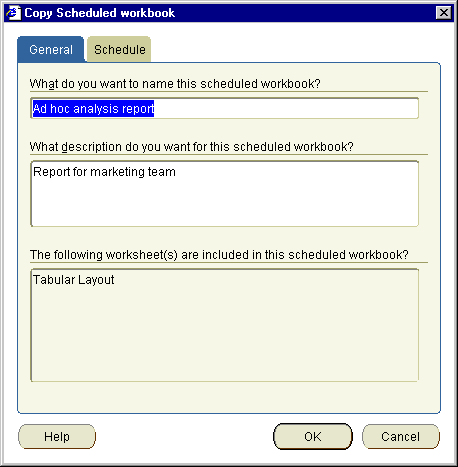
Use the "Schedule Wizard dialog: General tab" page to change the default name for the scheduled workbook.
If parameters are required for the worksheets that you specify, use the "Copy Scheduled Workbook dialog: Parameter Values tab" to specify values for parameters.

Use the "Schedule Wizard dialog: Schedule tab" to change the instruction to process the workbook (e.g. change the time or frequency).
Click OK to save the scheduled workbook.
The new scheduled workbook is displayed in the "Scheduling Manager dialog".
You unschedule a scheduled workbook to stop the scheduled workbook but keep its scheduled workbook results sets. For example, you might want to stop a scheduled workbook that is processed monthly, but keep monthly reports that have been produced.
When you unschedule a scheduled workbook, you update the instruction to process a particular Discoverer workbook. You do not delete the Discoverer workbook that is being processed (for more information, see "What are scheduled workbooks?").
Note: If you want to stop a scheduled workbook and remove its scheduled workbook results, use the Delete button (for more information, see "How to delete scheduled workbooks and scheduled workbook results sets").
When you unschedule a scheduled workbook, you do the following:
If the scheduled workbook has not yet been processed, you delete the instruction to process the workbook and the read-only copy of the workbook that Discoverer processes. The scheduled workbook is removed from the list of scheduled workbooks in the Scheduling Manager dialog.
If the scheduled workbook has been processed, you stop the instruction to process the workbook in the future but you do not delete the scheduled workbook. The scheduled workbook remains in the list of scheduled workbook in the Scheduling Manager dialog, with the Status column set to 'Unscheduled'. You keep the scheduled workbook results sets that have been produced.
To unschedule a scheduled workbook:
Choose File | Scheduling Manager to display the "Scheduling Manager dialog".

Select the scheduled workbook that you want to unschedule in the Scheduled Workbooks list.
Click Unschedule, then click Yes at the Confirm Unschedule dialog.
Note: If the Unscheduled button is grayed out, the scheduled workbook is a single run workbook that has been processed (i.e. the value in the Status column is Report Ready). Or, it has been unscheduled already (i.e. the value in the Status column is Unscheduled).
Click Close to close the Scheduling Manager dialog.
You delete a scheduled workbook to stop the scheduled workbook and remove its scheduled workbook results sets. For example, you might want to stop a scheduled workbook that is processed monthly, and remove monthly reports that have been produced.
You delete scheduled workbook results sets when you no longer need those results generated by scheduled workbooks. For example, you might have monthly reports that have accumulated over the previous year that you know you will never use again.
When you delete a scheduled workbook, you remove the instruction to process a particular Discoverer workbook. You do not delete the Discoverer workbook that is being processed (for more information, see "What are scheduled workbooks?").
Note: If you want to stop a scheduled workbook but keep its scheduled workbook results, use the Unschedule option (for more information, see "How to unschedule a scheduled workbook").
To delete a scheduled workbook or scheduled workbook results set:
Choose File | Scheduling Manager to display the "Scheduling Manager dialog".
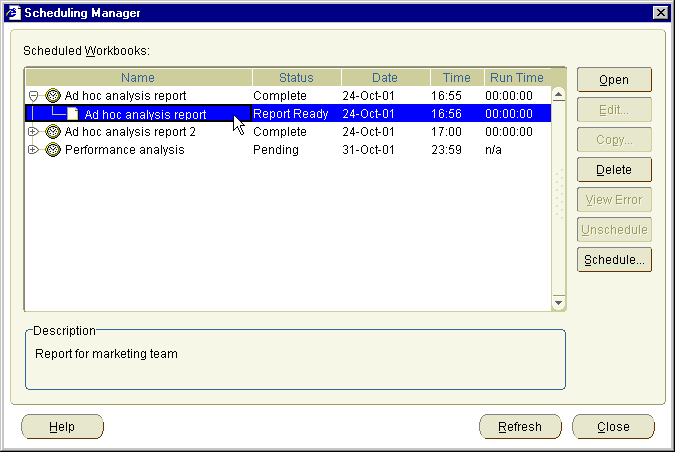
To delete a scheduled workbook:
Select a scheduled workbook in the Scheduled Workbooks and click Delete.
Click Yes at the confirmation dialog to remove the scheduled workbook and its scheduled workbook results sets.
To delete a scheduled workbook results set:
Select a scheduled workbook in the Scheduled Workbooks list and click the + symbol to expand the list of scheduled workbook results sets.
Select one or more scheduled workbook results sets.
Note: You can select more than one scheduled workbook results set by pressing the Ctrl key and clicking another scheduled workbook results set.
Click Yes at the confirmation dialog to remove the scheduled workbook results sets.
Click Close to close the Scheduling Manager dialog.
The specified scheduled workbooks and/or results sets are removed from the database.