|
Oracle TopLink Developer's Guide
10g Release 3 (10.1.3) B13593-01 |
|
 Previous |
 Next |
|
Oracle TopLink Developer's Guide
10g Release 3 (10.1.3) B13593-01 |
|
 Previous |
 Next |
For XML and EIS projects, TopLink Workbench maps each TopLink descriptor to your XML schema.
This section includes information on the following topics:
After you import one or more XML schemas into your project (see Importing an XML Schema) and you expand the schema object in the Navigator, TopLink Workbench displays the schemas associated with the project.
Figure 5-28 numbered callouts identify the following schema icons:
Project
Schemas object
Specific schema
For more information, see the following:
When you select a specific XML schema in the Navigator, you can display the structure and details of the schema using the Schema Structure tab.
To display the structure and details of a schema, use this procedure:
Select a schema element in the Navigator. Its properties appear in the Editor.
Click the Schema Structure tab. The Schema Structure tab appears.
Select an element in the schema. The element's details appear.
Use the following information to verify data in each field in the Schema Document Info tab:
| Field | Description |
|---|---|
| Schema Structure | Displays the elements of the schema, listed in alphabetical order, in an expandable or collapsible tree structure. |
| Details | Displays detailed information (such as name and type) for the currently selected element in the Schema Structure area. |
These fields are for display only and cannot be changed in TopLink Workbench.
The first step in configuring an EIS project (using XML records) or XML project is importing the XML schema(s) that your project uses.
When you import a schema, you define a schema reference that gives TopLink the information it needs to locate the schema itself. Anytime after you import an XML schema, you can update the schema reference (see "Configuring XML Schema Reference") if necessary.
After importing an XML schema, you can configure XML schema namespaces (see "Configuring XML Schema Namespace").
To import an XML schema into an EIS project (using XML records) or an EIS project, use this procedure:
Right-click the schemas element in the Navigator and select Import Schema from the context menu. The Import Schema dialog box appears.
Use the following information to enter data in each field in the Import Shema dialog box:
| Field | Description |
|---|---|
| Name | Specify the name of this schema. This is the display name that TopLink Workbench uses. It can be different than the name you specify when you configure Source. |
| Source | Select how TopLink Workbench should import the schema. |
| File | Specify that TopLink Workbench should import the schema from a file.
Enter the fully qualified directory path and filename of the schema file. |
| URL | Specify that TopLink Workbench should import the schema using a URL.
Enter the complete URL of the schema file. Note: When importing schemas by URL, ensure you have set your proxy information correctly. See "General Preferences" for more information. |
| Classpath | Specify that TopLink Workbench should import the schema from the project classpath. |
| Resource Name | Enter the fully qualified name of the XML schema file including the name of the package of which it is a part. For example, if your XML schema mySchema.xsd is in C:\project\config and you add this directory to your project classpath (see "Configuring Project Classpath"), specify a resource name of project.config.mySchema.xsd.
|
To reimport a specific schema, right-click on the specific schema in the Navigator and select Reimport Schema from the context menu.
To reimport all schemas in a project, right-click on Schemas in the Navigator and select Reimport All Schemas from the context menu.
To change a schema's source, right-click on the specific schema in the Navigator window and select Properties from the context menu. The Schema Properties dialog appears.
After you import an XML schema (see "Importing an XML Schema"), you can update its source by configuring the schema reference.
To specify the source of a schema, use this procedure:
Select a schema element in the Navigator. Its properties appear in the Editor.
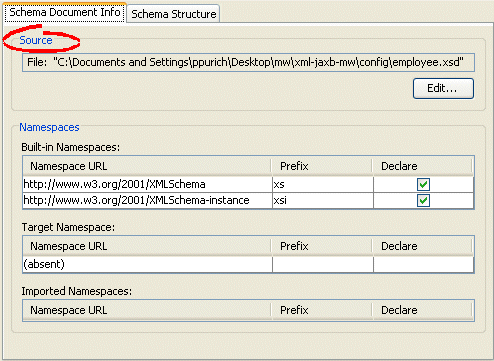
Click the Schema Document Info tab. The Schema Document Info tab appears.
Figure 5-31 Schema Document Info Tab - Source Field

Click Edit to select a new source for the selected schema. The Schema Properties dialog box appears.
Use the following information to complete each field in the Schema Properties dialog box:
| Field | Description |
|---|---|
| Name | Specify the name of this schema. This is the display name that TopLink Workbench uses. It can be different than the name you specify when you configure Source. |
| Source | Select how TopLink Workbench should import the schema. |
| File | Specify that TopLink Workbench should import the schema from a file.
Enter the fully qualified directory path and filename of the schema file. |
| URL | Specify that TopLink Workbench should import the schema using a URL.
Enter the complete URL of the schema file. Note: When importing schemas by URL, ensure you have set your proxy information correctly. See "General Preferences" for more information. |
| Classpath | Specify that TopLink Workbench should import the schema from the project classpath. |
| Resource Name | Enter the fully qualified name of the XML schema file including the name of the package of which it is a part. For example, if your XML schema mySchema.xsd is in C:\project\config and you add this directory to your project classpath (see "Configuring Project Classpath"), specify a resource name of project.config.mySchema.xsd.
|
Use Java to configure schema reference. Create a descriptor amendment method (see "Configuring Amendment Methods") that instantiates the appropriate type of XMLSchemaReference (XMLSchemaClassPathReference, XMLSchemaFileReference, or XMLSchemaURLReference) and configures the descriptor with it, as follows:
If you are using EISDescriptors, the TopLink runtime does not use the schema reference; no further configuration is required.
If you are using XMLDescriptors, configure the descriptor with the XMLSchemaReference using XMLDescriptor method setSchemaReference.
As defined in http://www.w3.org/TR/REC-xml-names/, an XML namespace is a collection of names, identified by a URI reference, which are used in XML documents as element types and attribute names. To promote reusability and modularity, XML document constructs should have universal names, whose scope extends beyond their containing document. XML namespaces are the mechanism which accomplishes this.
When you import an XML schema (see "Importing an XML Schema") such as the one that shows, TopLink Workbench organizes the various namespaces that the XML schema identifies as Table 5-3 shows.
Example 5-3 XML Schema with Namespace Options
<xsd:schema
    xmlns:<prefix>="<URI>"             <!-- TopLink Workbench Built-in Namespace -->
    targetNamespace="<URI>"            <!-- TopLink Workbench Target Namespace -->
    elementFormDefault="qualified"
    attributeFormDefault="unqualified"
    version="10.1.3">
    <xsd:import                        <!-- TopLink Workbench Imported Namespace -->
        namespace="http://xmlns.oracle.com/ias/xsds/opm"
        schemaLocation="object-persistence_1_0.xsd"
    />
...
</xsd:schema>
Table 5-3 TopLink Workbench XML Schema Categories
| TopLink Workbench Category | Defined By | Purpose | When Needed |
|---|---|---|---|
|
Built-in |
|
Provides access to types defined in other XML schemas for use as is. |
If your project uses more than one XML schema or if you want to use |
|
Target |
|
The namespace you use to qualify the types you define for your application. If set, all XML documents that use these types must use this namespace qualifier. |
You may need to specify a target namespace depending on how element and attribute form options are set (see "Element and Attribute Form Options"). |
|
Imported |
|
Provides access to types defined in the corresponding built-in XML schema so that you can extend the built-in types. Extended types must be qualified by the target namespace. |
If your project uses more than one XML schema and you want to extend one or more built-in types. |
For more information, see "Understanding XML Namespaces".
To specify the namespaces of a schema, use this procedure:
Select a schema element in the Navigator. Its properties appear in the Editor.
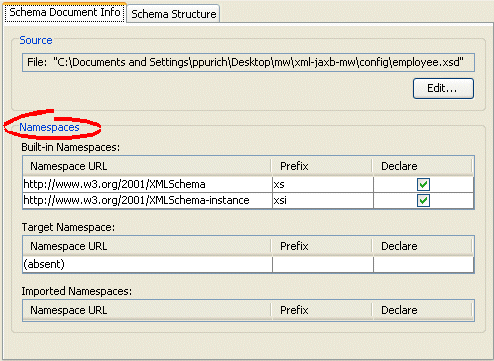
Click the Schema Document Info tab. The Schema Document Info tab appears.
Figure 5-33 Schema Document Info Tab - Namespaces Field

Use the following information to complete each Namespaces field in the tab:
| Field | Description |
|---|---|
| Built-in Namespaces | All namespaces defined by xmlns:<prefix>="<URI>".
|
| Target Namespaces | All namespaces defined by targetNamespace="<URI>".
|
| Imported Namespaces | All namespaces defined by xsd:import.
|
| Prefix | Double-click in the Prefix field to specify the prefix that corresponds to the given namespace.
When the TopLink runtime marshalls (writes) an object to an XML document, it uses the namespace prefixes you specify here. When the TopLink runtime unmarshalls (reads) an XML document, the document may use any prefix value as long as it corresponds to the appropriate namespace. For more information, see "TopLink Runtime Namespace Resolution". |
| Declare | When selected, XML documents must use the corresponding URI qualifier when referring to types from this namespace. XML documents may use a different prefix value as long as that value is associated with the appropriate namespace URI. For more information, see "TopLink Runtime Namespace Resolution". |
Using Java, to configure XML schema namespaces for an EIS descriptor (with XML records) or an XML descriptor, create a descriptor amendment method (see "Configuring Amendment Methods") that uses EISDescriptor or XMLDescriptor method getNamespaceResolver to configure the descriptor's NamespaceResolver accordingly as shows.