| Bookshelf Home | Contents | Index | Search | PDF | |
Fundamentals > Understanding the Siebel Application Window > Siebel Application Window Components >
Screens and Views
When you become familiar with the structure of the Siebel application window, you will be able to navigate to the information you need using the screen tabs, Site Map, Show drop-down list, menu button, Query button, thread bar, and view tabs. You can specify which screen and view tabs are displayed in your Siebel application from the User Preferences screen. For more information, see View Personalization.
Screen Tabs
The application is organized into screens. Each screen covers a broad topic. You access a screen by clicking the related screen tab, such as Opportunities, Calendar, or Accounts.
To access a screen, click the corresponding tab. The screen appears and the tab changes color. Figure 4 shows an example of screen tabs, where Contacts is the active screen tab.
Tab jump buttons. If the screen tab you need is not visible, use the tab jump buttons to move forward or backward through the screen tabs. The tab jump buttons are positioned to the left and right of the currently displayed tabs, as shown in Figure 5
NOTE: Tab jump buttons are also available for navigating the view tabs.
Site Map
The screen tabs that appear in the application window are determined by your organization and may be only a subset of the available screen tabs. To see a listing of all the screens available to you, use the Site Map.
NOTE: Not all views available in a screen will necessarily appear in the Site Map. To see all views available in a screen, navigate to the screen and use the Show drop-down list or view tabs to access the view you want. For more information on the Show drop-down list, see Show Drop-Down List. For more information on view tabs, see View Tabs.
To navigate to a screen using the Site Map
- From the application-level menu, choose View > Site Map.
- In the Site Map, click the desired hyperlink to access the corresponding screen.
The Site Map displays the main views available in that screen.
If you select a screen from the Site Map that does not appear as a screen tab in your application, a screen tab will be created when you jump to that screen. It will only be available for the current session.
- Click the view hyperlink to jump to that screen and view.
TIP: You can also click the site map button on the toolbar to access the Site Map. For more information, see Site Map Button.
Show Drop-Down List
You use the Show drop-down list to display a specific set of records, such as My Accounts or All Accounts, as well as to view records in a different format, such as the Explorer view.
Filtering a Set of Records
After identifying the desired screen and selecting the screen tab, you must decide what set of records you want to view in the selected screen. A default set of records appears below the screen tabs.
The Show drop-down list consists of filters, such as My Accounts, My Team's Accounts, and so on. Each filter is used to access a new set of records. Records consist of fields. For example, the fields in an Employee record might show an employee's name, address, and employee number.
Suppose you need to query for information about an account. However, the account is not owned by you. Currently, the default filter for the Accounts screen is My Accounts, which displays only your account records. To perform a query on every account record in the system that you have access to, you use the Show drop-down list and choose the All Accounts filter. You can then see all the account records that you have access to in the system.
Table 8 provides explanations for each filter in the Show drop-down list. The Accounts screen is used as an example, but these filters can appear in any screen. You may not see some filters shown in Table 8, depending on your responsibilities.
After using a filter in the Show drop-down list to display a set of records, you select a record by clicking anywhere in the record. This highlights the record and, depending on where in the record you click, may put a field into edit mode.
Selecting a Different View
You can also use the Show drop-down list to display data in different formats. For example, you can sometimes view the same data in a list, in an Explorer view, or in a Chart view.
The Explorer view is a way of displaying data in a hierarchical format, similar to that of Microsoft Windows Explorer. See Explorer (Tree) for more information on this type of view.
The Chart view is a way of presenting data graphically to compare a record's data to other data. See Charts for more information.
NOTE: Explorer and Chart views are not available in every screen.
Menu Button
The menu button displays a menu of actions that apply to the active form, list, or Explorer view, or a selected record in a list. For more information on forms, lists, or Explorer views, see Displaying Data.
Through the menu button, you can perform actions such as copy, edit, delete, query, columns displayed, and advanced sort.
Right-Clicking
Right-clicking in a form or a list displays the same menu of actions provided by the menu button in that form or list. Right-clicking outside of a form or a list will provide you with a menu of actions related to the entire Siebel application, such as creating a new record or opening the Search Center.
Query Button
The Query button appears on forms and lists. Click Query to launch a blank query in a form or list. For more information about querying, see Common Query Tasks.
Show More and Show Less Buttons
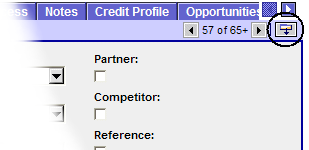
Every form or list has a show more button or a show less button in the top right corner. When the form or list is collapsed, you can click the show more button to expand it, as shown in Figure 6.
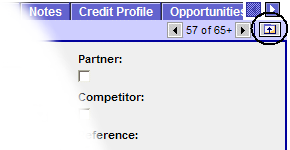
When the form or list is expanded, you can click the show less button to collapse it, as shown in Figure 7.
Clicking the show more or show less button in a form allows you to look at more or fewer fields; clicking the show more or show less button in a list allows you to look at more or fewer records, according to your needs.
Horizontal Scroll Bars
Horizontal scroll bars appear beneath lists that contain more columns than can fit on the screen. Use the horizontal scroll bar to move through all the columns currently being displayed. To see if more columns are available for viewing, click the menu button, and then click Columns Displayed.
Thread Bar
The thread bar, shown in Figure 8, appears immediately below the screen tabs. It helps you keep track of your navigational path when you drill across to a view on another screen using record hyperlinks. You can return to a previous point in the path by clicking the corresponding name on the thread bar. When you drill across screens using record hyperlinks, you remain in the same thread, which means that you may find yourself in a new screen and view, but you will not see all the records available in that screen and view. For example, if you were in the thread shown in Figure 8, you would see only the opportunities associated with the contact, Adams. If you want to see every opportunity to which you have access, you must click the current screen tab. Similarly, when you navigate to another screen using a screen tab or the Site Map, the thread bar resets and begins tracking your new path.
View Tabs
You use view tabs after you have selected the record you want to view or change. The view tabs show detailed presentations of data related to the selected record and screen.
The view tabs appear in the bottom part of the application window, below the screen tabs. The list of available views depends on which screen tab you have selected. Click a view tab to display the desired data for the record you have selected. For example, you may be looking at an account in the Accounts screen. Clicking the Contacts view tab displays the contacts associated with this account.
TIP: If the view tab you need is not visible, use the tab jump buttons to move forward or backward among the available view tabs. It may also be that you do not have a certain view tab set to show in your User Preferences. For more about showing and hiding view tabs, see View Personalization.
When you select a view tab, the record selected in the list above the view tabs may change to a form. More of the record's fields, which were not available for viewing in the list, appear. No other records are visible any more, so it is easier to focus on the selected record. To see every field in a record, click the More Info view tab, and then click the show more button to expand the form.
NOTE: In a few instances, you may find yourself unable to see the selected record when you navigate through the view tabs. This is because some views, such as the Explorer view, reset the records upon launch. It may also be a result of your access privileges.
Subview
The subview appears directly below the information displayed for the selected view tab. The subview gives you more details about the record selected in the view. Not all views have subviews. If a view has a subview, it appears automatically. Figure 9 shows the Activity Plans view and the Activities subview.
| Bookshelf Home | Contents | Index | Search | PDF | |
Fundamentals Published: 14 August 2003 |