| Oracle® Document Capture User's Guide Release 10gR3 E13863-01 |
|
 Previous |
 Next |
Home > User's Guide > User Interface > Indexing Screen
| Oracle® Document Capture User's Guide Release 10gR3 E13863-01 |
|
 Previous |
 Next |
Home > User's Guide > User Interface > Indexing Screen
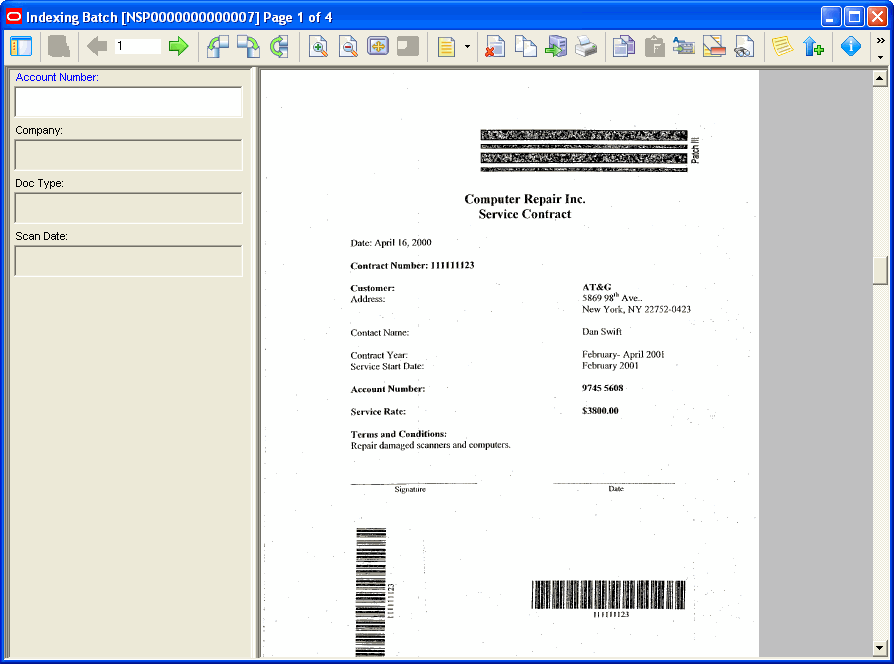
Use the Indexing screen to index and edit scanned batches.
Display this screen by selecting a batch to index in the Batch Indexing screen.

Indexing Screen Toolbar
Each option in the toolbar is described below:
| Toolbar Button | Button Name | Description |
|---|---|---|
 |
Toggle Layout | Move the index fields to the right side of the screen and the viewer to the left, or vice versa. |
 |
Database Lookup | Search an external database based on the field in which the cursor is positioned. If you entered characters to search for in the field before clicking the button, Index searches the database and displays values that match in a hit list; you select the value you want, and it is inserted into the field.
This button is active when a database lookup is available for the selected index field. |
 |
Previous Page | Display the document's previous page in the viewer. |
 |
Go to Page | Display a specific page by entering its number in this field and pressing Enter. |
 |
Next Page | Display the document's next page in the viewer. |
 |
Rotate Left | Rotate the image 90 degrees counterclockwise. Rotated images are saved that way within the batch. |
 |
Rotate Right | Rotate the image 90 degrees clockwise. Rotated images are saved that way within the batch. |
 |
Flip | Rotate the image 180 degrees. Rotated images are saved that way within the batch. |
 |
Zoom In | Enlarge the selected image's display. Click repeatedly to further zoom in. |
 |
Zoom Out | Reduce the selected image's display. Click repeatedly to further zoom out. |
 |
Fit to Window | Display the entire selected image in the viewer. |
 |
Toggle Zone Display | Turn zone display on or off. If zones are configured for the index profile, a turquoise box is displayed on the image when an index field is selected, to highlight the area. For example, a zone might highlight an area showing an invoice number so you can easily find it and type it in the current field. If you zoom in when zones are in effect, Index zooms in on the zone area, and saves the zoom setting. If the OCR option is available, characters from the zone might be automatically entered in the current field, leaving you to verify that they are correct. |
 |
View Mode | Use this button to change how images are displayed in the Indexing Screen. Click the button's arrow to select a different view, or click the button repeatedly to switch between the view options.
|
 |
Delete Pages | Delete pages from the batch. In the Delete Pages Screen that displays, delete the selected page or enter page numbers. (Specify a range using a dash and separate numbers with a comma.)) |
 |
Duplicate Pages | Copy one or more pages and paste them directly after the copied pages. For example, if indexing insurance forms, you might have policy pages needing to be indexed to different accounts.In the Duplicate Pages Screen that displays, specify the pages to duplicate (the current page, a range of pages, or all pages between any separator sheets surrounding the current page) and the number of copies to paste. |
 |
Commit | Send the selected batch for commit processing. |
 |
Send the currently displayed image to the printer. | |
 |
Copy Page Indexes | Copy the selected page's index values, for pasting to another page. |
 |
Paste Page Indexes | Paste previously copied index values to the selected page. |
 |
Apply Values to Remaining Pages | Apply the current page's index values to all pages after it. (Index values on images before the current image are not affected.) You can also select this command after clearing index values to clear all values from remaining pages. |
 |
Clear All Indexes | Start over indexing the selected image, clearing out all of its index fields. |
 |
Find | Search for images that contain a specified index value or that have no index entries. In the Find Screen that displays, enter the value to search for or choose Next Un-Indexed Page. Press F3 to search for the next instance of the search values you entered. |
 |
Edit Batch Note | Enter, edit, or delete a note for the batch in the note window that displays. |
 |
Edit Batch Status and Priority | Assign or change a batch's status and priority. From the Batch Status options displayed, enter or select a number between 0 and 10 in the Priority field (where 10 is the highest priority), and enter or select a status in the Status field. |
 |
Page Information | Display information about the selected page. The information remains on the screen, allowing you to monitor information as the page changes. Information includes: Batch Name, Batch ID, File Cabinet Name, File Cabinet ID, File Name, File Size, Include in Document (false if page detected as separator page and profile set to discard separator pages), Page Complete (true if page is fully indexed), and Page Number. |