Adding and Removing Projects from the Server
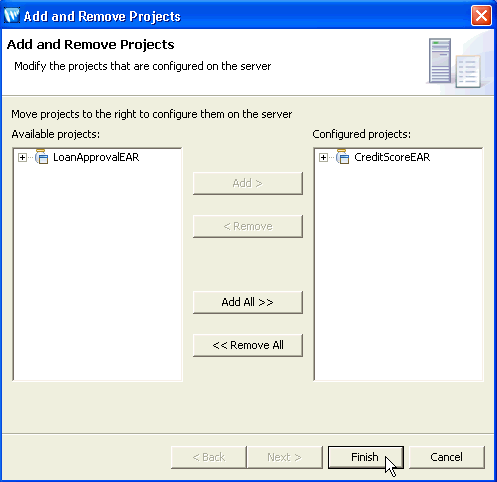
To add or remove projects from a server, on the Server view, right-click the target server, and select Add and Remove Projects.

The Add and Remove Projects dialog shows a list of projects available for addition to the server. Select and move projects from the left column to add them to the server. Note that the change will take effect only after you re-publish the application.
Stopping and restarting the server does not remove previously deployed projects.
Managing Deployed Projects
From the Servers view, expand the name of your server. The projects from the current workspace that are associated with this server will be displayed. This is not an indication that the projects are actually deployed to the server, simply that they are associated with the server.
If you right click on the server, you can click Add and Remove Projects to dissociate a project from the server and prevent it from being automatically deployed when the application runs.
Note that only open projects are deployed. You can close
a project by clicking on the project folder name in the Project Explorer view
and then click Project > Close Project. The project folder
icon will change to ![]() to
indicate that the project is now closed. Closed projects are not deployed.
Note that if the project was deployed before it was closed, it will
remain on the server unless you undeploy it.
to
indicate that the project is now closed. Closed projects are not deployed.
Note that if the project was deployed before it was closed, it will
remain on the server unless you undeploy it.
You can also use the working sets feature of Eclipse to specify a collection of projects/applications to be deployed as a set. You can get information on working sets from the help system by clicking Help > Help Contents and choosing Workbench User Guide.
Duplicate Project Name Conflicts
In many cases, duplicate project names and context paths can cause deployment problems. Projects previously deployed to a server can create conflicts with new projects with the same name or context root.
To remove previously added projects, move the project from the right column to the left column. Note that the change will take effect only after you re-publish the application.
Undeploying Applications
In some situtations you may find it necessary to undeploy a project instead of removing. For example, if an project has been deployed to the server outside of Workshop or if it has been deployed with Workshop from a previous release it may be necessary to remove it before deploying a new project with the same name or context root.
To undeploy, in the Server view, double-click the target server. On the Server Overview view, in the section labeled Published Modules, select the application and click Undeploy. Note that if a project is part of an EAR application, you cannot undeploy it separately from the EAR. You must undeploy the EAR as a whole along with all of its projects.