| Oracle® Retail Store Inventory Management User Guide Release 15.0 E64567-01 |
|

 Previous |
 Next |
Use the Item Request functions to request items to cover shortages and increased demand. For some items, store ordering may be allowed (see Chapter 19, "Store Orders"), but you can use item requests to replenish any items. Item requests are sent to the merchandising system, and the item is sourced from a warehouse or supplier depending on parameters set up for that item.
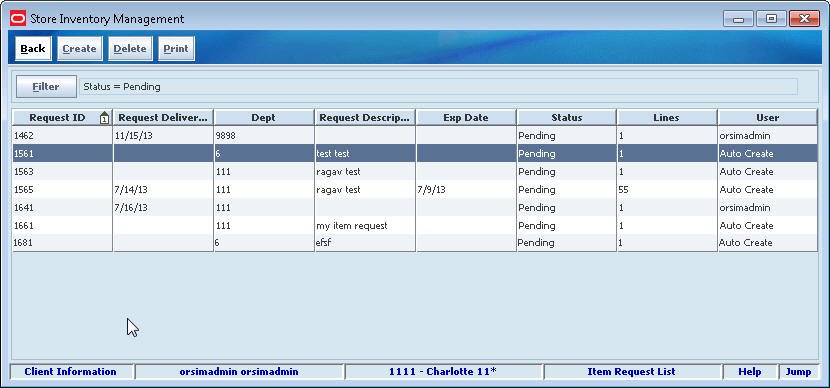
Item Request List Window
Navigate: Main Menu > Inventory Mgmt > Item Request. The Item Request List window opens.
From the Item Request List window, you can do the following:
From the Item Request List window, click Back to return to the Inventory Management menu.
Whenever the Item Request List window is displayed, you can filter the list of item requests to limit the requests listed. If the list is currently filtered, the filtering is shown next to the Filter button.
To filter the list of item requests or to change the current filtering, follow these steps:
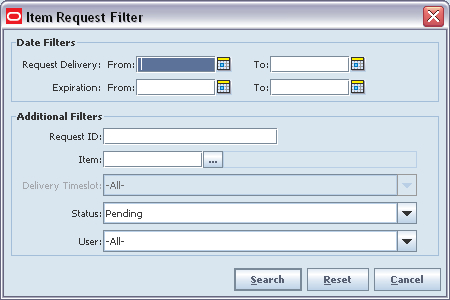
In the Item Request List window, click Filter. The Item Request Filter window opens.
Enter or select search values as needed to specify the item requests that you want to list. All values are optional. If you leave a field blank or select All, all values are included in the search.
Date Filters – Enter or select From Date and To Date values to limit the date range.
Request ID – Enter the Request ID.
Item – Enter the Item ID or click the Ellipsis button to look up an item.
In the Item Lookup window, locate and select the item you want. Click Apply to return to the Item Request Filter window. See ”Item Lookup” in Chapter 20 for more information.
Delivery Timeslot – Select the delivery timeslot for the item requests.
Status – Select Canceled, Completed, Pending, or All. The default is Pending.
User – Select the user who made the requests.
Click Search. You return to the Item Request List window, where your filter has been applied.
Use this procedure to replenish any item.
Navigate: Main Menu > Inventory Mgmt > Item Request. The Item Request List window opens.
|
Note: SIM system options can limit the number of items that can be requested in a item request. If you have reached the maximum number of line items, you will receive a message that you cannot add any more items. You can continue, but you cannot add another item without first deleting one. |
To request an item, follow these steps:
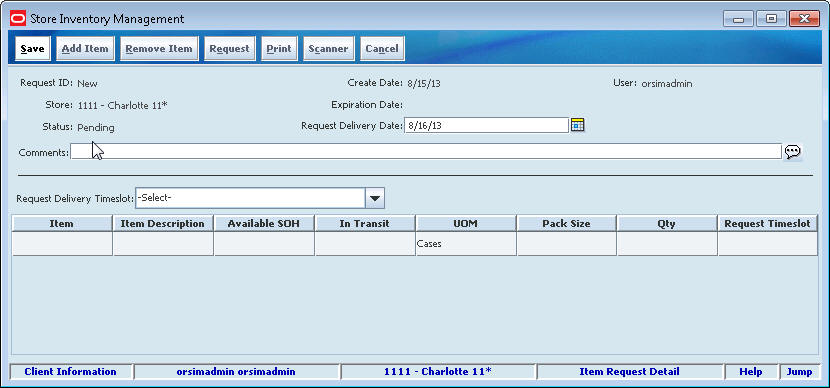
Click Create. The Item Request Detail window opens.
In the Request Delivery Date field, enter the date that you want the item delivered to your location, or click the Calendar button to select the date from the calendar. The date can be today or any later date.
In the Comments field, enter any additional information that you want to include with the request.
If you want to request a delivery time slot, and if the Request Timeslot Delivery field is enabled, select a time slot. (This field may not be available, depending on the item and how your system is set up. It is an optional field.)
Enter item information:
In the Item field, enter the item number click the Ellipsis button to look up the item, or click Scanner to scan the item. See ”Scan an Item (Scanner Button)” in Chapter 2 for more information.
In the Item Lookup window, enter search criteria as needed to find the item you want. (See ”Item Lookup” in Chapter 20 for more information about item lookup criteria.) Select the item you want and click Apply to return to the Item Request Detail window.
For each item on the request, enter information in the fields:
UOM – From the drop-down list, select the unit of measure.
Qty – Enter the number of items that you want delivered to your location.
To add more items to the item request, click Add Item.
Repeat Steps a through c for each item that you want to add.
Save or complete the request:
To save the request so you can modify it later, click Save. You are returned to the Item Request List window where the request displays with a status of Pending.
To complete the request, click Request. You are returned to the Item Request List window where the request is displayed with a status of Requested, if the filter is set to display requests in Complete status.
Use this procedure to view or edit an item request. You can edit only item requests in Pending status.
Navigate: Main Menu > Inventory Mgmt > Item Request. The Item Request List window opens.
To locate and edit an item request, follow these steps:
If you want to filter the item requests listed, click Filter. See ”Filter the Item Request List."
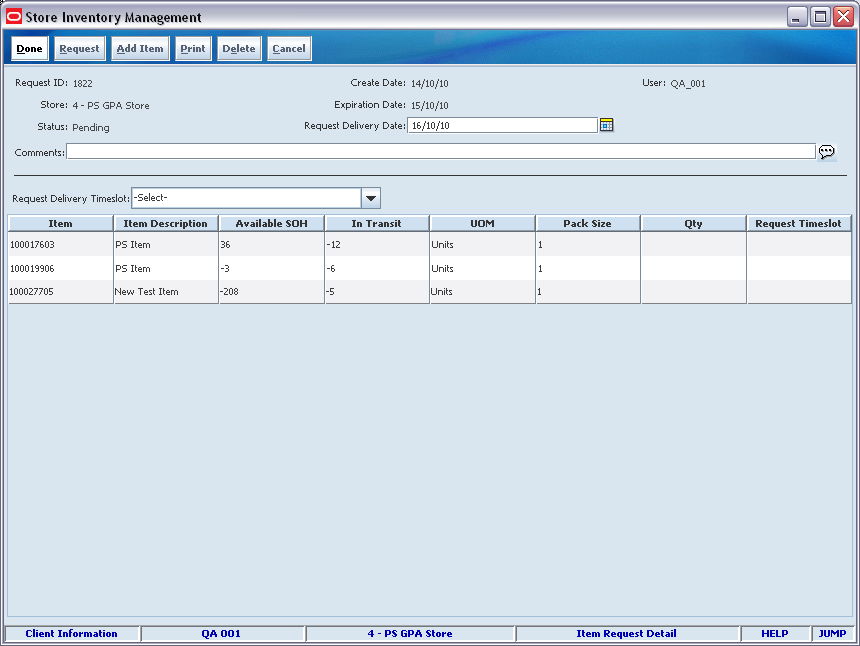
Double-click the item request you want to view or edit. The Item Request Detail window opens.
If you want to edit the item request, perform one or more of the following actions.
Change the Delivery Date
Enter a date in the Request Delivery Date field, or click the Calendar button to use the calendar to enter the date. The date can be today or any later date.
Remove an Item
Select the line item that you want to remove.
Click Remove Item.
Add an Item
Click Add Item.
In the Item field, enter the item number or click the Ellipsis button to look up the item, or click Scanner to scan the item. See ”Scan an Item (Scanner Button)” in Chapter 2 for more information.
For each item, enter information in the fields.
UOM – From the drop-down list, select the unit of measure.
Qty – Enter the number of items that you want delivered to your location.
Save or complete the request:
To save the request so that you can modify it later, click Save. You return to the Item Request List window, where the request is displayed with a status of Pending.
To complete the request, click Request. You return to the Item Request List window, where the request is displayed with a status of Complete.
Use this procedure to delete pending item requests. You can delete an item request only if its status is Pending.
Navigate: Main Menu > Inventory Mgmt > Item Request. The Item Request List window opens.
To delete item requests, follow these steps:
If you want to filter the item requests listed, click Filter. See ”Filter the Item Request List."
Select the item requests that you want to delete.
Click Remove Item. A message is displayed: ”Are you sure you want to delete the selected orders now?”
Click Yes. The requests are removed from the list.