| Oracle® Retail Demand Forecasting User Guide for the RPAS Fusion Client Release 16.0 E91109-03 |
|

 Previous |
 Next |
| Oracle® Retail Demand Forecasting User Guide for the RPAS Fusion Client Release 16.0 E91109-03 |
|
Previous |
Next |
This chapter provides a brief description of how to get started using RDF on the RPAS Fusion Client. It includes the following sections:
|
Note: Before you log on to the RPAS Fusion Client, ensure that your system meets the recommended configuration. For more information, refer to the Oracle Retail Predictive Application Server Installation Guide. |
Once you check the configuration, obtain the following information:
Uniform Resource Locator, URL – Enter the URL or the Web address of the application in the Web browser to access the application. For example:
http://<fullyqualifieddomainname>:<port>/aip
User name, Password, and Profile Name – Based on the tasks you want to perform, obtain a user account (that includes user name and password) to log on to the application.
To log on to the RPAS Fusion Client, follow these steps:
Start a supported browser such as IE, Firefox, or Chrome.
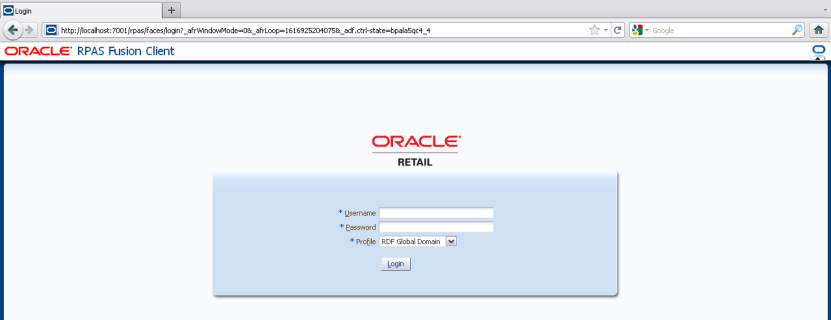
In the Address bar, enter the RPAS Fusion Client URL and press Enter. The RPAS Fusion Client Login page opens, as shown in Figure 2-1.
On the Login page, enter your Username and Password, and select your domain from the Profile drop-down list.
|
Note: If you have accessed the RPAS Fusion Client through a single sign-on environment such as the Oracle Retail Workspace portal, then only the profile field appears on the RPAS Fusion Client login page. Select your domain from the drop-down list, as shown in Figure 2-2. |
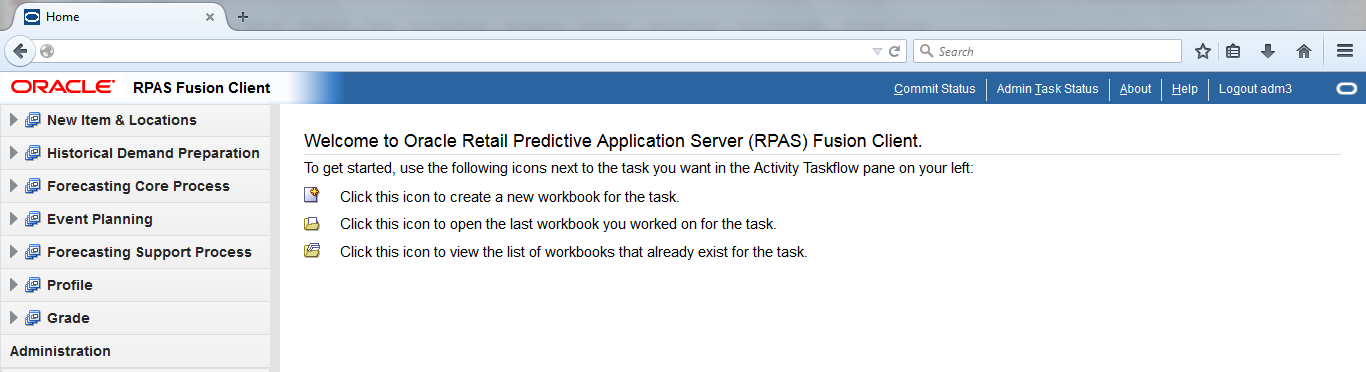
Click Login. The window refreshes and the homepage of the RPAS Fusion Client is shown.
The taskflow pane opens on the left of your window and enables you to easily navigate through the activities in the application. It provides a pre-configured business workflow organized into expandable and collapsible activities, tasks, and steps.
|
Note: The taskflow pane also opens when you log on to the application. |
Each activity consists of more than one task, and each task may consist of one or more steps. In the RPAS Fusion Client, each solution (spanning across multiple workbooks) is represented as a set of activities, tasks, and steps.
|
Note: The taskflow is configured for your domain during implementation. For more information on this configuration, refer to the Oracle Retail Predictive Application Server Configuration Tools User Guide. |
Figure 2-4 shows an example of an RPAS solution configured with activities, tasks, and steps:
In the RPAS Fusion Client, the workflow shown in Figure 2-5 opens in the following manner:
When you are working with a specific step, a left arrow icon appears in the taskflow pane, indicating the current step and your position in the workflow.
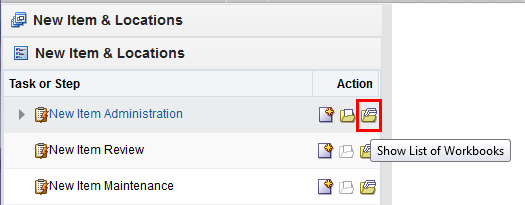
The Create New Workbook, Open Latest Workbook, and Show List of Workbooks icons that appear next to each task or step enable you to create new workbooks or open existing workbooks. You can find more information on creating new workbooks and opening existing workbooks in the section Opening a Workbook.
Figure 2-6 illustrates the icons that appear in an RPAS taskflow.
Table 2-1 describes the icons that appear with all the entries in the taskflow.
Table 2-1 Description of Icons in the Taskflow Pane
| Legend | Icon Name | Description |
|---|---|---|
|
A |
Activities |
These tabs represent the predefined activities of the application. |
|
B |
Tasks |
These are individual tasks within an activity. Tasks that have a workbook associated with them display a clipboard icon. |
|
C |
Steps |
One or more steps make up each task. |
|
D |
Current Position Icon |
Indicates the current step and your position in the workflow. |
|
E |
Create a New Workbook |
Click this icon to create a new workbook. The new workbook wizard associated with the relevant task opens. |
|
F |
Open the Latest Workbook |
Click this icon to view the latest workbook (associated with the relevant task/step) you worked on. |
|
G |
Show List of Workbooks |
Click this icon to view a list of all workbooks (associated with the relevant task/step) accessible to you. The Open Workbook window opens with a list of accessible workbooks. If you do not own any workbooks, a message appears allowing you to view all workbooks. In case there are no workbooks associated with the task/step, created by you or by someone else, a message appears that allows you to create a new workbook. |
|
H |
Collapse/Restore Icon |
Click this icon to collapse or restore the taskflow pane. This allows you to view more content in the Contents area. |
|
I |
Dynamic Task |
A dynamic task is a task that has been defined in the taskflow file but does not have a workbook associated with it. Dynamic tasks display a clipboard with a lightning bolt icon. |
The activity and tasks that appear in the taskflow pane are access-based. Depending upon the security settings, you may not have access to some tasks or activities. Access to a task is defined by whether you have access to the workbook that the task is assigned to.
The access to the workbook is maintained in the Security Administration step. Refer to the Oracle Retail Predictive Application Server Administration Guide for the Fusion Client for more information about the Administration activity. If you do not have access to a workbook, then you are not able to build the workbooks for the associated tasks and steps.
Hiding specific tasks or activities based on user access is configurable. In the configuration, a task can be set to either hidden or disabled. If it is hidden and you do not have access to it, then the task is not displayed. If it is disabled and you do not have access, then the task is displayed but the links to access the workbooks are disabled. For more information, refer to the Oracle Retail Predictive Application Server Configuration Tools User Guide.
When working within multiple steps or tasks, all changes you make in a specific step are maintained when you move to a step in the same task or a different task associated with the same workbook. In this case, you do not need to save your work when you switch between tasks within the same workbook.
If you switch to a task that is associated with a different workbook, you are prompted to save or discard the changes before opening or building a new workbook. To save your changes, use the Save As dialog box.
After you log on to the application, a taskflow pane opens that enables you to navigate through the activities and tasks associated with your user account.
|
Note: This procedure outlines the basic steps for creating a new workbook. For detailed information about building specific RDF workbooks, refer to the specific chapter for that workbook in this guide. |
To open a workbook:
On the taskflow pane, click the Show List of Workbooks icon next to the task or step you want. For more information on the taskflow pane, refer to the section Taskflow Pane.
The Open Workbook window opens.
Select the workbook you want and click Open Workbook.
From the list of workbooks, you can delete any workbook you have write access to.
To delete a workbook:
On the Open Workbook window, select the workbook you want.
To delete more than one workbook, hold down the Ctrl key and select the workbooks you want to delete. Or, you can hold down Shift and select a group of workbooks.
Click Delete. A warning message appears.
Review the warning message and then click Delete to delete the workbooks or click Cancel to cancel this operation.
When saving a workbook (or saving a copy using the Save As command), there are restrictions on the length of the file name and the characters that can be used,
The file name can be a maximum of 32 characters.
The filename can contain the following standard characters:
a - z
A - Z
0 - 9
The filename can contain the following special characters:
.
|
_
-
/
$
&
spaces
Any file name not meeting these conditions results in an error message.
The new workbook wizard also enables you to rename existing workbooks without affecting the data within the workbook or the other workbook information such as the created date, modified date, formatting information, and so on.
There are a few key points to know about renaming workbooks:
You can only rename workbooks that you have write access to.
Workbook names can be no more than 32 characters.
Workbook names cannot contain double or single quotation marks.
Workbooks cannot be named Untitled. This name is reserved.
To rename a workbook in the new workbook wizard, perform the following steps:
Select the workbook you want to rename from the list. When selected, it becomes shaded, as shown in Figure 2-10.
Click Rename.
The Rename Workbook dialog box appears. Enter the new name of the workbook and click OK.
The renamed workbook appears in the workbook list.
You can also rename a workbook from the File menu.
Figure 2-13 highlights the various components of the workbook wizard window.
Table 2-2 describes the components of the workbook wizard window.
Table 2-2 Workbook Wizard Window User Interface Components
| Legend | Window Area Name | Position | Description |
|---|---|---|---|
|
A |
Available Items area |
Center Left |
Displays the positions that are available for you to select. |
|
B |
View menu |
Center Left, within the Available Items area |
Provides options for viewing the available positions. You can adjust the column setting, detach the list to view it in a larger window, expand or collapse the positions, or scroll to the beginning or end of the list. |
|
C |
Dimension menu |
Center Left, within the Available Items area |
Opens the Dimension options window where you can select the levels of the dimension you want to view in the Available Items list. You can also select the attributes that you would like to see and sort by in the list. |
|
D |
Find field, Previous |
Center Left, within the Available Items area |
Enables you to identify the positions with the keywords you entered in the Find field. Use the Previous and Next arrows to navigate between the workbooks matching the search pattern. The search is not case-sensitive. |
|
E |
Wizard Taskflow |
Top Center |
Displays the steps in the wizard process and shows you where you are within that process. The wizard taskflow is configured in the RPAS Configuration Tools. For more information, refer to the Oracle Retail Predictive Application Server Configuration Tools User Guide. |
|
F |
Selected Items area |
Center Right |
Displays the positions you selected. It also includes a toolbar that enables you to perform various functions. |
|
G |
Load Favorite icon |
Center Right, within the Selected Items area |
Enables you to select a previously saved group of positions to load into the workbook. |
|
H |
Save Favorite icon |
Center Right, within the Selected Items area |
Enables you to save the positions you have selected as group. The next time you build a new workbook, you can select and load that group rather than choosing the same positions individually again. |
|
I |
Add and Add All icons |
Center |
Enables you to add positions that are selected in the Available Items area. To add all positions in the Available Items area, click the Add All icon. |
|
J |
Remove and Remove All icons |
Center |
Enables you to remove positions in the Selected Items area. To remove all positions in the Selected Items area, click the Remove All icon. |
|
K |
Wizard Navigation icon |
Bottom Right |
Enables you to navigate from one wizard page to another. Once you have made the selections for the workbook and clicked Finish, the workbook builds with the selected positions. |
|
L |
Synchronize Hierarchies check box |
Bottom Left |
When selected, the shown levels within the Selected Items area match the ones in the Available Items area. This is selected by default. |
To access online help, click Help in the global header.
The online help opens in a new browser window. If more than one help set is available, you can choose which one to view by selecting it from the Book drop-down field. If there is only one help set, the field is shaded.
The contents of the online help set are shown in the Contents section of the navigation bar on the left. Click the Expand icon next to the folders to drill down to the help topics. Click the page that you want to view. It appears in the content area.