| Oracle® Retail Back Office User Guide Release 14.1 E54470-01 |
|


 Previous |
 Next |
The Employee tab enables you to manage employee information. You can search for employees, add new and temporary employees, and edit employee security roles. Employees can clock in and out and view their collected time for the week, while managers can adjust time, confirm hours, and view employee time reports.
The following topics are discussed:
You can search for employees and modify an employee's name, role, or status. You can also add permanent and temporary employees to the database. However, employees may not be removed from the database.
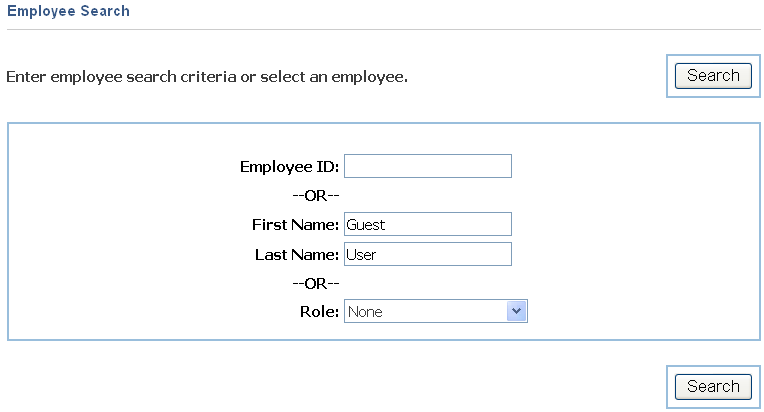
On the Employee Search screen, users can search for employees based on employee's first and last name, ID, or role as well as modify employee information. Employee information consists of the employee name, employee ID, login ID, password, role, and status.
To search for an employee:
Click the Employee tab.
Click the Employee subtab if it is not chosen.
Click the Search left navigation link. The Employee Search screen is displayed.
Enter the search criteria. You can search by employee's ID, first and last name, or role.
When searching by first and last name, you can enter the employee's full name or at least the first character of the first and last names.
Click Search.
If the employee is found, the details of the employee are displayed on the Employee Master screen.
If the employee is temporary, the Temporary Employee Master screen is displayed. This screen has the same fields as the Employee Master screen, except that the Remaining Days Valid field is displayed instead of the Days Valid field.
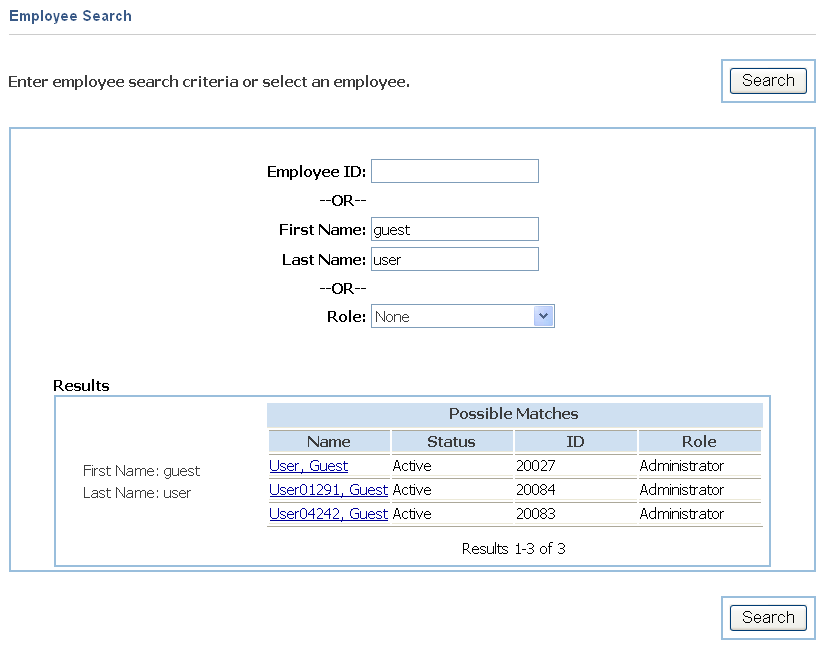
If more than one employee is found, the list of matching employees is shown in the Results section.
Click the employee name link of the employee to view the employee's information.
The Add Employee screen is used to add new permanent employees to the database. You enter employee information and assign a security role to the employee. An employee ID is automatically assigned for a permanent employee.
To add an employee:
Click the Employee tab.
Click the Employee subtab.
Click Add. The Add Employee screen is displayed.
Enter the employee's first and last name. The employee's middle name is optional.
Enter the employee login ID. A temporary password is automatically assigned to the employee.
Select a role from the menu. A role defines the access the employee has to specific Oracle Retail Back Office and Point-of-Service functions.
|
Note: Roles can be specified by the manager. Refer to "Security Roles" for information on editing security roles. |
Select an employee status from the menu. If the employee is actively working, click Active. If the employee is not currently working, click Inactive.
Select a preferred language for the employee from the menu.
To save the information, click Save.
If the information matches an existing employee, the Duplicate Employee screen is displayed.
The temporary password is displayed. It should be written down and given to the new employee. This is the only time the password is displayed.
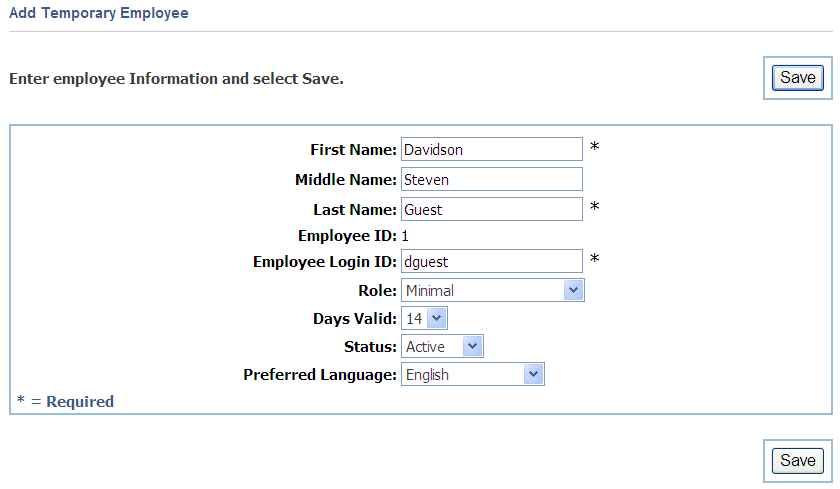
The Add Temporary Employee screen is used to add new temporary employees to the database. You can enter employee information and assign a security role to the employee. An employee ID is automatically assigned for a temporary employee.
To add an employee:
Click the Employee tab.
Click the Employee subtab.
Click Add Temp. The Add Temporary Employee screen is displayed.
Enter the employee's first and last name in the given fields. The employee's middle name is optional.
Enter the employee login ID. A temporary password is automatically assigned to the employee.
Select a role from the menu. A role defines the access the employee has to specific Oracle Retail Back Office and Point-of-Service functions.
|
Note: Roles can be specified by the manager. Refer to "Security Roles" for information on editing security roles. |
Select the number of days the employee will be working.
Select an employee status from the menu. If the employee is actively working, click Active. If the employee is not currently working, click Inactive.
Select the preferred language for the employee from the menu.
To save the information, click Save.
If the information matches an existing employee, the Duplicate Employee screen is displayed.
The temporary password is displayed. It should be written down and given to the new employee. This is the only time the password is displayed.
The Employee Master screen is used to make changes for permanent employees. The Temporary Master screen is used to make changes for temporary employees.
To change employee information:
Change the employee's name or login ID.
Select a new role from the menu.
Select a new status from the menu. The Confirm Status Change dialog is displayed.
To confirm the change, click Yes.
To not change the status, click No.
|
Note: There is a lag time on some application servers for the change in status to take effect. |
Select a new preferred language from the menu.
To reset the password, click Reset Password. The Reset Password dialog is displayed.
To confirm the password reset, click Yes. The temporary password is displayed. It should be written down and given to the employee. This is the only time the password is displayed.
To not reset the password, click No.
Click Save. The Employee Search screen is displayed. See "Searching for Employees".
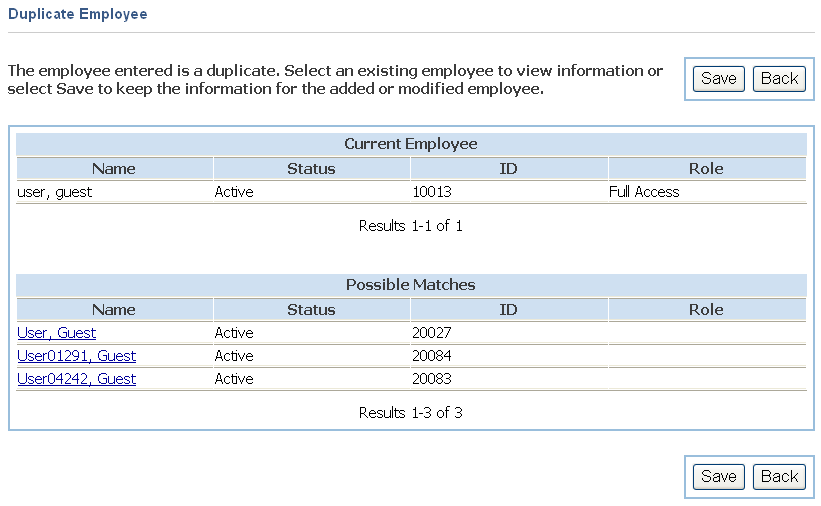
If the permanent or temporary employee entered has the same information as an existing employee, the Duplicate Employee screen is displayed. The current employee and any possible matches are displayed.
You can choose to select an existing employee or save the information for the newly added employee.
To view the information for the existing employee, click the employee's name link.
To save the new employee's information, click Save.
To return to the Add Employee or Add Temporary Employee screen, click Back.
The role assigned to an employee enables that employee access to specific functions in Oracle Retail Back Office and Point-of-Service. The administrator can define and modify security roles and may allow employees access to all or certain applications or modules (parts of an application). The access points set for a role determine what functionality is available to the user. If the functionality is not available to the user, the button or link that executes the function is not displayed.
To access roles:
Click the Employee tab.
Click the Employee subtab.
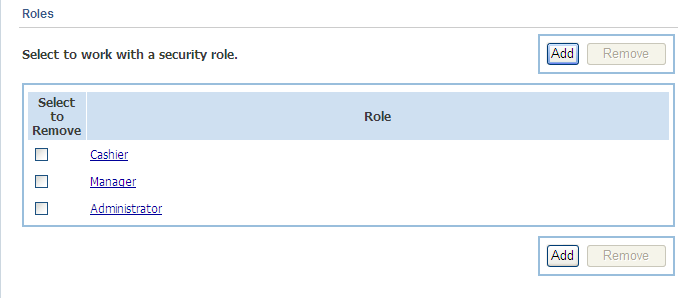
Click the Roles left navigation link. The Roles screen is displayed.
To view the settings for a role, click the name in the list. The Role Settings screen is displayed for that security role. See "Changing the Settings for a Role".
Select an application from the menu to include in the chosen role. To include all applications, click All. Applications are the software applications used by the store, including Oracle Retail Back Office and Point-of-Service.
Select a module from the menu. A module is one part of an application. For example, the Employee tab is one module of Oracle Retail Back Office.
Select specific features to include in the role setting. Select the check boxes next to the feature names or select the Select All check box to select all features in the list.
Click Save. The Roles screen is displayed.
Click another role in order to view or change the settings.
To change the features selected for a role on the Roles screen:
Click the name in the Role column. The Role Settings screen is displayed. See "Changing the Settings for a Role".
Choose the features to be added or removed for this role.
Click Save. The changes are saved.
To remove a role on the Roles screen:
Select the check box in the Select to Remove column for the role you want to remove.
Click Remove. The Confirm Role(s) Removal screen is displayed.
If you want to remove all the selected groups, click Yes. The roles are removed.
If you do not want to remove all the selected groups, click No. The role is not removed and the Select to Remove check box remains selected.
To add a new role on the Roles screen:
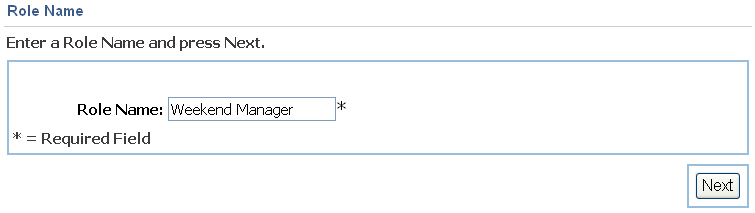
Click Add. The Role Name screen is displayed.
Enter the name for the role. Click Next. The Role Settings screen is displayed. See "Changing the Settings for a Role".
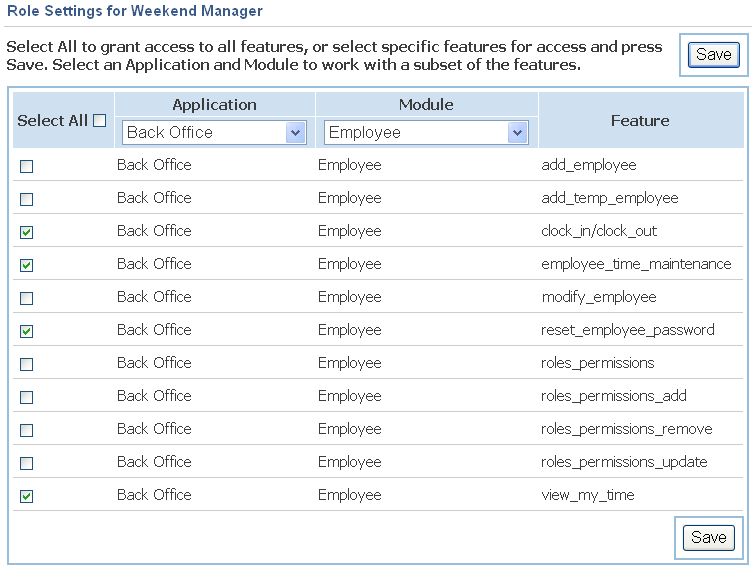
The Role Settings screen enables you to define the allowed access for the role.
Table 4-1 describes the information shown for each feature.
Table 4-1 Role Settings Column
| Column | Description |
|---|---|
|
Select All |
A selected checked box indicates that this role is granted access to the feature. If the check box is not selected, access to the feature is denied and a user ID assigned this role will not be able to use that feature. |
|
Application |
Available applications from which the functions can be selected. |
|
Module |
Sets of functions available for an application. For the Oracle Retail Back Office, this corresponds to the available subtabs. |
|
Feature |
Features available for the application and module. For the Oracle Retail Back Office, this corresponds to the left navigation links and action buttons available for each subtab. In some cases, additional fields can be secured such as the viewing of credit card numbers. |
To change the settings for the role:
Choose the features that can be accessed:
Click Application. Click the application whose features you want to choose.
Click Module. Click the module whose features you want to choose. The features available for that function are shown.
To grant access to all the features, select the Select All check box. To grant access to a specific feature, select the check box in the Select All column.
To deny access to a feature already selected, deselect the check box in the Select All column.
When you have made choices for all the applications and modules that you want, click Save. The role settings are saved.
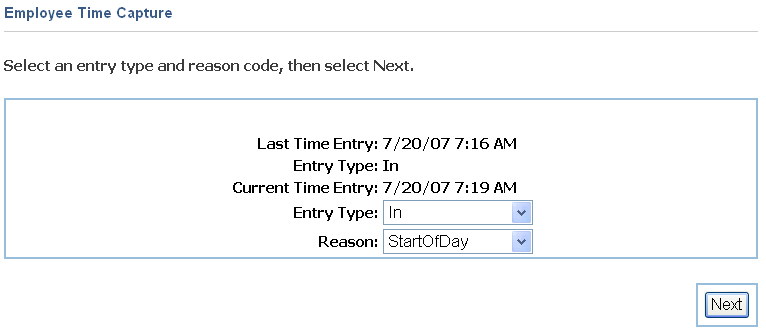
The Employee Time Capture screen is used by employees to clock in and out. Employees must clock in and out at the beginning and end of a shift, break, or meal. Capturing employee time is necessary in maintaining payroll, attendance, and time-related benefits. Clocking in and out in Oracle Retail Back Office eliminates the use of manual timesheets as the time capture saves the employee clock in and out times and compiles them into a report.
To clock in or out:
Log in to Oracle Retail Back Office using your employee user ID and password. For information on logging in, see "Logging In" in Chapter 1.
Click the Employee tab.
Click the Clock In/Out subtab. The Employee Time Capture screen is displayed.
Select an entry type from the menu. The entry type is either In or Out.
Select a reason from the menu. Reason options are: Break, lunch, Start of day, and End of day.
Click Next. The Successful Time Entry screen is displayed.
To return to the Employee Search screen, click Enter.
The Time Maintenance function enables you to view employee time summaries and time reports. You can confirm employee hours as well as view and edit employee hours. Authorized managers can enter and edit time entries made at Oracle Retail Back Office or Point-of-Service. You can also export a list of employees and their collected hours.
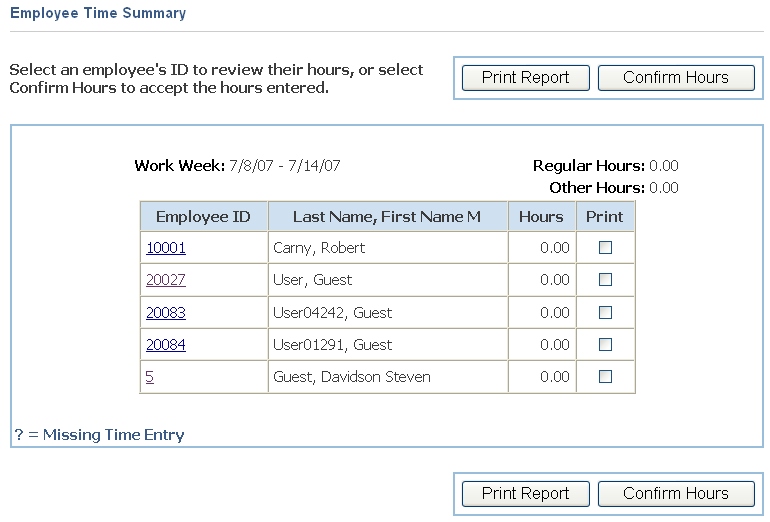
On the Employee Time Summary screen, a manager can view the hours for any employee and print a report of a single or multiple employees.
To view employee time:
Click the Employee tab.
Click the Time Maintenance subtab.
Click the Employee Time Maintenance left navigation link. The Employee Time Summary screen is displayed.
From this screen, you can do the following:
View the time for an employee by clicking the employee's ID. See "Viewing or Editing Employee Hours by Date".
Confirm hours by clicking Confirm Hours. Refer to "Confirming Employee Hours" for more information on confirming hours.
Print the employee data. Select the check box in the Print column for the employee data you want to print. Click Print Report.
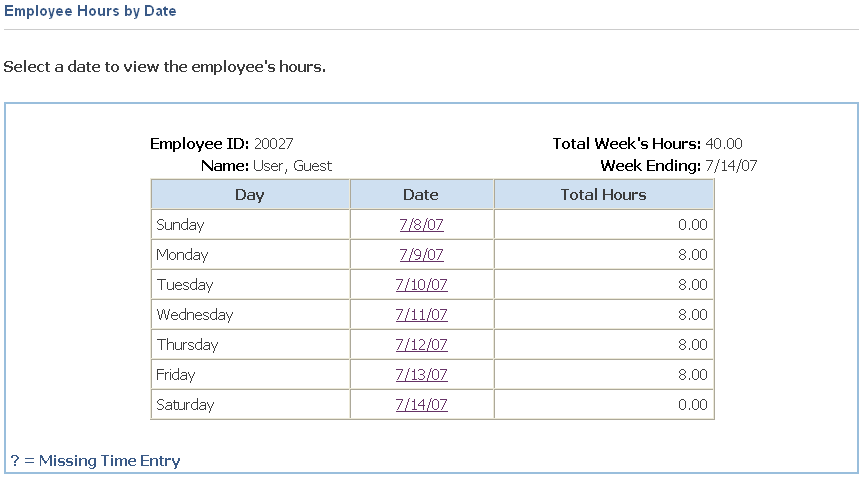
The Employee Hours by Date screen is used by managers to view or edit employee hours for the current week. For example, editing employee hours may be necessary when an employee forgets to clock in or out.
To edit an employee's time:
Click the Employee tab.
Click the Time Maintenance subtab.
Click the Employee Time Maintenance left navigation link. The Employee Time Summary screen is displayed. See "Viewing or Changing the Employee Time Summary".
To review an employee's hours, click the employee ID link of the specific employee. The Employee Hours by Date screen is displayed.
Click the date link of the hours you wish to view. The Edit Employee Hours screen is displayed.
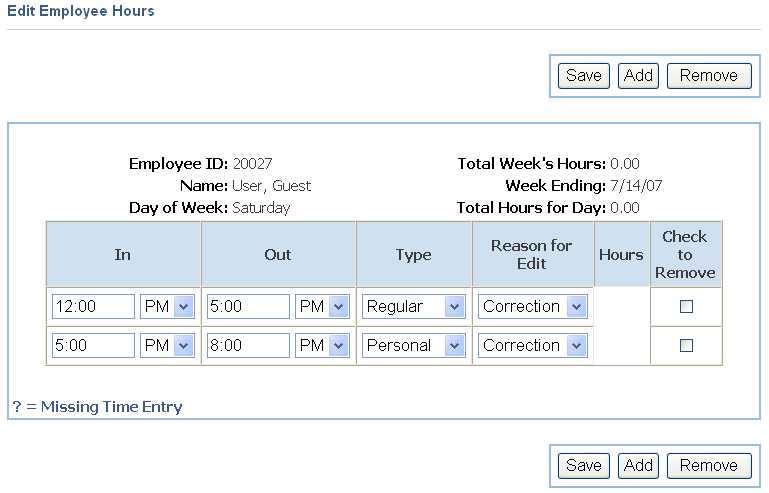
On the Edit Employee Hours screen, you can view and change the time entries for a specific day.
|
Note: Question marks (??:??) indicate a missing time entry. |
To edit the employee hours:
Edit the time information.
To edit time, enter a new time as HH:MM and select AM or PM from the menus.
To add a type and reason for edit, select from the provided menus.
To remove a time entry, select the check box next to the entry and click Remove.
To add a time entry, click Add. Another time entry option is added.
To save the changes, click Save. The information on the Edit Employee Hours screen is updated.
The Confirm Employee Hours screen enables a manager to validate an employee's hours for the given week. The hours can only be confirmed at the end of a work week.
To confirm an employee's hours:
Click the Employee tab.
Click the Time Management subtab.
Click the Confirm Employee Hours left navigation link.
|
Note: The Confirm Employee Hours screen can also be accessed from the Employee Time Summary screen. |
To edit the employee's hours, click Edit. The Employee Time Summary screen is displayed. To edit the hours, see "Viewing or Editing Employee Hours by Date".
To return to the confirmation screen, click Confirm Employee Hours.
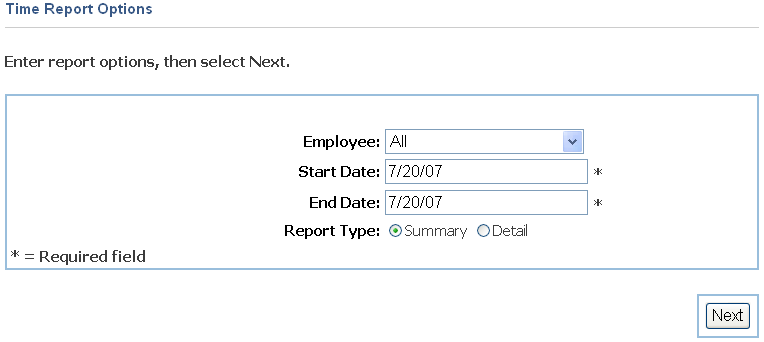
The Time Report Options screen is used to select the type of time report you want to view, export, or print. You can work with a summary or detailed report. For information on printing and exporting reports, see Chapter 3.
|
Note: Reports are not displayed in the default locale for the application. Dates are displayed in MM/DD/YYYY format. Time is displayed in HH:MM format. |
To view employee time reports:
Click the Employee tab.
Click the Time Maintenance subtab.
Click the Employee Time Reports left navigation link. The Time Report Options screen is displayed.
Select an employee from the menu. To select all employees, click All.
Enter starting and ending dates.
Select a Report type, either Summary or Detail.
Click Next. The time report is displayed. See "Employee Time Reports".
Employee time reports are displayed from the Employee Time Summary screen and through the Employee Time Reports left navigation link.
On the Time Report Options screen, you can select the report type. If Summary is selected, the Summary Employee Time Report is displayed. See "Summary Employee Time Report". If Detail is selected, the Detail Employee Time Report is displayed. See "Detail Employee Time Report".
When you are done viewing the report, click Done. To export the report, click Export. To print the report, click Print.
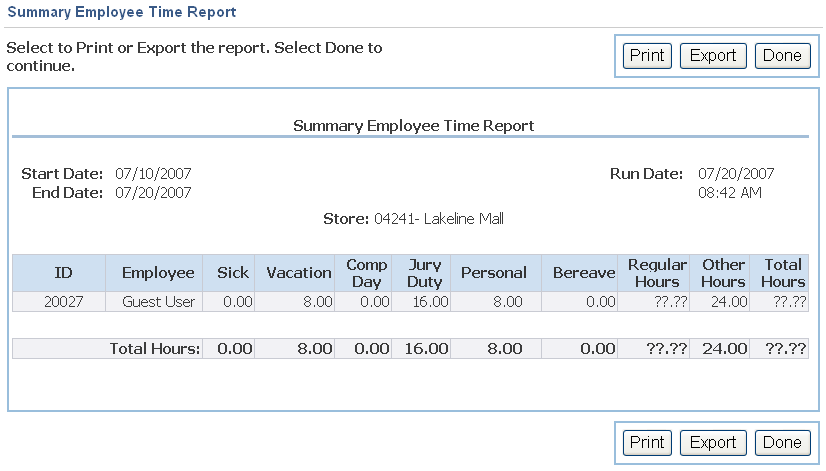
This report shows a list of employees and the total time entered in each category for each employee during the selected dates.
The following information is displayed in the report:
Report header:
Start and end dates and times covered in the report
Date and time the report was run
Store number and name
For each employee:
Employee ID
Employee first and last name
Total hours for each time entry type
Totals for regular hours, other hours, and total hours
Total hours for each time entry type for all employees in the report
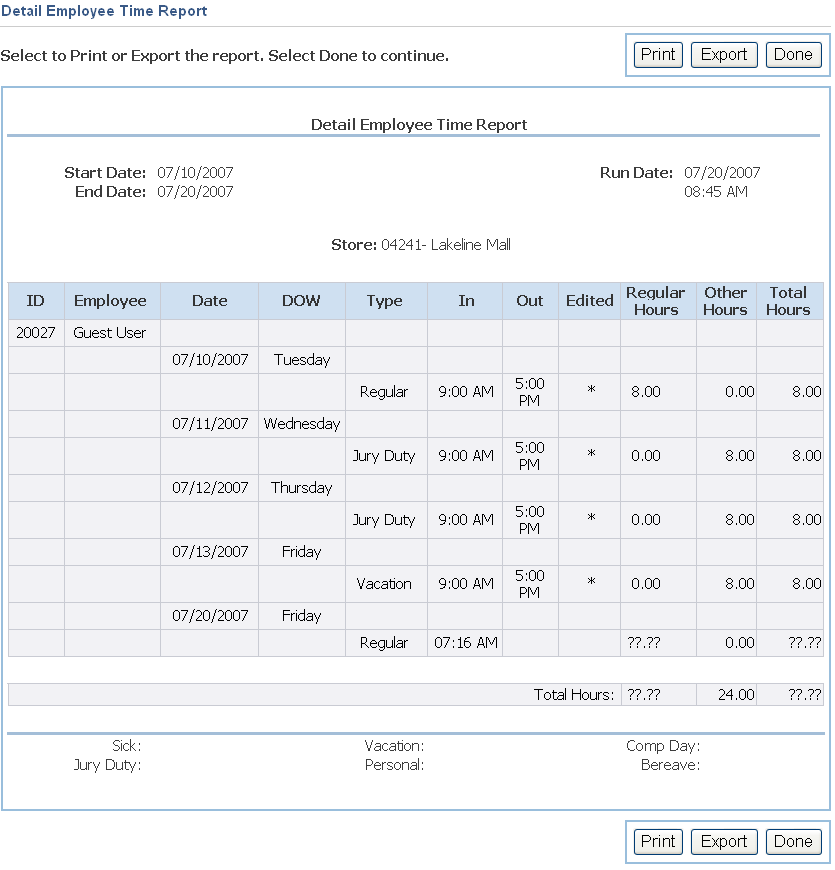
This report shows a list of employees and the time entries made for each employee during the selected dates.
The following information is displayed in the report:
Report header:
Start and end dates and times for the report
Date and time the report was run
Store number
For each employee:
Employee ID
Employee name
For each date in the report range that had a time entry:
Day of the week
Type of entry with the in and out times, reason if hours were edited, and total hours for that entry type
The totals for regular hours, other hours, and total hours
Total hours for each time entry type for all employees in the report
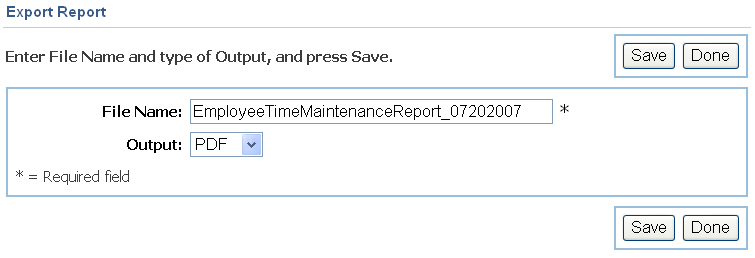
The Export Employee Data screen is used to export the data displayed on the Summary Employee Time Report or Detail Employee Time Report screen. To export the employee data:
Click Export. The Export Employee Data screen is displayed.
Enter a file name in the field.
Select the type of output from the menu. You can select RTF, CSV, HTML, or PDF as the output format.
To save the data as an external file, click Save. When you are done exporting the file, click Done.
The View My Time feature is only available to the employee logged into Oracle Retail Back Office. The employee can use this option to view time entries and any adjusted time for the current work week.
To view my time:
Log in to Oracle Retail Back Office using your employee user ID and password. For information on logging in, see "Logging In" in Chapter 1.
Click the Employee tab.
Click the Time Maintenance subtab.
Click the View My Time left navigation link. The Employee Hours by Date screen is displayed. Refer to "Viewing or Editing Employee Hours by Date".
To view or edit hours for a particular day, select that date from the list. The Edit Employee Hours screen is displayed. Refer to "Editing Employee Hours".
Edit the time information if needed. For help editing the information, refer to "Viewing or Editing Employee Hours by Date".
To edit time, enter a new time as HH:MM and select AM or PM from the menu.
Select type and reason for edit from the provided menus.
To remove a time entry, select the check box next to the entry and click Remove.
To add a time entry, click Add. Another time entry option is added.
To save the changes, click Save.