| Oracle® Retail Point-of-Service Installation Guide Release 14.1 E54459-01 |
|

 Previous |
 Next |
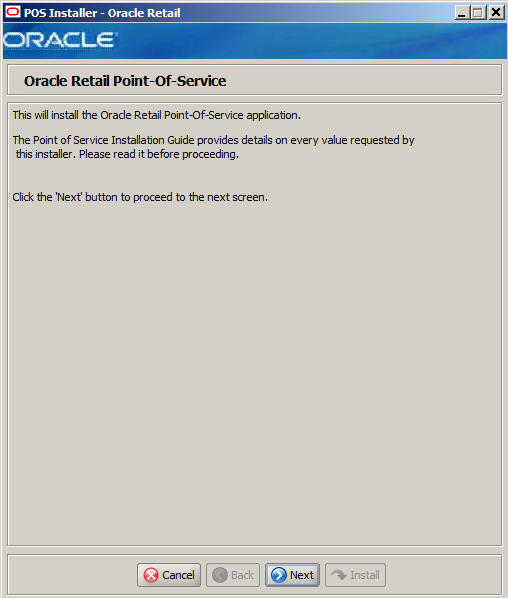
You need the following details about your environment for the installer to successfully install the Point-of-Service application. This appendix shows the windows that are displayed during the installation of the Point-of-Service client. Depending on the options you select, you may not see some windows or fields.
For each field in a window, a table is included in this appendix that describes the field.
For the installer windows for a server installation, see Appendix A.
|
Note: The paths shown in the window examples in this appendix use the path format for Microsoft Windows. In the table describing those fields, example paths for both Microsoft Windows and Novell SLEPOS are shown. |
|
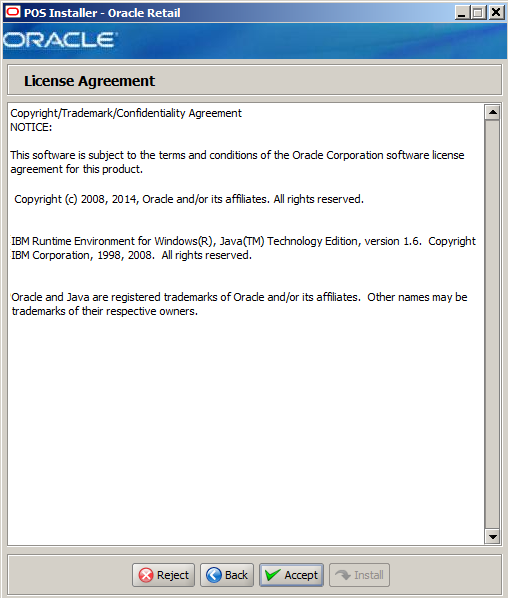
Note: You must choose to accept the terms of the license agreement in order for the installation to continue. |
The field in this window is described in the following table:
| Details | Content |
|---|---|
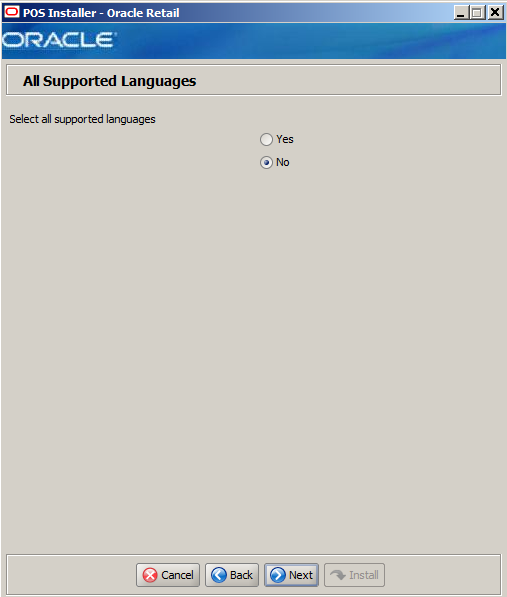
| Field Title | Select all supported languages |
| Field Description | Choose whether all languages are initially selected on the Supported Languages screen:
|
| Example | No |
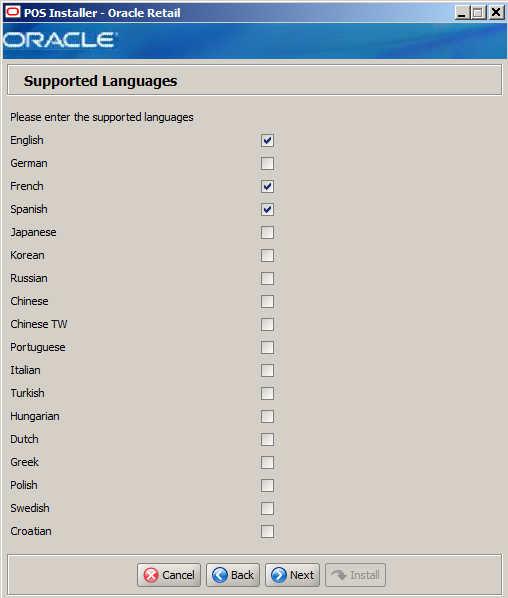
The field in this window is described in the following table:
| Details | Content |
|---|---|
| Field Title | Please enter the supported languages |
| Field Description | Select the languages that will be available for the Point-of-Service application.
The languages selected in this window determine the available choices in the Enter Default Locale window. |
| Example | English, French, and Spanish |
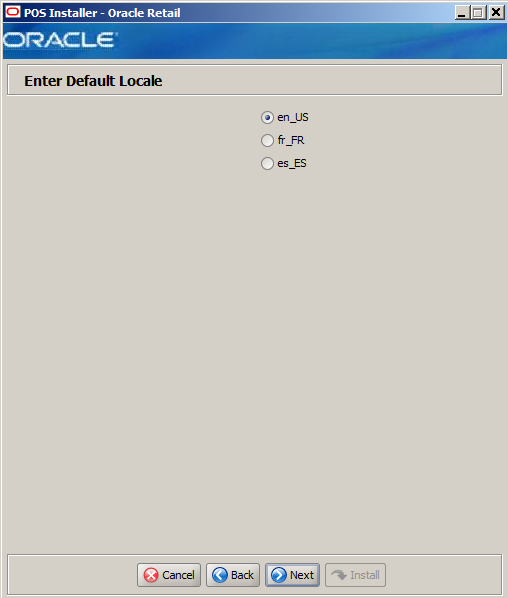
The field in this window is described in the following table:
| Details | Content |
|---|---|
| Field Title | Enter Default Locale |
| Field Description | Locale support in Point-of-Service enables the date, time, currency, calendar, address, and phone number to be displayed in the format for the selected default locale.
The choices for default locale are dependent on the selections made in the Supported Languages window. For each selected language, the default locale for that language is displayed in the Enter Default Locale window. For example, if English, French, and Italian are selected in the Supported Languages window, en_US, fr_FR, and it_IT are the available choices for the default locale. |
| Example | en_US |
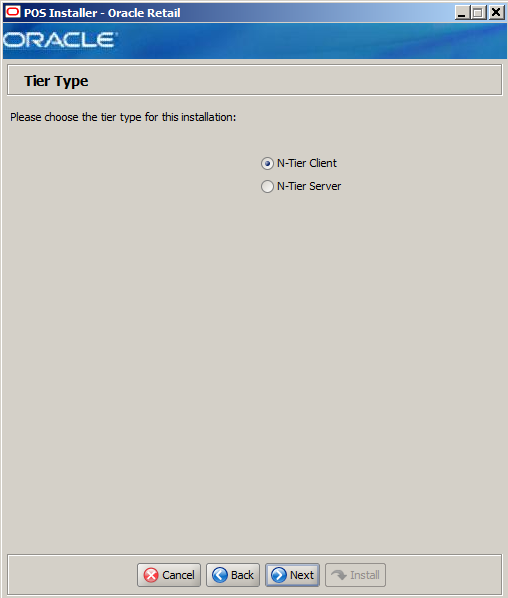
The field in this window is described in the following table:
| Details | Content |
|---|---|
| Field Title | Tier Type |
| Field Description | Choose the server tier type for this installation. For more information, see "Determining Tier Type" in Chapter 3.
To install the N-Tier version of the client, choose N-Tier Client. |
| Example | N-Tier Client |
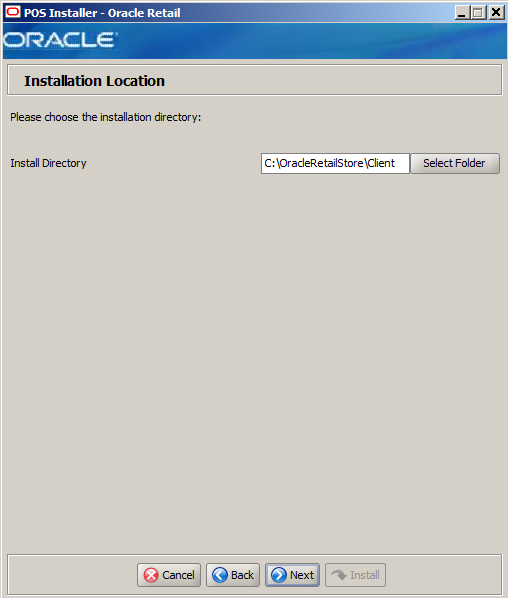
The field in this window is described in the following table:
| Details | Content |
|---|---|
| Field Title | Install Directory |
| Field Description | Choose the directory into which the Point-of-Service files are copied. The default for the first directory in the path is OracleRetailStore. This directory should be the same for all Oracle Retail POS Suite products.
Note: The server and the client must not be installed into the same directory. In this guide, <POS_install_directory> refers to the selected installation directory for the server or client. Files specific to Point-of-Service are copied to the pos subdirectory of <POS_install_directory>. |
| Example |
|
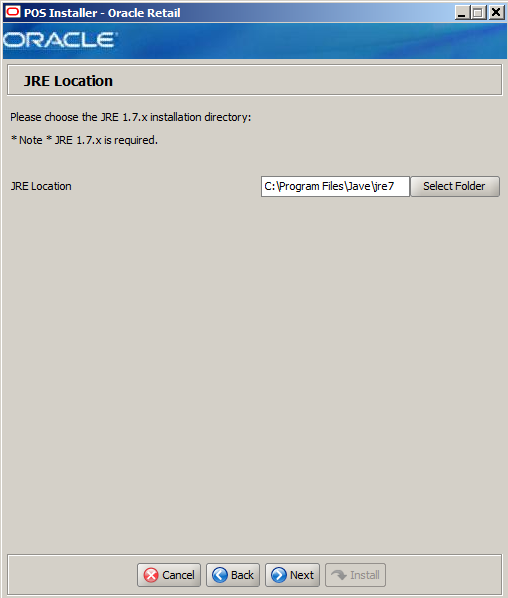
The field in this window is described in the following table:
| Details | Content |
|---|---|
| Field Title | JRE Location |
| Field Description | Enter the location where the JRE is installed. |
| Example |
|
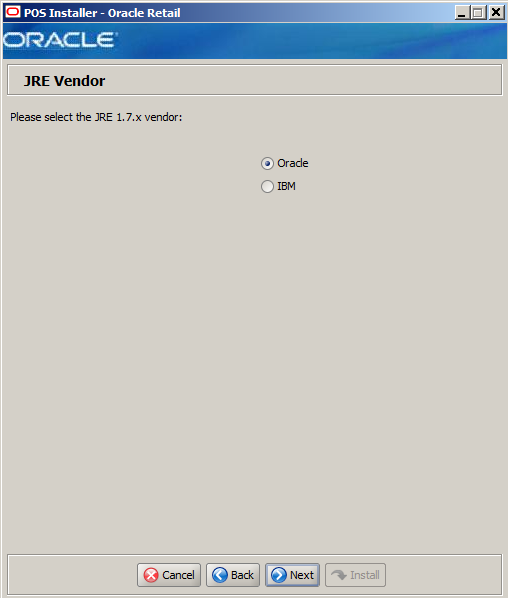
The field in this window is described in the following table:
| Details | Content |
|---|---|
| Field Title | Please select the JRE 1.7.x vendor |
| Field Description | Select the vendor for the JRE entered in the JRE Location window:
|
| Example | Oracle |
This window is only displayed if IBM is selected in the JRE Vendor window.
The field in this window is described in the following table:
| Details | Content |
|---|---|
| Field Title | Please select Yes to enable or No to disable |
| Field Description | Select whether the dashboard and web browser are configured:
|
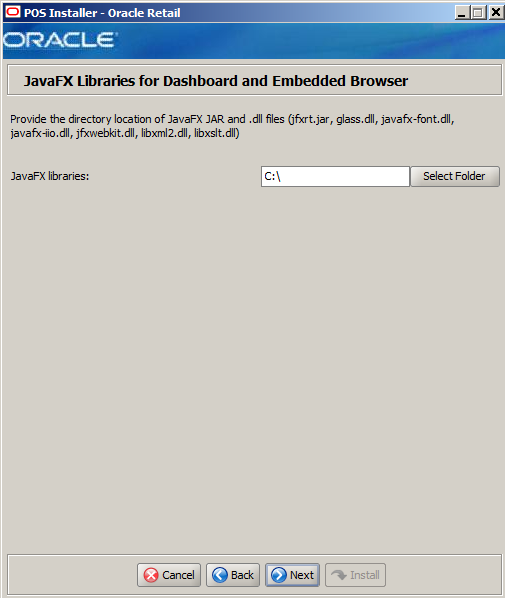
This window is only displayed on Microsoft Windows Embedded POSReady if IBM is selected in the JRE Vendor window and Yes is selected in the Dashboard/Browser Configuration window.
The field in this window is described in the following table:
| Details | Content |
|---|---|
| Field Title | JavaFX libraries |
| Field Description | Select the location of the directory with the required files:
|
| Example | C:\ |
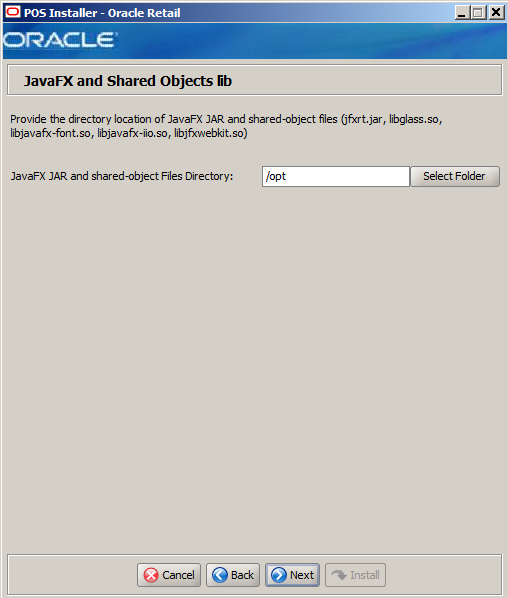
This window is only displayed on Novell SLEPOS if IBM is selected in the JRE Vendor window and Yes is selected in the Dashboard/Browser Configuration window.
The field in this window is described in the following table:
| Details | Content |
|---|---|
| Field Title | JavaFX JAR and shared-object Files Directory |
| Field Description | Select the location of the directory with the required files:
|
| Example | /opt/ |
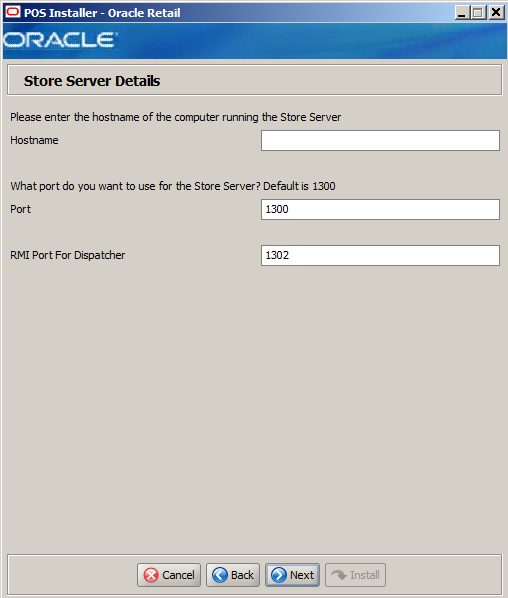
The fields in this window are described in the following tables:
| Details | Content |
|---|---|
| Field Title | Hostname |
| Field Description | Enter the host name of the store server. |
| Details | Content |
|---|---|
| Field Title | Port |
| Field Description | Enter the port number of the store server used for JNDI lookups by this installation. |
| Example | 1300 |
| Details | Content |
|---|---|
| Field Title | RMI Port For Dispatcher |
| Field Description | Enter the port number of this host computer used for RMI communication to this installation's Point-of-Service dispatcher. |
| Example | 1302 |
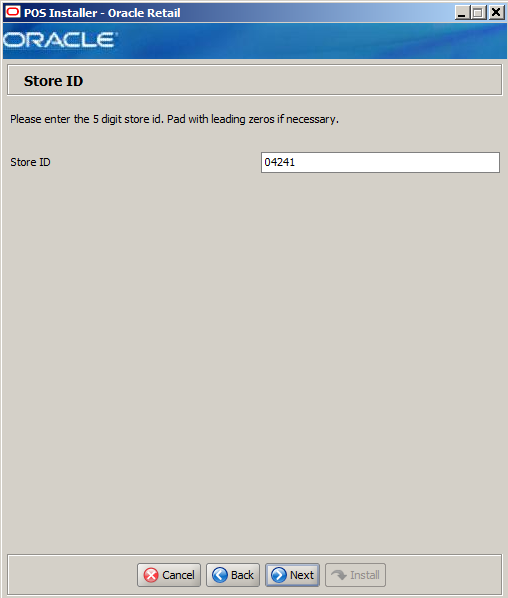
The field in this window is described in the following table:
| Details | Content |
|---|---|
| Field Title | Store ID |
| Field Description | Enter the store ID.
Note: The store ID must be five digits. It can be padded with leading zeroes if necessary. The store ID can only contain the numeric characters 0 through 9. |
| Example | 04241 |
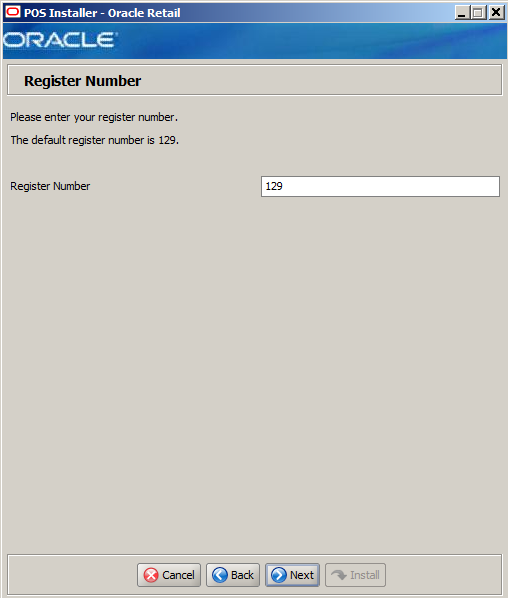
The field in this window is described in the following table:
| Details | Content |
|---|---|
| Field Title | Register Number |
| Field Description | Enter the register number for this installation. |
| Example | 129
Note: 1 to 999 is supported for the register number. Do not install more than one client with the same register number at a store. |
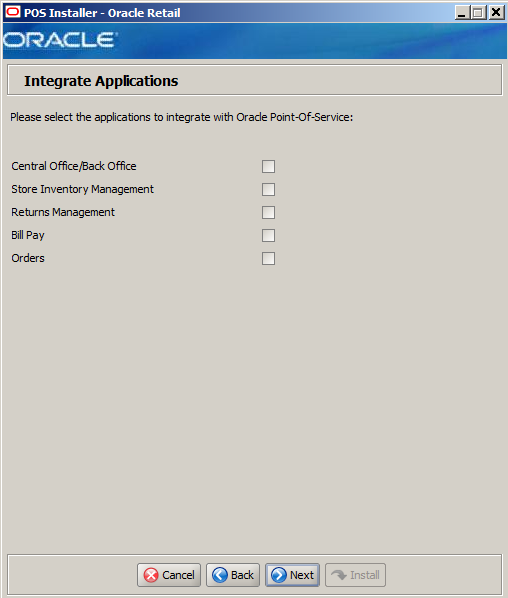
The field in this window is described in the following table:
| Details | Content |
|---|---|
| Field Title | Please select the applications to integrate with Oracle Point-of-Service |
| Field Description | Select the applications that Point-of-Service is integrated with:
|
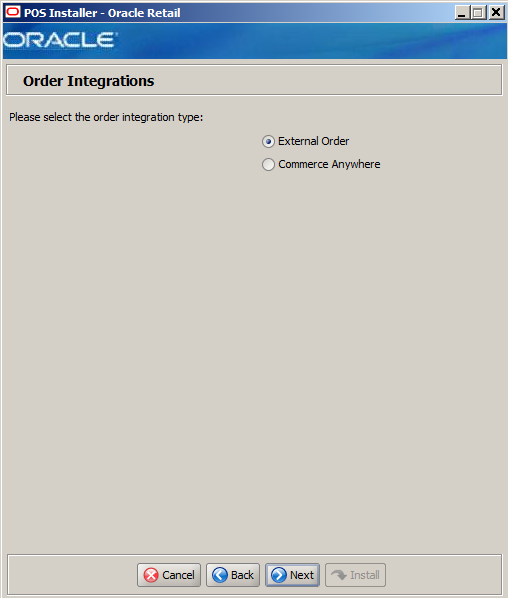
This window is only displayed if Orders is selected in the Integrate Applications window.
The field in this window is described in the following table:
| Details | Content |
|---|---|
| Field Title | Please select the order type |
| Field Description | Select the type of orders to be used:
|
| Example | External Order |
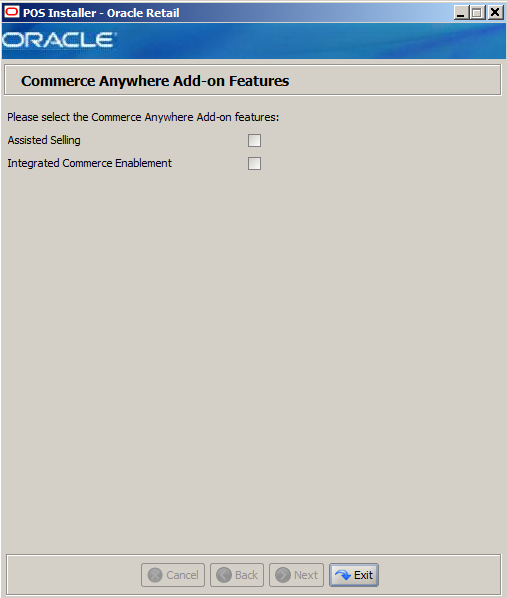
This window is only displayed if Commerce Anywhere is selected in the Order Integrations window.
The field in this window is described in the following table:
| Details | Content |
|---|---|
| Field Title | Please select the Commerce Anywhere Add-on features |
| Field Description | Select the Commerce Anywhere features that will be used in Mobile Point-of-Service:
|
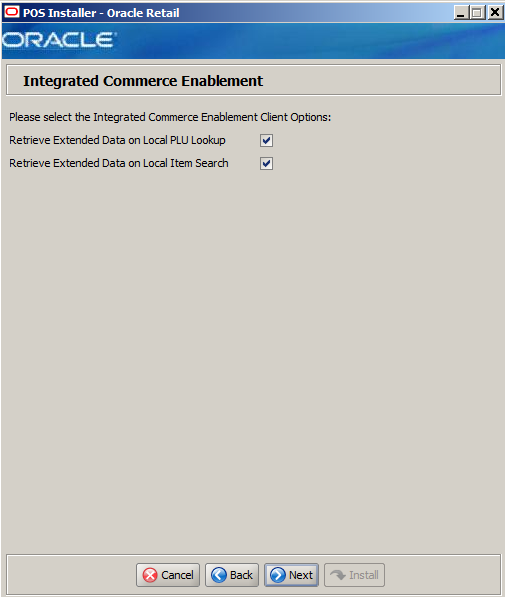
This window is only displayed if Integrated Commerce Enablement is selected in the Commerce Anywhere Add-on Features window.
The field in this window is described in the following table:
| Details | Content |
|---|---|
| Field Title | Please select the Integrated Commerce Enablement Client features |
| Field Description | Select the Commerce Anywhere client features that will be used in Mobile Point-of-Service:
|
This window is only displayed if Central Office/Back Office is selected in the Integrate Applications window.
The field in this window is described in the following table:
| Details | Content |
|---|---|
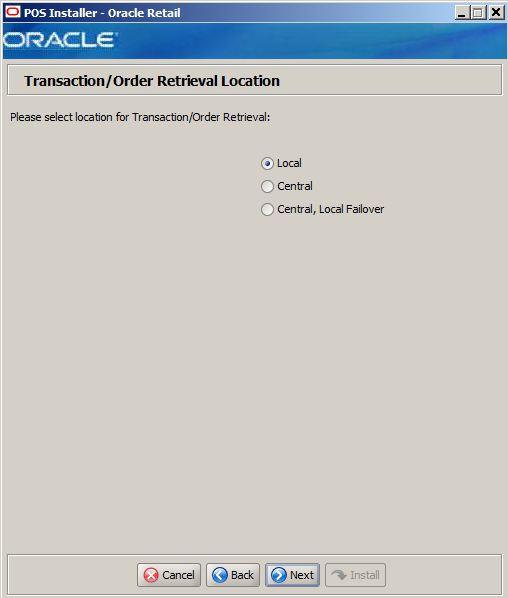
| Field Title | Please select location for Transaction Retrieval |
| Field Description | Choose the location for retrieving transactions.
Note: You must choose the same location for both the store server and client installations. |
| Example | Local |
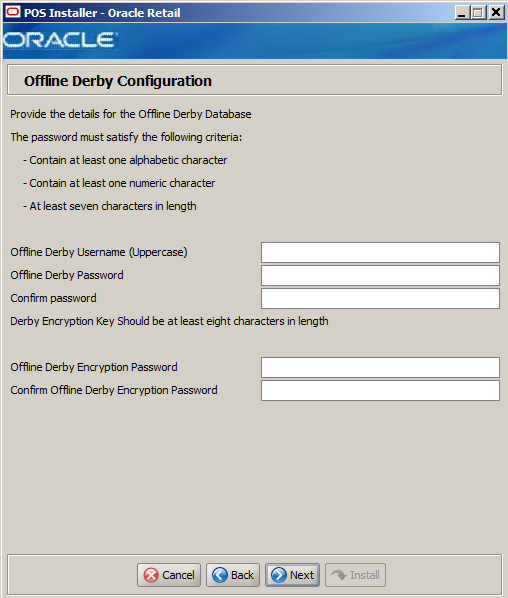
The fields in this window are described in the following tables:
| Details | Content |
|---|---|
| Field Title | Offline Derby Username (Uppercase) |
| Field Description | Enter the user name used for offline Derby processing. The user name must be in uppercase characters. |
| Details | Content |
|---|---|
| Field Title | Offline Derby Password |
| Field Description | Enter the password for the offline Derby user. |
| Details | Content |
|---|---|
| Field Title | Confirm Password |
| Field Description | Reentered Offline Derby Password used to confirm the password.
Note: The passwords in the Offline Derby Password and Confirm Password fields must match. |
| Details | Content |
|---|---|
| Field Title | Offline Derby Encryption Password |
| Field Description | Enter the encryption password for the offline Derby user. |
| Details | Content |
|---|---|
| Field Title | Confirm Offline Derby Encryption Password |
| Field Description | Reentered Offline Derby Encryption Password used to confirm the password.
Note: The passwords in the Offline Derby Encryption Password and Confirm Password fields must match. |
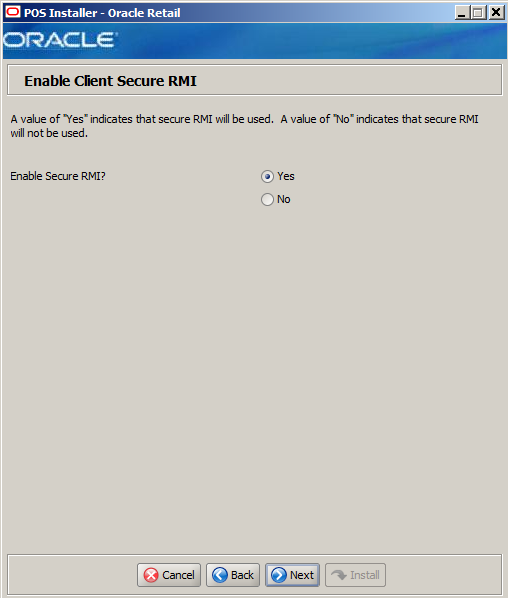
The field in this window is described in the following table:
| Details | Content |
|---|---|
| Field Title | Enable Secure RMI? |
| Field Description | Select whether secure RMI is to be used for communication between the store server and registers.
Note: If Yes is selected, secure RMI must also have been configured for the store server. |
| Example | Yes |
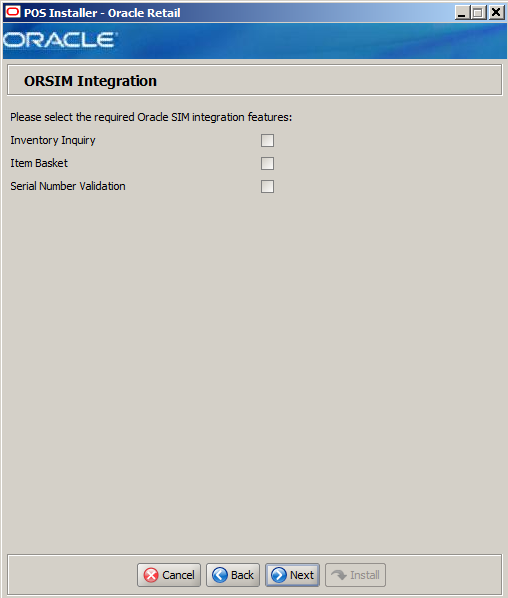
This window is only displayed if Store Inventory Management is selected in the Integrate Applications window.
The field in this window is described in the following table:
| Details | Content |
|---|---|
| Field Title | Please select the required SIM integration features |
| Field Description | Select the Oracle Retail Store Inventory Management (SIM) features that will be used in Point-of-Service:
|
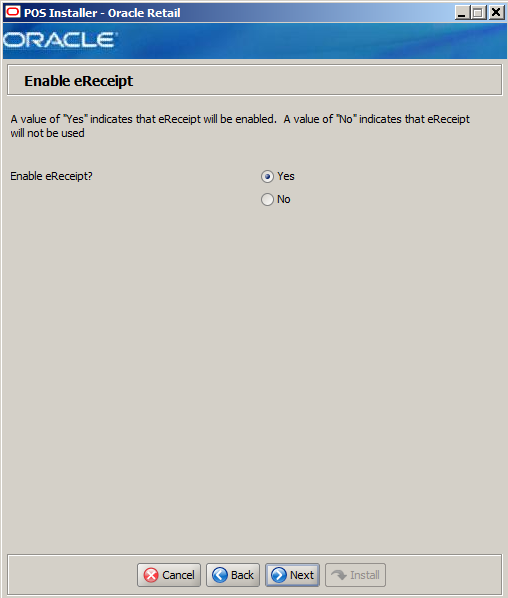
The field in this window is described in the following table:
| Details | Content |
|---|---|
| Field Title | Enable eReceipt? |
| Field Description | Choose whether the use of eReceipts is enabled. |
| Example | Yes |
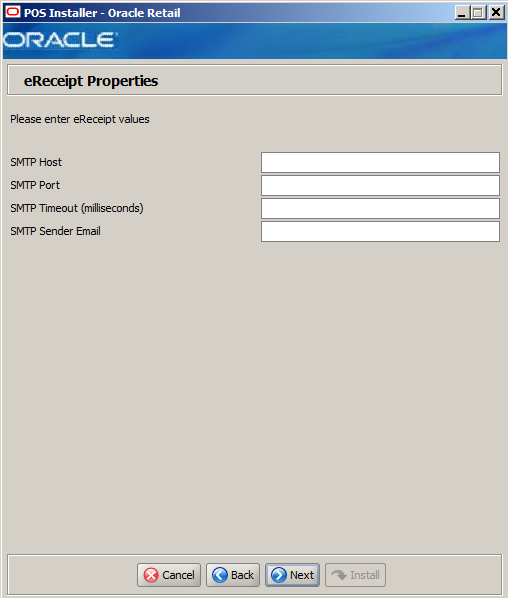
This window is only displayed if Yes is selected in the Enable eReceipt window.
The fields in this window are described in the following tables:
| Details | Content |
|---|---|
| Field Title | SMTP Host |
| Field Description | Enter the host name for the SMTP server. |
| Details | Content |
|---|---|
| Field Title | SMTP Port |
| Field Description | Enter the port number for the SMTP server. |
| Details | Content |
|---|---|
| Field Title | SMTP Timeout (milliseconds) |
| Field Description | Enter the amount of time to wait for the SMTP server. |
| Details | Content |
|---|---|
| Field Title | SMTP Sender Email |
| Field Description | Enter the e-mail address to use for the from address in e-mails generated by Point-of-Service. |
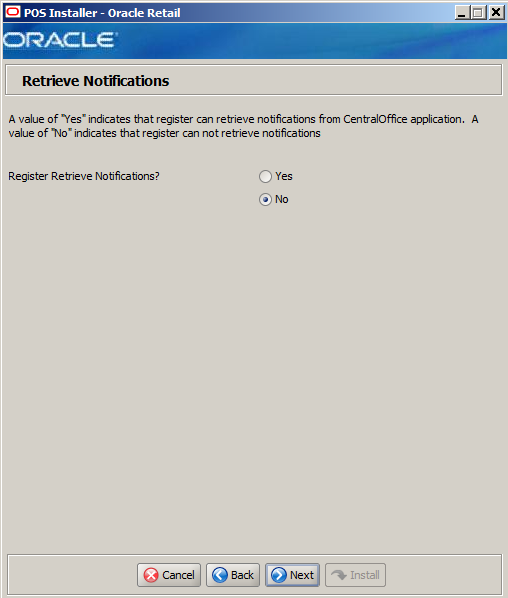
This window is only displayed if Central Office/Back Office is selected in the Integrate Applications window.
The field in this window is described in the following table:
| Details | Content |
|---|---|
| Field Title | Register Retrieve Notifications? |
| Field Description | Select Yes if registers can retrieve notifications from Central Office. |
| Example | No |
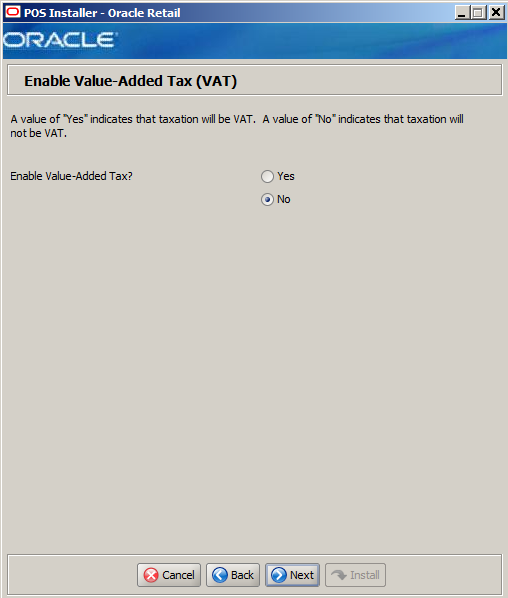
The field in this window is described in the following table:
| Details | Content |
|---|---|
| Field Title | Enable Value-Added Tax? |
| Field Description | Select Yes if Value-Added Tax is used. |
| Example | No |
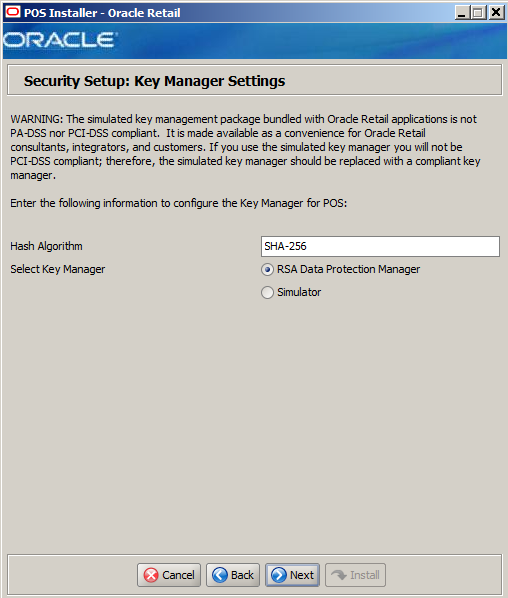
This window is used to configure the Encryption Key Store provider.
The fields in this window are described in the following tables:
| Details | Content |
|---|---|
| Field Title | Hash Algorithm |
| Field Description | Name of the algorithm used by the Key Manager to hash sensitive data. |
| Example | SHA-256 |
| Details | Content |
|---|---|
| Field Title | Select Key Manager |
| Field Description | Provider for Key Store management.
|
| Example | RSA Data Protection Manager |
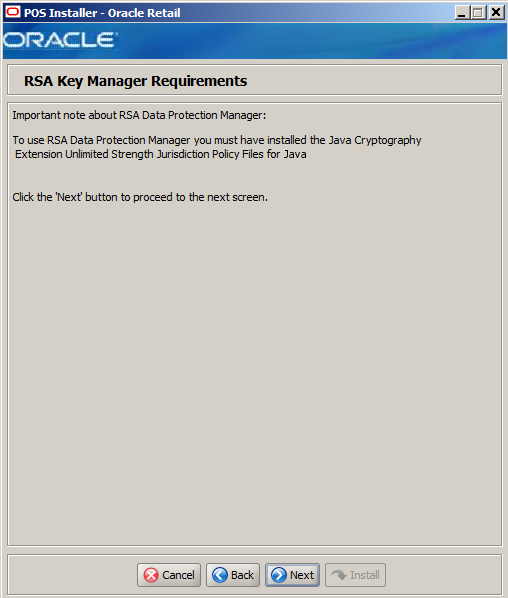
This window is only displayed if RSA Data Protection Manager is selected in the Security Setup: Key Manager window. This informational window explains the requirements needed to use the RSA Data Protection Manager. Verify that you meet the requirements and then click Next.
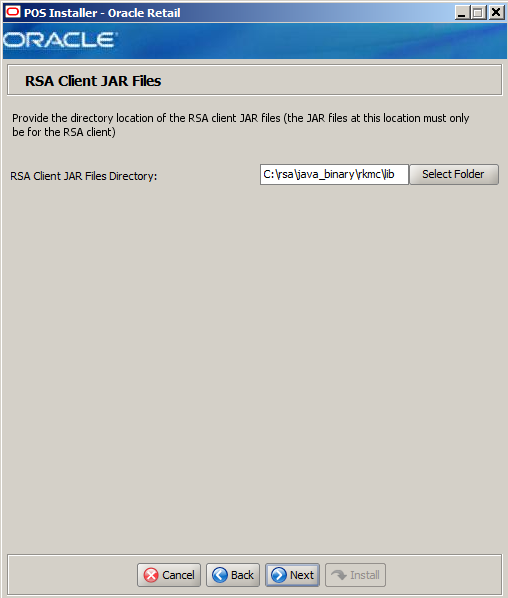
This window is only displayed if RSA Data Protection Manager is selected in the Security Setup: Key Manager window.
The field in this window is described in the following table:
| Details | Content |
|---|---|
| Field Title | RSA Client JAR Files Directory |
| Field Description | Choose the directory where the following RSA client jar files are located:
|
| Example |
|
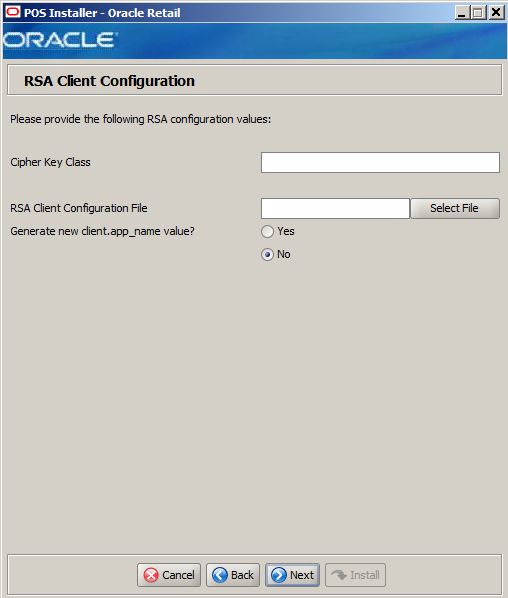
This window is only displayed if RSA Data Protection Manager is selected in the Security Setup: Key Manager window.
The fields in this window are described in the following tables:
| Details | Content |
|---|---|
| Field Title | Cipher Key Class |
| Field Description | Enter the name of the cipher suite that define the authentication and encryption algorithms that will be used by RSA to negotiate the security settings for the network connection. |
| Details | Content |
|---|---|
| Field Title | RSA Client Configuration File |
| Field Description | Select the location of the RSA client configuration file. This file contains the details for configuring the RSA client. |
| Details | Content |
|---|---|
| Field Title | Generate a new client.app.name value |
| Field Description | To have the installer generate a unique name for the client.app.name value in the RSA client configuration file, select Yes. To not change the value in the configuration file, select No. |
| Example | No |
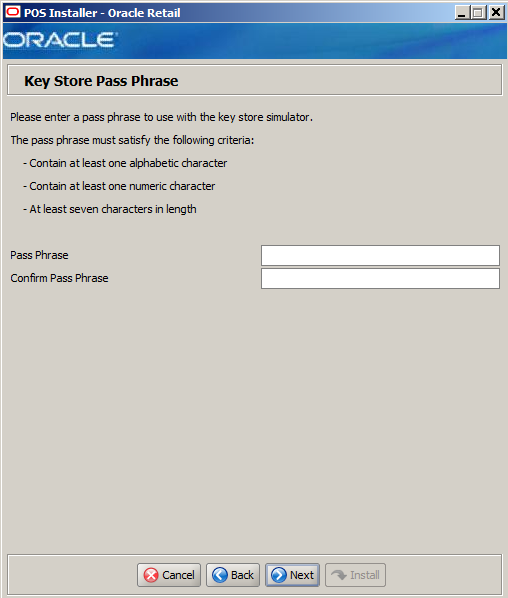
This window is only displayed if Simulator is selected in the Security Setup: Key Manager window.
The field in this window is described in the following table:
| Details | Content |
|---|---|
| Field Title | Pass Phrase |
| Field Description | Enter the pass phrase used to access the Key Store simulator.
Note: Use the same pass phrase for all Oracle Retail POS Suite applications in your configuration. |
| Details | Content |
|---|---|
| Field Title | Confirm Pass Phrase |
| Field Description | Reentered Pass Phrase used to confirm the pass phrase.
Note: The pass phrases in the Pass Phrase and Confirm Pass Phrase fields must match. |
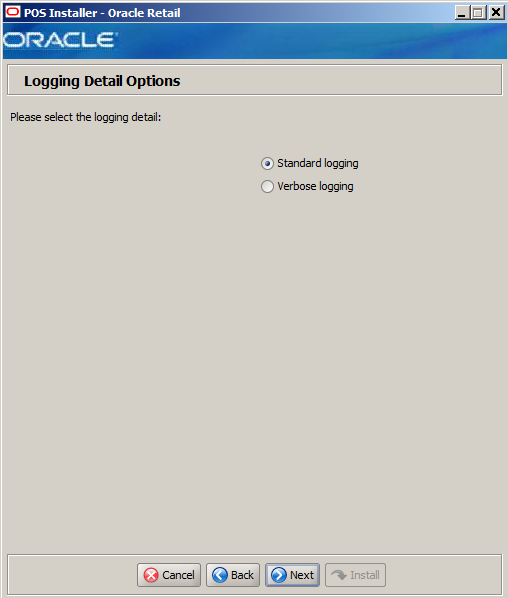
The field in this window is described in the following table:
| Details | Content |
|---|---|
| Field Title | Please select the logging detail |
| Field Description | Choose the level of client logging:
|
| Example | Standard logging |
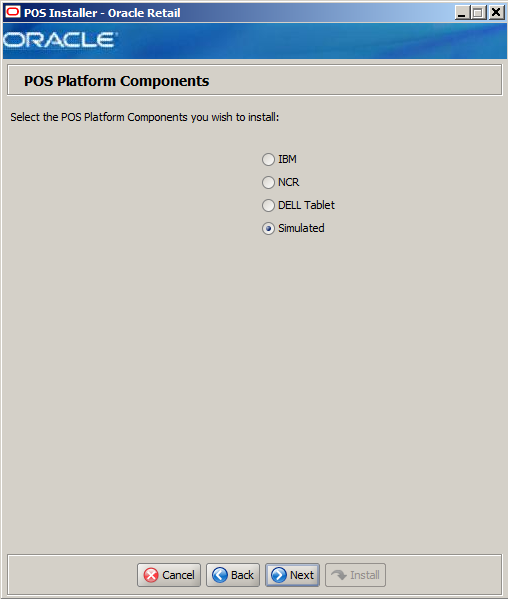
The field in this window is described in the following table:
| Details | Content |
|---|---|
| Field Title | Select the POS Platform Components you wish to install |
| Field Description | From the platform components, choose the type of register:
|
| Example | Simulated |
This window is only displayed if any component other than Simulated is selected in the POS Platform Components window.
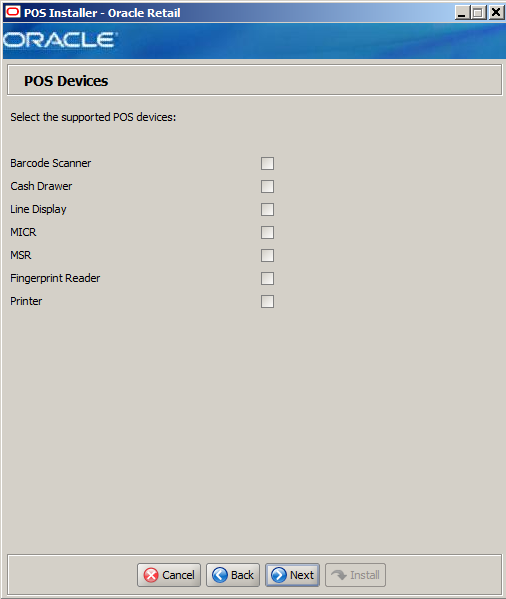
The field in this window is described in the following table:
| Details | Content |
|---|---|
| Field Title | POS Devices |
| Field Description | Choose the devices to be attached to the client register. |
This window is only displayed if Printer is selected in the POS Devices window.
The fields in this window are described in the following tables:
| Details | Content |
|---|---|
| Field Title | Select POS Printer Support |
| Field Description | Choose what is supported for a printer attached to the register or select a network printer.
For information on printing barcodes with JPOS fiscal printers, see the following sections:
|
| Example | JPOS Printer with slip station |
| Details | Content |
|---|---|
| Field Title | DBCS Printer |
| Field Description | If the printer supports the double-byte character set (DBCS), select Yes. |
| Example | No |
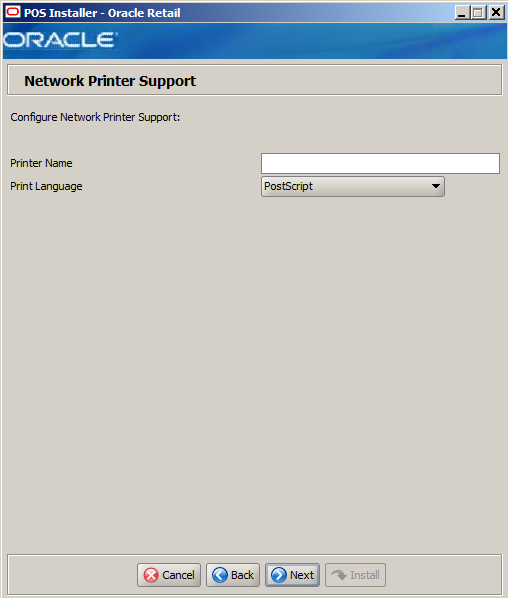
This window is only displayed if Network Printer is selected in the POS Printer Support window.
The fields in this window are described in the following tables:
| Details | Content |
|---|---|
| Field Title | Printer Name |
| Field Description | Enter the network printer name. |
| Details | Content |
|---|---|
| Field Title | Printer Language |
| Field Description | Select the language for the network printer. |
| Example | PostScript |
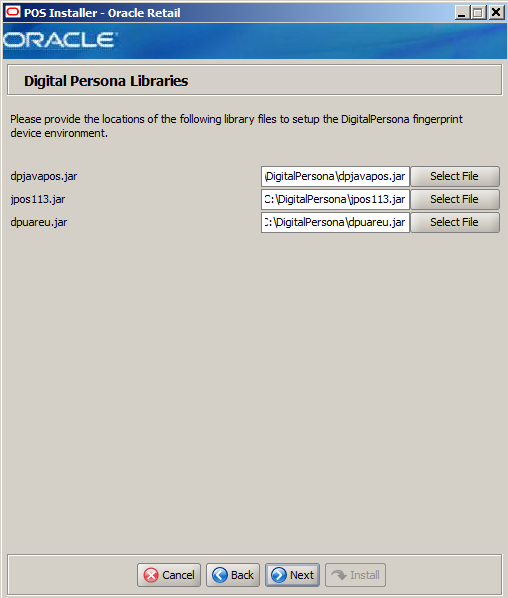
This window is only displayed if Fingerprint Reader is selected in the POS Devices window.
The fields in this window are described in the following tables:
| Details | Content |
|---|---|
| Field Title | dpjavapos.jar |
| Field Description | Enter the location of the jar file. |
| Example |
|
| Details | Content |
|---|---|
| Field Title | jpos113.jar |
| Field Description | Enter the location of the jar file. |
| Example |
|
| Details | Content |
|---|---|
| Field Title | dpuareu.jar |
| Field Description | Enter the location of the jar file. |
| Example |
|
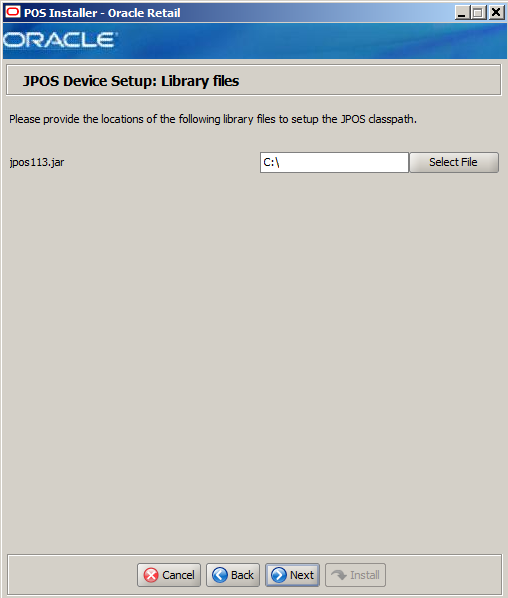
This window is only displayed if Simulated is selected in the POS Platform Components window.
The field in this window is described in the following table:
| Details | Content |
|---|---|
| Field Title | jpos113.jar |
| Field Description | Enter the location of the directory.
Note: The jar file is available from the manufacturer of the register. |
| Example |
|
This window is only displayed if Simulated is selected in the POS Platform Components window.
The field in this window is described in the following table:
| Details | Content |
|---|---|
| Field Title | Enable Support for Network Printing |
| Field Description | Choose the type of network printing:
|
| Example | Page Printer |
This window is only displayed if Simulated is selected in the POS Platform Components window and Page Printer is selected in the Network Printer Support window.
The fields in this window are described in the following tables:
| Details | Content |
|---|---|
| Field Title | Printer Name |
| Field Description | Enter the network printer name. |
| Details | Content |
|---|---|
| Field Title | Print Language |
| Field Description | Select the language for the network printer. |
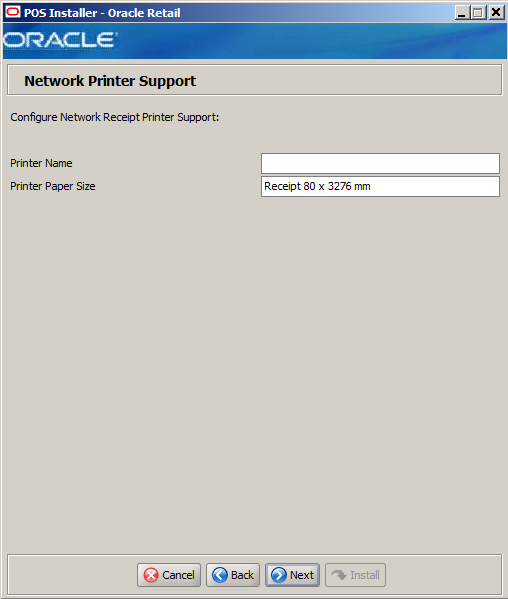
This window is only displayed if Simulated is selected in the POS Platform Components window and Roll Receipt Printer is selected in the Network Printer Support window.
The fields in this window are described in the following tables:
| Details | Content |
|---|---|
| Field Title | Printer Name |
| Field Description | Enter the printer name. |
| Details | Content |
|---|---|
| Field Title | Printer Paper Size |
| Field Description | Enter the name for the paper size for the printer. |
| Example | Receipt 80 x 3276 mm |
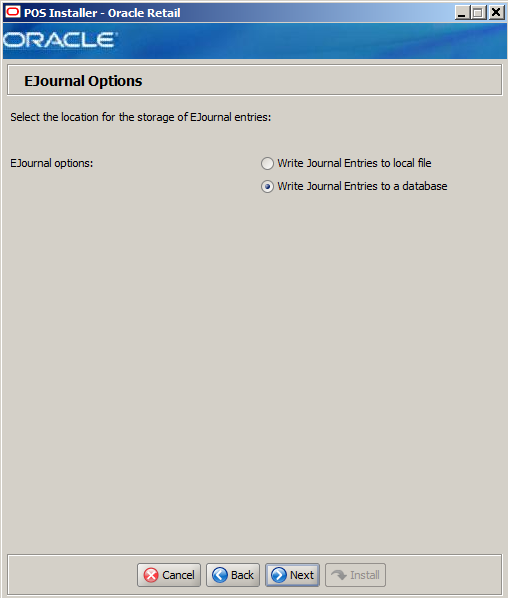
The field in this window is described in the following table:
| Details | Content |
|---|---|
| Field Title | EJournal Options |
| Field Description | Choose where the journal entries are to be written.
|
| Example | Write Journal Entries to a database |
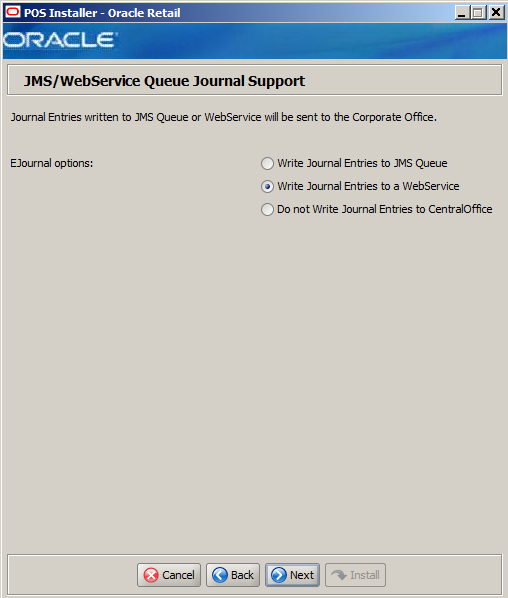
This window is only displayed if Central Office/Back Office is selected in the Integrate Applications window.
The field in this window is described in the following table:
| Details | Content |
|---|---|
| Field Title | EJournal Options |
| Field Description | Select an option for journaling. Journal entries written to a JMS queue or web service are sent to the corporate office.
Note: The same selection must be made for the server and the client. |
| Example | Write Journal Entries to a WebService |
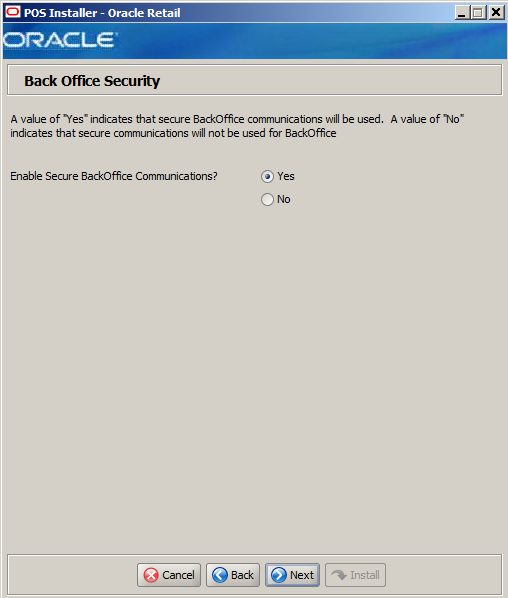
This window is only displayed if Central Office/Back Office is selected in the Integrate Applications window.
The field in this window is described in the following table:
| Details | Content |
|---|---|
| Field Title | Enable Secure Back Office Communications? |
| Field Description | Select Yes if secure communication with Back Office is required. |
| Example | Yes |
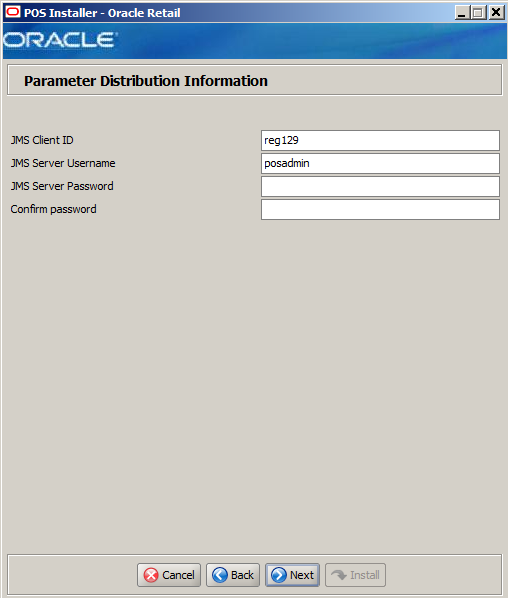
This window is only displayed if Central Office/Back Office is selected in the Integrate Applications window.
The fields in this window are described in the following tables:
| Details | Content |
|---|---|
| Field Title | JMS Client ID |
| Field Description | Identifier of the JMS client used for receiving parameter updates. |
| Example | reg129 |
| Details | Content |
|---|---|
| Field Title | JMS Username |
| Field Description | Identifier of the JMS user for receiving parameter updates. |
| Example | posadmin |
| Details | Content |
|---|---|
| Field Title | JMS Password |
| Field Description | Password of the JMS user receiving parameter updates. |
| Details | Content |
|---|---|
| Field Title | Confirm Password |
| Field Description | Reentered JMS Password used to confirm the password.
Note: The passwords in the JMS Password and Confirm Password fields must match. |
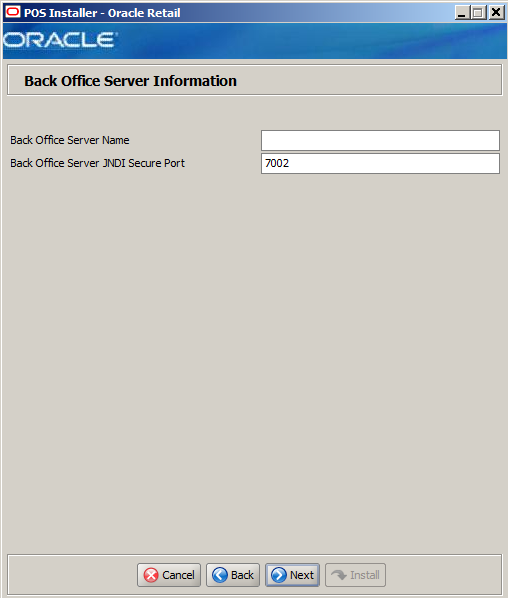
This window is only displayed if Central Office/Back Office is selected in the Integrate Applications window.
The fields in this window are described in the following tables:
| Details | Content |
|---|---|
| Field Title | Back Office Server Name |
| Field Description | Enter the host name for the Back Office application. |
| Details | Content |
|---|---|
| Field Title | Back Office Server JNDI Secure Port |
| Field Description | Enter the port number for the Back Office application. This is the port number that was selected when the Back Office domain was created. |
| Example | 7002 |
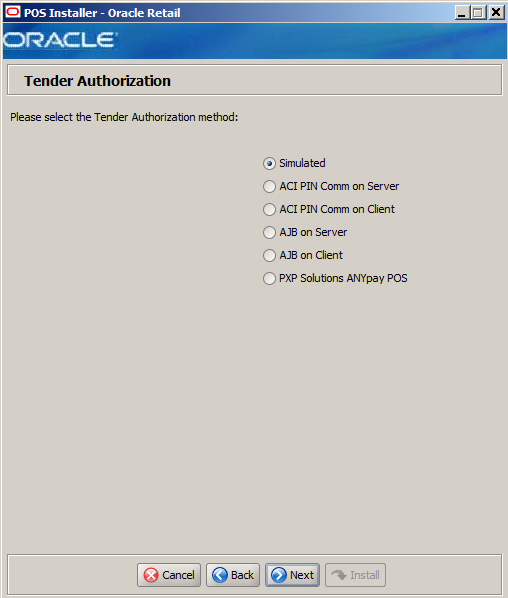
The field in this window is described in the following table:
| Details | Content |
|---|---|
| Field Title | Please select the tender authorization method |
| Field Description | Choose where tender authorizations are sent.
Note: If the store server is located at a remote location, it is highly recommended to configure ACI PINComm or AJB at each client in order to help minimize network delay. Note: Demo installations should use the Simulated option. |
| Example | Simulated |
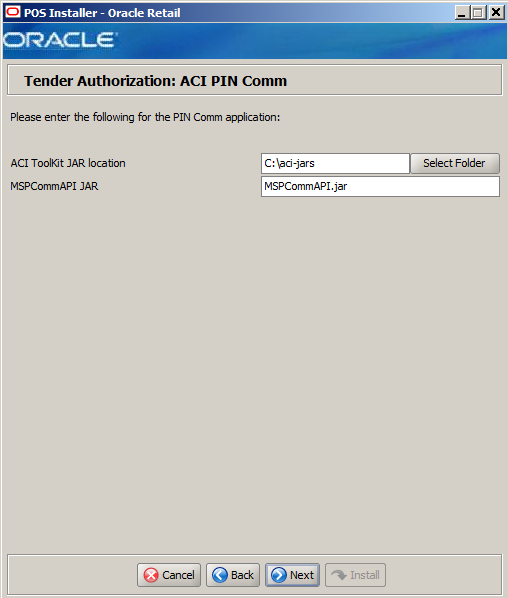
This window is only displayed if ACI PIN Comm on Server is selected in the Tender Authorization window.
The fields in this window are described in the following tables:
| Details | Content |
|---|---|
| Field Title | ACI ToolKit JAR Location |
| Field Description | Enter the path to the ACI ToolKit JAR file. |
| Example |
|
| Details | Content |
|---|---|
| Field Title | MSPCommAPI JAR |
| Field Description | Enter the name of the MSPCommAPI JAR file. |
| Example | MSPCommAPI.jar |
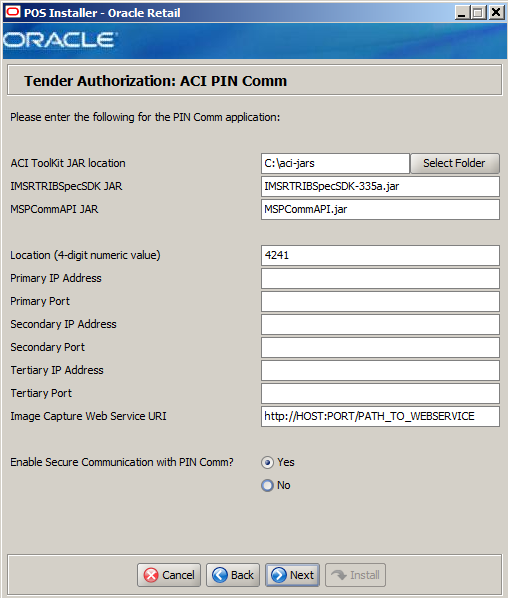
This window is only displayed if ACI PIN Comm on Client is selected in the Tender Authorization window.
The fields in this window are described in the following tables:
| Details | Content |
|---|---|
| Field Title | ACI ToolKit JAR Location |
| Field Description | Enter the path to the ACI ToolKit JAR file. |
| Example |
|
| Details | Content |
|---|---|
| Field Title | IMSRTRIBSpecSDK JAR |
| Field Description | Enter the name of the IMSRTRIBSpecSDK JAR file. |
| Example | IMSRTRIBSpecSDK-335a.jar |
| Details | Content |
|---|---|
| Field Title | MSPCommAPI JAR |
| Field Description | Enter the name of the MSPCommAPI JAR file. |
| Example | MSPCommAPI.jar |
| Details | Content |
|---|---|
| Field Title | Location (4-digit numeric value) |
| Field Description | Enter the four digit numeric value for the location. |
| Example | 4241 |
| Details | Content |
|---|---|
| Field Title | Primary IP Address |
| Field Description | Enter the primary IP address used for the communication between the store server and the tender authorizer. |
| Details | Content |
|---|---|
| Field Title | Primary Port |
| Field Description | Enter the primary port number used for the communication between the store server and the tender authorizer. |
| Details | Content |
|---|---|
| Field Title | Secondary IP Address |
| Field Description | Enter the secondary IP address used for the communication between the store server and the tender authorizer. |
| Details | Content |
|---|---|
| Field Title | Secondary Port |
| Field Description | Enter the secondary port number used for the communication between the store server and the tender authorizer. |
| Details | Content |
|---|---|
| Field Title | Tertiary IP Address |
| Field Description | Enter the tertiary IP address used for the communication between the store server and the tender authorizer. |
| Details | Content |
|---|---|
| Field Title | Tertiary Port |
| Field Description | Enter the tertiary port number used for the communication between the store server and the tender authorizer. |
| Details | Content |
|---|---|
| Field Title | Image Capture Web Service URI |
| Field Description | Enter the address of the Image Capture web service. |
| Example | http://HOST:PORT/PATH_TO_WEBSERVICE |
| Details | Content |
|---|---|
| Field Title | Enable Secure Communication with PIN Comm? |
| Field Description | Select Yes for communication with ACI PINComm using HTTPS. |
| Example | Yes |
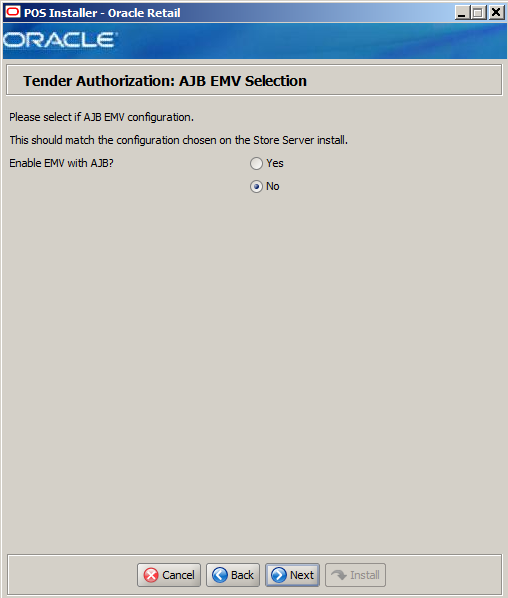
This window is only displayed if AJB on Server is selected in the Tender Authorization window.
The field in this window is described in the following table:
| Details | Content |
|---|---|
| Field Title | Enable EMV with AJB? |
| Field Description | Select whether Europay, MasterCard, and Visa (EMV) is enabled with AJB:
|
| Example | No |
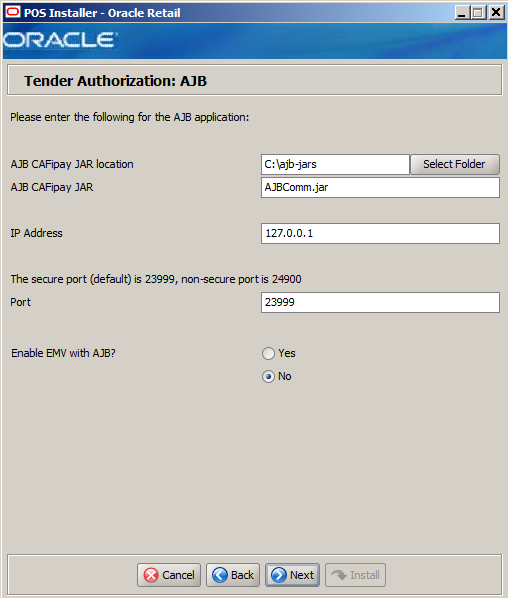
This window is only displayed if AJB on Client is selected in the Tender Authorization window.
The fields in this window are described in the following tables:
| Details | Content |
|---|---|
| Field Title | AJB CAFipay JAR Location |
| Field Description | Enter the path to the AJB CAFipay JAR file. |
| Example |
|
| Details | Content |
|---|---|
| Field Title | AJB CAFipay JAR |
| Field Description | Enter the name of the CAFipay JAR file. |
| Example | AJBComm.jar |
| Details | Content |
|---|---|
| Field Title | IP Address |
| Field Description | Enter the IP address used for the communication between the store server and the tender authorizer. |
| Example | 127.0.0.1 |
| Details | Content |
|---|---|
| Field Title | Port |
| Field Description | Enter the port number used for the communication between the store server and the tender authorizer. |
| Example | 23999 |
| Details | Content |
|---|---|
| Field Title | Enable EMV with AJB? |
| Field Description | Select whether Europay, MasterCard, and Visa (EMV) is enabled with AJB:
|
| Example | No |
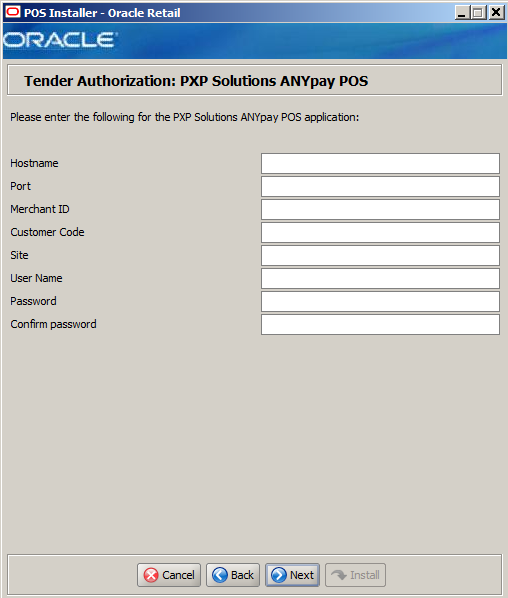
This window is only displayed if PXP Solutions ANYpay POS is selected for the Tender Authorization.
The fields in this window are described in the following tables:
| Details | Content |
|---|---|
| Field Title | Hostname |
| Field Description | Enter the host name of the PXP Solutions server. |
| Details | Content |
|---|---|
| Field Title | Port |
| Field Description | Enter the port number for the PXP Solutions server. |
| Details | Content |
|---|---|
| Field Title | Merchant ID |
| Field Description | Enter the ID of the merchant used to access the PXP Solutions application. |
| Details | Content |
|---|---|
| Field Title | Customer Code |
| Field Description | Enter the customer code used to access the PXP Solutions application. |
| Details | Content |
|---|---|
| Field Title | Site |
| Field Description | Enter the site to access the PXP Solutions application. |
| Details | Content |
|---|---|
| Field Title | User Name |
| Field Description | Enter the user name to use to access the PXP Solutions application. |
| Details | Content |
|---|---|
| Field Title | Password |
| Field Description | Enter the password to use to access the PXP Solutions application. |
| Details | Content |
|---|---|
| Field Title | Confirm Password |
| Field Description | Reentered Password used to confirm the password.
Note: The passwords in the Password and Confirm Password fields must match. |
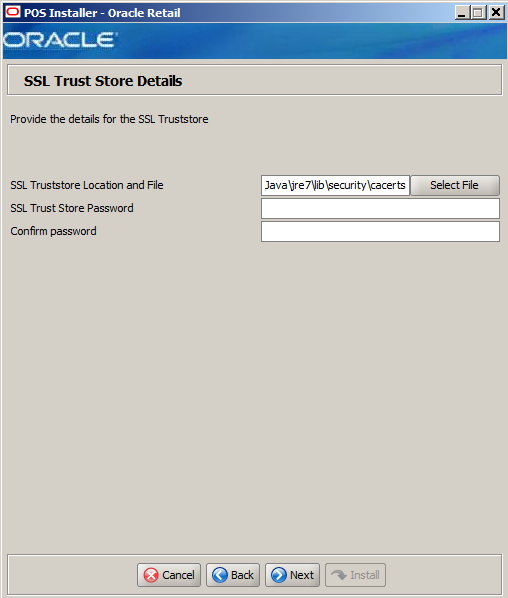
The fields in this window are described in the following tables:
| Details | Content |
|---|---|
| Field Title | SSL Truststore Location and File |
| Field Description | Enter the location and name of the truststore file. |
| Example |
|
| Details | Content |
|---|---|
| Field Title | SSL Trust Store Password (optional) |
| Field Description | Enter the password for the truststore. |
| Details | Content |
|---|---|
| Field Title | Confirm Password |
| Field Description | Reentered SSL Trust Store Password used to confirm the password.
Note: The passwords in the SSL Trust Store Password and Confirm Password fields must match. |