| Oracle® Retail Point-of-Service User Guide Release 14.1 E54472-02 |
|


 Previous |
 Next |
Security Options enable you to work with employee information, roles, parameters, and reason codes.
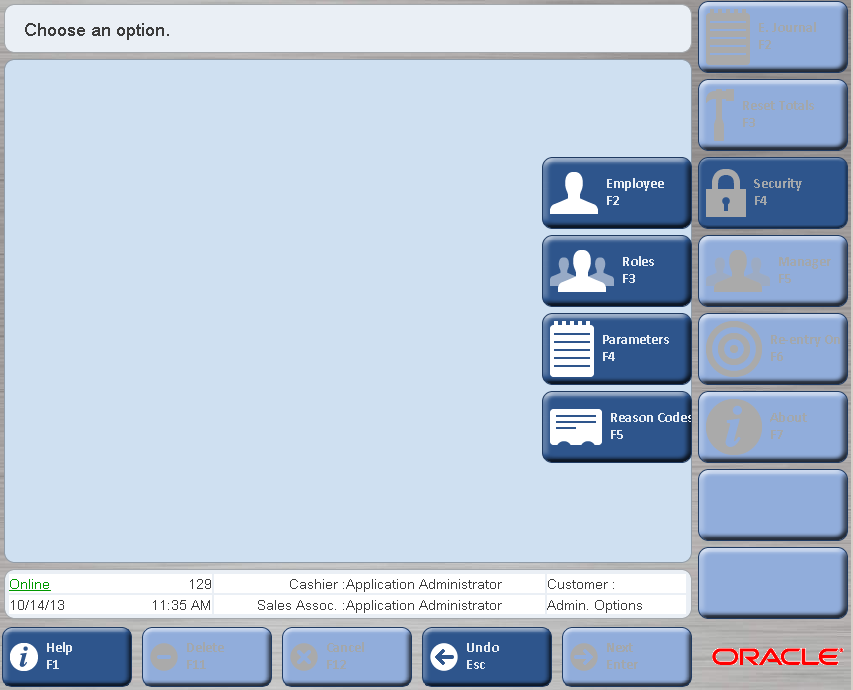
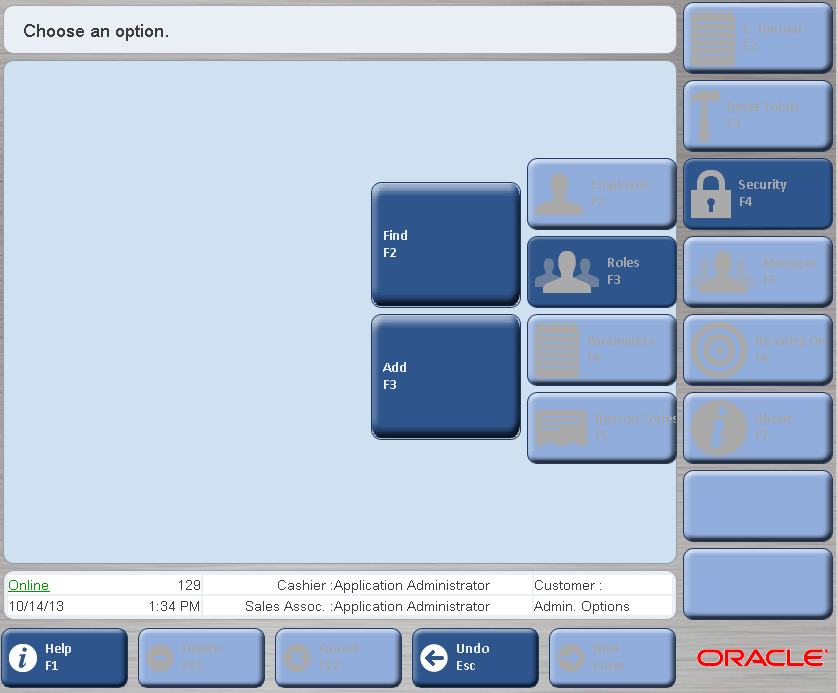
On the Main Options screen, press Administration/F4. You are prompted to log in. See "Logging In and Out" in Chapter 1 for more information. After logging in, press Security/F4. The navigation buttons for the security options appear.
The following options are described in this chapter:
Employee Options enable you to access information about employees, add new employees, and reset employee passwords.
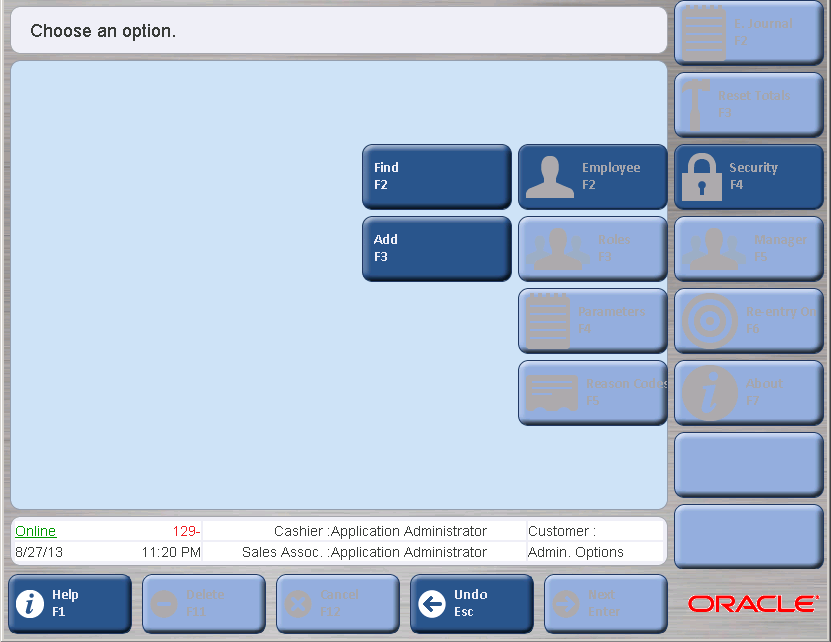
To access the employee options, press Employee/F2. The navigation buttons for the employee options appear.
The following functions are described:
Find Employee enables you to search for an existing employee. You can edit the employee information including, resetting the employee's password.
To search for an employee:
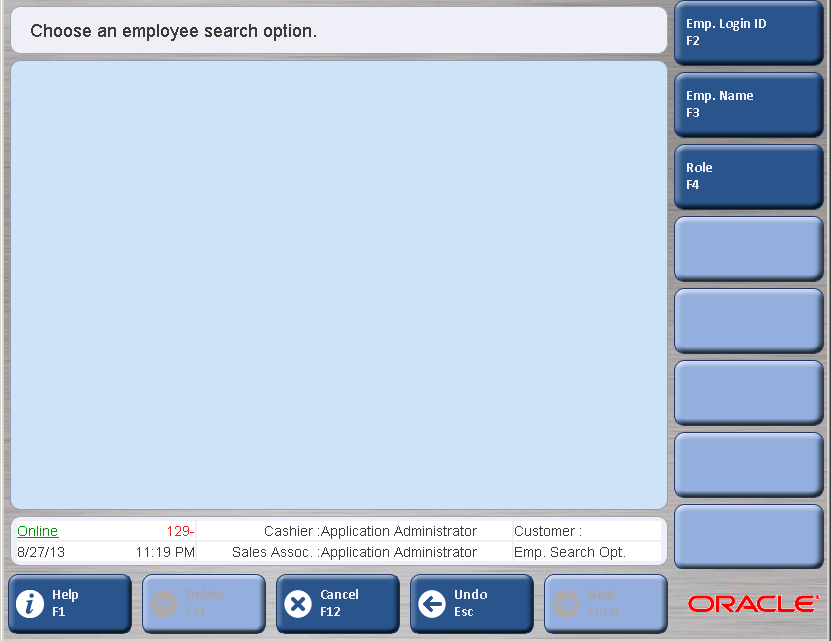
Press Find/F2. The Emp. Search Opt. screen appears.
Select the criteria for the search:
To search by employee ID, press Emp. Login ID/F2. The Find Employee ID screen appears. Enter the employee ID and press Next/Enter.
To search by employee name, press Emp. Name/F3. The Find Emp. Name screen appears. Enter a first and last name and press Next/Enter.
To search by role, press Role/F4. The Find Emp. Role screen appears. Select a role from the menu and press Next/Enter.
If more than one employee is found that matches the selection criteria, the Employee Select screen appears. Choose the employee on the list and press Next/Enter.
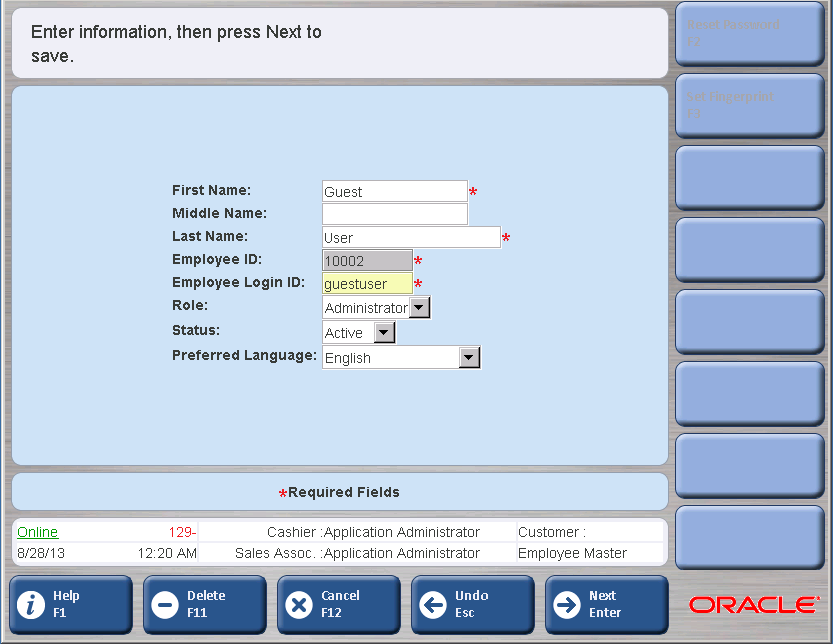
The Employee Master screen appears.
To change the employee information:
Enter any changes to the employee name or login ID. Select a different role, status, or preferred language from the menus. To save the changes, press Next/Enter.
To reset the password, press Reset Password/F2. The Reset Password dialog appears.
To confirm the password reset, click Yes. The temporary password appears. It should be written down and given to the new employee. This is the only time the password appears.
To not reset the password, click No. The Employee Master screen is redisplayed.
A fingerprint can be used to identify the employee at login if the application is configured to use a fingerprint reader. To capture the employee's fingerprint:
Press Set Fingerprint/F3. The Employee Fingerprint Enroll screen appears.
Direct the employee to press a finger against the fingerprint reader at least four times. Press Esc. The Employee Verify Fingerprint screen appears.
Direct the employee to press the same finger that was used for enrollment in the previous step against the fingerprint reader one time. Press Esc. The fingerprint is saved.
A new permanent or temporary employee can be added.
To add a new employee:
Press Add/F3. The Emp. Add Opt. screen appears.
Select the type of employee to add:
To add a permanent employee, press Standard/F2. The Employee Master screen appears. See Figure 10-4.
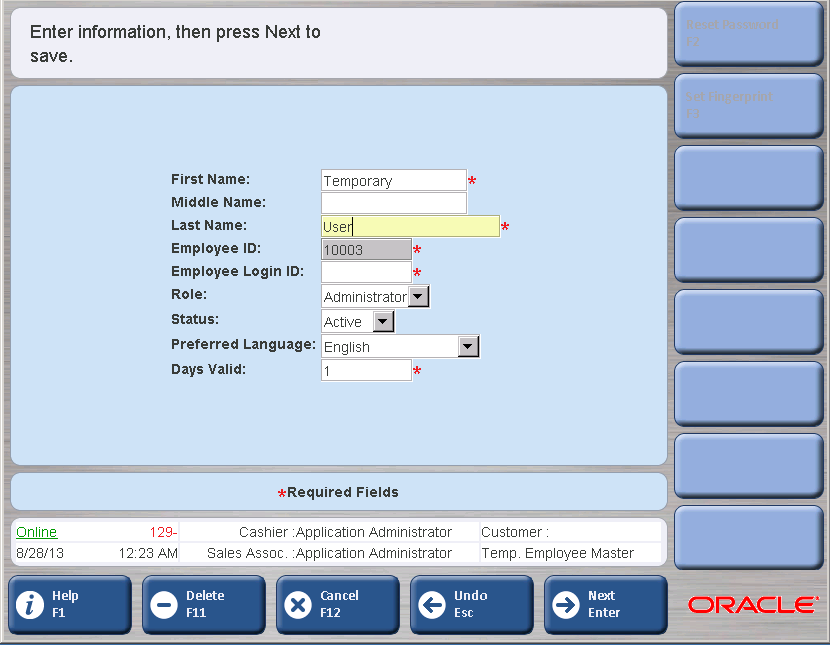
To add a temporary employee, press Temp/F3. The Temp. Employee Master screen appears.
Add the employee information:
Enter the employee name and login ID.
Select the role, status, and preferred language from the menus.
Enter the store number.
Select the number of days the employee will be working from the menu.
A fingerprint can be used to identify the employee at login if the application is configured to use a fingerprint reader. To capture the employee's fingerprint:
Press Set Fingerprint/F3. The Employee Fingerprint Enroll screen appears.
Direct the employee to press a finger against the fingerprint reader at least four times. Press Esc. The Employee Verify Fingerprint screen appears.
Direct the employee to press the same finger that was used for enrollment in the previous step against the fingerprint reader one time. Press Esc. The fingerprint is saved.
Press Next/Enter.
If the information matches an existing employee, the Emp. Select Add screen appears. The list shows any employees with the same name as the employee being added. You can choose to save the information for the new employee or select an existing employee.
The temporary password appears. It should be written down and given to the new employee. This is the only time the password appears.
Role options enable you to view roles, edit roles, and add roles. Press Roles/F3. The navigation buttons for the role options appear.
The following functions are described:
To find and edit a role:
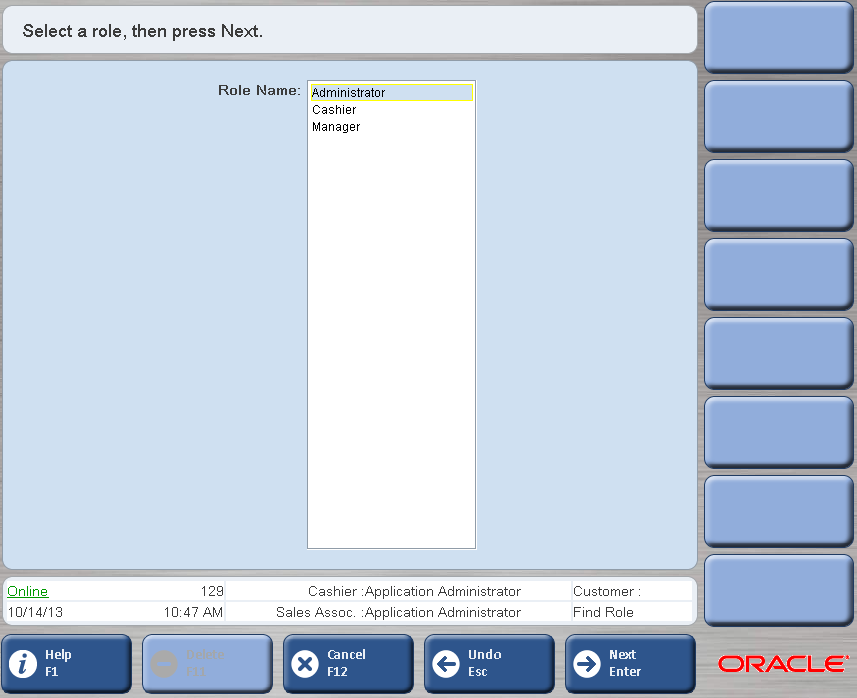
Press Find/F2. The Find Role screen appears.
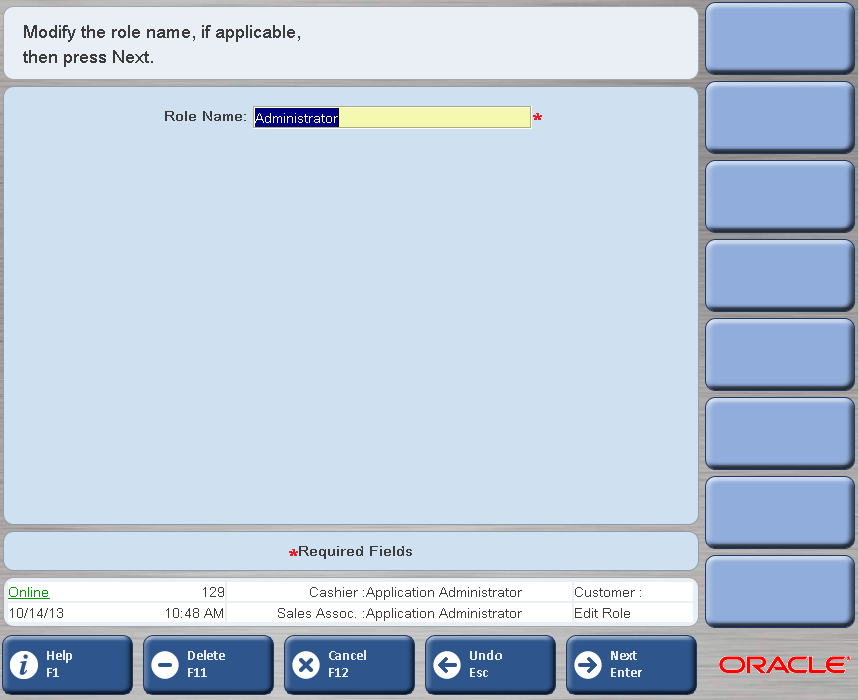
Select a role name and press Next/Enter. The Edit Role screen appears.
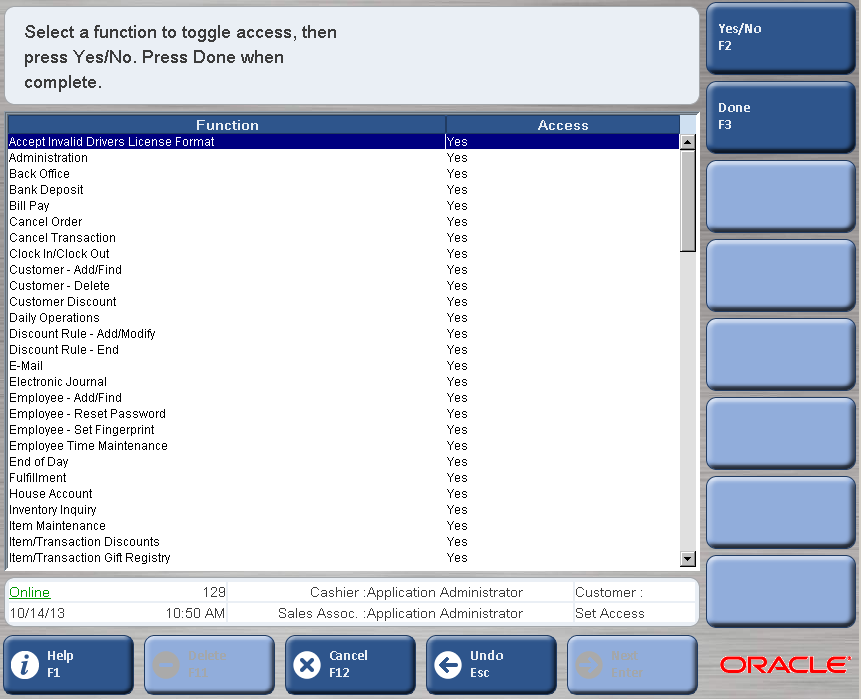
Change the role name, if needed, and press Next/Enter. The Set Access screen appears. The screen shows the access settings for the role.
To change the access for a function, select the function and press Yes/No/F2 to toggle the access for that function.
When you completed your changes, press Done/F3. You are returned to the Admin Options screen.
To add a role:
Press Add/F3. The Add Role screen appears.
Enter the new role name and press Next/Enter. The Set Access screen appears. For a new role, access for all the functions is initially set to No.
To change the access for a function, select the function and press Yes/No/F2 to toggle the access for that function.
When you completed your settings, press Done/F3. You are returned to the Admin Options screen.
The parameter option enables you to edit parameter values. To edit parameters:
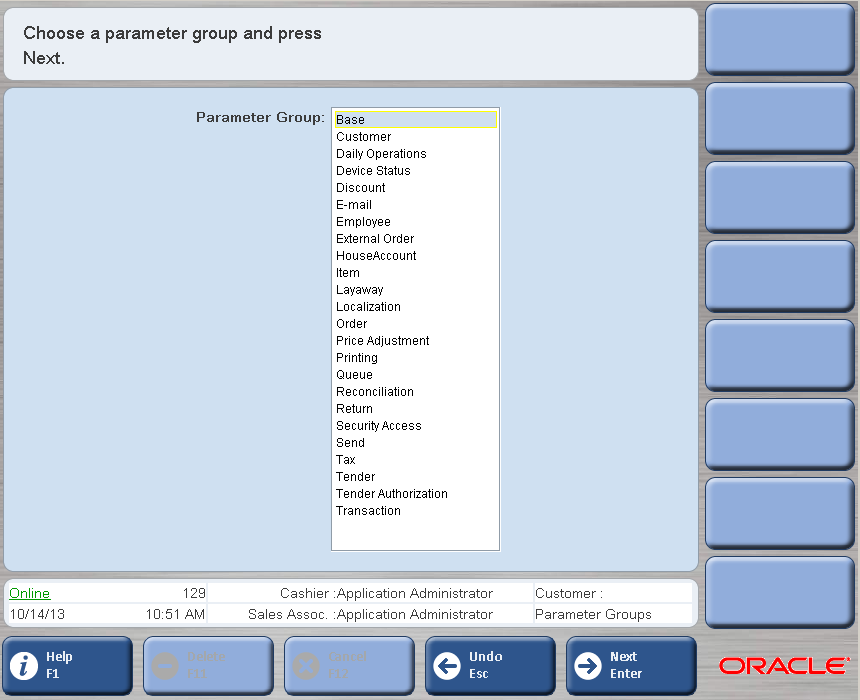
Press Parameters/F4. The Parameter Groups screen appears.
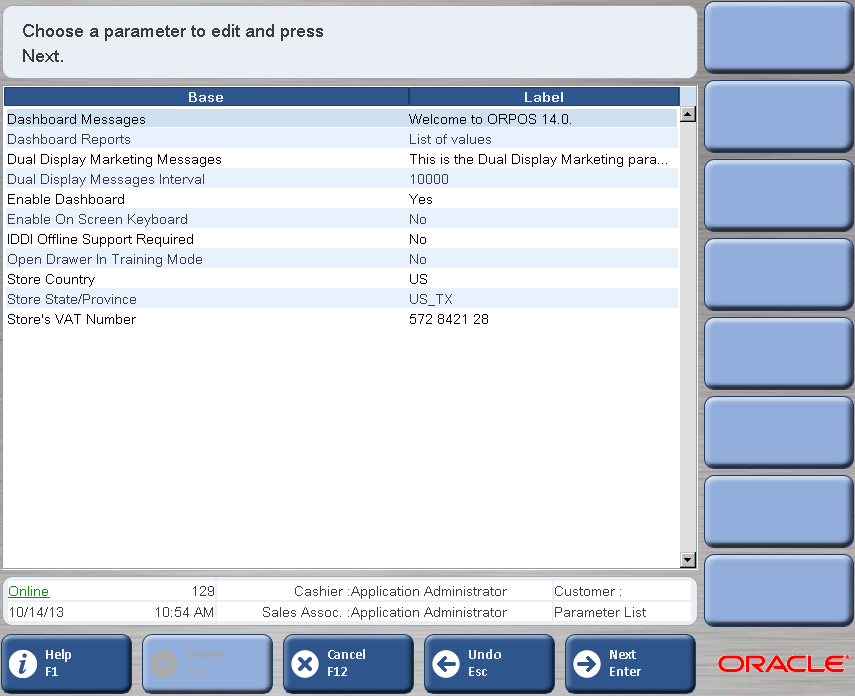
Select a parameter group and press Next/Enter. The Parameter List screen appears. This screen shows all the parameters in the parameter group that can be edited.
Select a parameter list and press Next/Enter. The Edit Parameter screen appears.
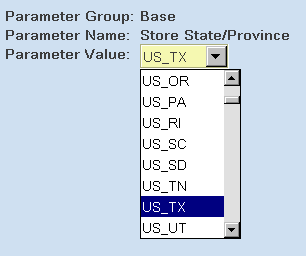
The Edit Parameter screen is used to change the value of a parameter. Figure 10-12 shows an example of a parameter with a list of values.
The type of edit screen displayed depends on the parameter:
If the parameter uses a text field, enter the new value for the text and press Done/F2.
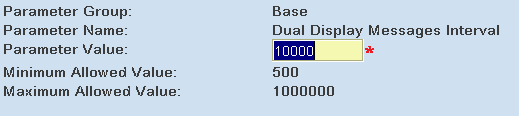
If the parameter uses a value field, enter the new value and press Next/Enter. The minimum and maximum allowed values are displayed on the screen.
If the parameter uses one value chosen from a list of possible values, select the new value from the list and press Next/Enter.
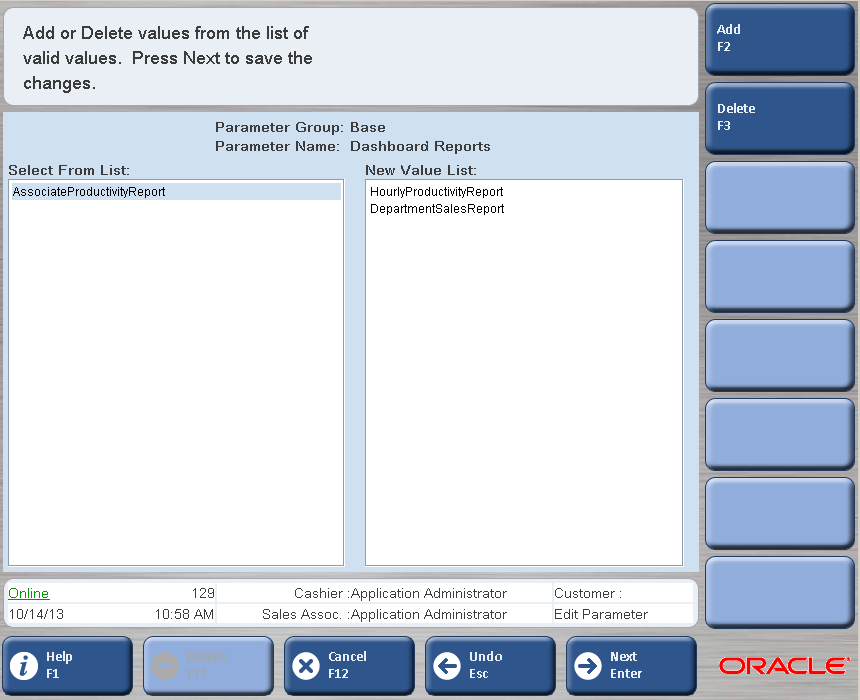
If the parameter allows more than one value from a list, you can add and remove values from the list. For an example, see Figure 10-16:
To add a value to the parameter, select the value in the Select From List field and press Add/F2. The value moves to the New Value List field.
To remove a value from the parameter, select the value in the New Value List and press Delete/F3. The value moves to the Select From List field.
When you have made all your changes, press Next/Enter.
After making the changes, you are returned to the Parameter List screen.
If you have made all your changes to a parameter list, press Undo/Esc. You are returned to the Parameter Groups screen.
When you have made all your changes, press Undo/Esc to return to the Admin Options screen.
Reason codes options enable you to edit and add reason codes.
To edit or add reason codes:
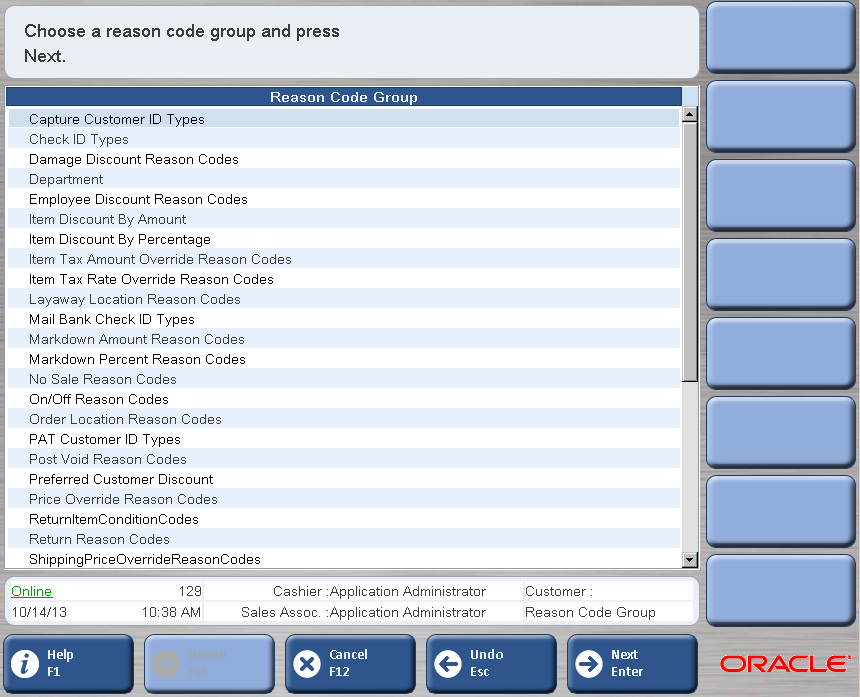
Press Reason Codes/F5. The Reason Code Group screen appears.
Select a group and press Next/Enter. The Reason Code List screen appears.
|
Note: If the Edit Reason Codes parameter is set to No, the reason codes are for viewing only. |
To change a reason code, select it and select an option:
To make the code the default for the reason code group, press Default/F2.
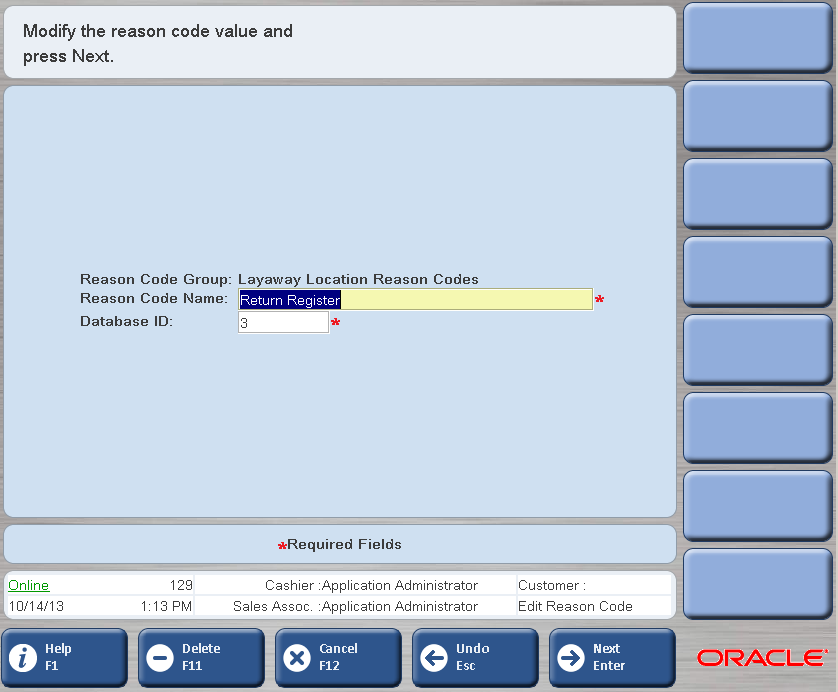
To change the name or database ID of a code, select the code in the list and press Edit/F3. The Edit Reason Code screen appears.
Make the changes and press Next/Enter. The Reason Code List screen appears.
To add a code, press Add/F4. The Add Reason Code screen appears. Enter a reason code name and database ID and press Next/Enter. The Reason Code List screen appears.
To delete a code, press Delete/F5.
To change the position of a code in the list, press Move Up/F6 or Move Down/F7.
To clear the default, press No Default/F8.
When you have completed your changes, press Done/F9. You are returned to the Reason Code Group screen.