Getting Started with ALES 3.0

     Previous  Next    Open TOC in new window    View as PDF - New Window  Get Adobe Reader - New Window
Content starts here

Tutorial 3: Creating Identities

This section contains the following topics:


Overview

In addition to defining the application resources in ALES, the users of the application must also be defined. Depending on the security model being used to secure the application, this may be as simple as defining an Anonymous user to represent anyone or it may involve defining of multiple roles or groups containing many users.


Scenario

This section walks you through the steps of creating the Identities (Groups and Users) needed to represent users of the Admissions System’s Patient Roster.
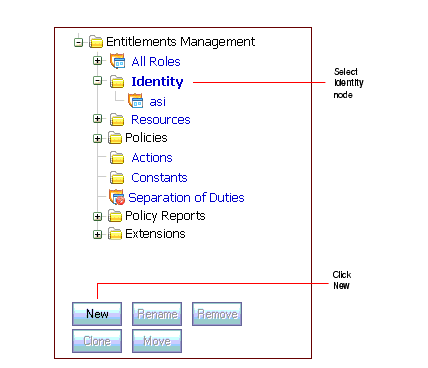
Type
Name
Description
Users
John Kildaire
A doctor who is a member of the Doctor’s group. He requires View access to the Admissions System.
 
Harold Hopkins
An Admissions System operator who is a member of the AdmissionsOperator group. To add and remove names from the Admissions System’s patient roster, he requires View and Edit access.
Groups
Doctors
All doctors at Parker Hospital.
 
AdmissionsOperators
All Admissions System operators.


Create the Users

  1. If you have not already done so, start the Administration Server and launch the Entitlements Management Tool.
  2. In the left navigation pane, select the Identity node and click New at the bottom of the pane.

  3. On the New Identity Directory window, enter Admissions and click OK.
  4. Note: In most cases, you should create a separate Identity directory for an organizational domain. In this example, the Admissions directory could be used for all Parker Hospital employees.

  5. When you return to the main window, select the new Admissions directory in the left pane. Then select the Users tab in the right pane and click New at the bottom.

  6. On the New User window, enter 
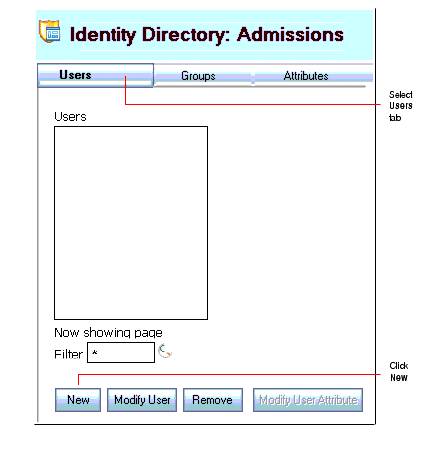
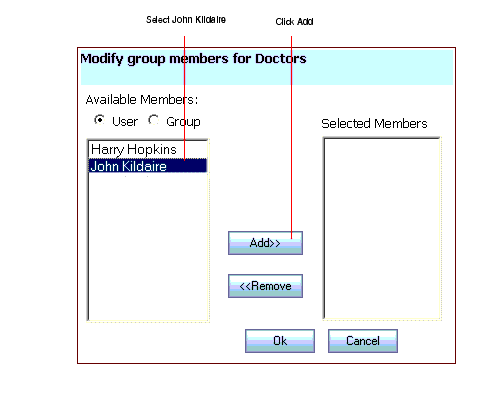
John Kildaire in the User Name field and complete the two password fields using any six-character string. Then click OK.
  7. This returns you the Admissions Identity page and shows John Kildaire as a new user.

  8. To create the Harry Hopkins user, click New in the right pane. Then enter Harry Hopkins and the passwords and click OK.
  9. To save your work, click Save Changes at the top of the main window.


Create the Groups

  1. Returning to the left navigation pane, select the new Admissions directory in the left pane. Then select the Groups tab in the right pane and click New at the bottom.
  2. On the New Group window, enter 
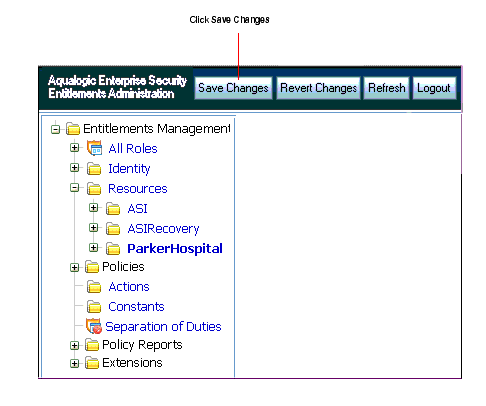
Doctors in the Group Name field and click OK.
  3. To add John Kildaire to this Group, select Doctors in the Group list and then click Modify Group Membership.

  4. On the Modify Group Members window, select John Kildaire and click Add.

  5. Then use the same steps to add Harold Hopkins to the AdmissionsOperators group.


Save the Identities

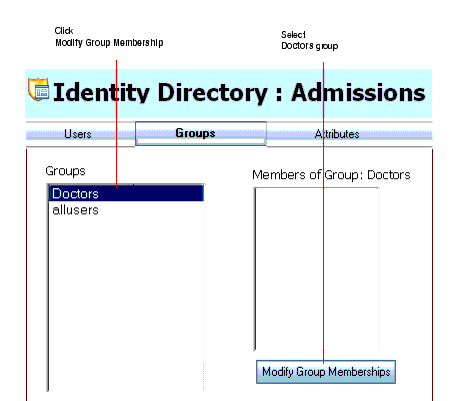
After creating the Users and Groups described, return to the main window and click Save Changes.


Summary

This tutorial showed how to create the Groups and Users needed to represent users who access the Admissions System Patient Roster.

In the next tutorial, you will learn how create a Role with a Membership Rule.


  Back to Top       Previous  Next