|
|
This section contains the following sections:
This section walks you through the steps of creating a Role using a Membership Rule. A Role is essentially a collection of permissions that are granted the Users who are assigned to it. It also defines how, when, and under what constraints the Role is assigned.
In ALES 3.0, the inheritance pattern of Roles can be configured so that a User assigned to a parent Role also inherits any child Roles (so long as this is not prohibited by other policies).
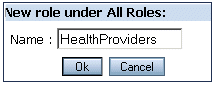
The Role created in this tutorial is named HealthProviders. The Membership Rule assigns all members of the Doctors group to this Role.
You can create a Role and Membership Rule using either the All Roles or the Membership Rules node. In this example we use All Roles.
HealthProviders in the Name field and click OK. 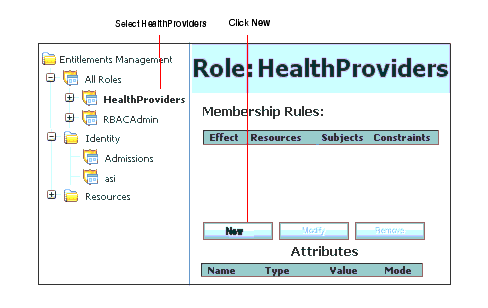
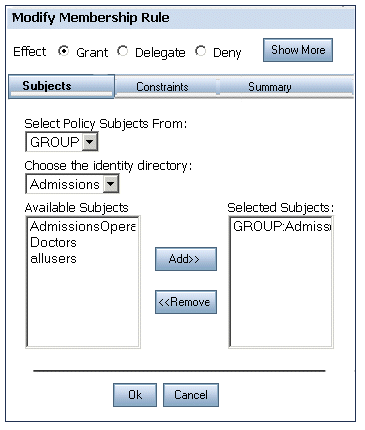
Group displays in the Select Policy Subjects From field and that the Admissions group displays in the Choose Identity Directory field. Then select the Doctors group in the Available Subjects list and click Add. For this tutorial, we won’t add any more information to the Membership Rule. But if you want to, you can specify that this rule applies only to the Patient Roster. If you would like to do this, click Show More at the top of the Modify Rule Membership window. This adds the Resources tab to the window where you can drill down and select roster_index.jsp, the Resource representing the Patient Roster.
After creating the Role as described, click Save Changes at the top of the main window.
This tutorial showed how to create a Role and define its membership using a Membership Rule. The next tutorial shows how to define Authorization policies. One of these policies will make use of the HealthProviders Role to grant access to the Patient Roster.


|