|
|
This chapter describes how to create an AquaLogic Service Bus (ALSB) Control called ServiceProviderAccessControl under the alint.process, and consume ServiceProviderAccessContract.wsdl from the File System.
This chapter discusses the following topics:
ALSB Control is based on the Beehive controls framework, which is used to invoke the ALSB proxies. The proxies have ALSB Control configured with support for security and transaction context propagation from WLI to ALSB.
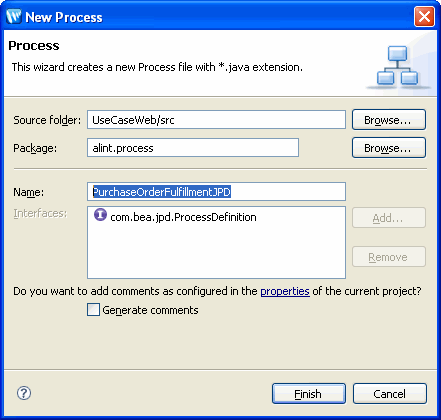
External services like inventory system, credit card system, and shipping services are proxy services that can be invoked by the ALSB Control. Before you start creating the ALSB Control, create the PurchaseOrderFulfillmentJPD.
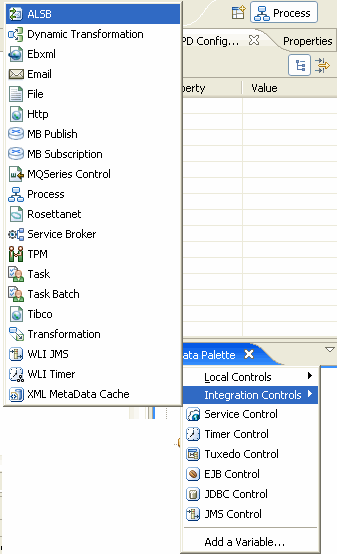
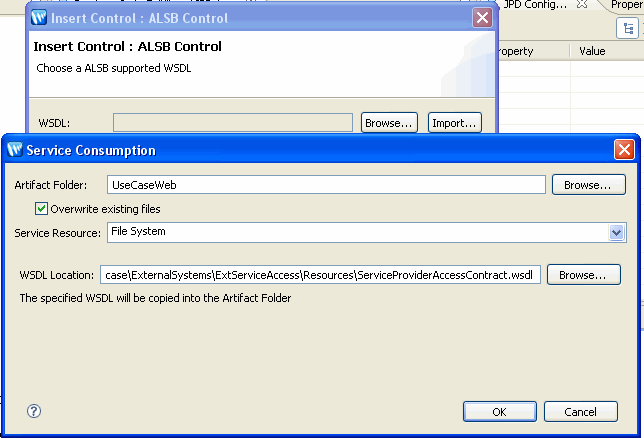
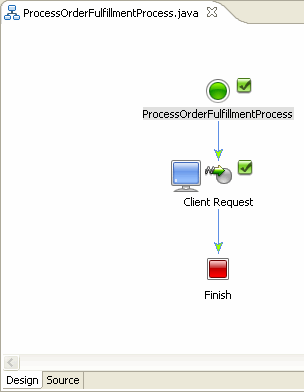
PurchaseOrderFulfillmentJPD as the Name of the Process. Type alint.process as the Package, if the package is not already set, as shown in Figure 4-1.The Insert Control : ALSB Control wizard is displayed.
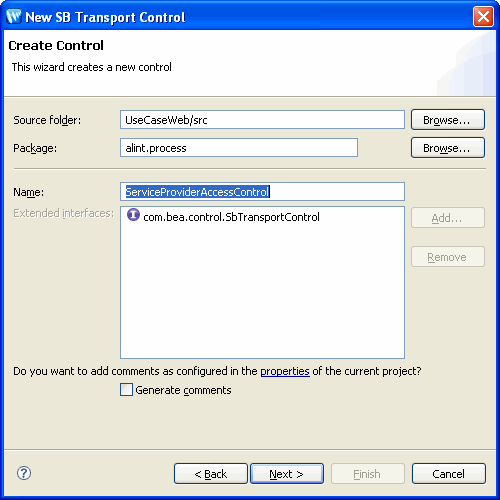
ServiceProviderAccessControl. Ensure that alint.process is the Package. Figure 4-4 shows the Create Control dialog box.UseCaseWeb\src\alint\process.{TUTORIAL_ROOT}\ALIntE2EUsecase\ExternalSystems\ExtServiceAccess\Resources folder and select the ServiceProviderAccessContract.wsdl.Click OK. The values are populated, as shown in Figure 4-6.
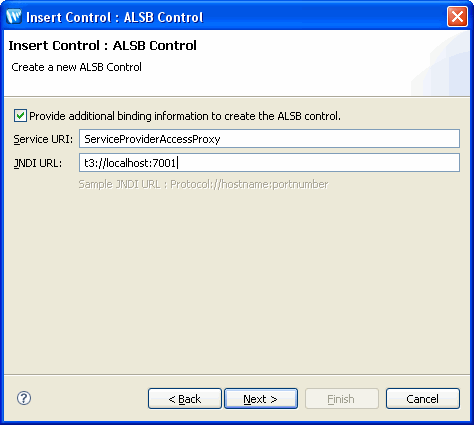
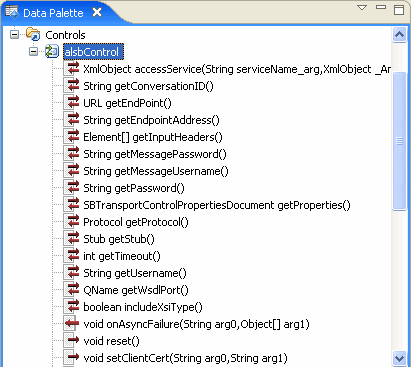
ServiceProviderAccessProxy. On JNDI URI, enter t3://localhost:7001 as shown in Figure 4-7.The ALSB Control is created in the Controls folder of the Data Palette, as shown in Figure 4-8.
PurchaseOrderFulfillmentJPD is used for state management and process orchestration.
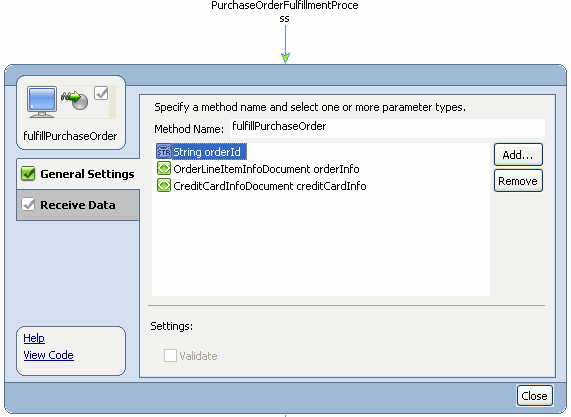
fulfillPurchaseOrder in Method Name, and click Add... on the General Setting tab. java.lang.String orderId
org.openuri.purchaseOrder.OrderLineItemInfoDocument orderInfo
org.openuri.purchaseOrder.CreditCardInfoDocument creditCardInfo
Table 4-1 lists the parameter and types of these variable names.
For more information about creating variables for a JPD, see Creating Variables in Guide to Building Business Process.
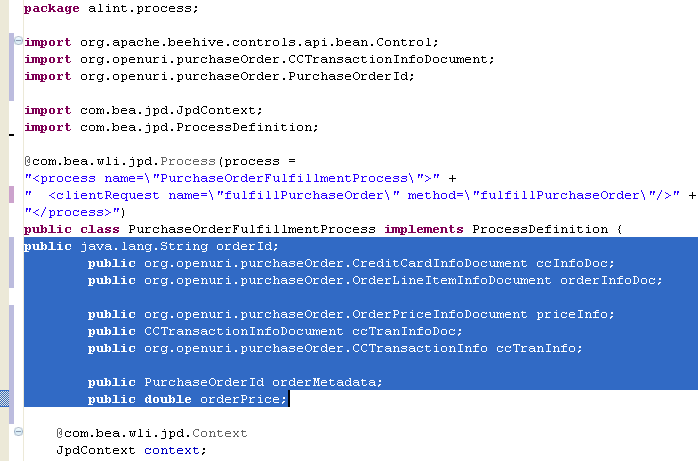
public org.openuri.purchaseOrder.OrderPriceInfoDocument priceInfo;
public CCTransactionInfoDocument ccTranInfoDoc;
public org.openuri.purchaseOrder.CCTransactionInfo ccTranInfo;
public PurchaseOrderId orderMetadata;
public double orderPrice;
Figure 4-12 shows the variable names in Source view.
| Note: | In case of compilation errors, add the imports as shown in Figure 4-12 . |
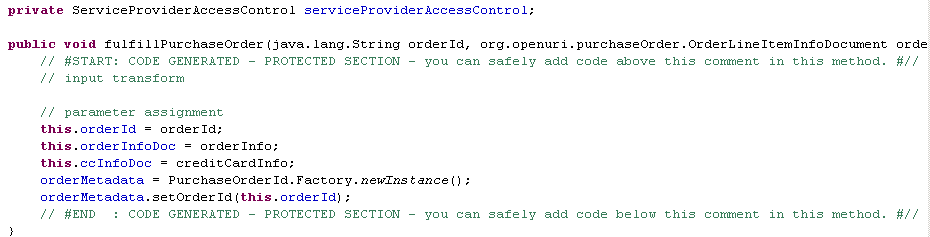
orderMetadata = PurchaseOrderId.Factory.newInstance();
orderMetadata.setOrderId(this.orderId);
| Note: | orderMetadata is required to publish the results after the inventory and the credit card systems are invoked. |
Figure 4-13 shows the fulfillPurchaseOrder method in Source view.
private static final String CREDIT_CARD_SERVICE = "CreditCardService";
private static final String INVENTORY_SERVICE = "InventoryService";
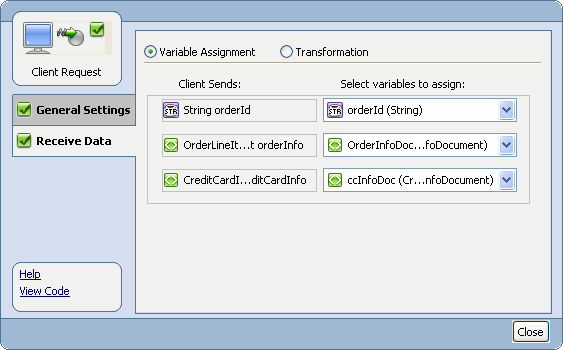
You have now added the clientRequest node and the required variables to the ProcessOrderFulfillmentJPD, as shown in Figure 4-14.
This section describes how to invoke Inventory system and credit card systems:
updateInventory. Right-click this updateInventory node, and select View Code. Copy the following code in the Source view:public void serviceProviderAccessControlAccessService() throws Exception {// #START: CODE GENERATED - PROTECTED SECTION - you can safely add code above this comment in this method. #//
// input transform
// return method call
this.priceInfo = org.openuri.purchaseOrder.OrderPriceInfoDocument.Factory.parse(serviceProviderAccessControl.accessService(INVENTORY_SERVICE, this.orderInfoDoc).xmlText());
// output transform
// output assignments
// #END : CODE GENERATED - PROTECTED SECTION - you can safely add code below this comment in this method. #//
System.out.println(“>>>>>>>>Received from update inventory = ” + priceInfo.getOrderPriceInfo ());
}
Figure 4-15 shows the code in Source view.
transferMoney. Right-click this transferMoney node, and select View Code. Copy the following code in the Source view:public void serviceProviderAccessControlAccessService1() throws Exception {// #START: CODE GENERATED - PROTECTED SECTION - you can safely add code above this comment in this method. #//
// input transform
// return method call
this.opReceived = serviceProviderAccessControl.accessService(this.CREDIT_CARD_SERVICE, this.ccInfoDoc);
// output transform
// output assignments
// #END : CODE GENERATED - PROTECTED SECTION - you can safely add code below this comment in this method. #//
this.ccTranInfo = org.openuri.purchaseOrder.CCTransactionInfoDocument.Factory.parse(opReceived.xmlText()).getCCTransactionInfo();
System.out.println(">>>>>>>>>>> Received from transfer money = " + ccTranInfo.getStatus()); }
| Note: | Here you are not calculating the order price that is being passed to the external credit card system. You will calculate it in Aggregating the Purchase Order Fulfillment Results.. |
http://localhost:7001/UseCaseWeb/alint/process/PurchaseOrderFulfillmentJPD.jpd is displayed in the internet browser.fulfillPurchaseOrder XML file, enter the values as follows:You can now verify the debug messages on the server console that are printed when the purchase order is processed. Note that the Transaction ID is the same in inventory and credit card system debug statements, indicating that they are invoked in context of the same transaction. See Figure 4-16.
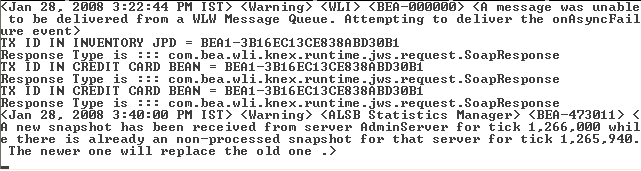
The transaction context is propagated from the PurchaseOrderFulfillmentJPD to the external systems - credit card service and inventory service.
Business processes in WebLogic Integration are transactional in nature. Every step of a process is executed within the context of a transaction. A transaction ensures that one or more operations execute as an atomic unit of work.
The ALSB control provides an option to propagate the transaction context of the JPD to AquaLogic Service Bus, which can be specified using the annotation provided for the transactional purpose.
Similarly, JPD transport supports optional transaction propagation from ALSB to WLI, which depends on the QOS parameters and propagate transaction attribute in the JPD transport configuration.
ALINT supports the propagation of security context. By default, the current authenticated subject (associated with the executing thread) is propagated to ALSB when no principal/credential is specified as part of the SBTransport annotation in the ALSB Control (ServiceProviderAccessControl.java).
| Note: | Switch to the External Systems workspace to secure the external systems. To switch to a new workspace, select File > Switch Workspace.... |
The external systems, credit card system and inventory system, are protected. The InventorySystem and CreditCardSystem JPDs are available in Package Explorer at the following locations:
You can provide permissions to the administrator to execute the InventorySystem and CreditCardSystem JPDs.
| Notes: | In the Source view, @Security(rolesAllowed="IntegrationAdmin") is commented. To protect these JPDs from being accessed, remove the comments (//) from this annotation in the Source views of the JPDs. |
| Note: | After you have removed the comment tag, only users with role = IntegrationAdmin can execute the InventorySystem and CreditCardSystem JPDs. |
The JPDs are protected using the @Security annotation, as shown in Figure 4-17.

After modifying the changes to the JPDs, do the following:
> src > alint > system, right-click on any of the JPDs, for example, InventorySystemJPD, and select Run As > Run on Server:Switch to the UseCase workspace that you were using. To switch to a new workspace, select File > Switch Workspace....
The client is authenticated using the basic auth method when the PurchaseOrderProcessingProxy is invoked. The security context is propagated to the WLI layer (PurchaseOrderFulfillmentJPD) to ALSB (ServiceProviderAccessProxy) to the external systems (inventory and credit card systems).
You can review PurchaseOrderFulfillmentJPD to verify that you do not provide any username and password to access the external services. For information about verifying security context propagation, see Verifying Security Context Propagation.


|