|
|
ALSB proxy services can be configured to validate messages passed between clients and business services. Validation actions can be configured at any stage in the message handling pipeline. However these actions are usually configured in the early stages to eliminate erroneous messages. XQuery conditional expressions can be used to perform explicit validation during message processing.
You can configure message validation logic in the following ways:
This tutorial includes the following topics:
You must complete Tutorial 1. Routing a Loan Application and Tutorial 2. Transforming a Loan Application before beginning this tutorial:
The objective of this tutorial is to provide tasks to configure ALSB resources that implement message validation and error handling, in ALSB Console. This tutorial includes the following:
This tutorial exposes you to the following features of ALSB:
A primary mortgage company routes every loan application through an ALSB proxy service that validates the message. If the application is:
Figure 5-1 summarizes the logical architecture to support this scenario and illustrates how ALSB is positioned in the enterprise system environment to mediate the messaging between the client and the business services.
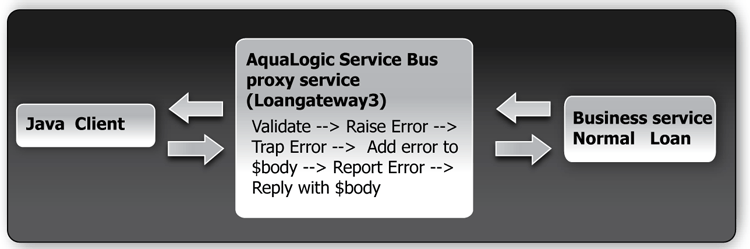
In this scenario, you can configure ALSB to validate an incoming message in the message flow against a schema definition in a WSDL resource. Every field is checked for valid content. All elements must be populated for the application to be valid. When the value of the loan duration field is not an integer, the validate action raises an error. The context variable, $fault, is populated with the error details. The error is trapped by a stage error handler which replaces the body context variable <Notes> field value with the text of the $fault <reason> element. A Report action then saves the error code and the message body, for later viewing and searching in the console. The Reply action returns the body context variable to the client.
In this scenario, the message routing is as follows:
Use the MortgageBroker project folder and the directory structure that you created in the previous tutorial to hold the project artifacts. The resources required for this scenario are described in the following table.
In this tutorial, ALSB is used to route a loan application within a mortgage company to a target web service. The loan application has to be completed correctly for the application to be processed. If there is an error in the application, ALSB raises a validation exception, and returns an error message to the client.
You will create a proxy service, LoanGateway3, and configure it to route a message to the NormalLoan business service. You will configure the behavior of the proxy service by performing the following tasks:
Ensure that ALSB is running in the domain you created for the tutorial and that you have completed the tasks described in Tutorial 1. Routing a Loan Application.
For this tutorial, use the MortgageBroker project folder and the directory structure you created in Tutorial 1. Routing a Loan Application to hold the project artifacts.
The Project Explorer pane is opened in the navigation pane and a project page is displayed in the console.
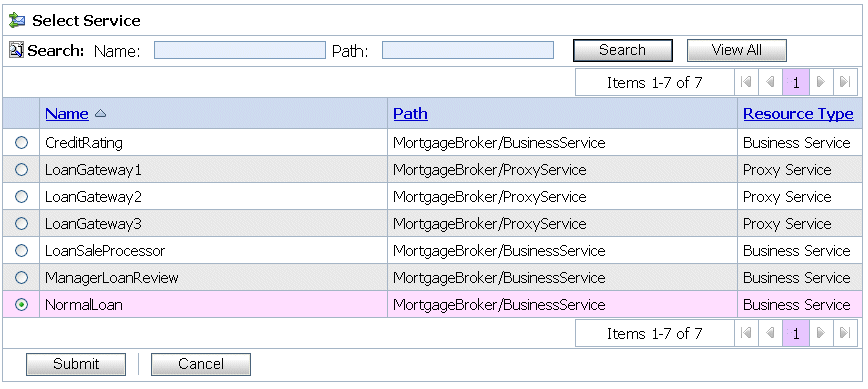
In this section, you will create the proxy service, LoanGateway3. You will use the existing normalLoan WSDL resource to validate the content of the message. If the loan application is valid and meets the expected criteria it is routed to the existing NormalLoan business service. The normalLoan WSDL resource and the NormalLoan business service were created in To Create the normalLoan WSDL Resource section in Tutorial 1. Routing a Loan Application.
In this task, you create a proxy service that is used to route the loan application to the appropriate business service. For creating this proxy service instance, follow the tasks described in To Create the Proxy Service, and use the proxy service name and the endpoint URI specified in Table 5-2.
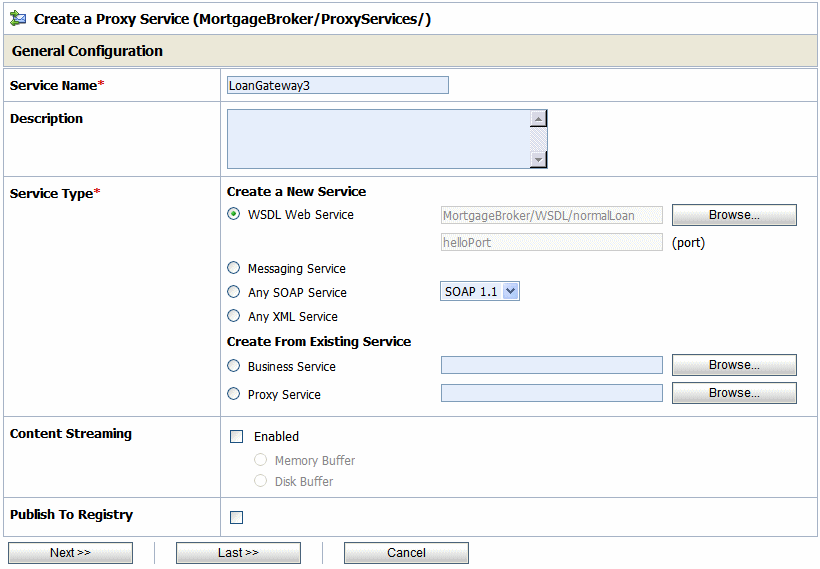
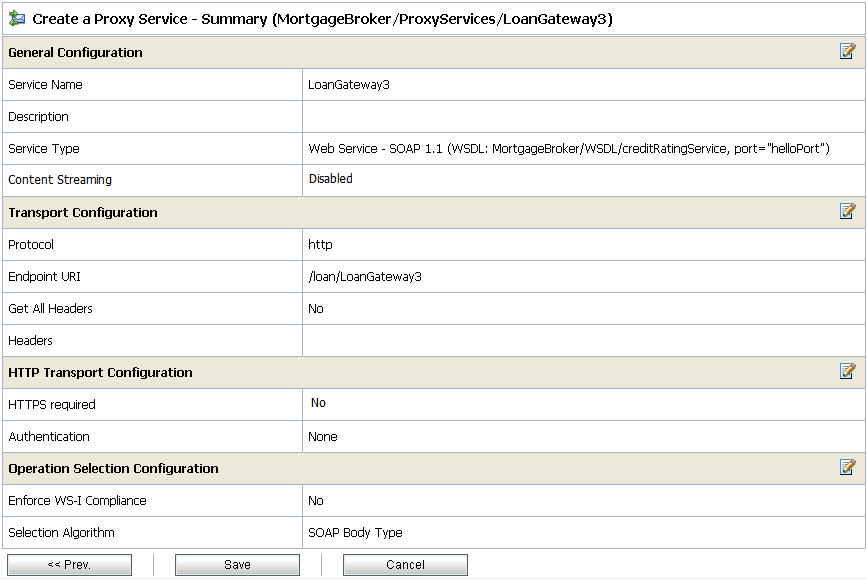
While configuring the proxy service, accept the default settings for the HTTP transport configuration, message level security configuration, and default SOAP Body Type operation selection algorithm. When the Create a Proxy Service - Summary page is displayed, you must review the summary of configuration settings before to registering the proxy service.
When you complete this task, the MortgageBroker/ProxyService folder must contain the following proxy services you created in this tutorial and the previous tutorials:
The proxy service is implemented in ALSB as a message flow. ALSB message flows define the implementation of proxy services using request and response pipelines. Message flows can include zero or more of the following pipeline pairs:
Each pipeline can include one or more stages, which in turn include actions.
To configure the behavior of the LoanGateway3 proxy service, you must complete the following tasks:
The Project Explorer pane is opened in the navigation pane.
| Note: | You must be in a session to edit resources. If you have not already done so, begin a session (click Create in the Change Center) so that you can configure the proxy service and edit the message flow. |
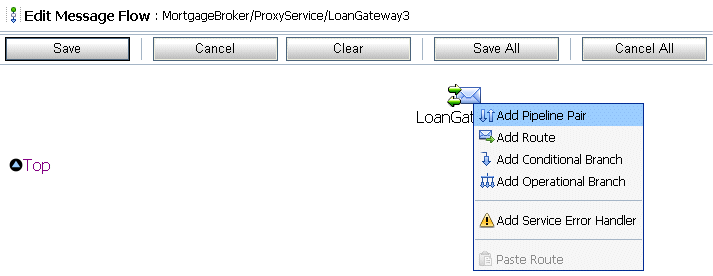
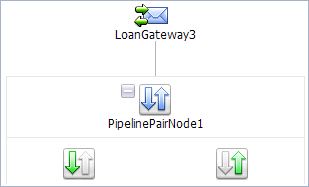
The Edit Message Flow page for the proxy service LoanGateway3 is displayed.
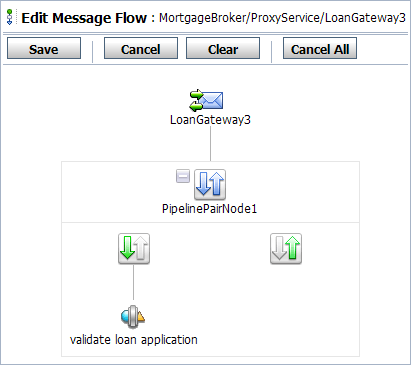
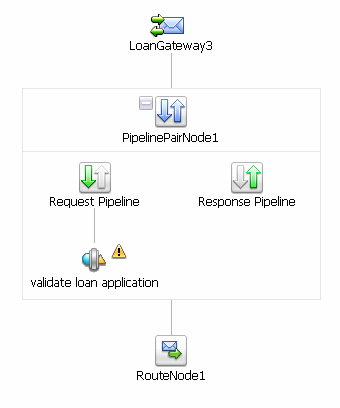
The PipelinePairNode1 is created and placed in the message flow. Request and response pipelines are displayed for this node as shown in Figure 5-5.
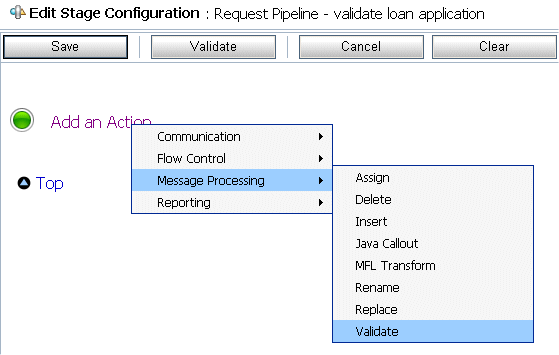
You must now configure the Request actions for the proxy service.
The page is displayed as shown in Figure 5-6.
 Validate from the drop-down list. The Validate action is added to the stage.
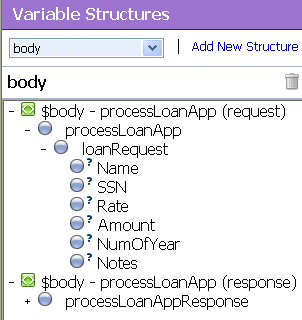
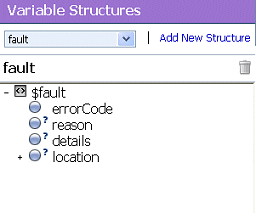
A structural representation of the body element is displayed in the Variables Structure pane.
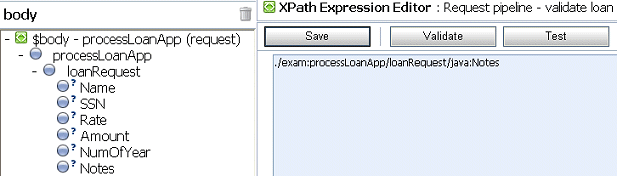
The processLoanApp element is within the $body - processLoanApp (request) element.
A graphical representation of the structure of the loan application document is displayed.
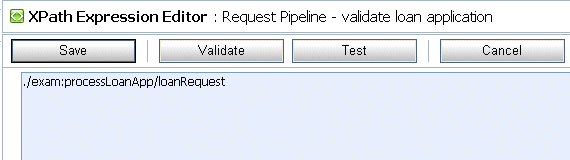
./exam:processLoanApp/loanRequest
| Note: | The drag-and-drop functionality works only in Internet Explorer (IE) browsers. If you are using a browser other than IE, select the loanRequest element in the Variable Structures pane. The expression is displayed in the Property Inspector palette. Place the cursor in the XQuery expression text box and click Copy Property. The expression is copied to the text box. You can also copy the expression in the palette and paste it in the XQuery Expression text box. |
It is good practice to do this before you submit the expression. The expression is validated for syntax. If there are errors in the expression, they are displayed directly above the Validate button. In this case, the expression is valid.
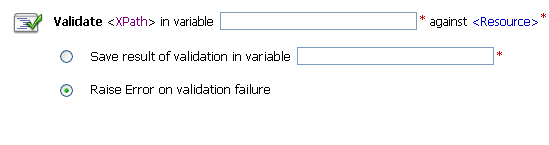
The Edit Stage Configuration page displays <XPath> which is replaced by the XQuery expression.
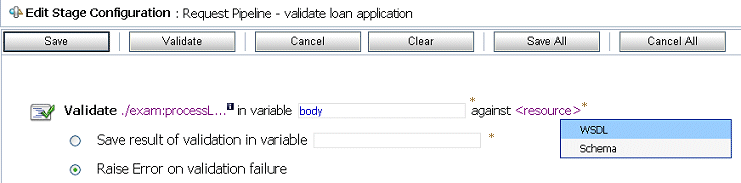
body.You must validate the message against the resource since the proxy service is based on the WSDL resource that you originally created.
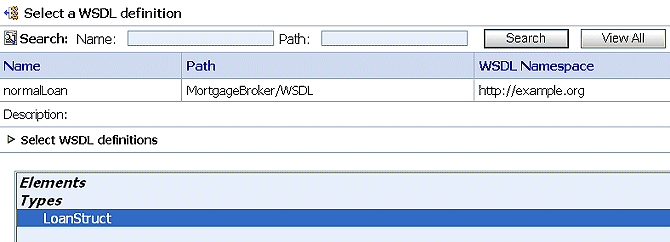
The Select WSDL Definitions pane is populated with the content categories of the WSDL.
| Note: | Message validation must be done as early as possible in a message flow. This prevents unnecessary processing of invalid message content. By raising an exception, further message processing is stopped and an error response is immediately returned to the client. |
| Note: | Messages can be validated at the route node or using a separate Validate action (as in this case). When you create a Validation stage, message processing is more modular since the configured validate actions logically break down the message flow. If multiple validations are performed on a message, the validate action is logically expanded. |
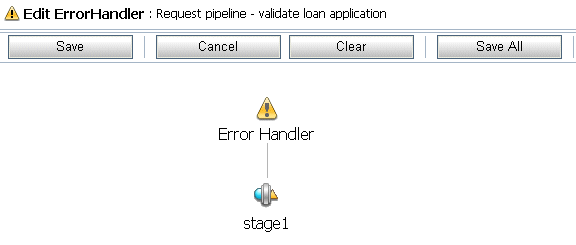
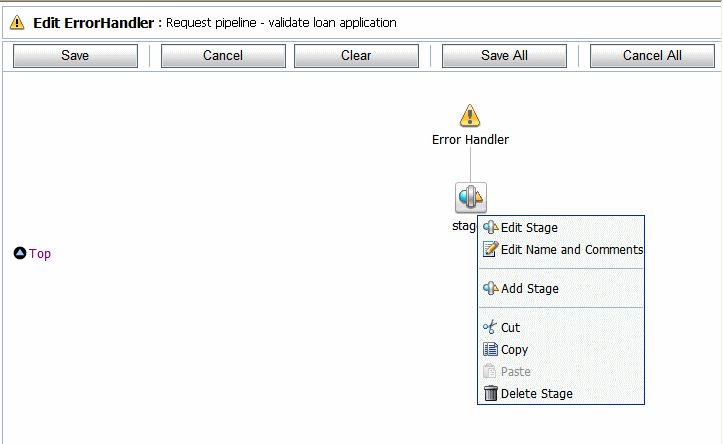
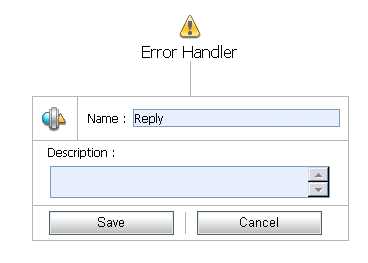
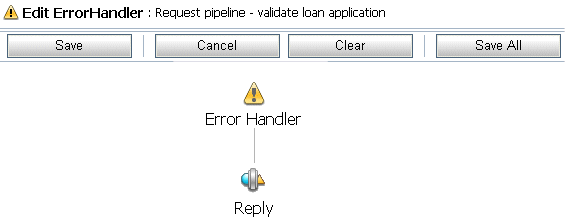
You must perform the following tasks to configure the Stage Error Handler:
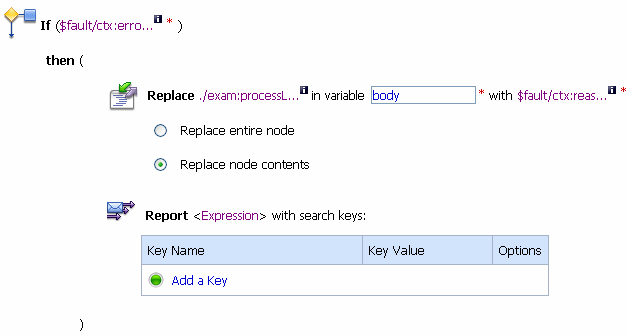
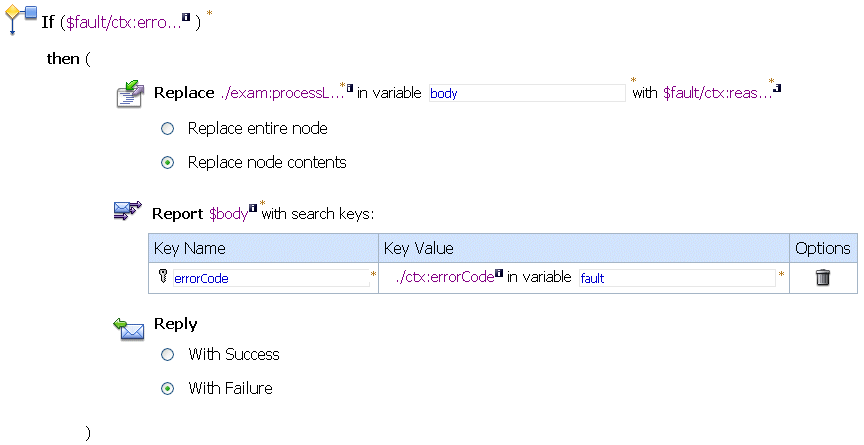
Reply, then click Save.The Edit Stage Configuration page is displayed as shown in Figure 5-17.
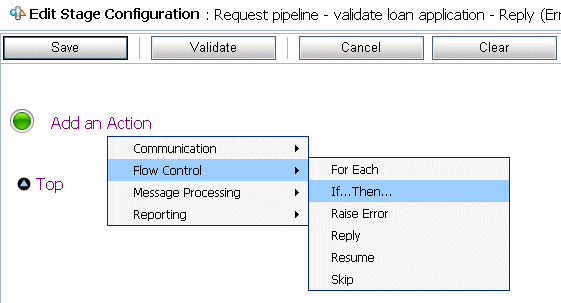
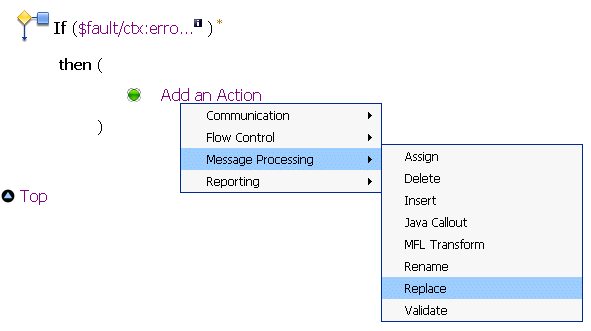
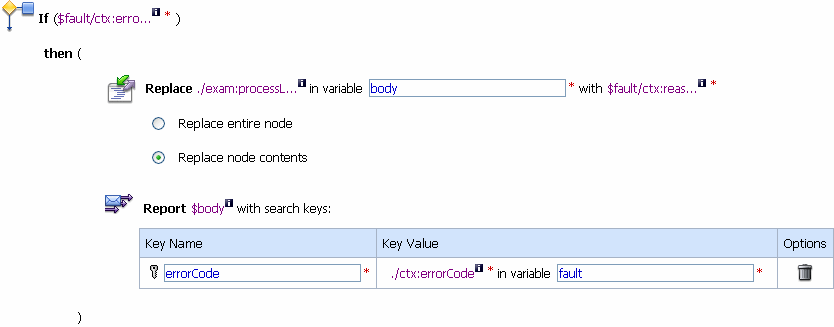
If...Then…The If...Then action is added to the Reply stage.
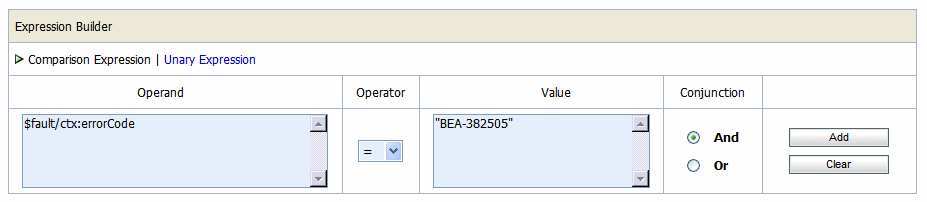
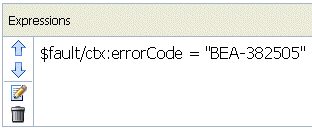
$fault/ctx:errorCode in the Operand textbox.The Expression Builder pane is displayed as in Figure 5-20:
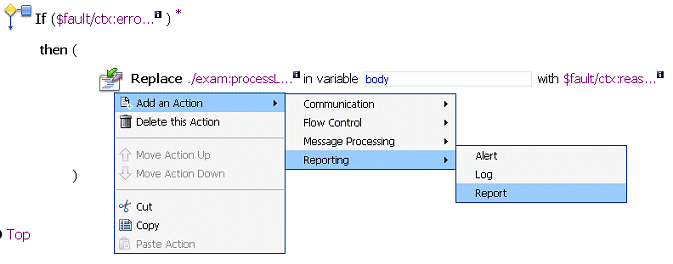
| Note: | When adding multiple actions on a page, click the action preceding the placement of the new action and select the action to be added from there. actions are added in sequence. |
Replace. The replace statement will be displayed as shown in Figure 5-23.
A structural representation of the body element is displayed in the Variable Structures pane.
The processLoanApp element is within the $body - processLoanApp (request) element.
./exam:processLoanApp/loanRequest/java:Notes
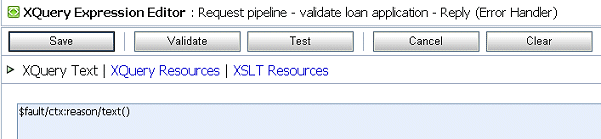
body.$fault/ctx:reason/text()The Replace action is displayed as shown in Figure 5-26.
Next, you must add a Report action and configure it to report the body context variable as detailed context, and set a key name of errorCode and the key value to the actual error code found in the fault context variable.
ReportingReport. The report action is added to the page.The Stage Error Handler is displayed as shown in Figure 5-28.
body - processLoanApp from the Select Structure drop-down list.
The $body XQuery expression is typed in the text box.
| Note: | The drag-and-drop functionality works only in Internet Explorer (IE) browsers. If you are using a browser other than IE, select the body element in the Variable Structures pane. The expression is displayed in the Property Inspector palette. Place the cursor in the XQuery expression text box and click Copy Property. The expression is copied to the text box. You can also copy the expression in the palette and paste it in the XQuery Expression text box. |
Type ./ctx:errorCode expression in the text box.
| Note: | The drag-and-drop functionality works only in Internet Explorer (IE) browsers. If you are using a browser other than IE, select the errorCode element in the Variable Structures pane. The expression is displayed in the Property Inspector palette. Place the cursor in the XPath expression text box and click Copy Property. The expression is copied to the text box. You can also copy the expression in the palette and paste it into the XPath Expression text box. |
This step enables you to index the reporting data by error code. The keys are a convenient way to identify a message. You can use the error code to search for reporting entries in the reporting module.
The Report action must be displayed as shown in Figure 5-32.

The Edit Stage Configuration page is displayed as shown in Figure 5-33.
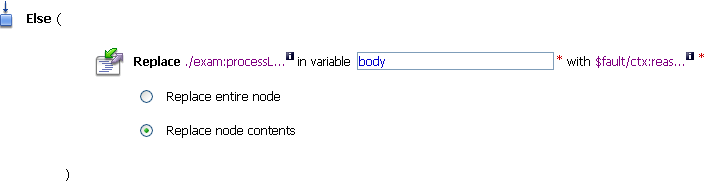
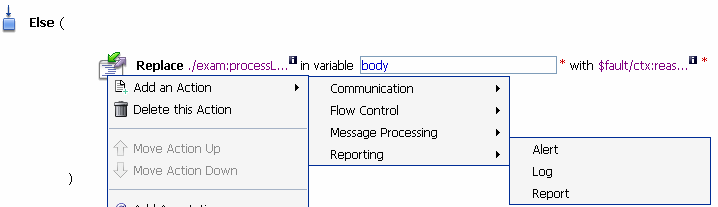
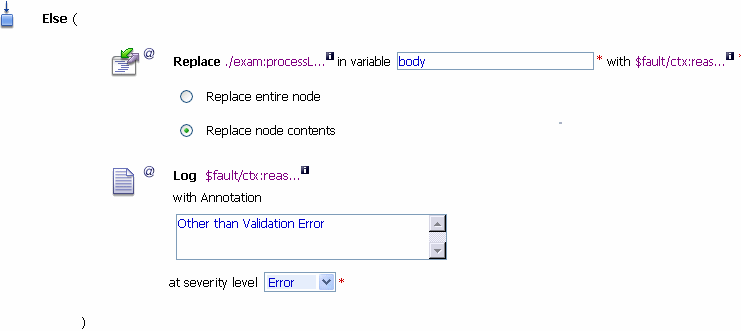
Replace.The Edit Stage Configuration page is displayed as shown in Figure 5-34.
Log.The reply error handler Else action is displayed as shown in Figure 5-35. Add the Log action
$fault/ctx:reason/text() in the XQuery Text page. Other than validation error, in the With Annotation text box.The completed Else condition must be displayed as shown in Figure 5-37.
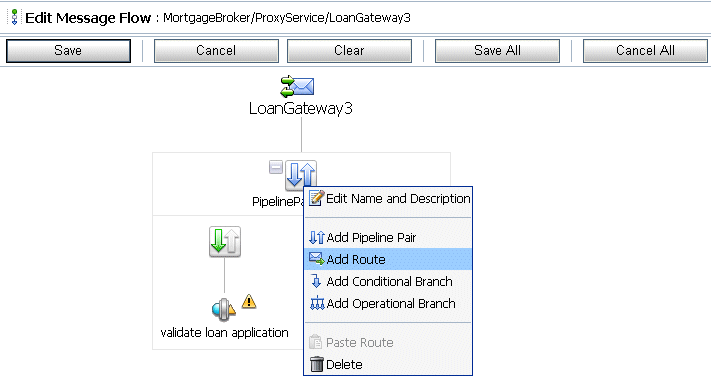
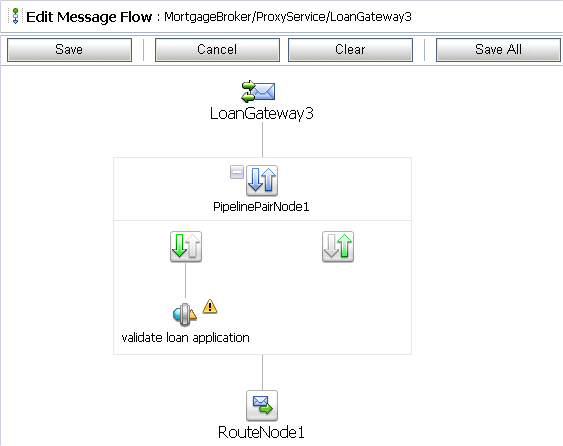
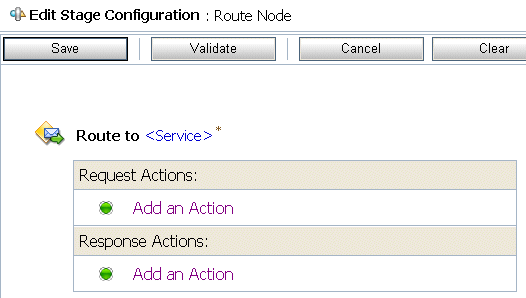
Flow ControlReply. The reply action is added to the page.You must now add a Route Node to the Pipeline pair and configure it to enable default routing to the NormalLoan business service.
The Edit Message Flow page is displayed as shown in Figure 5-40.
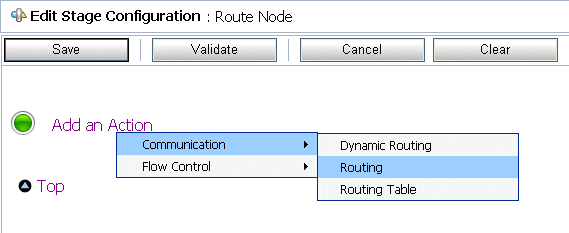
Routing. The Route to action is displayed in the Edit Stage Configuration page as shown Figure 5-42.
This is the operation on the NormalLoan business service that is invoked at run time. You have now defined the case for routing the loan application to the NormalLoan business service. The Edit Message Flow page is displayed as shown in Figure 5-44.
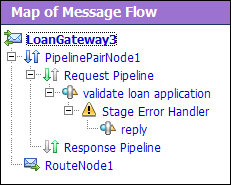
You can view the map of the message flow of the proxy service as shown in Figure 5-45.
Now that you have configured ALSB to work with the client and the target business services, you must test the configuration. To test the routing configuration, you must change the value of the Loan duration (in years) field in the build.xml file. Then you must test the routing logic by verifying whether the proxy service behavior changes for different loan values. If the loan value entered is a non integer, an exception must be triggered and an error message displayed in the Notes field of the message. If the loan value entered is an integer, the message must be routed to the NormalLoan business service. The message returned in the command window indicates whether a validation exception occurred or the message was routed to the appropriate business service.
To test the loan application using the test console, you must first deploy the client jars in the WLS console. For more information see, Load the Client Application.
<loanRequest xmlns:java="java:normal.client">
<!--Optional:-->
<java:Name>Smith</java:Name>
<!--Optional:-->
<java:SSN>1234567</java:SSN>
<!--Optional:-->
<java:Rate>5</java:Rate>
<!--Optional:-->
<java:Amount>900000000</java:Amount>
<!--Optional:-->
<java:NumOfYear>10.1</java:NumOfYear>
<!--Optional:-->
<java:Notes>Large Loan Processing</java:Notes>
</loanRequest>
Accept other default settings and click Execute. The response as in Figure 5-46.
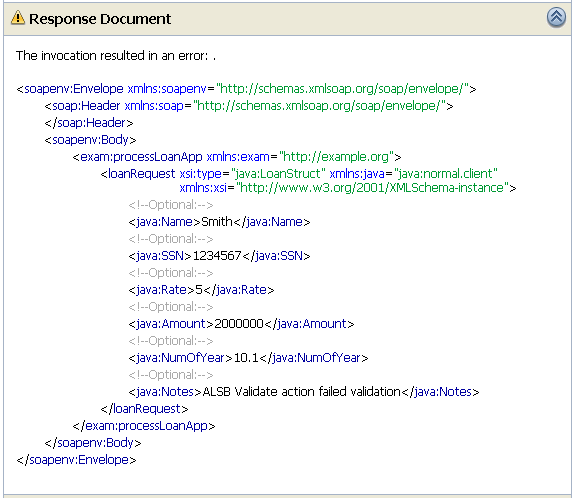
This response message indicates that a validation exception occurred because the loan duration specified was not an integer.
<loanRequest xmlns:java="java:normal.client">
<!--Optional:-->
<java:Name>Smith</java:Name>
<!--Optional:-->
<java:SSN>1234567</java:SSN>
<!--Optional:-->
<java:Rate>4</java:Rate>
<!--Optional:-->
<java:Amount>300000000</java:Amount>
<!--Optional:-->
<java:NumOfYear>10</java:NumOfYear>
<!--Optional:-->
<java:Notes>Normal Loan</java:Notes>
</loanRequest>
Accept other default settings and click Execute. The response as in
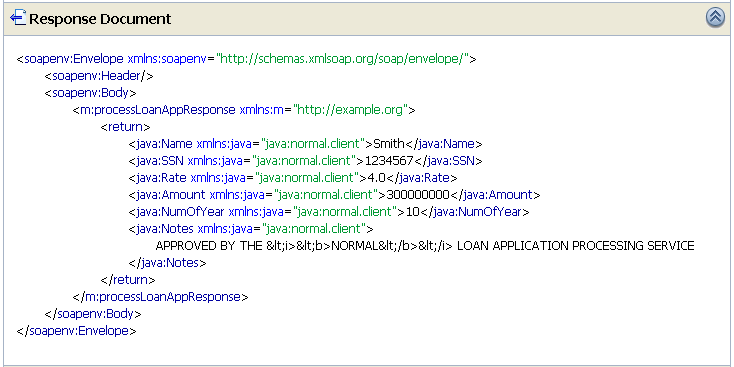
The response message indicates that the NormalLoan business service processed the loan application because the loan duration value was an integer.
Now that you have tested the proxy service, you can explore the reporting and monitoring features of the ALSB Console.
| Note: | You must have run the tests in To Test the Loan Application Routing Configuration Using Test Console multiple times (at least five times) to generate data to enable you to explore the reporting and monitoring features. |
ALSB includes a JMS Reporting Provider for message reporting. The Reporting module in the ALSB Console displays the information captured from this reporting provider. You can create your own reporting provider using the Reporting Service Provider Interface (SPI) if you do not wish to use the out-of-the-box reporting provider.
The dashboard of ALSB Console contains reporting features that are presented in a drill-down format. When you explore the links presented, the information is made available to you.
ALSB can monitor and collect run-time information for both systems operations and business auditing purposes. ALSB aggregates run-time statistics that you can view on a customizable Dashboard. The Dashboard allows you to monitor the health of the system and alerts you to problems in your messaging services. With this information, you can quickly and easily isolate and diagnose problems as they occur.


|