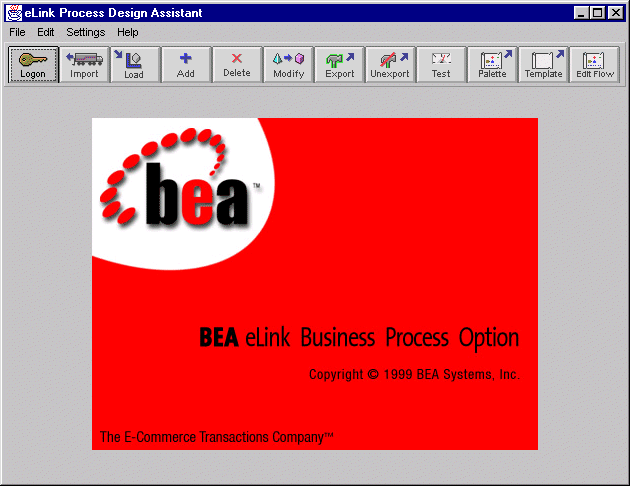
The BEA eLink Business Process Option opening window appears.
Figure B-1 Process Design Assistant Opening Window
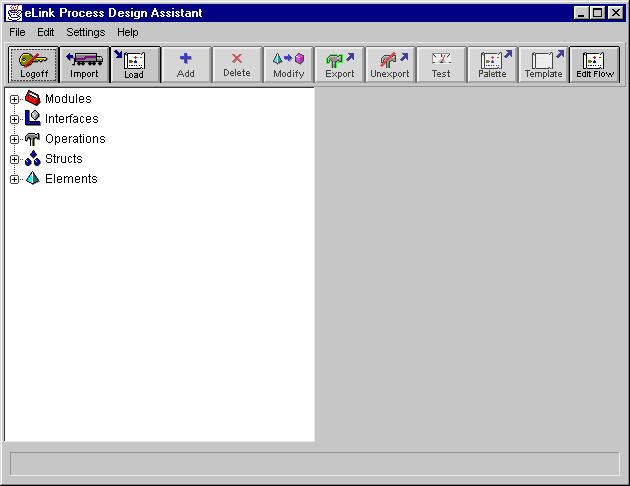
The Process Design Assistant Business Interface Window appears.
Figure B-2 Business Interface Window


The following is an example of how a process flow is created. It follows from the example presented in Chapter 1, "eLink Overview," and is carried through the remainder of this user's guide. This example is simplified to allow the use of MATHSERV, a simple math application that is provided with the eLink Business Process Option software. A working process flow can be created according to these instructions using only the installed software.
In this series of steps, you log on to the Process Design Assistant.
Creating a Simplified Funds Transfer Process Flow: a Tutorial
Logging On
The BEA eLink Business Process Option opening window appears.
Figure B-1 Process Design Assistant Opening Window

The Process Design Assistant Business Interface Window appears.
Figure B-2 Business Interface Window

In this series of steps, you set up the interface to the applications connected to eLink. The interface consists of a number of contracts. Contracts are agreements on inputs and expected outputs to and from eLink and the applications connected to eLink. They are also referred to as operations. You also add an operation that will become the template for your process flow.
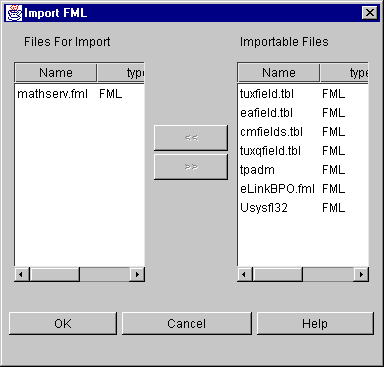
If mathserv.fml does not appear on the list of Importable Files in the Import FML window, see the README file for configuration and installation of the MATHSERV application. This README file can be found on your server in $TUXDIR/apps/mathapp.
The imported FML fields will appear as elements in the repository tree after refreshing the screen. These elements are now available for use in creating operations and interfaces. Operations & interfaces can be created interactively. However in this tutorial, we will load the interface used by this tutorial.
Figure B-3 Import FML Window
The Interface Load Results dialog box appears and lists the actions taken to load the SIMPLOPS Interface.
Note:
Because loading an interface may reset certain operational parameters, it should only be done once for a particular interface.
As an alternative, you could interactively create an interface with the SUBTRACT_INTEGER and ADD_INTEGER operations in it. For instructions in interactively creating an interface, see the Usage section of Chapter 3, "Specifying Business Service Contracts."
The SIMPLOPS interface will appear in the Contract Repository tree after refreshing it (File...Refresh).
The interface and operation that you're creating, exporting, and testing will become the palette and template for your process flow. The process flow directs and drives your entire eLink system.
In this series of steps, you will generate the palette and template that will be used to form your process flow. You must use only the generated palette and template to form your process flow because only they have the necessary components to form a proper eLink process flow.
The Palette Generation Results window appears displaying a list of generation actions.
The Template Generation Results window appears displaying a list of generation actions.
The Business Process Window is the part of the eLink Business Process Option where you form your process flow. Be sure to use these instructions to move to the Business Process Window. Using these instructions ensures the correct configuration of your Business Process Window.
A login dialog appears.
The Business Process Window allows you to form process flows from generated palettes and templates.
Note: The only process flows that will work in eLink are those that are formed from generated palettes and templates.
The first step in forming your process flows is to copy the tasks, which will be the elements of your process flow, from your palettes to your templates.
The Process Query dialog appears.
A list of available palettes appears.
Palette: SIMPLOPS appears in a Design Pad window.
The Process Query dialog appears.
Available templates display in the right window.
The SimpleTeller template window appears in a Design Pad window. The task pane of the template should be empty the first time you use it.
This places the SubtractInteger object on the SimpleTeller Template's design pad. As an alternative to Steps 23 and 24, you can drag the SubtractInteger icon from the palette's design pad to the template's design pad. For instructions, see Copying tasks between Design Pad windows in Chapter 4, "Designing Business Processes."
This places two AddInteger tasks on the SimpleTeller template.
Tasks are generated from operations. Operations become tasks during palette generation when they are given default parameter assignments. In the following steps, the tasks are improved by the addition of perform conditions, dependencies, and the modification of parameter assignments.
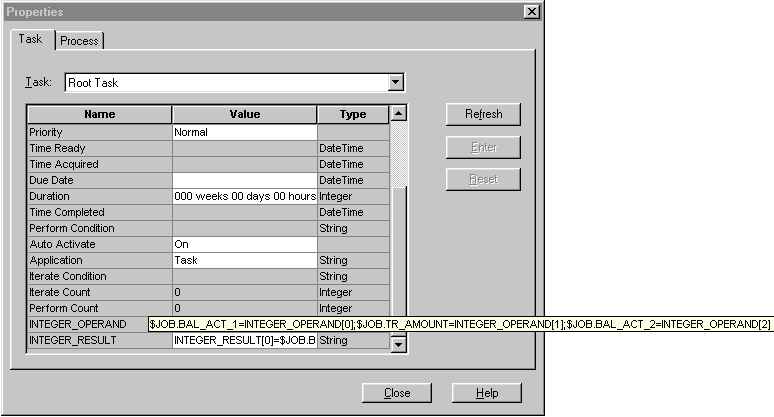
$JOB.BAL_ACT_1=INTEGER_OPERAND[0];
$JOB.TR_AMOUNT=INTEGER_OPERAND[1];
$JOB.BAL_ACT_2=INTEGER_OPERAND[2]
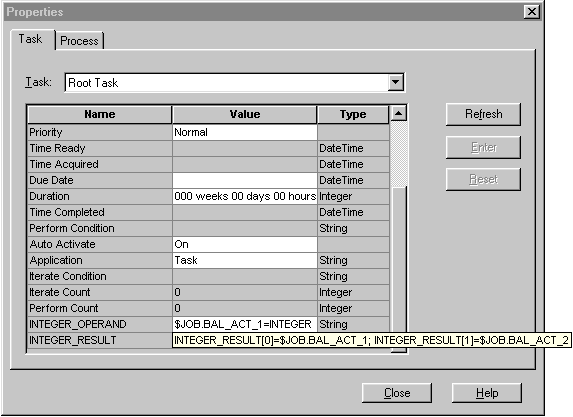
Figure B-4 Modifying Root Level INTEGER_OPERAND
INTEGER_RESULT[0]=$JOB.BAL_ACT_1;
INTEGER_RESULT[1]=$JOB.BAL_ACT_2
Figure B-5 Modifying Root Level INTEGER_RESULT
INTEGER_OPERAND[0]=$JOB.BAL_ACT_1;
INTEGER_OPERAND[1]=$JOB.TR_AMOUNT
$JOB.BAL_ACT_1=INTEGER_RESULT[0]
INTEGER_OPERAND[0]=$JOB.BAL_ACT_2;
INTEGER_OPERAND[1]=$JOB.TR_AMOUNT
$JOB.BAL_ACT_2=INTEGER_RESULT[0]
INTEGER_OPERAND[0]=$JOB.BAL_ACT_1;
INTEGER_OPERAND[1]=$JOB.TR_AMOUNT
$JOB.BAL_ACT_1=INTEGER_RESULT[0]
$JOB.BAL_ACT_1>=0
This series of steps adds your new process to your eLink Business Process Option configuration, so it can be run by the process runner or starter processes. To do this you must edit your eLink_BPO.cfg by adding the process name, which is also called a service name, to a SERVICE_LIST setting.
/work1/ic/appdir
tmshutdown -s <server name>
Your process flow is tested in the same manner as testing any operation in the Business Interface Window. However, the connected applications, the eLink Platform, the Data Integration Option, and the Business Process Option can all come into play when testing a process flow.
This section is provided to explain the mechanics of the funds transfer tutorial from the previous section in more detail as the more high-level conceptual information is presented here.
Figure B-6 shows inputs and outputs to and from the SimpleTeller process flow. This process flow implements a simple funds transfer. It is considered a simplified transfer because only whole dollar amounts may be transferred (parameters are of integer type) and because addition and subtraction tasks are used in place of actual deposit and withdrawal business services.
Figure B-6 SimpleTeller Process Flow Inputs & Outputs

We begin by looking at the top level of the process definition. This level of the process is also known as the Root Task. The process must "know" the input and output information presented in Figure B-6 to execute the process correctly. The input information coming into the process from the caller (INTEGER_OPERAND[*]) must be assigned to job-level attributes, and the output job-level attributes must be assigned to the output going out of the process as a reply to the caller. To do this (for the purposes of the funds transfer example), the following must be assigned as the value of the root-level INTEGER_OPERAND attribute:
$JOB.BAL_ACT_1=INTEGER_OPERAND[0];
$JOB.TR_AMOUNT=INTEGER_OPERAND[1];
$JOB.BAL_ACT_2=INTEGER_OPERAND[2]
and, the following must be assigned as the value of the root-level INTEGER_RESULT attribute:
INTEGER_RESULT[0]=$JOB.BAL_ACT_1;
INTEGER_RESULT[1]=$JOB.BAL_ACT_2
Assigning these values to the root-level parameter attributes defines the inputs and outputs to and from the process at the process (root) level.
The job-level attribute names BAL_ACT_1, TR_AMOUNT, and BAL_ACT_2 were arbitrarily created and assigned and each of them can be any string of alpha-numeric (UPPERCASE) characters. It is suggested that they describe the function they are to perform. For example, BAL_ACT_1 is short for Balance of Account 1.
Figure B-7 shows the Root Task properties screen with parameter assignments made as specified above.
Figure B-7 INTEGER_RESULT Root-Level Parameter Assignments

Figure B-8 shows inputs and outputs to and from the SubtractInteger task. This task subtacts one integer from another. It is used to simulate a withdrawal of funds from a bank account.
Figure B-8 SubtractInteger Task Inputs & Outputs

SubtractInteger is a sub-task of the root task, so the job-level attributes created in the Root Task can be used. These are the expressions that should be entered as the value for the SubtractInteger INTEGER_OPERAND attribute:
INTEGER_OPERAND[0]=$JOB.BAL_ACT_1;
INTEGER_OPERAND[1]=$JOB.TR_AMOUNT
and the expression entered as the value for the SubtractInteger INTEGER_RESULT attribute is:
$JOB.BAL_ACT_1=INTEGER_RESULT[0]
The actual operation performed at the application level is:
INTEGER_RESULT[0]=INTEGER_OPERAND[0]-INTEGER_OPERAND[1]
If you use substitution, the equivalent expression is:
$JOB.BAL_ACT_1=$JOB.BAL_ACT_1-$JOB.TR_AMOUNT
So, looking at this equation, you can see that a new balance is obtained for Account 1 by subtracting the transfer amount from Account 1's starting balance. This is the action that occurs in the withdrawal portion of a funds transfer. Notice that the same job-level attribute is used for the starting and ending account balance.
Figure B-9 shows inputs and outputs to and from the AddInteger task. This task adds one integer to another. It is used to simulate a deposit of funds to a bank account.
Figure B-9 AddInteger Task Inputs & Outputs

AddInteger is a sub-task of the root task, so the job-level attributes created in the Root Task can be used. These are the expressions that should be entered as the value for the AddInteger INTEGER_OPERAND attribute:
INTEGER_OPERAND[0]=$JOB.BAL_ACT_2;
INTEGER_OPERAND[1]=$JOB.TR_AMOUNT
and the expression entered as the value for the SubtractInteger INTEGER_RESULT attribute is:
$JOB.BAL_ACT_2=INTEGER_RESULT[0]
The actual operation performed at the application level is:
INTEGER_RESULT[0]=INTEGER_OPERAND[0]+INTEGER_OPERAND[1]
If you use substitution, the equivalent expression is:
$JOB.BAL_ACT_2=$JOB.BAL_ACT_2+$JOB.TR_AMOUNT
So, looking at this equation, you can see that a new balance is obtained for Account 2 by adding the transfer amount to Account 2's starting balance. This is the action that occurs in the deposit portion of a funds transfer. Notice that the same job-level attribute is used for the starting and ending account balance.
Table B-1 lists all of the MATHAPP services and provides a desription of the required inputs and outputs. These services can be included in operations, then in interfaces in the Business Interface Window. However, you must import mathserv.fml before doing so.