


|
|
The Telemetry Console Extension provides a set of visual tools you can use to directly manipulate objects to display telemetry information about configured Edge Server instances and RFID devices. The following sections provide a high level overview of its features and functionality:
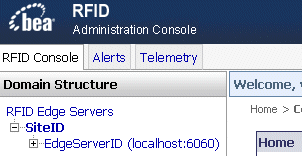
When you launch the Edge Server Administration Console, the Console appears with three tabs, RFID Console, Alerts, and Telemetry, as shown in Figure 2-1.
By default, the RFID Console is initially selected on login, which shows the standard Edge Server Administration Console. Select Telemetry to display the Console extension.
These tabs are always present, so you can easily move back and forth between the primary Edge Server Administration Console pages and the Telemetry Console Extension.
| Note: | All Telemetry Console Extension functionality occurs in the context of a Java applet. Each time you select the Telemetry tab, the applet is loaded. |
| Note: | When you select the RFID Console tab, the applet is unloaded, and you are returned to the Edge Server Administration Console context that existed before you displayed the Telemetry Console Extension. All activity related to the applet and the Telemetry Console Extension is terminated; for example, data collection stops. |
You can display telemetry data (metrics) about any running Edge Server instances and RFID devices that are configured in the Edge Server Administration Console.
You can display metrics from different Edge Servers or readers in telemetry charts; typically, charts should contain similar metrics. Thus, a single chart can provide a comprehensive view of the performance and behavior of various Edge Servers or RFID devices. For example, you can create a chart for tagsInField for all the antennas configured for a reader. If one antenna is reading fewer tags, it could be due to bad positioning or perhaps, because the antenna is not functioning properly.
For more information, see Available Edge Server and Reader Telemetry Metrics.
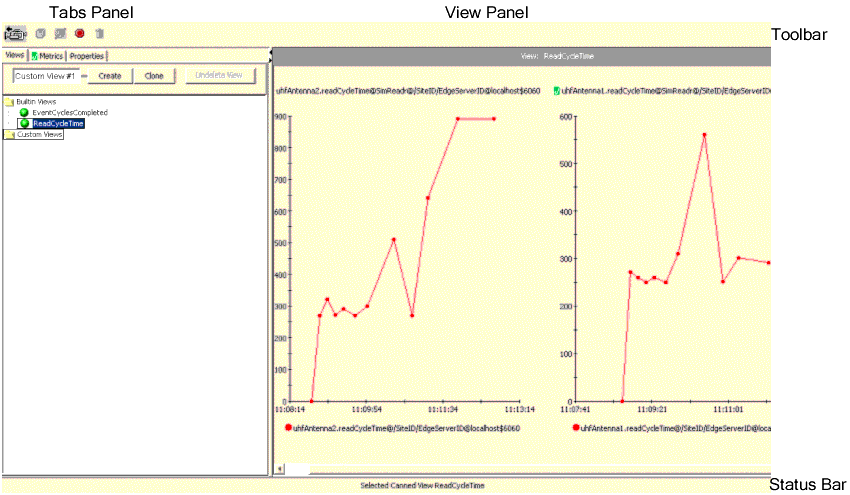
The Telemetry Console Extension has two panels, the Tabs panel and the View panel, plus a toolbar and a status bar, as shown in Figure 2-2.
A view is a collection of one or more charts which display real-time telemetry data, as shown in Figure 2-3 and Figure 2-4. Views are displayed in the View panel, on the right side of the Telemetry Console Extension page. The View panel displays a single view at a time.
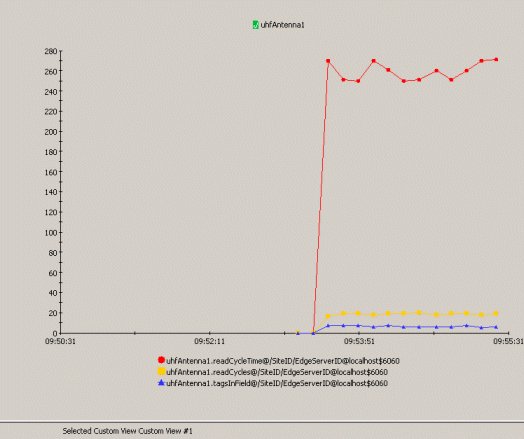
Each chart contains a legend, labels, and controls for identifying and displaying the data. A chart can display data from one or more data sources. The data sources include one or more metrics from one or more Edge Servers and readers.
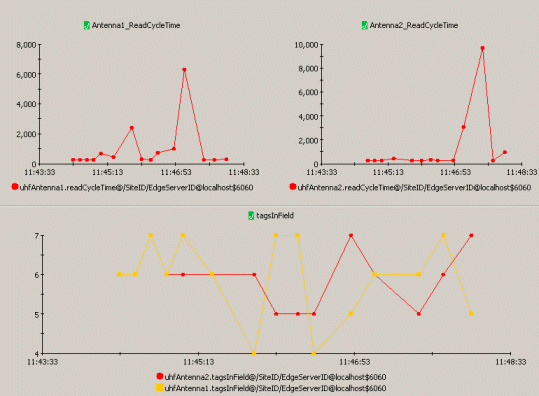
Each data source is displayed as a distinct graph, which shows the values of data points over a time span. The relationship between views, charts, and graphs is shown in Figure 2-5.
In the figure, the view contains two charts, "Antenna1" and "ReadCycleTime," based on metrics data from an RFID Edge Server (SiteID/EdgeServerID@localhost:6060). The "Antenna1" chart contains three metrics graphs, "tagsInField," "readCycles," and "readCycleTime." The "ReadCycleTime" chart contains one metrics graph, "readCycleTime."
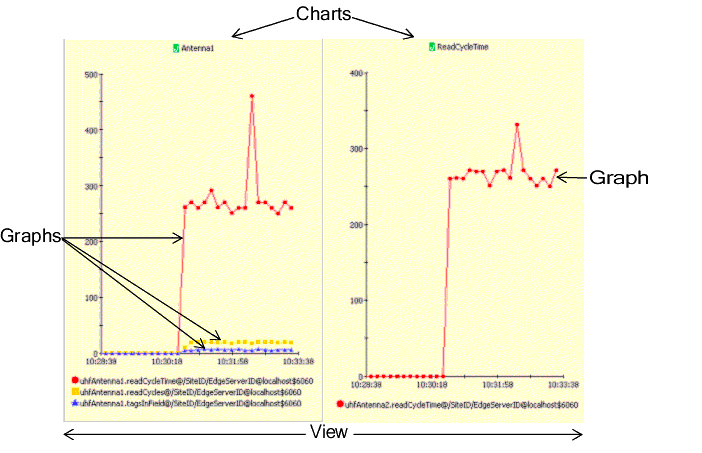
| Note: | A chart can include graphs based on data from one or more Edge Servers. |
The Tabs panel, on the left side of the page, contains tabs with controls for creating and modifying the views and charts that are displayed in the View panel, on the right.
The Tabs panel contains three tabs:
The toolbar and status bar are available at all times, regardless of which tab is displayed in the Tabs panel.
The toolbar is displayed directly above the Tabs and View panels. The buttons and icon in the toolbar are described in Table 2-1.
The status bar at the bottom of the page displays information about the selected item.
The following terms are used to describe on-screen elements.
You can display short messages, called tooltips, about several types of objects in the Telemetry Console Extension, by positioning the mouse pointer over the objects. To display a tooltip for an item, move the mouse pointer to point to the object, and pause. Do not click the mouse. After a momentary delay, a short message about the item is displayed.
In all areas of the Telemetry Console Extension, you can display tooltips for standard controls such as buttons, text fields, scrollbars, and such, which tell you what each control does. But you can also display details about the objects you use to display information, as described in Working with Charts and Graphs.
To create a view and add charts and graphs:
The Telemetry Console Extension is a graphical user interface with visual tools for manipulating objects to display telemetry data. Alternative interaction techniques are available for accomplishing many activities:


|


