|
|
| e-docs > Tuxedo > CORBA ActiveX Online Help > Tasks |
|
CORBA ActiveX Online Help
|
Tasks
This Help topic includes the following sections:
Loading CORBA Interfaces into the Interface Repository
Before you can create an ActiveX view of a CORBA object, you need to load the interfaces of the CORBA object into the Interface Repository. If the interfaces of a CORBA object are not loaded in the Interface Repository, they are not displayed in the Services window. If a desired CORBA interface is not displayed in the Services window, use the idl2ir command to load the Object Management Group (OMG) Interface Definition Language (IDL) for the CORBA interface into the Interface Repository. The syntax for the idl2ir command is as follows:
idl2ir -f repository-name file.idl
The following table describes the options for the idl2ir command.
For a complete description of the idl2ir command, see the CORBA Programming Reference in the BEA Tuxedo online documentation.
Starting Application Builder
To start the Application Builder:
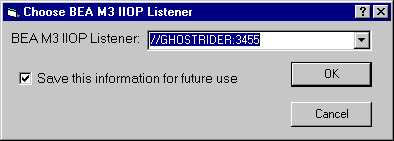
Figure 4-1 Connecting to the IIOP Listener
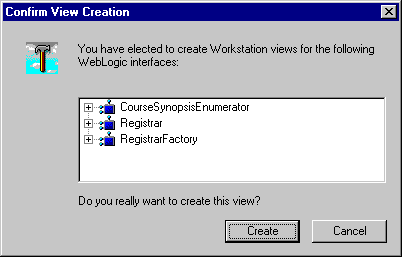
Creating ActiveX Bindings for CORBA Interfaces
To create an ActiveX binding for a CORBA interface:
You can now use the ActiveX view of a CORBA object from an ActiveX client application.
Changing the Settings for Creating ActiveX Bindings for CORBA Interfaces
Use the Workstation Bindings tab page on the Options window to change the settings used to create ActiveX bindings for the interfaces of CORBA objects. To get to the Workstation Bindings tab page, click Tools->Options.
Table 4-1 describes the options on the Workstation Bindings tab page.
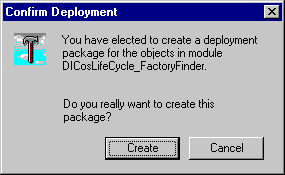
Creating Deployment Packages
To distribute client applications to other client computers, you need to create a deployment package. A deployment package contains all the data the client application needs to have to use ActiveX views of CORBA objects, including the bindings, type libraries, and registration information. The deployment package is a self-registering ActiveX control with the file extension .ocx.
To create a deployment package for an ActiveX view of a CORBA object:
Changing the Directory Location for Deployment Packages
Use the Deployment Packages tab page on the Options window to change the directory location for deployment packages for ActiveX views of CORBA objects. To access the Deployment Packages tab page, click Tools->Options. The current directory location for the deployment packages is displayed. The default location is \tuxdir\Packages.
Changing the Default Directory Locations
The Application Builder provides default directory locations for C++ header files, MIDL and ODL files, and type libraries. You can change those directory locations.
To change the directory locations:
Filtering Objects Displayed in the Main Window
Use the Display tab page on the Options window to filter the types of objects displayed in the Application Builder main window. By default, CORBA interfaces and modules are displayed.
You have the option of also displaying the following types of information: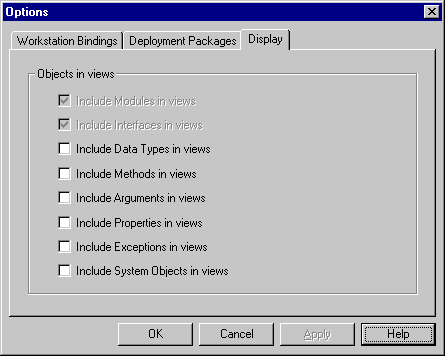
Use the Include System Objects option to enable the display of a specific set of definitions in the Interface Repository, for example, CosTransactions.
To display additional information in the Application Builder main window, click the desired options and click OK.
Displaying Properties
Use the Properties window to display one or more pages listing the properties of the selected adapter, module, or interface. The content of the Properties window is object specific.
Table 4-2 describes the possible properties.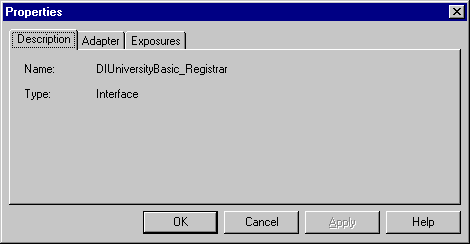

|

|

|