WebLogic Enterprise T-Engine Installation on Windows Systems
This chapter explains how to install the WebLogic Enterprise 5.1 T-Engine software on Microsoft Windows 2000, NT 4.0, 98, and 95 systems.
This topic includes the following sections:
Platforms Supported
The Microsoft Windows platforms listed in Table 2-1 are supported.
|
Operating System
|
Release/Version
|
|
Microsoft Windows 2000
|
|
|
Microsoft Windows NT
|
4.0 Service Pack 5 (SP5) on Intel
|
|
Microsoft Windows 98
|
|
|
Microsoft Windows 95
|
Service Pack 1
|
You can install all or selected WebLogic Enterprise server, client, and administration components on a Microsoft Windows 2000 or NT 4.0 SP5 (Intel) operating system. You can install only the WebLogic Enterprise client components on the Microsoft Windows 98 and 98 operating systems. Windows 98 and 95 systems cannot be used as WebLogic Enterprise server systems.
For the hardware and software requirements for these operating systems, see WebLogic Enterprise T-Engine Platform Data Sheets.
If You Are Upgrading from a Previous Release
If you are installing the WebLogic Enterprise 5.1 software on a Windows 2000, NT, Windows 98, or Windows 95 system that contains a previous version of WebLogic Enterprise, M3, or BEA Tuxedo software, there are important upgrade considerations.
BEA recommends that you use the Windows Add/Remove (uninstall) program to remove a previous version of WebLogic Enterprise, M3, or BEA Tuxedo software on the target system, before you install WebLogic Enterprise 5.1. During the WebLogic Enterprise 5.1 installation, the procedure will try to detect earlier versions of WebLogic Enterprise, M3, or BEA Tuxedo; if present, the procedure will recommend that you cancel the installation, exit Setup, and use the Windows Add/Remove program.
Note: BEA strongly recommends that you not run more than one version of WebLogic Enterprise, M3, or BEA Tuxedo software on the same system. Unexpected problems can occur.
Starting with a Clean System
To ensure that you are starting with a clean system, before you install WebLogic Enterprise 5.1, follow these steps:
- Use the tmshutdown command to stop any running WebLogic Enterprise, M3, or
BEA Tuxedo applications. This command is described in the Administration topics
in the WebLogic Enterprise online documentation.
- If necessary, stop the TListen and Tuxedo IPC Helper services. From the Start
menu, click Start->Settings->Control Panel->Services. A screen similar to
the following is displayed.
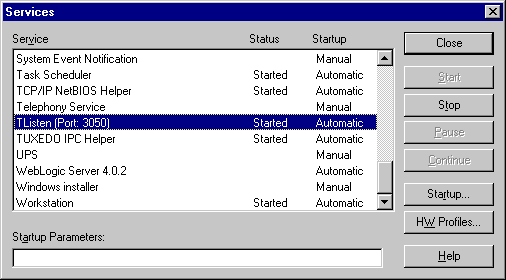
- Scroll to the entry for the TListen service, select it, and then click the Stop
button. The Status value should change from Started to a blank entry. Then scroll
to the Tuxedo IPC Helper service, select it, and click the Stop button. In some
cases, you may see an error; however, the service's Status value should change
from Started to a blank entry. Click the Close button.
- Move to a temporary location any files that you or your coworkers added to the
%TUXDIR% directory, where TUXDIR is the directory in which the prior WebLogic
Enterprise, M3, or BEA Tuxedo software resides. This step is necessary because
the Windows Add/Remove uninstall program only knows about the original set
of files that were installed by BEA. If additional files are present, older
directories may continue to exist after you run the uninstall program.
- Back up any existing WebLogic Enterprise, M3, or BEA Tuxedo files that you
customized for your environment. For example, you should back up the Resource
Manager (RM) file in %TUXDIR%\udataobj\Rm. The Rm file contains database
vendor-specific settings that are used by commands such as buildtms and
buildXAJS. You may also need to back up the BEA Administration Console
webgui.ini initialization file to a temporary location. This file is located in
%TUXDIR%\udataobj\webgui, where TUXDIR is the directory in which you
installed the prior version of WebLogic Enterprise, M3, or BEA Tuxedo.
- Run the Windows Add/Remove program to remove the prior WebLogic
Enterprise, M3, or BEA Tuxedo software version. From the Start menu, click
Start->Settings->Control Panel->Add/Remove Programs. A screen similar
to the following is displayed:
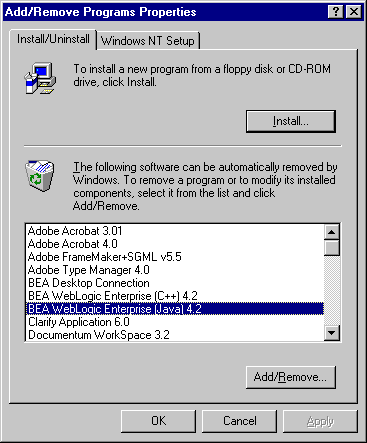
- Scroll to the entry for the prior WebLogic Enterprise, M3, or BEA Tuxedo
software, select it, and click the Add/Remove button.
Note: If you have both the C++ and Java components of WebLogic Enterprise 4.2 installed on your machine, you must remove the Java software before removing the C++ software.
- In response to the prompt, confirm that you want to uninstall the software. After
the program finishes, it displays a screen similar to the following:
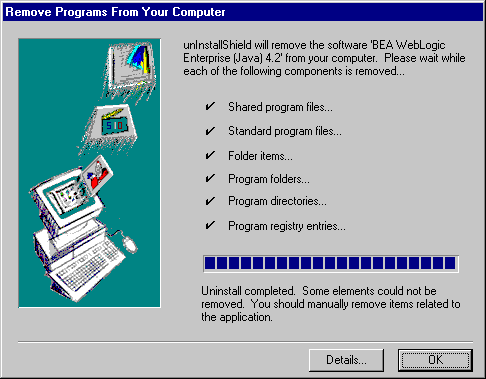
- If the uninstall program was not able to remove all directories (usually because
the files were added after the original installation), you can click the Details
button to find out which directories remain on your system. If the files in the
directories contain changes that you made, such as a modified sample file, move
it to a temporary location.
- If the prior version of WebLogic Enterprise was 4.2 or 4.1, you may need to
uninstall the WebLogic Enterprise Java and WebLogic Enterprise C++ software
as separate steps. Remember: if you have both the C++ and Java components of
WebLogic Enterprise 4.2 installed on your machine, you must remove the Java
software before removing the C++ software, as shown in Step 7.
- Reboot your system after the uninstall completes.
- Install the WebLogic Enterprise 5.1 software, as described in this chapter. When
the WebLogic Enterprise 5.1 software installation finishes, compare the files
from a previous release that you moved to a temporary location (such as your RM
file described in a previous step) with the installed version. If appropriate,
customize the installed file so that it contains the data that is appropriate for your
environment.
Installing the WebLogic Enterprise Software on Microsoft Windows 2000 or NT 4.0 Systems
This section describes how to install the WebLogic Enterprise software on Microsoft Windows 2000 or NT 4.0 systems.
Preinstallation Considerations
This section describes some important tasks that you should perform before starting the WebLogic Enterprise installation.
Backing Up Files
If you are installing WebLogic Enterprise software on a system that already has M3 or WebLogic Enterprise software installed, there are some files that you may want to back up prior to the installation, and then restore them after the installation is complete. This is because some files that you may have modified for your M3 or WebLogic Enterprise software are overwritten when the WebLogic Enterprise software is installed.
To avoid having to modify these files again, proceed as follows:
- If you are installing one or more of the WebLogic Enterprise server software
components, back up the RM file to a temporary location. This file is located in the
%TUXDIR%\udataobj or $TUXDIR/udataobj directory, where TUXDIR is the
directory in which you installed the M3 or WebLogic Enterprise software.
- If you are installing the BEA Administration Console, back up the webgui.ini
file to a temporary location. This file is located in the
%TUXDIR%\udataobj\webgui or $TUXDIR/udataobj/webgui directory.
- After the installation is complete, restore these files to their original locations.
Stopping WebLogic Enterprise or BEA Tuxedo Applications and Related Services
Before beginning the installation, make sure no BEA Tuxedo or WebLogic Enterprise client or server applications are running. For information about the tmshutdown command, see Starting and Shutting Down Applications in the Administration section of the WebLogic Enterprise online documentation.
Checking That Your Account Has Administrator Privilege
You need administrator privileges to perform the installation. If you attempt to install the WebLogic Enterprise software without administrator privileges, the following error message will be displayed:
Cannot Install Tuxedo IPC Helper Service.
Microsoft Windows 2000 or NT 4.0 Installation Procedure
It will take approximately 10 minutes to install the software.
Warning: If you are re-installing the WebLogic Enterprise 5.1 software on your system, and you also already installed the optional WebLogic Enterprise 5.1 Encryption Package software (56-bit or 128-bit) on your system, you must:
- First, uninstall the WebLogic Enterprise Encryption Package software. (See the
section Removing (Uninstalling) the WebLogic Enterprise Encryption Package
from Your System.)
- Next, uninstall the WebLogic Enterprise 5.1 software. (See the section
"Removing (Uninstalling) the WebLogic Enterprise Software from Your
System" on page 2-43.)
- Re-install the WebLogic Enterprise 5.1 software, as explained in this section.
To install the WebLogic Enterprise software on a Microsoft Windows 2000 or NT 4.0 operating system, complete the following steps:
- Insert the BEA WebLogic Enterprise software CD in the CD player. The Windows
autorun feature is used to automatically begin the installation. (To bypass the
autorun feature, hold down the Shift key while inserting the CD in the CD player.
You can then run the setup.exe file in the inwnt40 directory on the CD.)
- The Setup screen is displayed, followed by the Welcome screen.
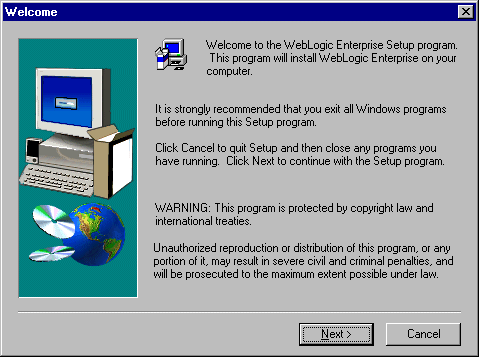
- Click Next. The Software License Agreement screen is displayed.
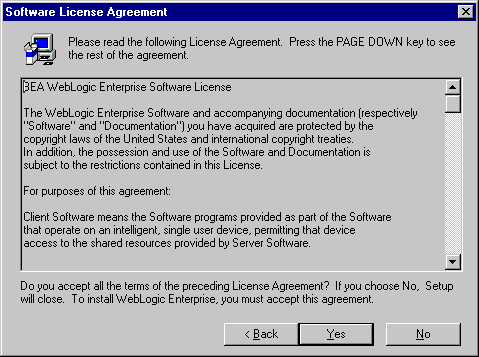
- To accept the license agreement, click Yes. The User Information screen is
displayed.
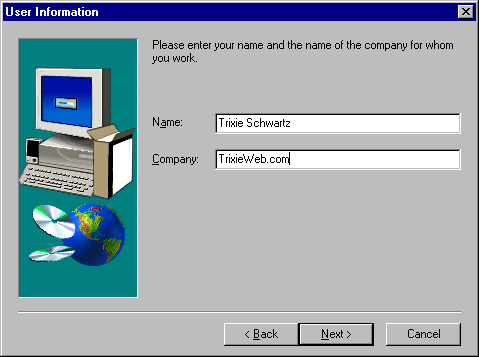
- Enter your name and the name of your company and click Next. The Registration
Confirmation screen is displayed.
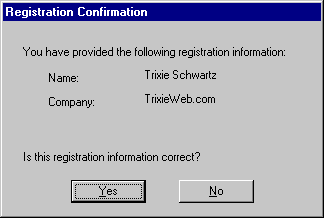
- If the registration information is correct, click Yes; otherwise, click No and
correct the information. The Choose Destination Location screen is displayed.
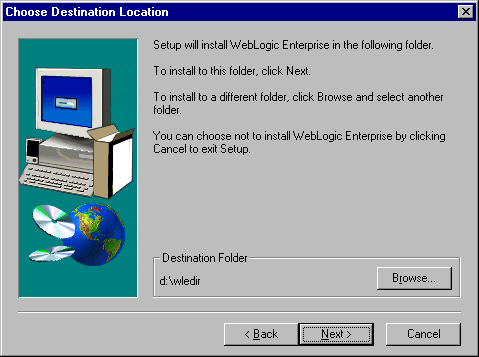
The default destination folder is c:\wledir. In the previous sample screen, the user selected d:\wledir (or this was the location of previously installed software).
- Click Next to accept the location, or click Browse to select a different location. If
you enter a path that does not exist, the installation procedure prompts for a
confirmation that you want the directory created.
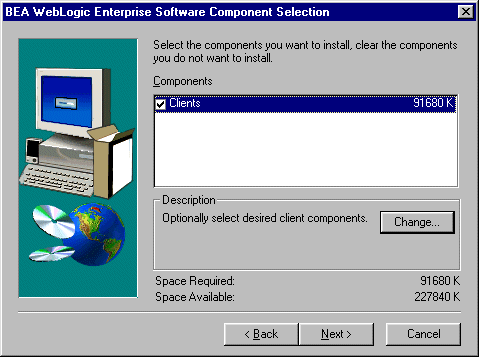
After you complete the directory path screen, the BEA WebLogic Enterprise Software Component Selection screen is displayed.
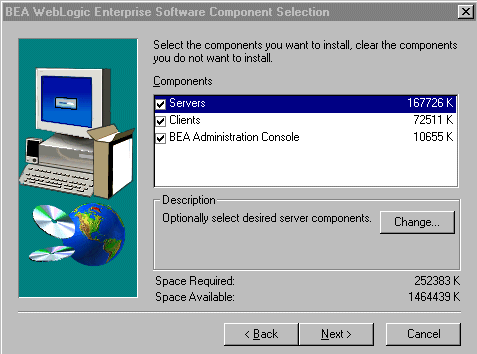
- By default, all WebLogic Enterprise components are selected for installation. The
WebLogic Enterprise 5.1 installation procedure lets you select or deselect the
components that you want to install. You can also select or deselect specific
subcomponents within the Servers or Clients categories. The BEA
Administration Console component does not have any subcomponents.
You must select at least one component for installation. Selecting a main component category causes all of its subcomponents to be selected. Deselecting a component causes all of its subcomponents to be deselected. Deselecting all subcomponents causes their parent component to be deselected.
The main WebLogic Enterprise categories for the installation are:
- Servers
- Clients
- BEA Administration Console
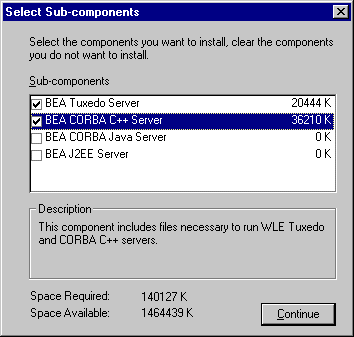
To deselect or select particular servers for installation, highlight the Servers category and then click the Change... button. On the Select Sub-components screen, deselect the server types you want to omit. Within the Servers category, the options are:
- BEA Tuxedo Server
- BEA CORBA C++ Server
- BEA CORBA Java Server
- BEA J2EE Server
Notes: The BEA Tuxedo Server is always installed in a Server installation, even if you deselect it on this screen.
When you install an individual type of server software, its corresponding client software is also installed. For example, if you install the J2EE Servers software, the RMI/EJB client software is also installed automatically. Therefore, if you have installed a type of server software, you do not need to perform a separate installation for the client software for that server.
On the Select Sub-components screen, click the Continue button when you have made your choices. For example:
After you click the Continue button, you are returned to the BEA WebLogic Enterprise Software Component Selection screen.
To deselect or select particular clients for installation, highlight the Clients category and then click the Change... button. On the Select Sub-components screen, deselect the client types you want to omit. The Client options are:
- BEA Tuxedo Client
- BEA CORBA C++ Client
- BEA RMI/EJB Client
- BEA ActiveX Client
- BEA CORBA Java Client
On the Select Sub-components screen for the clients, click the Continue button when you have made your choices. For example:

You are returned to the BEA WebLogic Enterprise Software Component Selection screen.
The Administration category consists of the Administration Console and does not have any subcomponents. For information about how to start this Console after it is installed, refer to BEA Administration Console Startup. For information about how to use this Console, refer to the online help that is accessible through the Console's Help button.
When you have made your selections, click Next. If you indicated that your installation will include the BEA Administration Console, the Choose Destination Location screen for the Administration Console HTML files is displayed.
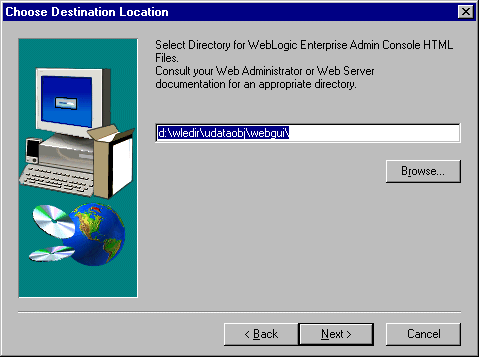
- For information about the path on this screen, see the section "For All Server
Platforms Supporting the BEA Administration Console" on page 1-15. To specify
a nondefault directory for the BEA Administration Console HTML files, click
Browse, specify the nondefault directory, and click Next. Otherwise, click Next.
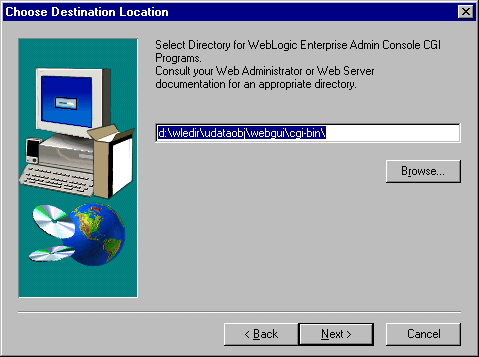
Another Choose Destination Location screen is displayed.

- For information about the path on this screen, see the section "For All Server
Platforms Supporting the BEA Administration Console" on page 1-15. To specify
a nondefault directory for the BEA Administration Console GUI Java applets,
click Browse, specify the nondefault directory, and click Next. Otherwise, click
Next. Another Choose Destination Location screen is displayed.
- For information about the path on this screen, see the section "For All Server
Platforms Supporting the BEA Administration Console" on page 1-15. To specify
a nondefault directory for the BEA Administration Console GUI CGI programs,
click Browse, specify the nondefault directory, and click Next. Otherwise, click
Next. The Enter Information screen is displayed.
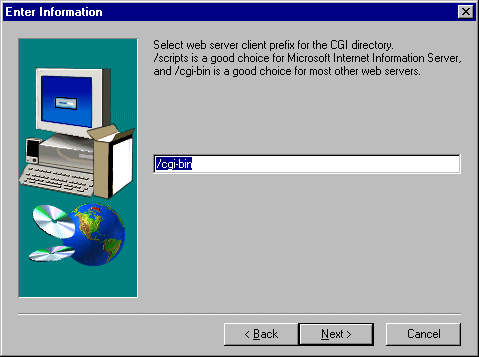
- For information about the path on this screen, see the section "For All Server
Platforms Supporting the BEA Administration Console" on page 1-15. To specify
a nondefault Web Server client prefix for the GUI CGI directory, click Browse,
specify the nondefault prefix, and click Next. Otherwise, click Next. The Select
Program Folder screen is displayed.
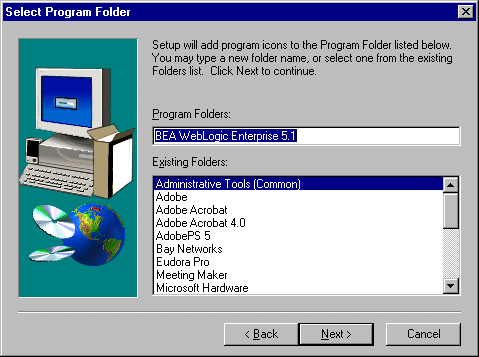
- To specify a nondefault program folder name, enter the folder name or select a
folder name from the Existing Folders, and click Next.
- If the installation program detects a prior version of M3, WebLogic Enterprise, or
BEA Tuxedo (or an earlier installation of WebLogic Enterprise 5.1) on the target
system, the installation program recommends that you cancel the installation, exit
Setup, and run the Windows Add/Remove program to remove it. For example:

BEA recommends that you not run multiple versions of WebLogic Enterprise, M3, or BEA Tuxedo on the same machine. If you see this prompt, click the OK button, then click the Cancel button in the next screen:
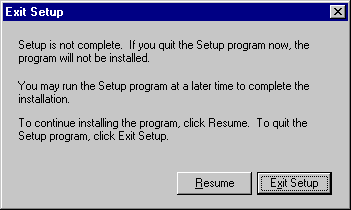
If you had to click the Cancel button because the installation program detected existing M3, WebLogic Enterprise, or BEA Tuxedo software on the target system, the installation program displays the following screen. Click the Exit Setup button, and then use the Windows Add/Remove program to remove the prior installation, as described in the section "Starting with a Clean System" on page 2-3.
- If you did not have to cancel the installation, the installation continues and you
are prompted about having the installation program back up the target system's
performance data:
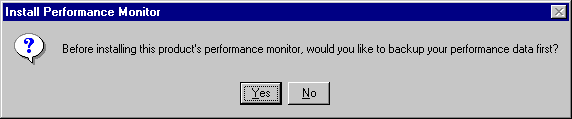
- To back up your performance data files before you install the WebLogic
Enterprise performance monitor, click Yes. The BEA WebLogic Enterprise
TListen Password screen is displayed:
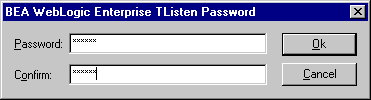
- Enter the tlisten password in the Password field and again in the Confirm field
and click Ok. If Cancel is clicked, the tlisten password installation is deferred.
For information about the tlisten password and instructions for setting it, see
the section "Selecting an Administrative Password" on page 1-17. The Install
license screen is displayed.
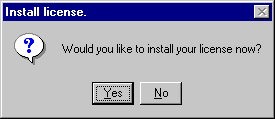
- To install the WebLogic Enterprise software license now, click Yes; otherwise,
click No to install the license later. If you click Yes, the Insert License Disk
screen is displayed.
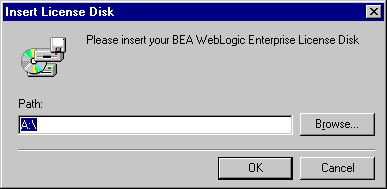
- Your product license is on a 3.5-inch diskette that is included in the WebLogic
Enterprise product box. To install the license, insert the license diskette in the
disk drive on your machine and, if your diskette drive is drive A, click OK;
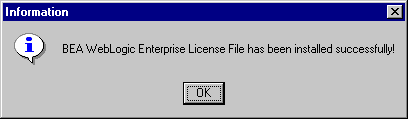
otherwise, enter the correct drive and click OK. An Information screen is
displayed informing you that the WebLogic Enterprise license file installed
successfully.
Note: If you decide that you do not want to install the license now, but you want to complete the installation procedure and install the license later, do not click Cancel. Clicking Cancel terminates the installation. Instead, remove the license diskette from the disk drive and click OK. A screen is displayed that states that the lic.txt could not be found and you can elect to complete the installation without installing the license.
- Click OK. The installation procedure displays the following screen.
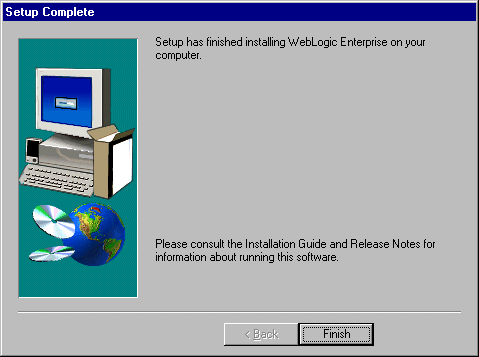
Click the Finish button to complete the installation.
- Reboot your system.
Setting Microsoft Windows 2000 or NT 4.0 Environment Variables
Before you use the WebLogic Enterprise software, you may need to define the JDK_HOME environment variable.
The JAVA_HOME variable is needed to start Java server applications and to build and run Java sample applications.
To set this variable, complete the following procedure:
- Click the Windows Start button, and click
Settings->Control Panel->System->Environment.
The System Properties screen is displayed.
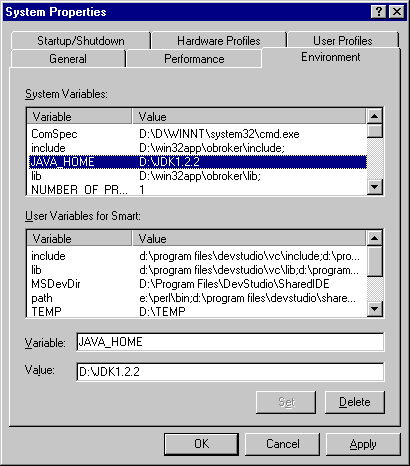
- Enter the JAVA_HOME environment variable and set its value to the directory
containing the JDK, as shown in the sample screen.
Note: JavaServer will not start on Microsoft Windows NT or Windows 2000 if JDK bin is in the path after a network drive. Make sure the JDK bin directories (that is, jre/bin and jre/bin/classic) are set in the PATH before any network driver path elements via the Control Panel before booting the JavaServer.
- Click Apply and OK to close the System Properties window.
Installing the Product License After You Install the WebLogic Enterprise Software
If you elected not to install your software license when you installed the WebLogic Enterprise software, you can install the license using the BEA License Utility.
Note: Your product license is on a 3.5-inch disk that is included in the software box.
To install the license, complete the following steps:
1. Insert the license disk into the disk drive on your machine.
2. Use the taskbar to click Start-->Programs-->BEA WebLogic Enterprise 5.1
-->BEA License Utility 5.1.
The BEA License Utility screen is displayed.
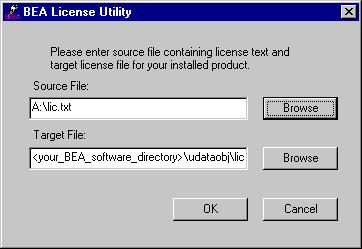
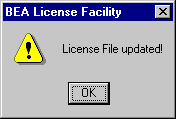
3. If the disk drive on your machine is drive A, click OK; otherwise, enter the correct drive and click OK. The license is installed and the License File updated message is displayed.
Running Simpapp to Verify the WebLogic Enterprise CORBA ++ Software Installation on Microsoft Windows 2000 or NT 4.0
To verify that you have successfully installed the WebLogic Enterprise CORBA C++ client and server software, execute the simpapp application. This "simple application" is a WebLogic Enterprise client/server application that converts text strings to uppercase and lowercase letters, and can verify whether your installation is successful.
Note: This section assumes you installed all WebLogic Enterprise server components, or one of the CORBA server components. If you installed only the J2EE server component, see the next section, "Running a Basic EJB Sample to Verify the WebLogic Enterprise J2EE Software Installation" on page 2-35, for information about running an EJB sample to verify the installation.
Before attempting to run simpapp, refer to the section "Software Requirements" on page 6-25 to ensure that the software requirements are satisfied. For example, the path to the Microsoft Visual C++ 6.0 environment must be known on this system, because nmake is used.
To run simpapp, open an MS-DOS window and complete the following steps:
- Make sure that the directory in which you installed the WebLogic Enterprise
software is set in the environment variable TUXDIR. For example, if you installed
the software in the default directory, complete the following steps to set the TUXDIR
environment variable to C:\WLEDIR:
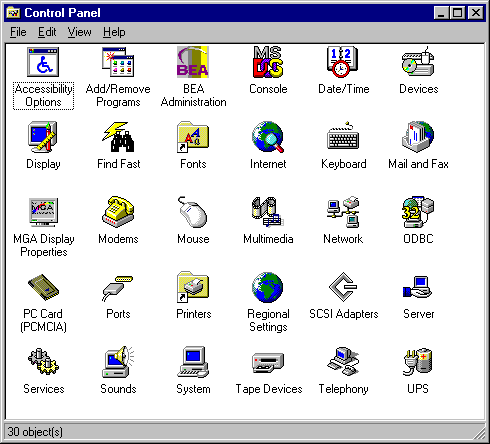
- On the Windows Start menu, click Settings->Control Panel. The Control
Panel is displayed.
- Click the BEA Administration icon. The BEA Administration screen is
displayed.
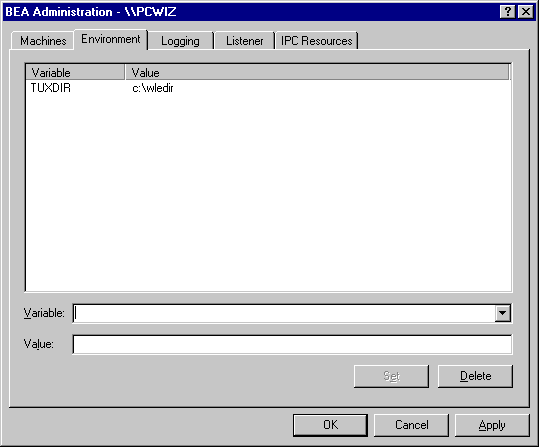
- If the BEA Administration screen is not displaying the Environment page as
shown in the above screen, click the Environment tab. The Environment page
is displayed.
- Click on the TUXDIR variable, enter C:\WLEDIR in the value field, and click
OK.
- Using Windows Explorer, create a directory under WLEDIR and copy the contents
of the simpapp directory to it. If you installed the WebLogic Enterprise software
in the default directory, the simpapp directory is located at
C:\WLEDIR\Samples\Corba\Simpapp.
- Using an MS-DOS window:
- Change (cd) to the copy directory.
- Check the permissions on all the files in the copy directory and, if necessary,
change the permissions to allow full access. To set permissions to full access,
enter attrib -R /S *.*.
- To run simpapp automatically, enter runme. The simpapp application runs and
prints the following messages:
Testing simpapp
cleaned up
prepared
built
loaded ubb
booted
ran
shutdown
saved results
PASSED
- To run the sample manually to observe the simpapp processes starting and
stopping, complete the following steps:
- Enter results\setenv.
- Enter tmboot -y. The application starts several processes.
- Enter simple_client. The prompt String? is displayed.
- Enter a word in lowercase letters. The application converts the word to
uppercase and then to lowercase letters.
- Enter tmshutdown -y. The application shuts down the processes.
- To restore the directory to its original state, enter the following:
- results\setenv
- nmake -f makefile.nt clean
Running Simpapp to Verify the WebLogic Enterprise CORBA Java Software Installation on Microsoft Windows 2000 or NT 4.0
To verify that you have successfully installed the WebLogic Enterprise CORBA Java client and server software, execute the simpapp_java application. This "simple application" is a WebLogic Enterprise client/server application that converts text strings to uppercase and lowercase letters, and can verify whether your installation is successful.
Notes: This section assumes you installed all WebLogic Enterprise server components, or the CORBA Java server components. If you installed only the J2EE server component, see the next section, "Running a Basic EJB Sample to Verify the WebLogic Enterprise J2EE Software Installation" on page 2-35, for information about running an EJB sample to verify the installation.
If you have installed the CORBA Java server components, the CORBA C++ components are also automatically installed. Therefore, if running simpapp_java as described in this section is successful, it also verifies that the CORBA C++ components were installed correctly.
Before running the sample application, see Chapter 6, "WebLogic Enterprise T-Engine Platform Data Sheets" for important information about prerequisite software. For example, on NT systems, you must first download and install the Java 2 SDK version 1.2.2.
Before attempting to run simpapp_java, refer to the section "Software Requirements" on page 6-25 to ensure that the software requirements are satisfied. For example, the path to the Microsoft Visual C++ 6.0 environment must be known on this system, because nmake is used.
To run simpapp, open an MS-DOS window and complete the following steps:
- Make sure that the directory in which you installed the WebLogic Enterprise
software is set in the environment variable TUXDIR. For example, if you installed
the software in the default directory, complete the following steps to set the TUXDIR
environment variable to C:\WLEDIR:
- On the Windows Start menu, click Settings->Control Panel. The Control
Panel is displayed.
- Click the BEA Administration icon. The BEA Administration screen is
displayed.
- If the BEA Administration screen is not displaying the Environment page as
shown in the above screen, click the Environment tab. The Environment page
is displayed.
- Click on the TUXDIR variable, enter C:\WLEDIR in the value field, and click
OK.
- Using Windows Explorer, create a directory under WLEDIR and copy the contents
of the simpapp directory to it. If you installed the WebLogic Enterprise software
in the default directory, the simpapp_java directory is located at
C:\WLEDIR\Samples\Corba\Simpapp_java.
- Using an MS-DOS window:
- Change (cd) to the copy directory.
- Check the permissions on all the files in the copy directory and, if necessary,
change the permissions to allow full access. To set permissions to full access,
enter attrib -R /S *.*.
- To run simpapp_java automatically, enter runme. The simpapp_java
application runs and prints the following messages:
Testing simpapp
cleaned up
prepared
built
loaded ubb
booted
ran
shutdown
saved results
PASSED
- To run the sample manually to observe the simpapp_java processes starting and
stopping, complete the following steps:
- Enter results\setenv.
- Enter tmboot -y. The application starts several processes.
- Enter simple_client. The prompt String? is displayed.
- Enter a word in lowercase letters. The application converts the word to
uppercase and then to lowercase letters.
- Enter tmshutdown -y. The application shuts down the processes.
- To restore the directory to its original state, enter the following:
- results\setenv
- nmake -f makefile.nt clean
Running a Basic EJB Sample to Verify the WebLogic Enterprise J2EE Software Installation
If you installed only the WebLogic Enterprise J2EE server component, you can run the stateless session EJB sample application provided by the WebLogic Enterprise software to verify the installation.
Before running the sample application, see Chapter 6, "WebLogic Enterprise T-Engine Platform Data Sheets" for important information about prerequisite software.
This sample demonstrates the usage of a stateless session EJB using a simple stock trader application. This sample demonstrates how the client must maintain any persistent state-such as the change in the cash account-across repeated calls to the session EJB. All the logic for the balance is encapsulated in the client, where all the persistence is provided by the container and the logic is maintained in the EJB.
The EJB in this sample provides basic trading methods, such as buying and selling stocks. Because there are no persistent stores involved in this sample, all the stock data are set in the deployment descriptor of the EJB as environment properties. The container supplies the data to the EJB through a JNDI lookup operation.
To build the stateless session EJB sample application, use the following steps:
- Make sure that the directory in which you installed WebLogic Enterprise is set in
the environment variable TUXDIR. Make sure to set the JAVA_HOME environment
variable.
- Make a copy of the %TUXDIR%\samples\j2ee\ejb directory into a work
directory.
- Change directory to the work directory.
- Change the permissions on all the files to give them write-access. For example:
prompt>attrib /S -r *
- Run the JavaServer version of the sample automatically by entering the runme
command:
prompt>runme basic statelessSession
- A number of messages are displayed, along with information about whether the
build procedure was successful. The sample is built, the servers are booted, and
the client is run once.
After you have executed the runme command, you can run the samples manually if you like.
To run the samples manually:
- Change the current directory to the basic\statelessSession directory.
- Make sure that your environment is set correctly by entering the following
command:
prompt>setenv
- Boot the server, run the client, and shut down the server by entering the following
commands:
prompt>tmboot -y
prompt>run_client.cmd
prompt>tmshutdown -y
To restore the sample application directory to its original state:
- Change to the work directory.
- Enter the following command, where TUXDIR is the directory in which you
installed the WebLogic Enterprise software:
prompt>%TUXDIR%\samples\j2ee\ejb\clean.cmd
For more information about the stateless session EJB sample application, see the Guide to the EJB Sample Applications in the WebLogic Enterprise online documentation.
Installing the WebLogic Enterprise Software on Microsoft Windows 98 and 95 Systems
Notes: Before beginning the installation, ensure that no BEA Tuxedo or WebLogic Enterprise applications are running.
It takes approximately 10 minutes to install the software.
Warning: If you are re-installing the WebLogic Enterprise 5.1 software on your system, and you already installed the optional WebLogic Enterprise 5.1 Encryption Package software (56-bit or 128-bit) on your system, you must:
- First, uninstall the WebLogic Enterprise Encryption Package software. (See the
section Removing (Uninstalling) the WebLogic Enterprise Encryption Package
from Your System.)
- Next, uninstall the WebLogic Enterprise 5.1 software. (See the section
"Removing (Uninstalling) the WebLogic Enterprise Software from Your
System" on page 2-43.)
- Re-install the WebLogic Enterprise 5.1 software, as explained in this section.
To install the BEA WebLogic Enterprise software on a Microsoft Windows 98 or 95 operating system, follow the steps listed below.
Note: In this section, installation screens that are identical to the screens shown in the Windows 2000 and NT 4.0 section are not repeated.
- Insert the BEA WebLogic Enterprise software CD in the CD player. The Windows
autorun feature is used to automatically begin the installation. (To bypass the
autorun feature, hold down the Shift key while inserting the CD in the CD player.
You can then run the setup.exe file in the inwnt40 directory on the CD.)
- The Setup screen is displayed, followed by the Welcome screen.
- Click Next. The Software License Agreement screen is displayed.
- To accept the license agreement, click Yes. The User Information screen is
displayed.
- Enter your name and the name of your company and click Next. The Registration
Confirmation screen is displayed.
- If the registration information is correct, click Yes; otherwise, click No and
correct the information. The Choose Destination Location screen is displayed.
- The default destination folder is c:\wledir. Click Next to accept this location,
or click Browse to select a different location. If you enter a path that does not
exist, the installation procedure prompts for a confirmation that you want the
directory created.
- After you complete the directory path screen, the BEA WebLogic Enterprise
Software Component Selection screen is displayed. For an installation on a
Windows 98 or Windows 95 system, you can only install components from the
client list.
To deselect or select particular clients for installation, click the Change... button. On the Select Sub-components screen, deselect the client types you want to omit. The Client options are:
- BEA Tuxedo Client
- BEA CORBA C++ Client
- BEA RMI/EJB Client
- BEA ActiveX Client
- BEA CORBA Java Client
On the Select Sub-components screen for the clients, click the Continue button when you have made your choices. Then click the Next button on the Software Components Selection screen.
- The Select Program Folder screen is displayed. To specify a nondefault program
folder name, enter the folder name or select a folder name from the Existing
Folders, and click Next.
- If a prior version of WebLogic Enterprise exists on your system, the installation
procedure prompts you to remove it.
- The WebLogic Enterprise software is installed. When the software installation
completes, the Update AUTOEXEC.BAT screen is displayed.
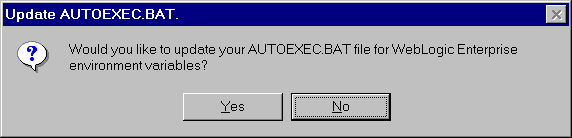
- Click Yes to update the AUTOEXEC.BAT file. The Set APPDIR environment
variable screen is displayed.

- Click Yes. The WebLogic Enterprise Application Directory screen is displayed.
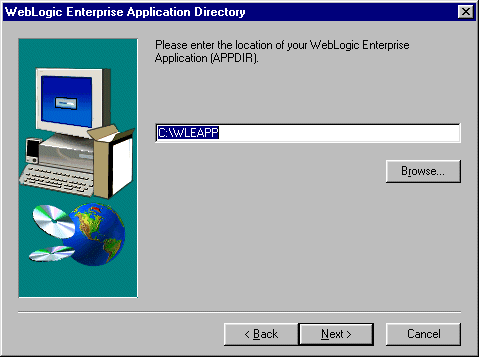
- To accept the default directory, click Next. To specify a nondefault directory,
click Browse, enter the desired directory, and click Next. If the BEA Tuxedo
Client was selected, the Set WSENVFILE environment variable screen is
displayed.
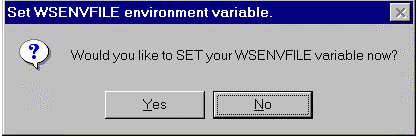
- To set the WSENVFILE environment variable, click Yes. The WebLogic
Enterprise /WS Environment File screen is displayed.

- To accept the default directory, click Next. To specify a nondefault directory,
click Browse, enter the desired directory, and click Next. The Setup is verifying
installation screen is displayed.
- After the installation program verifies the installation, the installation is
completed. If you had the installation program update your AUTOEXEC.BAT
file, the following screen is displayed.

- Click the Finish button and reboot your system.
Removing (Uninstalling) the WebLogic Enterprise Software from Your System
This section explains how to remove the WebLogic Enterprise software from your system.
Warning: If you also installed the optional WebLogic Enterprise Encryption Package software (56-bit or 128-bit) on your system, you must:
To remove the WebLogic Enterprise software from your system:
- Log on to the system. If you are using a Microsoft Windows 2000 or NT 4.0
system, log on as the administrator or as a member of the Administrator group.
- Make sure that no BEA Tuxedo or WebLogic Enterprise client or server
applications are running. Use tmshutdown to shut down all WebLogic
Enterprise applications.
- On the Microsoft Windows taskbar, click Start->Programs->BEA WebLogic
Enterprise 5.1->UnInstall BEA WebLogic Enterprise 5.1. The Confirm File
Deletion screen is displayed:
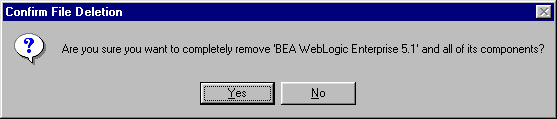
- Click Yes to confirm the removal and uninstall the WebLogic Enterprise
software. The Remove Programs From Your Computer screen is displayed.
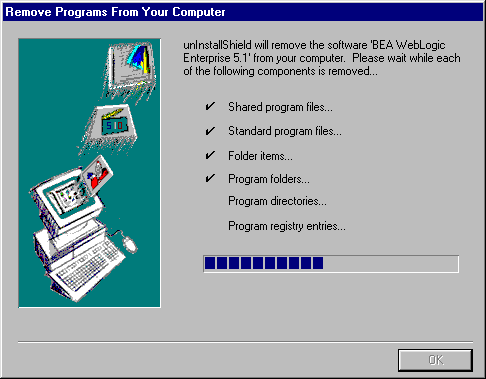
The WebLogic Enterprise product is removed from your system and from the Windows Registry. Reboot your system.
|
|
|
Copyright © 2000 BEA Systems, Inc. All rights reserved.
Required browser: Netscape 4.0 or higher, or Microsoft Internet Explorer 4.0 or higher.
|