

| Download Docs | Site Map | Glossary | |
|
|
|||
| bea.com | products | dev2dev | support | askBEA |
 |
 |
|
|||||||
| e-docs > WebLogic Platform > WebLogic Integration > BPM Topics > File Plug-In > Using the File Plug-In |
|
File Plug-In
|
Using the File Plug-In
The File Plug-In extends the functionality of BEA WebLogic Integration Business Process Management (BPM). It provides additional functionality to the WebLogic Integration BPM Studio. Specifically, the File Plug-In provides basic actions for working with files and transferring files between local and remote file systems. Actions are the basic unit of work performed during business process management functions; they define workflow and task behavior.
This section includes the following information:
About the File Plug-In
This section includes information on the following topics:
What the File Plug-In Does
The File Plug-In has the following functionality:
When using the File Plug-In, you should keep the following in mind:
Using the File Plug-In or Adapter for File?
In general, use the File Plug-In for basic file actions, such as reading, writing, and deleting files or transferring files between local and remote systems. If you require more capability, use the WebLogic Adapter for File. The WebLogic Adapter for File performs additional file operations and can also read and write Excel spreadsheet contents and Comma Separated Variable (CSV) formats. For more information about File System Adaptor, see the BEA WebLogic Adapter for File.
What You Need to Know
This document is written for workflow designers and system integrators who develop client interfaces between file systems and other applications. The information provided in this document requires that you are have in-depth knowledge of workflow design and workflow templates, File Transfer Protocol (FTP), and WebLogic Integration Studio. Additionally, it is assumed that you know Web technologies and have a general understanding of Microsoft Windows and UNIX systems.
If you do not have the required knowledge of workflows or the WebLogic Integration Studio, see the following documents:
File Plug-In and the Plug-in Framework
Like other plug-ins, the File Plug-In extends BPM functionality. It adheres to the BPM Plug-In specification. For more information, see Programming BPM Plug-Ins for WebLogic Integration at http://download.oracle.com/docs/cd/E13214_01/wli/docs70/devplug/index.htm. The Plug-in Configurations window displays the plug-ins and their status, as shown in Figure 1-1.
Figure 1-1 Plug-ins Configurations Window
Using the File Plug-In
The following sections provide information about using the File Plug-In. These sections do not contain step-by-step instructions for setting up File Plug-In actions and assume that you are knowledgeable about designing WebLogic Integration workflows. For a step-by-step example, see An Example of Using the File Plug-In.
Overview of File Plug-In Actions
This section provides general information for using the File Plug-In. It shows the Studio features needed for setting up File Plug-In actions. Figure 1-2 shows the Studio with a Workflow Design window open.
Figure 1-2 WebLogic Integration Studio
The Workflow Design window allows you construct workflows and access the properties that define workflows. Most File Plug-In actions require a variable to hold file content. Use the Variable Properties window to define the variables used by the workflow actions, as shown in Figure 1-3. Figure 1-3 Variable Properties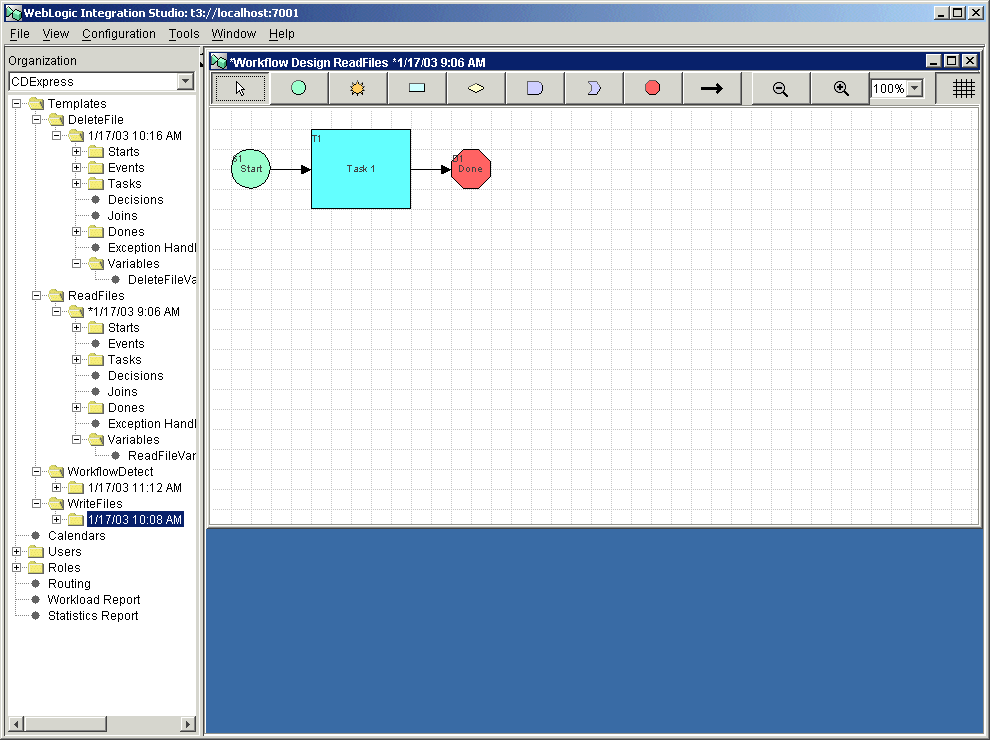
In the Workflow Design window, right-click a task node to open the Task Properties windows, where you can define workflow properties, as shown in Figure 1-4. Figure 1-4 Task Properties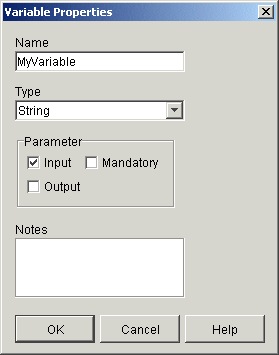
Click the Add button to open the Add Actions window. In the Add Action window, you can access many File Plug-In actions, as shown in Figure 1-5. Figure 1-5 Add Action Window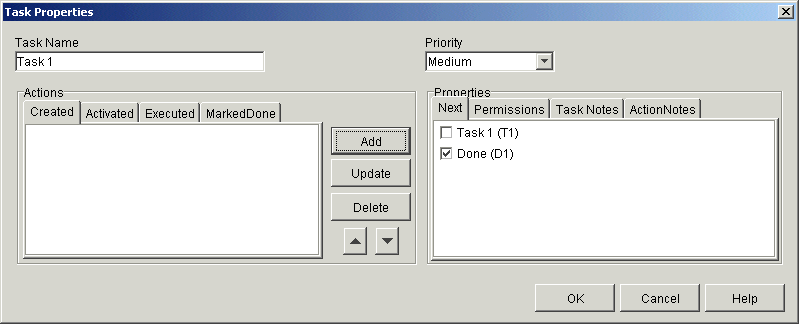
The actions available in the File Plug-In windows and other Studio windows are discussed in the sections that follow. Workflow Expressions Wherever you see the Expression button 
 next to a field in a Studio window, the field requires that an entry formulated in the workflow expression language. In File Plug-In actions (with the exception of starting a workflow upon file creation), the following properties may require expressions:
Values for these properties can be obtained from the Expression Builder and XPath Wizard, which returns a string value. The following values are available:
Note: The string value for the file or directory name must contain the full path to the file or directory. Two formats for the path are available:
For more information about expressions, see "Using Workflow Expressions" in Using the WebLogic Integration Studio.
Reading Files
Use the File Plug-In to read a file and assign the content to a workflow variable. Figure 1-6 shows the window for defining the reading files action.
Figure 1-6 Read a File Window
Template Definitions Set the following properties to read a file: Note: Before defining the workflow's task properties, you must define a workflow variable; the file content is bounded to a workflow variable.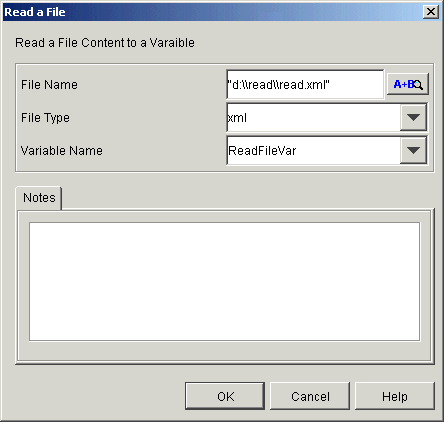
Caution: Reading the same file by multiple workflow instances is allowed. You should prevent multiple threads from modifying the same file at the same time.
Write File
Use the File Plug-In to a define task that can write variable's contents to a specified file. This action has the ability to create a new file, append content to an existing file, or overwrite an existing file. Figure 1-7 shows the window for defining write file actions.
Figure 1-7 Write a File Window
Set the following properties to write a file: Note: Before defining the workflow's task properties, you must define a workflow variable; the file content is bounded to a workflow variable.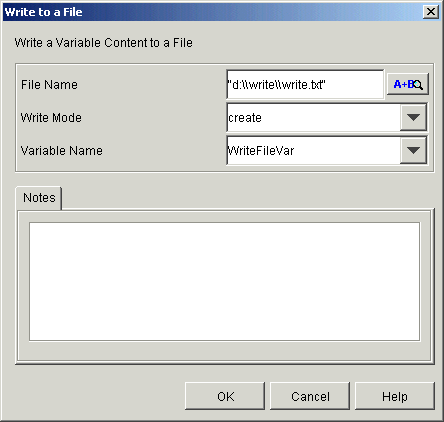
The available file types are text, XML, and binary.
Caution: Multiple threads cannot update the same file. You should prevent multiple threads from modifying the same file at the same time.
Delete File
Use the File Plug-In to define workflows that can delete files. Figure 1-8 shows the action window for deleting a file.
Figure 1-8 Delete a File
Set the following properties to delete a file: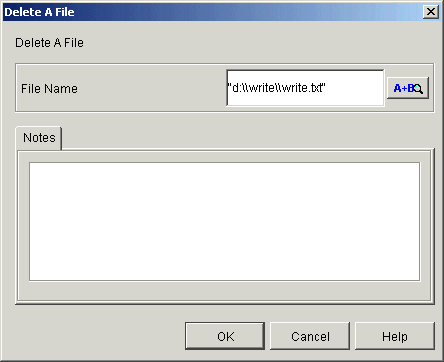
File Name: Entry must be formulated in the workflow expression language and include the full path name (see Workflow Expressions).
Resume Workflow on File Detection
Use the File Plug-In to define an event node so that when a workflow instance reaches that node, the workflow checks for the existence of a specified file. If the file exists, the workflow reads the content of the file and then moves on. If the file does not exist, the workflow waits for the file to be created. Figure 1-13 shows the window for defining the event node.
Note: Only one file can only resume one workflow instance.
Figure 1-9 Event Properties Window for File Resume
Set the following properties for File Resume: Note: Before defining the workflow's task properties, you must define a workflow variable; the file content is bounded to a workflow variable.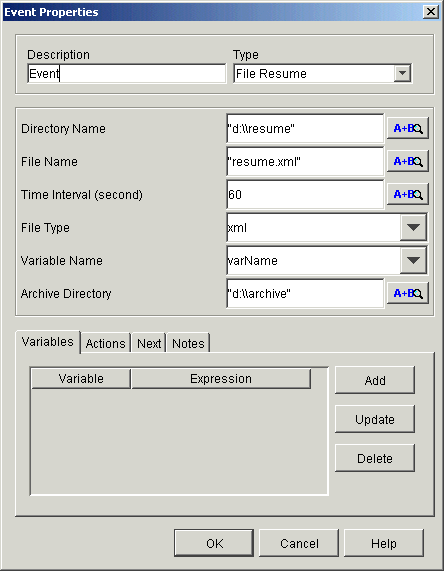
Note: For more information about workflow expressions, see Workflow Expressions.
After the properties are set, the Event Node indicates the action setting, as shown in Figure 1-10.
Figure 1-10 Event Node with File Action
Start Workflow on Detection of File Creation Use the File Plug-in to start a workflow when a file is created. Figure 1-11 shows the window for defining the Start node. Note: One file can start only one workflow instance. Figure 1-11 Start Properties Window for File Start
Set the following properties for starting a workflow from the creation of a file: Note: Before defining the workflow's task properties, you must define a workflow variable; the file content is bounded to a workflow variable.
Note: After selecting the Event radio button in the Start Properties window, the Event drop-list appears. When you select File Start from the drop-list, the Start Properties window changes to show the File Start properties.
After the properties are set, the Start Node indicates the action setting, as shown in Figure 1-12.
Figure 1-12 Start Node with File Action
Get and Put Files Using FTP Use the File Plug-In to move files between a local system and a remote system. Use Get Files to retrieve a file from a remote system for additional processing, such as starting a workflow, triggering an event, or reading information into a workflow. Use Put Files to move a file from a local system to a remote system for archiving or triggering an application on the remote system. Figure 1-13 shows the window for defining the Get and Put actions. Figure 1-13 File Transfer (FTP) Window
Set the following properties for transferring files between systems: Note: Before defining the transfer action, you must define an action to read the file, as described in Reading Files. As required by the Reading Files action, you must also define a workflow variable; the file content is bounded to a workflow variable.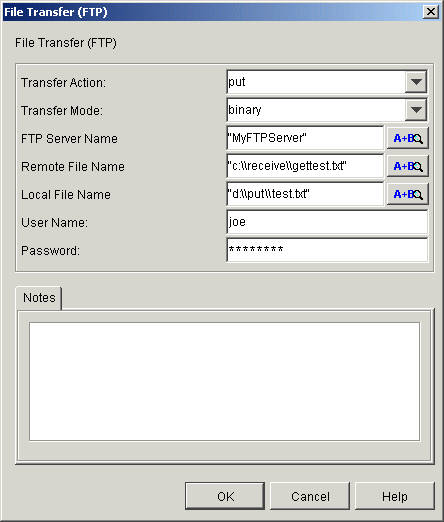
Caution: Get overwrites a file if the same file name exists in local system and Put overwrites a file if the same file name exists in remote system.
Note: For more information about workflow expressions, see Workflow Expressions.
Configuring File Plug-In for a Migrated Domain
This section tells you how to update your database schema and configure the File Plug-In for a single server domain and a cluster domain.
Updating the BPM Database Table
The File Plug-in uses a new database table called FILEPOLL. To update the BPM database with this table, run the following script:
BEA_HOME\weblogic700\integration\dbscripts\<database_type>\migrate\BPM_70-70SP2.sql
In the preceding line BEA_HOME represents the WebLogic Platform home.
Migrating to a Single Server Domain
To configure the File Plug-In for a single server domain, edit the domain's config.xml file as follows:
<EJBComponent Name="WLI-BPM File Plug-in"
Targets="<Customer_Server_Name>" URI="fileplugin-ejb.jar"/>
<JMSQueue JNDIName="com.bea.wli.bpm.FilePluginQueue"
Name="WLI_BPM_FP" Template="WLI_JMSTemplate"/>
Migrating to a Clustered Domain
To configure File Plug-In for a clustered domain, edit the cluster's config.xml file as follows:
Note: This example shows a cluster system (mycluster) with one manager server (myserver) and two managed server (c1, c2)
<EJBComponent Name="WLI BPM File Plug-in"
    Targets="mycluster"
    URI="fileplugin-ejb.jar"/>
<JMSDistributedQueue Name="WLI_BPM_FP"
    JNDIName="com.bea.wli.bpm.FilePluginQueue"
    Targets="mycluster">
    <JMSDistributedQueueMember Name="WLI_BPM_FP-c1"
        JMSQueue="WLI_BPM_FP-c1"
        Weight="1"/>
    <JMSDistributedQueueMember Name="WLI_BPM_FP-c2"
        JMSQueue="WLI_BPM_FP-c2"
        Weight="1"/>
<JMSTemplate Name="WLI_BPM_FP"/>
</JMSDistributedQueue>
<JMSQueue Name="WLI_BPM_FP-c1"
    JNDIName="com.bea.wli.bpm.FilePluginQueue-c1"
    StoreEnabled="true"
    Template="WLI_JMSTemplate-c1"/>
<JMSQueue Name="WLI_BPM_FP-c2"
    JNDIName="com.bea.wli.bpm.FilePluginQueue-c2"
    StoreEnabled="true"
    Template="WLI_JMSTemplate-c2"/>

|

|

|