|
|
This section describes how to use the Worklist Console to modify a task in the Loan_Web project. The key objectives for this section are:
This section is an extension of the previous section, and relies on its environment. So, it is assumed that you have the Loan Application open in Workshop for WebLogic Platform, and the myworklist server is up and running.
Perform the following steps to log in and re-assign a task:
http://localhost:7001/worklistconsole
Alternatively, select Run WebLogic IntegrationWorklist Console to open the WebLogic Integration Management Console in the Workshop for WebLogic Platform IDE.
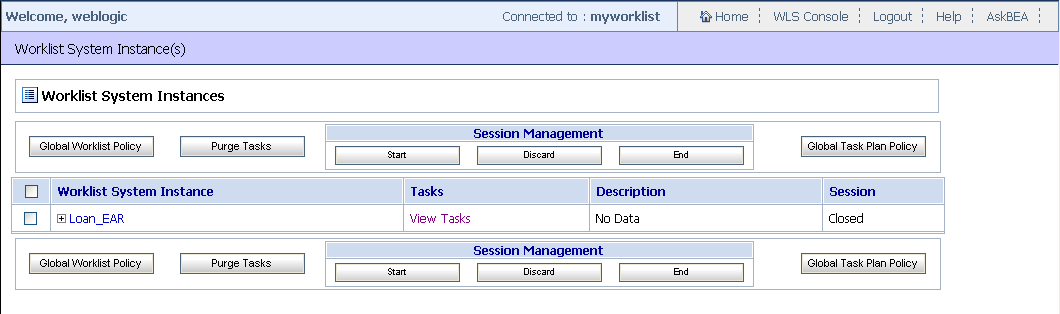
Username: weblogic Password: weblogic Loan_EAR Worklist System Instance as shown in Figure 3. Worklist Application Management: Worklist System Instance Page
As a user with administrator rights, you can view all the Worklist Instance details at any given point. After clicking View Tasks, the page is refreshed and all the tasks in the Loan_EAR project are listed in the Task Summary page.
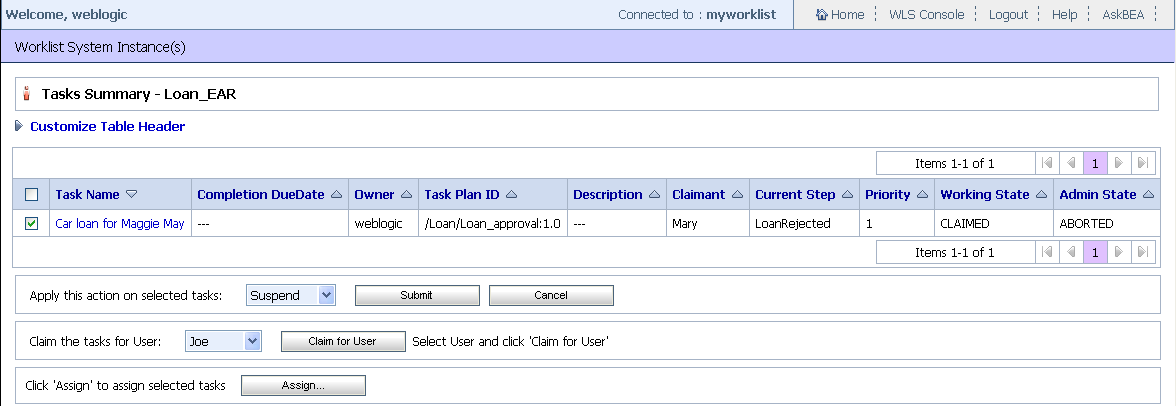
Mary, as shown in Figure 5-2. Selected action REACTIVATE executed successfully dialog appears in the Tasks Summary - Loan_EAR page.
| Note: | Since Mary, rejected the loan in the previous chapter, you have to activate the task. |
| Note: | At this point, if you log in to the Worklist User Portal as weblogic, you will notice that there are no tasks assigned to you. After completion of this section, the list of tasks assigned should be updated to reflect re-assignment of the task selected in Figure 5-2. |
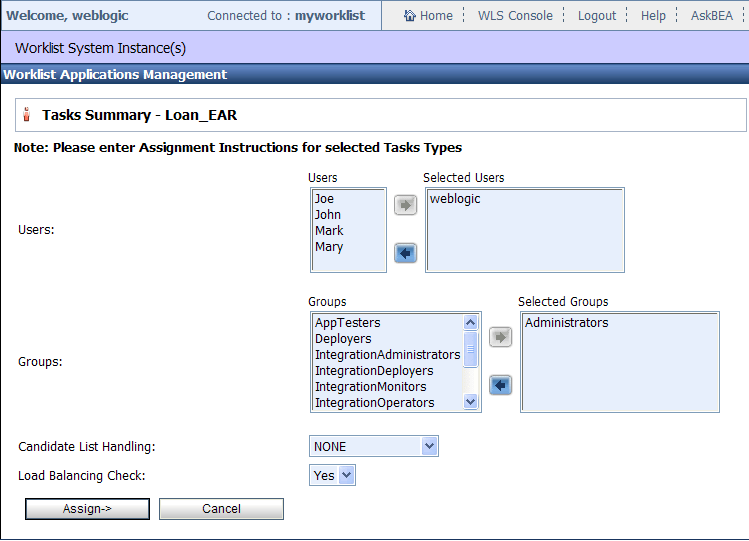
weblogic from the Users list to the Selected Users list, and Administrators from the Group list to the Selected Groups list (see Figure 5-3).
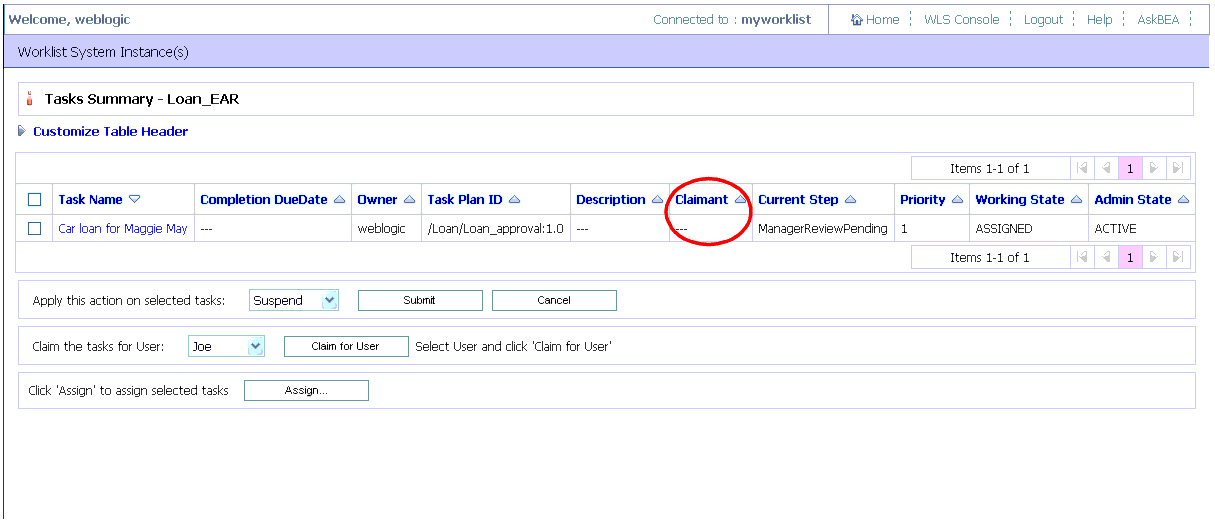
After completing the re-assignment task, verify if the task has been assigned to the user weblogic using Worklist Portal.
http://localhost:7001/Loan_Web.
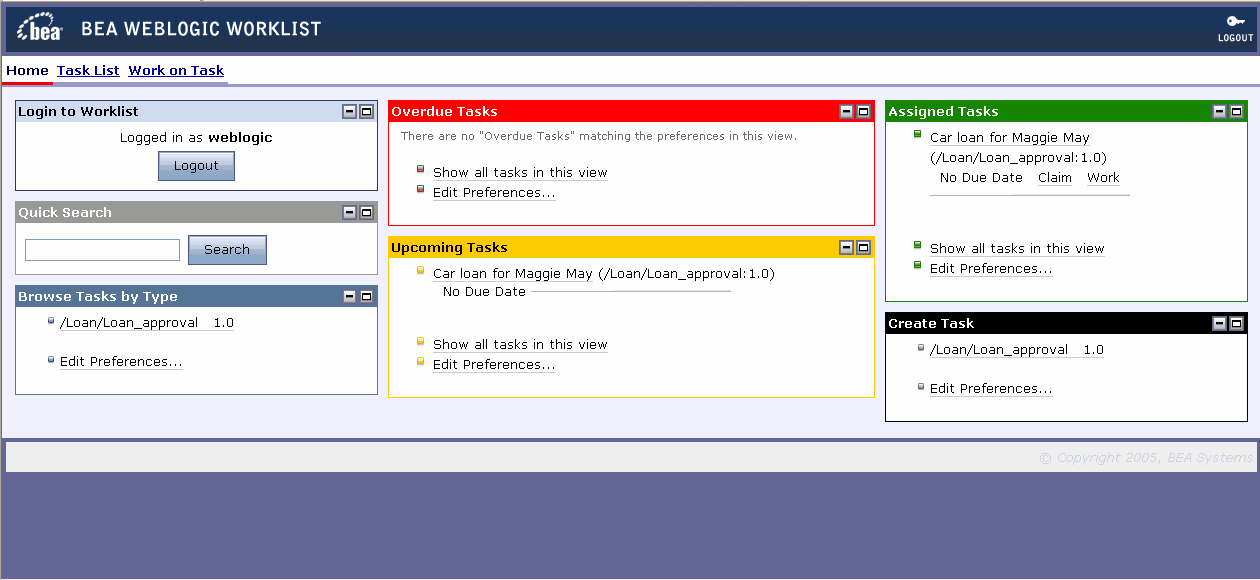
Username: weblogic Password: weblogic weblogic, as shown in Figure 5-4. The task instance Car loan for Maggie May is now displayed in your Assigned Tasks portlet.


|