


|

|
|
|
|
Monitoring Workflows
The following sections discuss workflow monitoring:
Using the Workflow Monitoring Features
Use the BEA WebLogic Process Integrator workflow monitoring features to monitor and modify workflows, gather information, and make informed decisions based on available data. You can perform the following tasks:
User Interface
The following WebLogic Process Integrator folder tree items are relevant to the monitoring features:
Workflow Instance Status
A workflow instance is a session of a workflow template definition that has been placed into run-time. To monitor the status of workflow instances, select a workflow template definition within a workflow template in the folder tree, right-click, and choose Instances from the pop-up menu. This displays the Workflow Instance dialog box, which contains status information for the instances of the selected workflow template definition.
Figure 10-1 Workflow Instances Dialog Box
The Workflow Instances dialog box contains the following: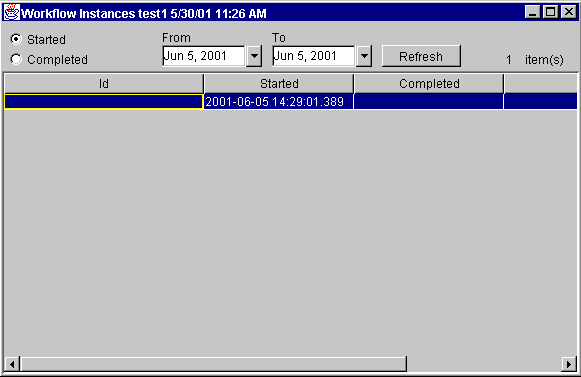
Figure 10-2 Workflow Instance From/To Dates
For each workflow shown, the following information is displayed:
For performance reasons, the BEA WebLogic Process Integrator server only returns 100 items at a time. If there are additional items, a button (+) appears which, when pressed, will retrieve the next 100 items. When no additional items remain, the button is no longer shown.
Viewing Workflow Status
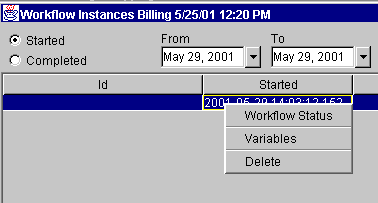
Right-clicking or double-clicking a particular workflow template definition instance in the list of instances in the Workflow Instances dialog box displays a menu. Choose the first item on the menu to display the overall workflow status for a particular instance.
Figure 10-3 Workflow Status Menu Option
The Workflow Status command displays a window showing either the graphical representation of the workflow with the active task highlighted or a list view of all tasks. The following two icons upper in the right hand side of the dialog box to allow toggling between the graphical representation and the list view.
Clicking the graphical representation icon displays a graphical representation of a workflow template definition that has been instantiated (is now an instance of the workflow template).
Figure 10-4 Graphical Representation of Workflow
In the graphical representation, the active tasks are green, the executed tasks are gray, and the inactive tasks are white. ClickingVars displays the Workflow Variables dialog box. For details about this dialog box, see Viewing Workflow Variables. Clicking the list view icon displays a list view of the workflow and its associated tasks. Figure 10-5 List View of Workflow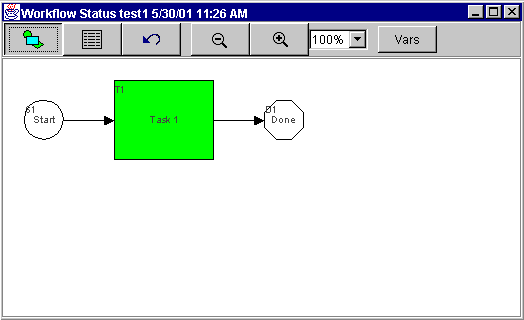
Various properties are displayed for each task within the workflow, depending on the way the list is tailored. Usually, the task name is shown in the list. The first column shown is the task status. A box indicates that the task is pending, or waiting to be executed (it has a start date, but not a completed date). Tasks shown without a box are not yet in a state that allows them to be executed (meaning that they have neither a start date nor a completed date). A box with a check mark in it indicates a task that has already been completed (has a completed date). Furthermore, a pending task is shown with a red box, indicating the task is now overdue (meaning its due date is before the current date). Right-clicking a task in the list displays a menu with the following options: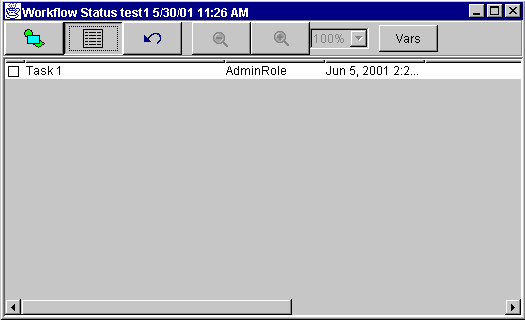
Figure 10-6 Reassign Task Dialog Box
A task can be assigned to a user, a user within a role (determined by the workflow engine so that workload balancing is automatically done), or a role. When a selection is made, a message is sent to the BEA WebLogic Process Integrator server to set the task's assignee to the selected user or role.
Tasks can only be reassigned if their properties allow reassignment of tasks, and the task is not already done.
Figure 10-7 Task Properties Dialog Box
The Task Properties dialog box contains the following:
Viewing Workflow Variables
The second option on the pop-up menu, which is displayed by right-clicking the instance, is the workflow variables. This command is used to display a list of all workflow instance variables.
Figure 10-8 Variables Menu Option
When selected, the Variables menu option displays the Workflow Variables dialog box, which lists the variables of the selected workflow instance. Figure 10-9 Workflow Variables Dialog Box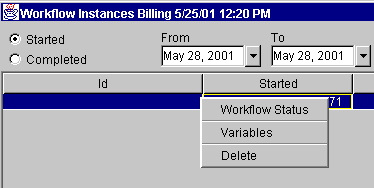
The Workflow Variables dialog box displays each variable in a list, showing its name and its current value. Use the buttons in the dialog box as follows: 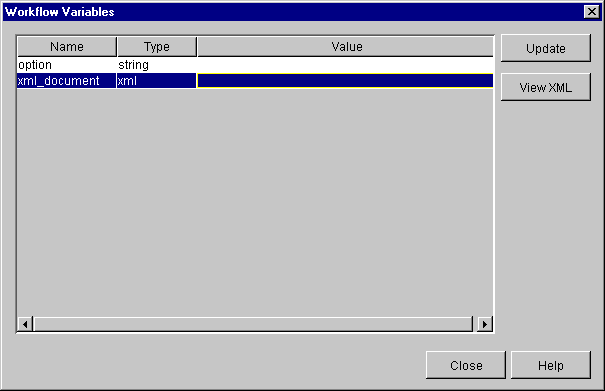
Figure 10-10 Set Variable Dialog Box
When you save the change, a message is sent to the BEA WebLogic Process Integrator server to reset the variable. Because workflow logic often depends on the value of variables, use caution when manually changing the value of a variable.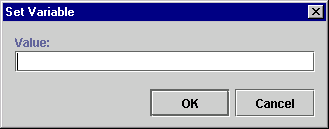
Deleting Workflow Instances
The Delete menu option allows you to delete a workflow instance. Selecting this menu option displays the Delete Workflow dialog box.
Figure 10-11 Delete Workflow Dialog Box
A positive confirmation sends a message to the BEA WebLogic Process Integrator server prompting the deletion of the selected workflow instance(s).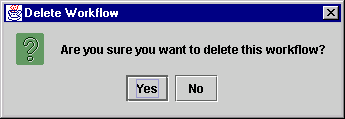
Viewing User Worklists
In the BEA WebLogic Process Integrator folder tree, right-click a user from the list and select Open User Worklist from the pop-up menu. A list of tasks assigned to the user is displayed in the User Worklist dialog box.
Figure 10-12 User Worklist Dialog Box
Note: You cannot execute tasks on worklists invoked from within the Studio. To execute tasks from a worklist you must invoke the Worklist client application.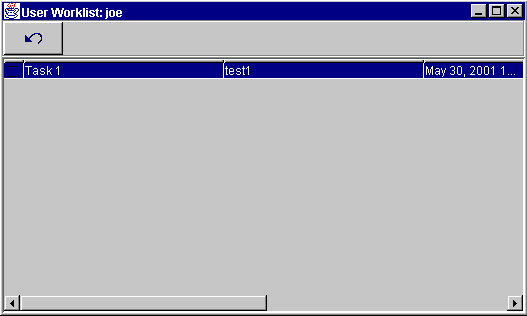
Viewing Role Worklists
In the BEA WebLogic Process Integrator folder tree, right-click a role from the list and select Open Role Worklist from the pop-up menu. A list of tasks assigned to the role is displayed in the Role Worklist dialog box.
Figure 10-13 Role Worklist Dialog Box
Note: You cannot execute tasks on worklists invoked from within the Studio. To execute tasks from a worklist you must invoke the Worklist client application.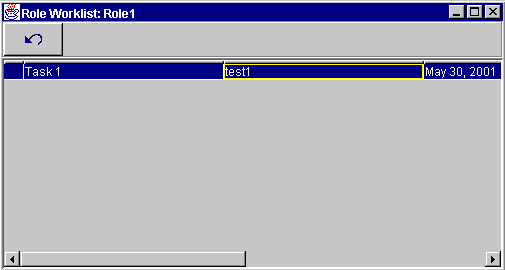
Using Workload Reports
BEA WebLogic Process Integrator allows you to view workload reports, showing the number of tasks, by workflow, task, user or role, and task status. In the BEA WebLogic Process Integrator folder tree, right-click Workload Report, and choose Open from the pop-up menu to display the Workload Report Properties dialog box.
Figure 10-14 Workload Report Properties Dialog Box
Compiling Workload Report Information The workload report will display information according to the selections you make in the Workload Report Properties dialog box: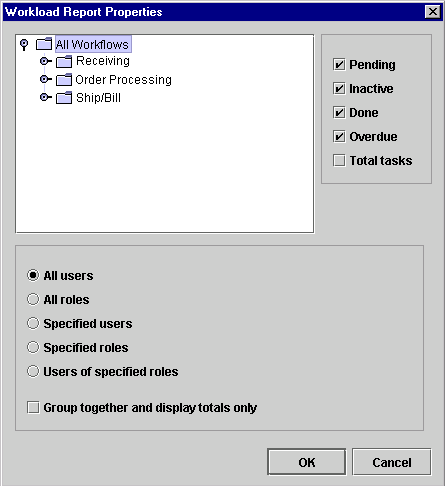
Viewing Workload Reports
After you make your workload report selections, click OK to display a graphical representation of the current workload.
Figure 10-15 Workload Report Dialog Box
The contents of the report are broken down by user, role, or totals, depending on the options selected. This display may scroll left and right if there is a lot of information. A bar chart indicates the total number of tasks of various state counted. The legend at the top of the window shows what each color represents, depending on the options selected at design time. For more precise indicators, the actual number of tasks is shown above each bar.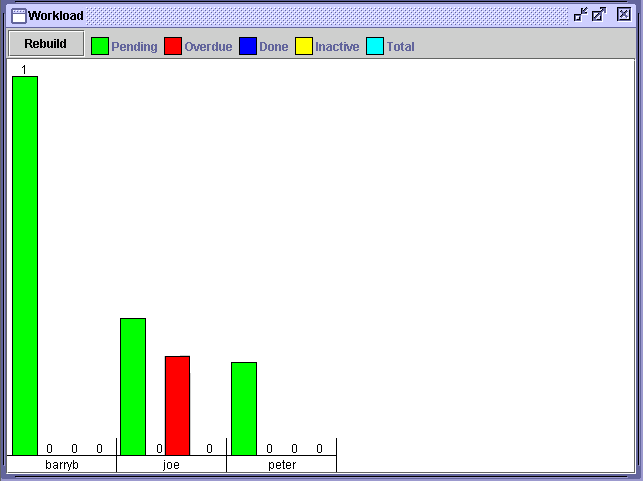
Using Statistics Reports
You can view statistics reports that are based on tasks, users, roles, and so on. A statistics report provides statistical information based on historical data kept for completed workflows. It shows number of tasks completed, total time, average time, minimum and maximum times spent for task. Standard deviation is also shown.
Compiling Statistics Report Information
In the BEA WebLogic Process Integrator folder tree, right-click Statistics Reports and choose Open from the pop-up menu to display the Statistics Report Properties dialog box. The report includes information according to the selections you make in the Statistics Report Properties dialog box.
Figure 10-16 Statistics Report Properties Dialog Box
Viewing Statistics Reports
When you make your statistics report selections, click OK to display the statistics report.
Figure 10-17 Statistics Report
The top of the dialog box has several options: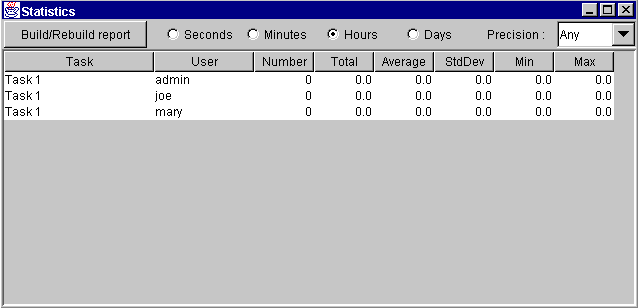
Several columns are displayed in the report, depending on the options selected at report design time:
Because the report definition is stored separately from the results, the statistics report can be run at any time.

|

|

|
|
|
|
Copyright © 2001 BEA Systems, Inc. All rights reserved.
|