|
|
|
|
|
|
Miscellaneous Portlets
This topic discusses portlets that have a variety of functionality. The following portlets are described:
Email Portlet
The Email portlet demonstrates the use of the Java Mail API. The Email portlet displays a list of messages in an email inbox. Although you can see which messages are there, you cannot read them. This section describes how to set up the Email portlet.
Java Source: examples/sampleportal/email
JSP Source: sampleportal/sampleportal/portlets/email
Note: Before you can set up the Email portlet, you must have a valid email address in the selected visitor's user profile.
Figure 7-1 Email Portlet—Not Configured
Figure 7-2 Email Portlet—Edit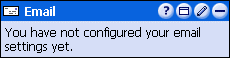
If you have entered the correct information, you should see your new emails in the Email portlet, as shown in Figure 7-3. Figure 7-3 Email Portlet—New Email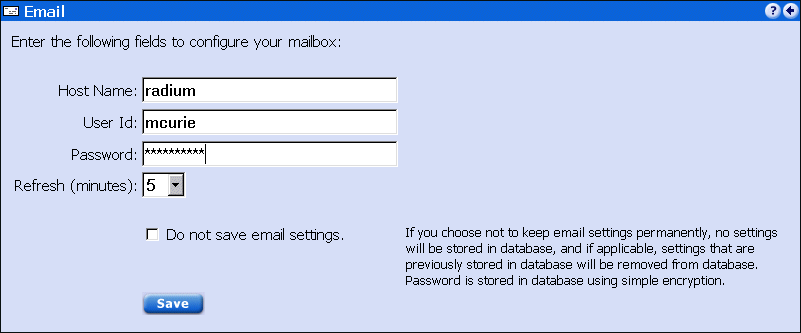
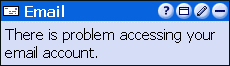
If the information you entered is not correct, the Email portlet indicates a problem, as shown in Figure 7-4. Figure 7-4 Email Portlet—Improperly Configured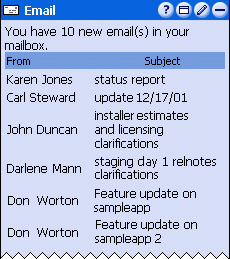
What's Hot Portlet
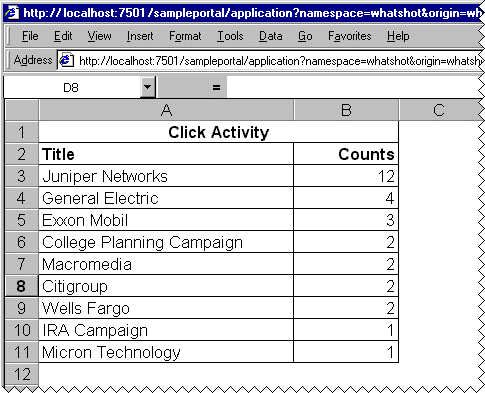
The What's Hot portlet is an example of a simple reporting portlet. It shows the number of times a company profile has been clicked. This portlet pulls information from the WebLogic Portal event tracking system. Specifically, the What's Hot portlet collects real-time information from an event and displays the information. It shows the use of an asynchronous custom event listener. The content of What's Hot can also be displayed in an Excel spreadsheet.
Java Source: examples/sampleportal/whatshot
JSP Source: sampleportal/sampleportal/portlets/whatshot
To learn about the What's Hot portlet, complete the following instructions:
Figure 7-5 What's Hot—Citigroup, 3 Counts
Figure 7-6 Company Profiles Portlet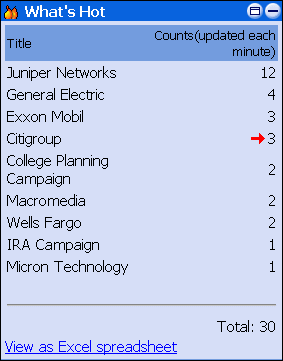
Figure 7-7 What's Hot—Citigroup, 4 Counts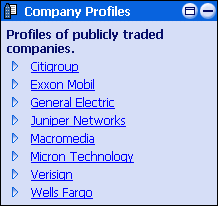
Figure 7-8 What's Hot—Excel Spreadsheet
My Work and Team Work Portlets
The My Work portlet provides a To Do list for personal activities. The Team Work portlet provides a To Do list for team activities. Any changes in the Team Work portlet are displayed for each team member. Every member of the team can update the Team Work portlet. The My Work and Team Work portlets are implemented through Enterprise JavaBeans (EJB) 2.0 entity beans.
Java Source: examples/sampleportal/collaboration
JSP Source: sampleportal/sampleportal/portlets/collaboration
To learn more about these portlets, complete the following instructions:
Figure 7-9 Team Work Portlet—No Items Saved
Figure 7-10 Team Work Portlet—New To Do Items
Figure 7-11 Team Work Portlet—Item Added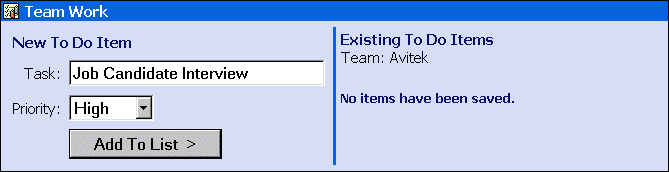
Figure 7-12 Team Work Portlet—Items Added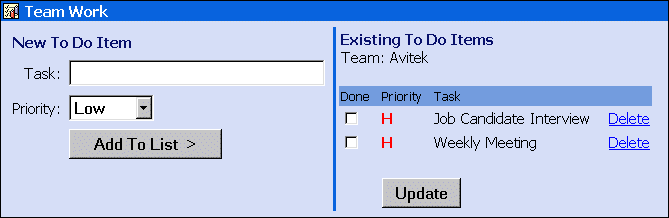
Figure 7-13 Team Work Portlet—Item Checked

The My Work portlet operates in the same way, except other team member portlets are not updated.
Customer Service Portlet
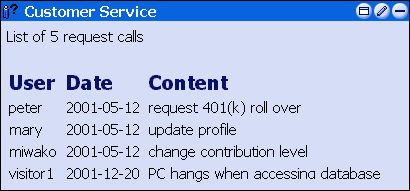
The Customer Service portlet demonstrates EJB 2.0 implementation and integration with the J2EE Connector Architecture (JCA) sample database adaptor provided with WLS 6.1. The Customer Service portlet has two views: the Individual view, where visitors can see only their service requests and add new requests, and the Service Representative view, where all service requests from every group member are displayed.
Java source: sampleportal/sampleportal/WEB-INF/src/examples/sampleportal/customerservice
sampleportal/src/examples/sampleportal/customerservice
JSP source: sampleportal/customerservice
To learn more about the Customer Service portlet, complete the following instructions:
Note: Only the Customer Service Representative (Visitor 5) can see all the requests.
Figure 7-14 Customer Service Portlet—Default (Visitor 5)
Figure 7-15 Customer Service Portlet—Default (Visitor 1)
Figure 7-16 Customer Service Portlet—Enter Request (Visitor 1)
Figure 7-17 Customer Service Portlet—New Request (Visitor 1)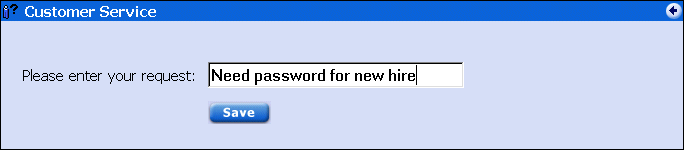
Figure 7-18 Customer Service Portlet—New Request Added (Visitor 5)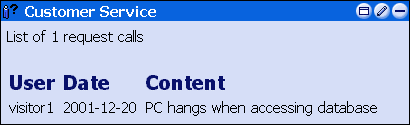
This completes the Tour of the Avitek Financial Sample Portal.

|

|
|
|
|
Copyright © 2001 BEA Systems, Inc. All rights reserved.
|