Visitor Tools Guide
Using the Visitor Tools
Overview
Portal visitors can use browser-based tools to personalize the makeup and appearance of their portal. This guide details the portal features that are available to registered visitors.
These step-by-step instructions tell you how to:
- Login to a Portal
- Modify Portal Resources
- View the contents of a portal
- Edit the contents of a portal
- Change the menu style
- Reorder the book items
- Add book items
- Remove book items
- Add a new book
- Add a new page
- Edit the contents of a page
- Change the page layout
- Add new items to the page
- Remove items from the page
- Rename a page
- Move a page
- Rename a portlet
- Move a portlet
- Change the theme
- Change the portal look and feel
Login to a Portal
Before you can use the WebLogic Portal Visitor Tools, you must login as a registered user to a portal desktop that was created in the WebLogic Administration Portal.
Note: This guide uses the sample portal included in WebLogic Portal 8.1 for the purpose of illustrating an example.
To login to a portal:
- Launch your browser and enter the URL for the portal you want to customize.
- Login into the portal. In this example, the username/password is weblogic/weblogic.
Figure 1-1 Login Screen

You are now logged into the portal and can begin customizing your view of it using the Visitor Tools.
- To begin using the Visitor Tools, click on the Customize My Portal link in the portal.
Figure 1-2 Customize My Portal Link

Modify Portal Resources
Using the Visitor Tools, you can change your view of the portal by changing items, such as the menu style or the contents of a portal book. You can also add new items, such as books and pages.
View the Contents of a Portal
To view the contents of a portal:
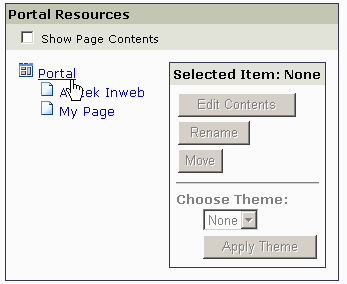
In the Customize your view of the Portal pane, click the box next to Show Page Contents. This expands the desktop hierarchy so you can view the major components of the portal that you can personalize.
Figure 1-3 Show Page Contents
Edit the Contents of the Primary Book (Portal)
To begin customizing your view of the desktop:
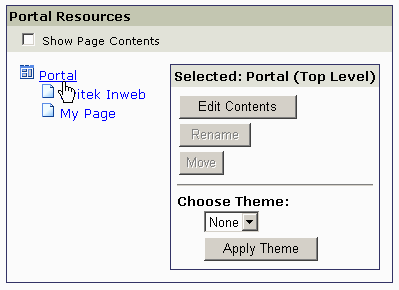
- In the hierarchy in the Portal Resource pane, click on the portal resource that you want customize.
- When you select a book or page in the Portal Resource pane, the Edit Contents button becomes active.
Note: In the Portal Resource hierarchy, the top level is called Portal. This is not the portal itself — rather this is the desktop's primary book. When you are editing resources in this hierarchy, you are changing the contents of the resources assigned to the primary book.
Figure 1-4 Edit Contents of the Primary Book
Change the Menu Style
To change the menu style:
- In the Menu (Tabs) pane, click the drop-menu to see the available menu styles.
Figure 1-5 Choose a Menu Style

- Click on the menu style you want to use. Click Apply Menu.
Note: To preview the new menu style, return to the portal to view your changes.
Reorder the Book Items
To reorder the items in a book:
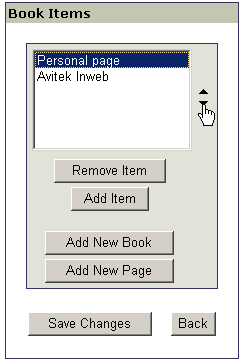
- In the window displaying the available book items, select the book item you want to move.
- Click on the up or down arrows next to the window to move the item up or down.
Figure 1-6 Reorder Book Items
Add Existing Book Items
To add items to a book:
- Click the Add Item button.
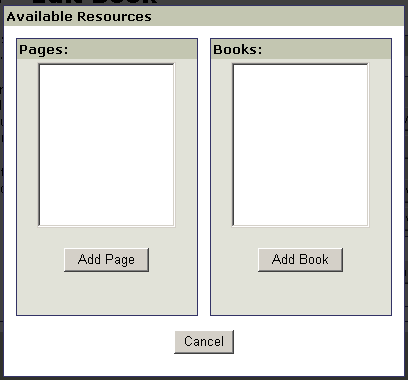
- From the pop-up window, select the item you want to add. You can add existing resources to your portal by choosing items listed in the Available Resources pane. You can also add a new page or a new book.
Figure 1-7 Add Existing Items
Add a New Page
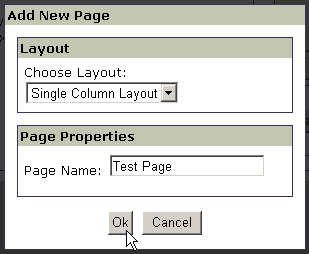
To add a new page:
- Click the Add New Page button.
- In the Add New Page pane, select a layout from the drop-down menu.
- In the Page Name field, enter the name for the new page.
- Click OK. This returns you to the Book Items pane.
Figure 1-8 Add a New Page
- To edit the contents of the new page, click Save Changes in the Book Items pane. Then select the new page name from the Portal Resources pane in the Customize Your View of the Portal window.
Add a New Book
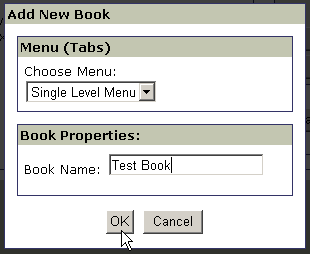
To add a new book:
- Click the Add New Book button.
- In the Add New Book pane, select a menu style from the drop-down menu.
- In the Book Name field, enter the name for the new book.
- Click OK. This returns you to the Book Items pane.
Figure 1-9 Add a New Book
- To edit the contents of the new book, click Save Changes in the Book Items pane. Then select the new book name from the Portal Resources pane in the Customize Your View of the Portal window.
Remove a Book Item
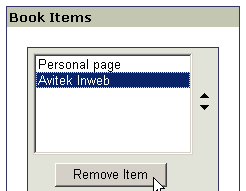
To remove an item from a book:
- In the Book Items pane, select the item you want to delete.
Figure 1-10 Remove a Book Item
Edit the Contents of a Page
Change the Page Layout
To change the page layout:
- In the Portal Resources pane, click the page you want to change. Click Edit Contents.
- In the Layout pane, select the layout you want from the drop-down menu.
Figure 1-11 Choose a Layout

Note: If you reduce the number of columns in your layout, any portlets from the removed columns will be moved to the remaining columns in the layout.
Move Items on a Page
To move items on a page:
- In the Portal Resources pane, click the page you want to change. Click Edit Contents.
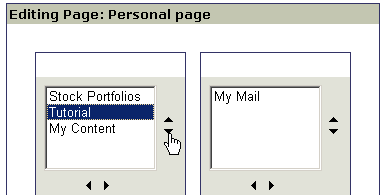
- In the Editing Page pane, select the page item you want to move.
- Using the up and down arrows to the right of the window, you can move the item's position within a column in the layout.
- Using the left and right arrows at the bottom of the window, you can move the item's position to another column in the layout.
Figure 1-12 Move the Items on a Page
Add New Items to a Page
To add a new item to a page:
- In the Portal Resources pane, click the page you want to change. Click Edit Contents.
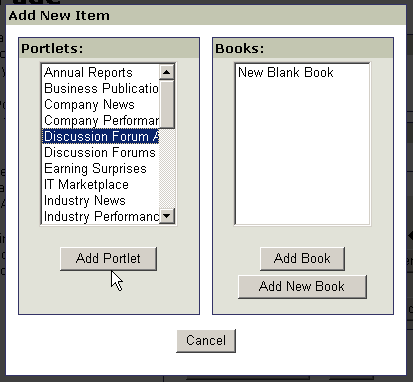
- In the Editing Page pane, click Add New Item.
- In the pop-up window, select a new item from the list of available resources, such as portlets and books.
- Click Add Portlet, Add Book, or Add New Book as desired.
Figure 1-13 Add New Items
Remove an Item From a Page
To remove an item from a page:
- In the Portal Resources pane, click the page from which you want to remove an item. Click Edit Contents.
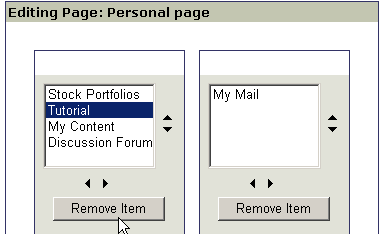
- In the Editing Page pane, select the item you want to remove.
Figure 1-14 Remove an Item From a Page
Rename a Page
To rename a page:
- In the Portal Resources pane, click the page you want to rename. Click Rename.
- In the pop-up window, enter the new name for the page.
Figure 1-15 Rename a Page

Move a Page
To move a page between books:
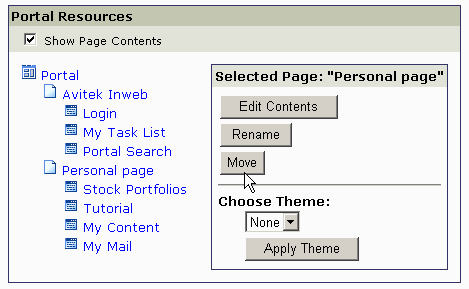
- In the Portal Resources pane, click Show Page Contents in order to view embedded books.
- Click the page you want to move. Click Move.
- Click on the target book to which you want to move the page.
Figure 1-16 Move a Page
Note: To reorder the pages within a book, see "Reorder the Book Items" on page 5.
Rename a Portlet
To rename a portlet:
- In the Portal Resources pane, click on the portlet you want to rename. Click Rename.
- In the pop-up window, enter the new name for the portlet.
Figure 1-17 Rename a Portlet

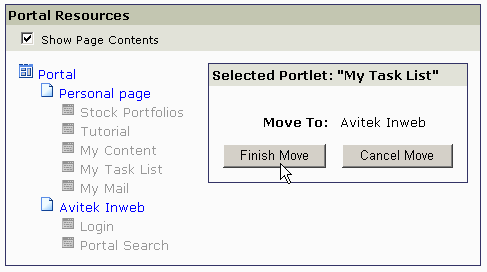
Move a Portlet
To move a portlet to a different page:
- In the Portal Resources pane, click on the portlet that you want to move. Click Move.
- Click on the page to which you want to move the portlet.
Figure 1-18 Move a Portlet
Note: To reorder portlets within a page, see "Reorder the Book Items" on page 5.
Change the Theme
To change the theme of a book, page, or portlet:
- In the Portal Resources pane, select the book, page, or portlet for which you want to change the theme.
- In the Choose Theme field, select an available theme from the drop-down menu.
Figure 1-19 Choose a Theme

Note: Out of the box, the sample portal does not include any themes.
Change the Portal Look and Feel
To change the look and feel:
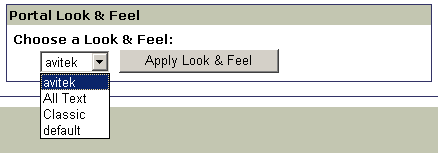
- In the Portal Look & Feel pane, select a Look and Feel from the drop-down menu.
Figure 1-20 Choose a Look and Feel
