Using WSRP with WebLogic Portal
|
|
Establishing WSRP Security
The WSRP standard does not enforce any specific security standard at this time; however, it does recommend that you follow security standards such as WS-Security and SAML when implementing WSRP-compliant portlets. The WSRP standard does emphasize using transport-level security standards, such as SSL/TLS, to address the security issues involved in Consumers invoking Producers on behalf of end-users. These security standards only require that a Producer's WSDL declare ports for an HTTPS service entry point. Consumers can only determine that secure transport is supported by parsing the URL for the service entry point access control.
Note: It is a general limitation of J2EE security that security constraints on web application resources are not honored when a portlet uses those resources. This limitation applies to both remote and local portlets. To work around this limitation, it is recommended that you use entitlements on the consumer portal to restrict access to specific content.
This section describes some of the security measures we suggest you follow. It contains information on the following subjects:
- Access Control
- Security Recommendations
- Secure WSRP Messages
- Manage User Identity
- Establishing Single Sign-on with Remote Portlets: Example
- Securing the WebLogic Administrator's Logon Information
Access Control
Both Producers and Consumers can control access by using the implemented security measures.
- Consumers can restrict end-users access to portlets and to specific operations on those portlets.
- Producers can implement access control programmatically through the use of facilities such as an authenticated user identity.
Security Recommendations
While the WSRP standard does not specify security requirements, the following recommendations serve as guidelines that will ensure secure implementation of your WSRP-compliant portlets:
- Setting Security Constraints on Resources
- Secure WSRP Messages
- Manage User Identity
- Securing the WebLogic Administrator's Logon Information
Setting Security Constraints on Resources
As a basic rule and best practice, administrators should secure all web applications and their resources running in a production environment. Security is especially important when resource URLs (links to files and images on a producer) are used with WSRP. Per the WSRP 1.0 specification, resource URLs are absolute and become part of the final URL, which is visible in the wsrp-url parameter.
When you view portal page's source in a browser, these resource URLs are visible. Because they provide the URL back to the hosting web application on the producer machine, it is important that all resources on the producer are secure. For example, using this information, a user could guess URLs on the producer, such as the WebLogic Server Console, and attempt to access them directly.
Warning: It is the responsibility of the producer's administrator to secure web applications and resources appropriately.
For information on adding security constraints to a WebLogic Server, see URL (Web) and EJB (Enterprise JavaBean) Resources and security-constraint at:
http://download.oracle.com/docs/cd/E13222_01/wls/docs81/secwlres/types.html#1208206
http://download.oracle.com/docs/cd/E13222_01/wls/docs81/webapp/web_xml.html#1017885
Creating a Resource Connection Filter
As discussed in the previous section, the wsrp-url parameter exposes resource URLs on the producer machine.
By default, a consumer allows access to URLs hosted on the machines that host WSRP producers that are currently known to the consumer. Such producers are ones added to the consumer with WebLogic Workshop, the Portal Administration Portal, or WebLogic Portal APIs. If you want to override this default behavior, do the following:
- On the consumer, create a class that implements the interface
com.bea.wsrp.consumer.resource.ResourceConnectionFilter. This interface includes one method: public boolean allowedURL(String url);Implement this method to return
trueonly for URLs that you want to allow access to through thewsrp-urlparameter.Place the implementation class file in
WEB-INF/lib/classes. For example,WEB-INF/lib/classes/MyResourceProxyServletImpl.class.- Register the class with the ResourceProxyServlet on the consumer. To do this, add an
<init-param>element to the ResourceProxyServlet definition in theWEB-INF/web.xmlfile of the consumer web application. You must set the<param-name>toresourceConnectionFilter, and the<param-value>to the fully qualified classname of your ResourceConnectionFilter implementation class. Listing 9-1 shows a sample ResourceProxyServlet servlet definition.
Listing 9-1 Configuring ResourceProxyServlet (in WEB-INF/web.xml)
<servlet>
<servlet-name>ResourceProxyServlet</servlet-name>
<servlet-class>com.bea.wsrp.consumer.resource.ResourceProxyServlet</servlet-class>
<init-param></servlet>
<param-name>resourceConnectionFilter</param-name>
<param-value>myClasses.MyResourceProxyServletImpl</param-value>
</init-param>
Secure WSRP Messages
Securing WSRP messages ensures their confidentiality between just the interested parties. When a portlet's messaging is secure, only parties authorized to handle the contents of that portlet's messages can see those messages. To secure WSRP messages:
- Use SSL on any port through which the Producer will be offered.
- Configure the Producer to offer secure portlets by specifying
"true"for all secure attributes in the <service-config> element of the Producer project'sWEB-INF/wsrp-producer-config.xmlfile, as shown in Listing 9-2.
Listing 9-2 <service-config> Element Configured for Security
<service-config>
<registration required="true" secure="true"/>
<service-description secure="true"/>
<markup secure="true"rewrite-urls="true" transport="string"/>
<portlet-management required="true" secure="true"/>
</service-config>
Note: If you make any changes to wsrp-producer-config.xml, you will need to redeploy or bounce the server before the changes become active.
Manage User Identity
- Rely on single-sign-on (SSO), which is set up by default in WebLogic Portal.
- Let users login to the Consumer portal. WebLogic Portal will manage SSO automatically.
What is Single Sign-on?
Single sign-on (SSO) is mechanism whereby a single action of user authentication and authorization can permit that user to access all computers and systems to which access permission has been granted, without having to enter multiple passwords. Single sign-on reduces human error, a major component of systems failure and is therefore a feature.
How Single Sign-on Works with WSRP
SSO support is meant to propagate user identity from the consumer to the producer. That is, the consumer provides authentication, and the WSRP stack makes sure that the same user identity is established on each producer with which the user is interacting. The best way to see this in action is to monitor the SOAP message log on the producer or consumer side. After login (on the consumer side), you will see an extra SOAP header in each request.
Each web application has a monitor which logs soap messages. The monitor can be viewed by going to http://<machine>:<port>/<webapp>/monitor. For more information on monitoring SOAP messages, please refer to Monitoring Producer/Consumer Message Logs at:
http://download.oracle.com/docs/cd/E13218_01/wlp/docs81/wsrp/monlog.html#998933
The Signed Certificate
Producers authenticate Consumers through the use of client certificates in conjunction with SSL/TLS. Therefore, if you are relying on SSO and allow users to log-in to the Consumer portal, as recommended, the Producer must trust that Consumer. To establish this trust, the Consumer needs a certificate of authentication signed by an approved certificate authority (CA), such as VeriSign, Inc. This section introduces the Java keytool utility that is used to generate a self-signed certificate. Later in this chapter, we use the keytool in a detailed example that includes obtaining and using a signed certificate from a CA.
The Java keytool Utility
When you install WebLogic Platform, part of the installation process installs a Java runtime environment (JRE). Within the JRE you will find a utility call keytool.exe. keytool is a key and certificate management utility with which you can administer your own public/private key pairs and associated certificates to use in self-authentication (where the user authenticates himself/herself to other users/services) or data integrity and authentication services by using digital signatures.
keytool Concepts and Terminology
You should be familiar with the following terms when implementing security for WSRP-compliant portlets:
Also known as a public-key certificate—a digitally signed statement from one entity (the issuer), saying that the public key (and some other information) of another entity (the subject) has some specific value.
An organization, such as VeriSign, Inc. that will accept a CSR and return to the requestor a certificate or certificate chain.
A set of certificates used to establish trust back to a common certificate authority. The first certificate in the chain contains the public key corresponding to the private key.
A file that is sent to a certificate authority, who will authenticate the certificate requestor (usually offline) and return to the requestor a certificate or certificate chain, used to replace the existing certificate chain (which initially consists of a self-signed certificate) in the keystore.
A database of private keys and their associated X.509 certificate chains that are used to authenticate the corresponding public keys. A keystore file has the
.jksextension. The keystore is scoped to the domain, so you will find it in the<BEA_HOME>/user_projects/domains/specificDomainfolder (wherespecificDomainis the domain to which the application you want to secure points). WebLogic Platform ships with a default keystore calledwsrpKeystore.jks. We strongly recommend that you rename this file for each domain in which you plan to run it. Otherwise, application security will be compromised.
keytool Reference
keytool was created by Sun Microsystems. For complete information on this utility, please refer to keytool - Key and Certificate Management Tool at:
http://java.sun.com/j2se/1.4.2/docs/tooldocs/windows/keytool.html
Secure the /producer Path
By default, the Producer servlet is not protected. In order to restrict access to a Producer, protect the path <webAppPath>/producer at the network or firewall level (where webAppPath is the URL of the web application).
Establishing Single Sign-on with Remote Portlets: Example
The following example will show you how to establish SSO from a Consumer to a Producer. In this simple example, you will be able to log in to a remote portlet from a local portlet on a Consumer.
In this example, you will do the following:
- Set up an environment (domain, portal application, and portal web applications) in which to run the example.
- Create a login portlet and establish SSO with a remote portlet by using the signed certificate supplied with BEA WebLogic Portal 8.1
- Use the Java keytool utility to create a new keystore (this utility is described in The Java keytool Utility).
Before you attempt this exercise, please read the preceding section, Manage User Identity.
Step 1. Set Up the Environment
To set up the necessary environment for this example, please refer to Step 1: Set Up Your Environment in Establishing Interportlet Communications with Remote Portlets. Follow the instructions in that section explicitly. If you already completed the environment setup described in Step 1: Set Up Your Environment, you do not need to complete this step.
Note: We recommend that you use the same environment from Establishing Interportlet Communications with Remote Portlets to avoid cluttering your <BEA_HOME>/user_projects folder. If you want to complete this exercise in a new domain and/or portal application, be sure to substitute the names you select for those components in the following procedures.
Step 2. Create the Login Portlet and Establish SSO with a Remote Portlet
In this step, you will create a log-in portlet on the Consumer using the BEA-supplied log-in controller page flow and a simple JSP portlet on the Producer. You will then federate the JSP portlet to the Consumer. Next, you will attempt to log in to the remote portlet by using the log-in portlet.
Create the Log-in Page Flow Portlet
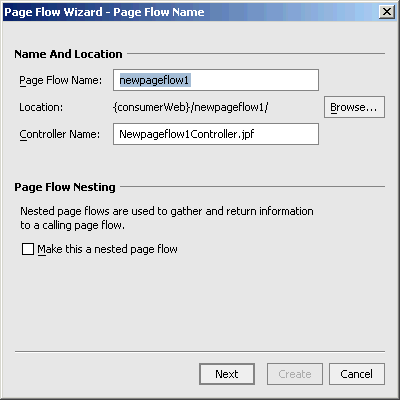
The Page Flow Wizard - Page Flow Name dialog box appears (Figure 9-1).
Figure 9-1 Page Flow Wizard - Page Flow Name Dialog Box
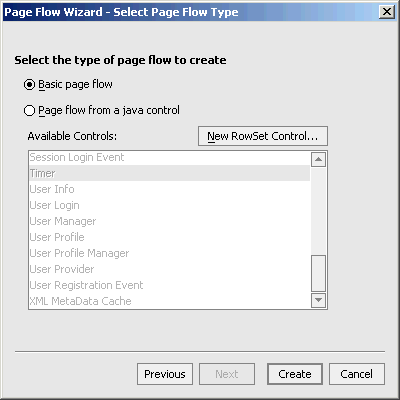
The Page Flow Wizard Page - Flow Type dialog box appears (Figure 9-2)
Figure 9-2 Page Flow Wizard - Page Flow Type Dialog Box
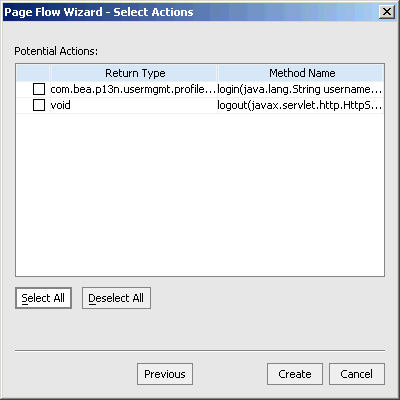
The Page Flow Wizard - Select Action dialog box appears (Figure 9-3)
Figure 9-3 Page Flow Wizard - Select Action Dialog Box
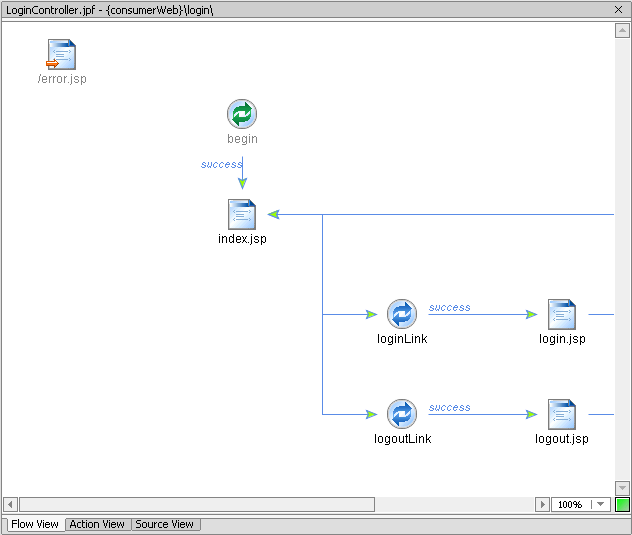
The page flow file is created. LoginController.jpf will appear under consumerWeb on the application tree and the page flow schematic will appear in the IDE workspace (Figure 9-4).
Figure 9-4 LoginController.jpf Page Flow in IDE Workspace
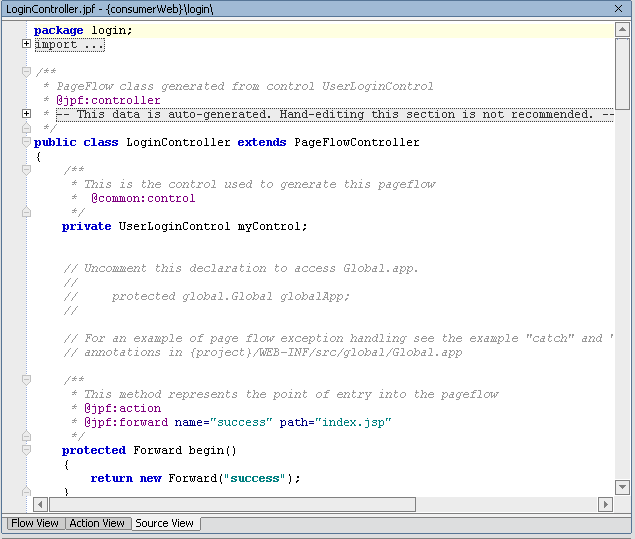
- Click Source View to display the page flow code (Figure 9-5)
Figure 9-5 LoginController.jpf Source
com.bea.p13n.usermgmt.profile.ProfileWrapper var = myControl.login
  (aForm.username, aForm.password, aForm.request );
com.bea.p13n.usermgmt.profile.ProfileWrapper var = myControl.login
(aForm.username, aForm.password,super.getRequest());
The call should now look like the example in Listing 9-3
Listing 9-3 Updated Forward login(LoginForm aForm) Call
 public Forward login(LoginForm aForm)
        throws Exception
    {
        com.bea.p13n.usermgmt.profile.ProfileWrapper var =
        myControl.login(aForm.username, aForm.password,
           super.getRequest() );
      getRequest().setAttribute("results", var);
        return new Forward("success");
    }
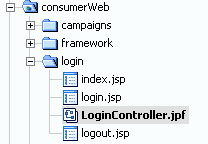
LoginController.jpfwill appear under consumerWeb/login in the application tree (/login is created when you save LoginController.jpf; Figure 9-6).Figure 9-6 LoginController.jpf Under consumerWeb/login
- Right-click
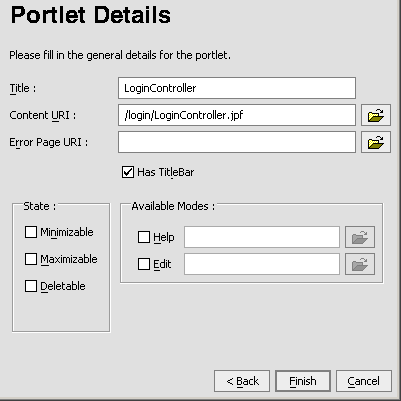
LoginController.jpfin the application tree to open the context menu and select Generate Portlet... The Portlet Wizard - Portlet Details dialog box appears (Figure 9-7).
Figure 9-7 Portlet Wizard - Portlet Details Dialog Box for LoginController.jpf
Note that
LoginController.jpfalready appears in the Content URI field.
Create a Log-in Portal
In this step, you will create a portal to contain the login portlet you built in Create the Log-in Page Flow Portlet.
- Right-click the consumerWeb node of the application tree to open the context menu and select New>Portal.
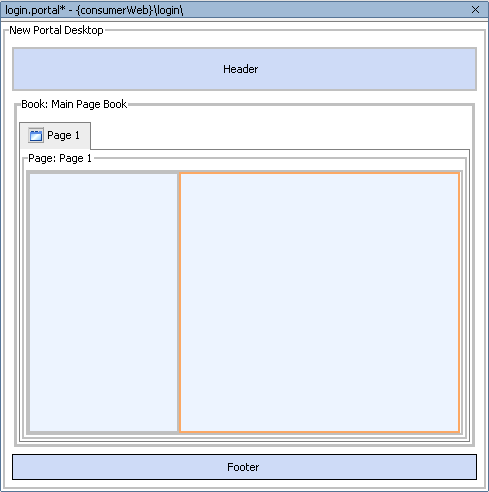
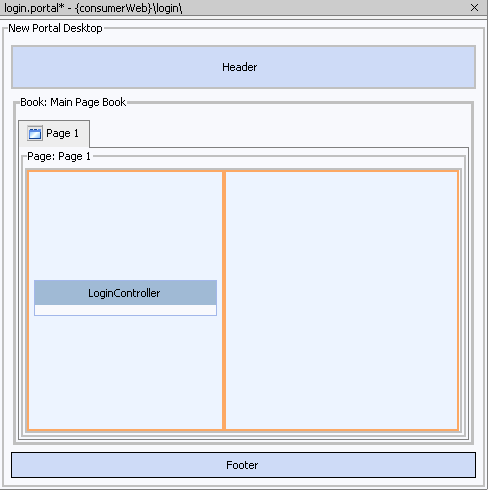
login.portalappears underconsumerWeb/loginin the application tree and the portal layout appears in the WebLogic Workshop workspace (Figure 9-8).Figure 9-8 login.portal in WebLogic Workshop Workspace
- Drag
LoginController.portletfrom the Data Palette onto the left-hand column of the portal layout, as shown in Figure 9-9.
Figure 9-9 LoginController.portlet in Portal Layout
Create a Portlet on the Producer
Next, create a JSP file and portlet on the Producer. This is the portlet you will federate to the Consumer portal you created in Create a Log-in Portal and will be the portlet you will attempt to log in to when you test the login portal.
- Ensure that Web User Interface and JSP File are selected in the left and right-hand panes, respectively; in File name, enter
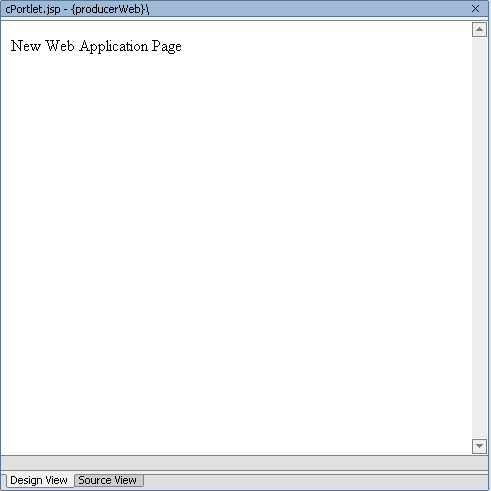
cPortlet.jspand click Create. cPportlet.jspappears in the WebLogic Workshop workspace (Figure 9-10).Figure 9-10 cPortlet.jsp in Design View
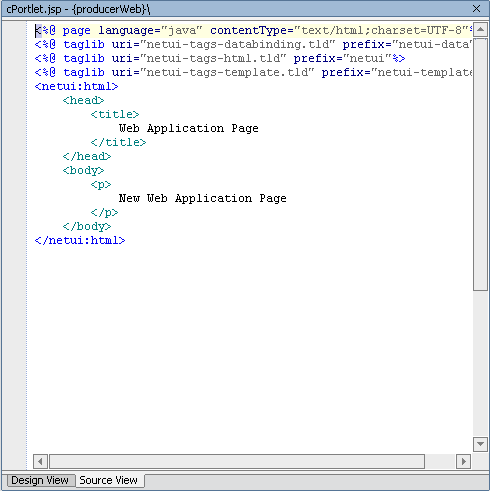
- Click Source View to display the JSP code for cPortlet.jsp (Figure 9-11).
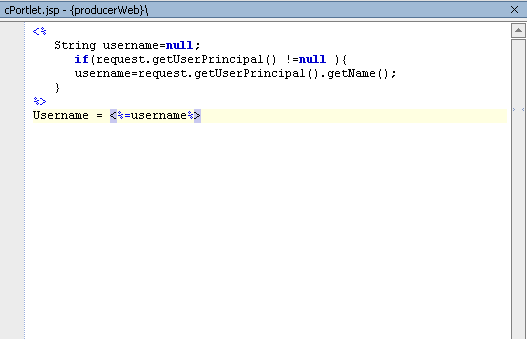
- Copy the code from Listing 9-4 and replace the existing
cPortlet.jspsource code with it.
Figure 9-11 cPortlet in Source View
Listing 9-4 cPortlet.jsp Source
<%
   String username=null;
      if(request.getUserPrincipal() !=null ){
      username=request.getUserPrincipal().getName();
   }
%>
Username = <%=username%>
The WebLogic Workshop workspace will look like the example in Figure 9-12.
Figure 9-12 New cPortlet.jsp Source
- Right-click
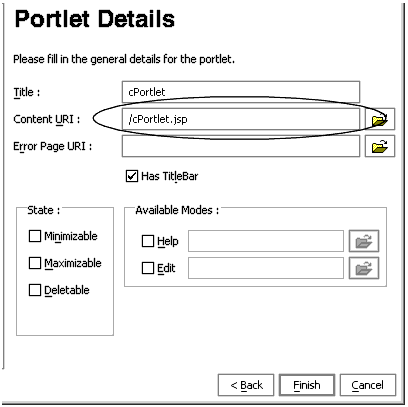
cPortlet.jspin the application tree to display the context menu and select Generate Portlet... The Portlet Details dialog box for
cPortlet.jspappears (Figure 9-13).Figure 9-13 Portlet Details Dialog Box for cPortlet.jsp
Note that
cPortlet.jspappears in the Content URI dialog box.
Federate the Producer Portlet to the Consumer
Next, you will surface the JSP portlet you created in Create a Portlet on the Producer to the Consumer. To do so, use this procedure.
Note: Ensure that WebLogic Workshop is running.
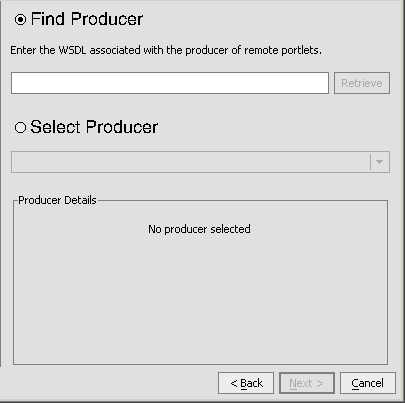
The Find/Select a Producer dialog box appears (Figure 9-15), with Find Producer selected.
Figure 9-15 Find/Select a Producer Dialog Box
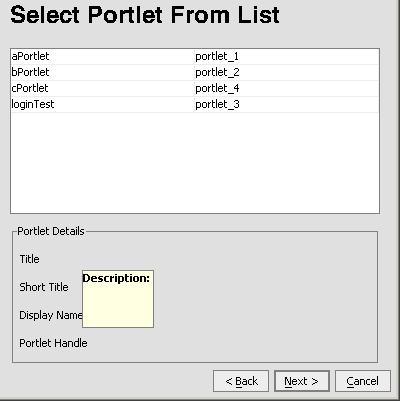
The Select Portlet from List dialog box appears (Figure 9-16).
Figure 9-16 Select Portlet from List Dialog Box
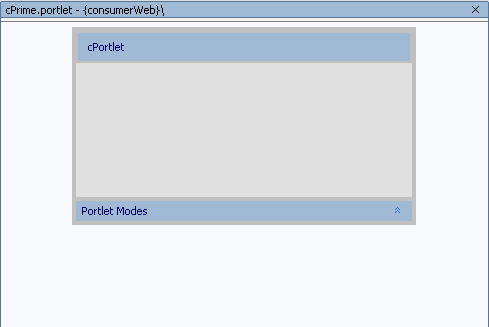
cPrime.portletwill appear under consumerWeb on the application tree and the portlet layout will appear in the WebLogic Workshop workspace (Figure 9-17).Figure 9-17 cPrime Portlet Layout
http://localhost:7001/producerWeb/producer?WSDL
Test the Log-in Portlet
Finally, you need to test the log-in portlet you created in Create the Log-in Page Flow Portlet to ensure that you can log in to a remote portlet. Once that test is successful, you will "break" the application, which will prevent you from logging in to the remote portlet.
Note: Ensure that WebLogic Server is running.
To run this test, do the following:
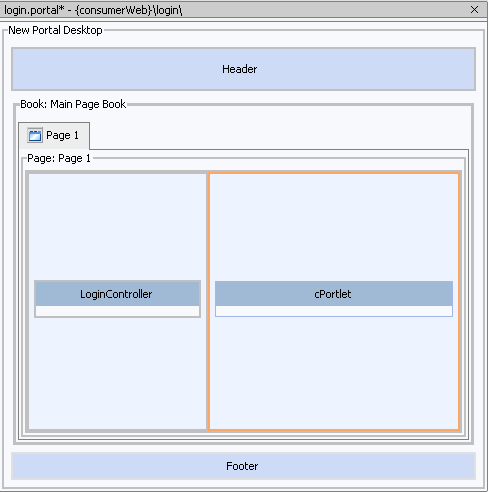
- Drag cPortlet from the Data Palette into the right-hand placeholder of the portal (Figure 9-18). cPortlet is the name that
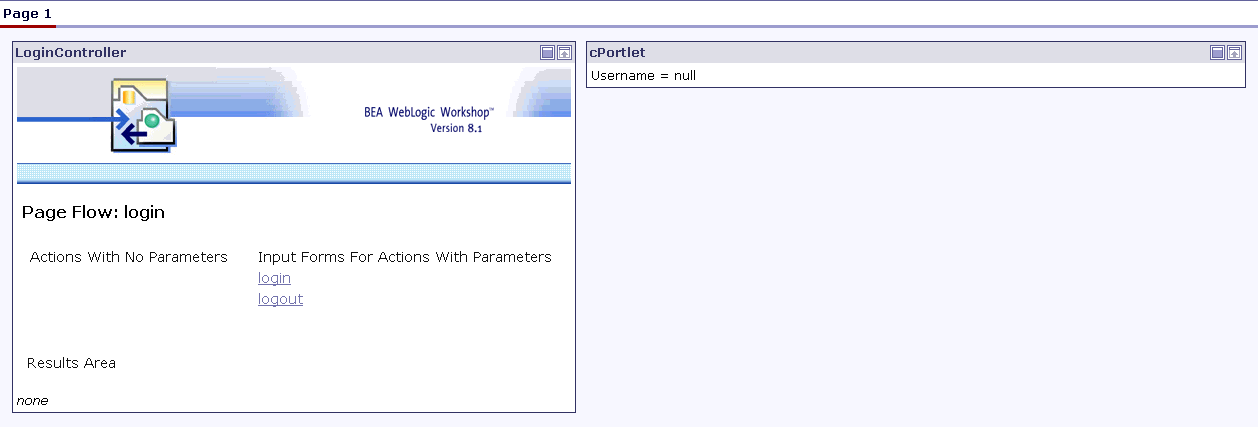
cPrime.portletis identified by in the Data Palette. If the Data Palette is not visible, select View>Windows>Data Palette. After a few moments, the portal will appear in a browser (Figure 9-19).
Figure 9-19 login.portal Rendered in the Browser
Figure 9-18 login.portal with cPortlet Added
Note that cPortlet displays the text Username = null.
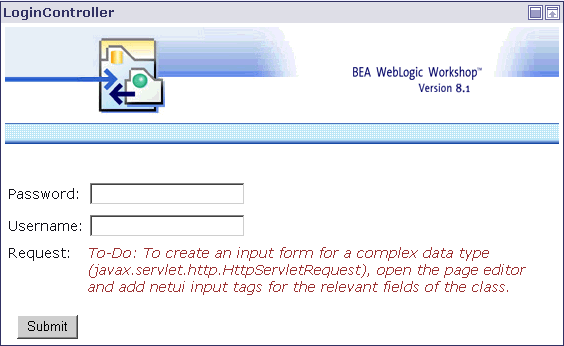
LoginController refreshes to show log-in fields (Figure 9-20).
Figure 9-20 Log-in Fields on LoginController.portlet
In both Password and Username, enter weblogic and click Submit.
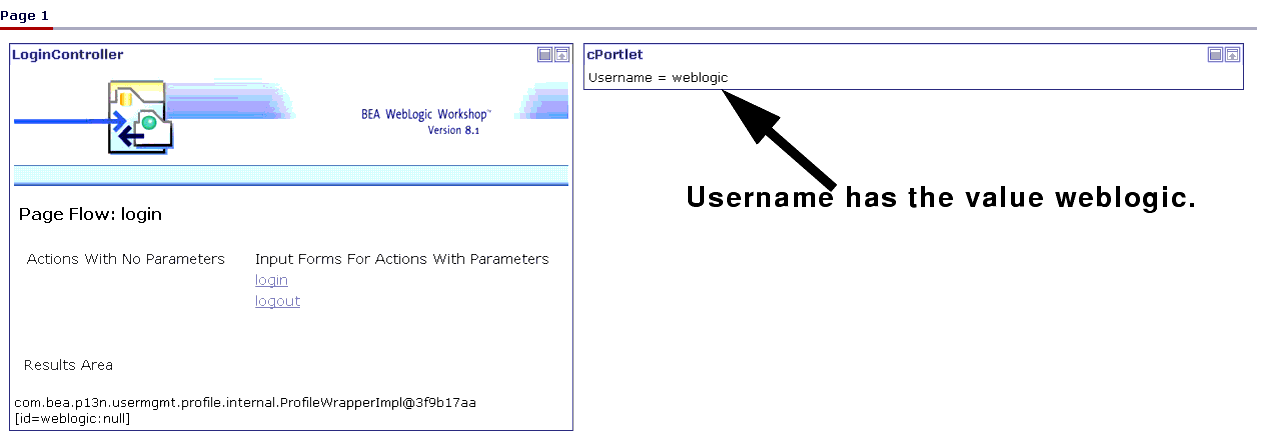
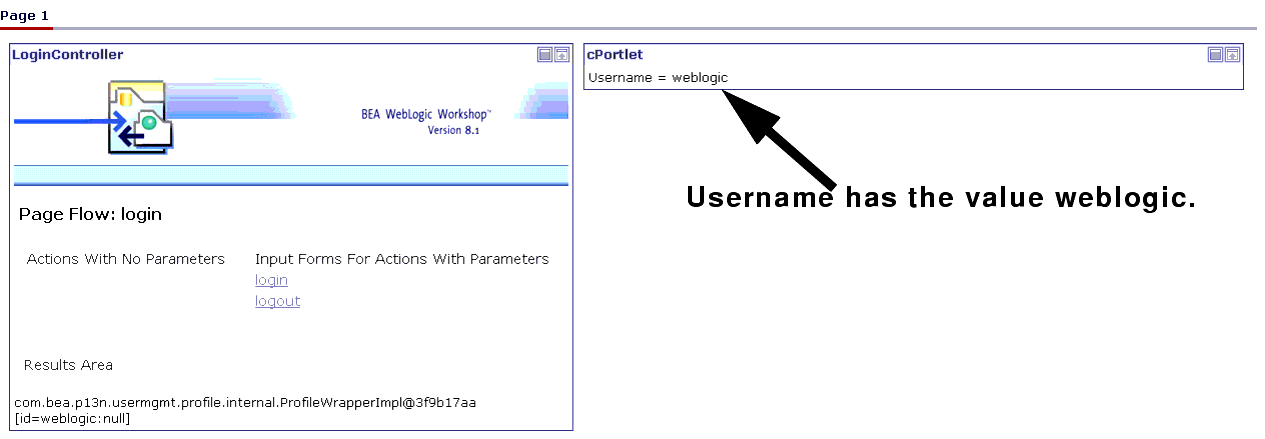
The portal refreshes; cPortlet will now display Username = weblogic.
Figure 9-21 login.portal After Login is Successful
Summary
In this step, you created all components required to build a portal that will allow you to log in to a portlet that has been federated to that portal from a producer. You then assembled a log-in portal using out-of-the-box resources, rendered that portal in a browser, and logged in to the remote portlet. In the next step, you will "break" this portal.
Step 3: Break the Log-in Portal
In this step, you will rename the keystore file, which will prevent login to the remote portlet on login.portal. Next, you will verify that you cannot log in to the portal by attempting and failing to successfully log in.
Rename the .jks File
To rename the .jks file, do the following:
Note: Ensure that WebLogic Workshop is running.
Retest the Portal
Now, you will launch the log-in portal and attempt to log in to the remote portlet again. To do so, do the following:
- Under consumerWeb, double-click login.portal to open that portal in WebLogic Workshop (if
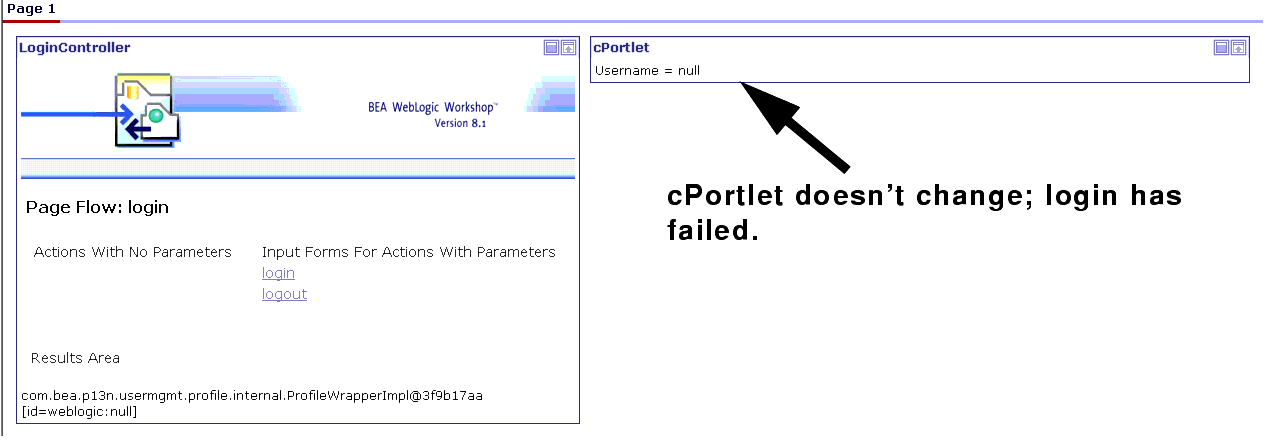
login.portalis already open when you launched WebLogic Workshop, you can ignore this step). - The portal refreshes and cPortlet will read Username = null (that is, it won't change; Figure 9-22). This indicates that the login has failed.
Note: The application ipcWsrpTest should be open.
Figure 9-22 login.portal After Failed Login Attempt
Step 4: Obtain and Implement a Signed Certificate
In this step, you will use the The Java keytool Utility to create a Self-signed certificate, creating a new keystore in the process. You will then generate a Certificate Signing Request (CSR) and send that CSR to a Certificate Authority (CA) who will return to you a signed certificate that you will use to establish log-in to the remote portlet.
Before You Begin
Before attempting this procedure, please read about The Java keytool Utility. You might also want to review the information included in keytool - Key and Certificate Management Tool at:
http://java.sun.com/j2se/1.4.2/docs/tooldocs/windows/keytool.html
Generate a New Keystore
To generate a new keystore, use this procedure.
Note: <BEA_HOME> is the directory where you installed WebLogic Platform.
testkeypassis the password used to protect the private key of the generate key pair.- <BEA_HOME>
\user_projects\domains\ipcWsrpDomain\is the domain directory. wsrpKeystoreis the new.jksfile.teststorepassis the password used to protect the integrity of the keystore.testaliasis a name you specified as an alias, which is used to access an entity in the keystore.
Note: The keytool utility is scoped to the JVM you are using. If you select another JVM when you configured your implementation of WebLogic Server, for example BEA WebLogic JRockit, you must navigate to and run the following commands from that JVM's directory.
<BEA_HOME>\jdk142_05\bin>keytool -genkey -keypasstestkeypass-keystore <BEA_HOME>\user_projects\domains\ipcWsrpDomain\wsrpKeystore.jks-storepassteststorepass-aliastestalias
Note: For a complete list of options, please refer to keytool - Key and Certificate Management Tool at:
http://java.sun.com/j2se/1.4.2/docs/tooldocs/windows/keytool.html
The keytool options are not required. If you choose not to specify them, defaults are used for those that have default values and you will be prompted for any required values.
Create the Certificate Signing Request and Import the Signed Certificate
You've now generated a self-signed certificate. Because any certificate is more likely to be trusted by others if it is signed by a Certification Authority (CA), you now need to generate a Certificate Signing Request (CSR) to gain that signature. To create the CSR, do the following:
- Go to a command prompt and navigate to
<BEA_HOME>\jd142_05\bin(if you are already at this directory, you can ignore this step).
keytool -certreq -keystore<BEA_HOME>\user_projects\domains\ipcWsrpDomain\wsrpKeystore.jks -alias testalias
The system responds:
Enter keystore password:
The system responds:
Enter key password for <mykey>:
-----BEGIN NEW CERTIFICATE REQUEST-----
MIICYzCCAiACAQAwXjELMAkGA1UEBhMCVVMxCzAJBgNVBAgTAkNPMRAwDgYDVQQHEwdCb3VsZGVy
MRQwEgYDVQQKEwtCRUEgU3lzdGVtczENMAsGA1UECxMERG9jczELMAkGA1UEAxMCRWQwggG3MIIB
LAYHKoZIzjgEATCCAR8CgYEA/X9TgR11EilS30qcLuzk5/YRt1I870QAwx4/gLZRJmlFXUAiUftZ
PY1Y+r/F9bow9subVWzXgTuAHTRv8mZgt2uZUKWkn5/oBHsQIsJPu6nX/rfGG/g7V+fGqKYVDwT7
g/bTxR7DAjVUE1oWkTL2dfOuK2HXKu/yIgMZndFIAccCFQCXYFCPFSMLzLKSuYKi64QL8Fgc9QKB
gQD34aCF1ps93su8q1w2uFe5eZSvu/o66oL5V0wLPQeCZ1FZV4661FlP5nEHEIGAtEkWcSPoTCgW
E7fPCTKMyKbhPBZ6i1R8jSjgo64eK7OmdZFuo38L+iE1YvH7YnoBJDvMpPG+qFGQiaiD3+Fa5Z8G
kotmXoB7VSVkAUw7/s9JKgOBhAACgYBkQ10+BRJVVzMgZTQJiUDYdK+5WOI1EkvXbyZPmvYzAfch
vtR7WKJZMPcbAyq9mtrOXFY7TTEkupXlY4R8c5DdLW0db3YB1eV4gUGQOXn4Y+zE8Z4LxKNhkKLk
yEUQhv0JkyzIReV7sioJahf7AiOwqs2cW1r4dNt4y42duwrdsKAAMAsGByqGSM44BAMFAAMwADAt
AhRARh4iBbioO+Jn3qc/bXOpjr+cqgIVAI78/s8hMqhFkTJxt/qtE3L3F1aP
-----END NEW CERTIFICATE REQUEST-----
- Submit the CSR to a certification authority (CA), such as VeriSign, Inc. They will authenticate you, sign a certificate, and then return it to you. This certificate authenticates your public key.
Note: Submitting the .pem file to a CA is beyond the scope of this document. There are many CAs you can use and your company might already have agreements with a specific CA that defines how to submit the CSR. You can also access the website for any CA to review their submission process.
Import the Signed Certificate
A CA will return two certificates: a consumer certificate and the CA certificate. The CA certificate is used to validate the CA's signature on the consumer certificate. Use the keytool -import command to store both the CA-signed certificate and the consumer certificate in the keystore.
Note: Depending upon the CA you use, the CA might return a single file with both certificates imbedded therein. You will have to separate the two using some sort of certificate translation tool, such as the certificate import/export wizards in Internet Explorer. This process is beyond the scope of this document; we recommend you consult your company's security administrator or the CA you used.
Now, you will import both the consumer certificate and the CA certificate into the keystore. Note that when you run the import command, you must use a different alias for each of the certificates, as explained in the following steps.
keytool -import -alias testalias -file<BEA_HOME>\user_projects\domains\ipcWsrpDomain\wsrpKeystore.pem -keypass testkeypass -keystore<BEA_HOME>\user_projects\domains\ipcWsrpDomain\wsrpKeystore.jks -storepass teststorepass
Note: For more information on using the -import command, please refer to:
http://java.sun.com/j2se/1.4.2/docs/tooldocs/windows/keytool.html#importCmd
Owner: CN=Your Name, OU=WLP Docs, O=WLP, L=Boulder, ST=Colorado, C=US
Issuer: CN=Thawte Test CA Root, OU=TEST TEST TEST, O=CA NameCertification, ST=FO
R TESTING PURPOSES ONLY, C=ZA
Serial number: 121e
Valid from: Mon Dec 13 11:18:17 MST 2004 until: Mon Jan 03 11:18:17 MST 2005
Certificate fingerprints:
MD5: 87:29:4B:7F:02:7D:2B:90:EF:FA:7D:02:50:82:7D:FF
SHA1: 25:08:1E:98:7D:76:31:48:B3:6B:4B:5F:81:24:59:1D:41:CA:A2:DB
Trust this certificate? [no]:
- Repeat steps 1 through 3 to import the CA certificate. Save the CA certificate obtained from the CA in a file called <BEA_HOME>\user_projects\domains\ipcTestDomain\
CAcert.pem, and use the following values for the.pemfilename (-file) and alias (-alias) when you run thekeytool -importcommand.
-file <BEA_HOME>\user_projects\domains\ipcTestDomain\CAcert.pem
-alias CAtestalias
Step 5: Update the Consumer mBean
Update the Consumer mBean with the new certificate information by doing the following
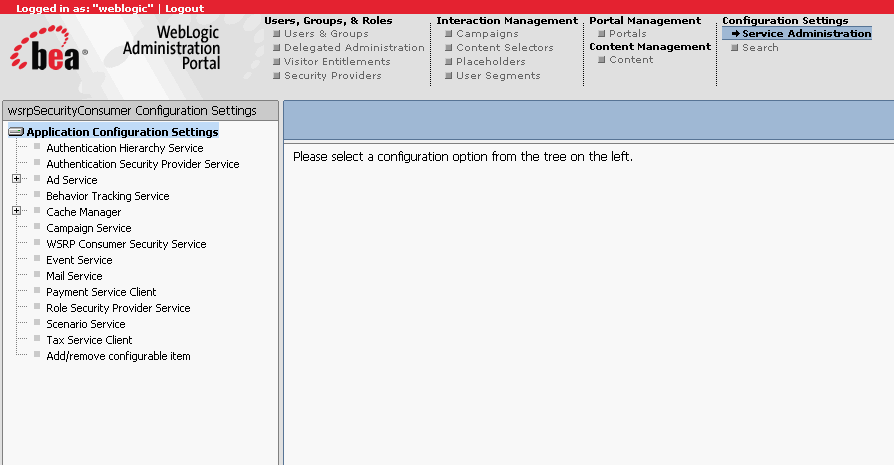
The Configuration Setting page appears (Figure 9-23).
Figure 9-23 Configuration Settings Page
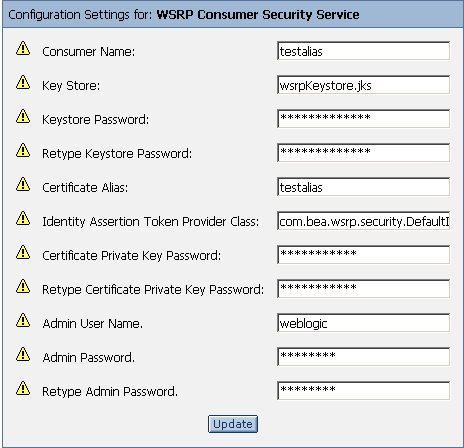
The Configuration Settings for: dialog box appears in the right pane (Figure 9-24)
Figure 9-24 Configuration Settings for: WSRP Consumer Security Service Dialog Box
- Update the necessary fields on this dialog box with information from the keystore. At the minimum, you must update the fields listed in Table 9-1.
Step 6: Update the WSRP Identity Asserter
For a Producer to trust a Consumer, it needs to recognize the Consumer's signed certificate. To ensure this, you need to provide the Producer with the Consumer's public key, which the administrator must add to the Producer's keystore.
To update the WSRP identity asserter, use this procedure:
- Launch an instance of WebLogic Server and open the WebLogic Server console by entering in the address field of a browser the URL:
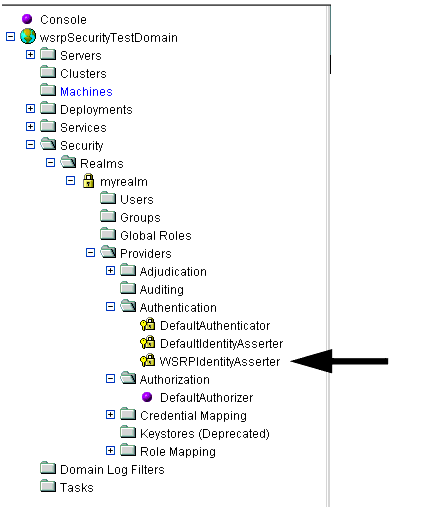
- In the left pane, drill down to the WSRP Identity Asserter node (Security>Realms>myRealm>Providers>Authentication>WSRPIndentityAsserter), as shown in Figure 9-25.
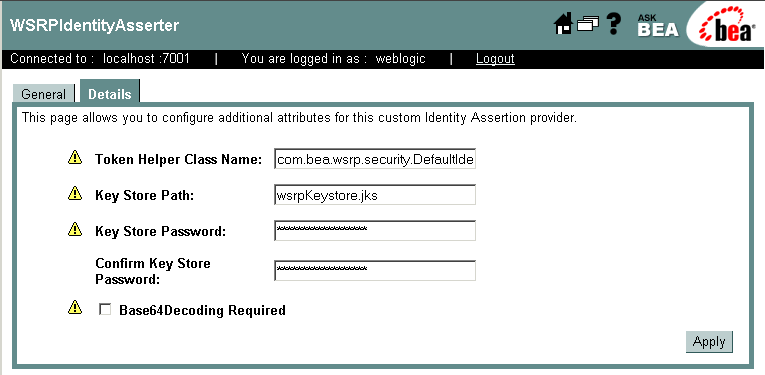
- Select the Detail tab to display WSRP identity detail information, as shown in Figure 9-26.
- Update the information in the WSRP Identity Asserter as described in Table 9-2.
http://localhost:7001/console
Figure 9-25 WSRP Identity Asserter Drill-down
Figure 9-26 WSRP Identity Asserter Detail
Note: If any of the yellow icons next to the field labels are blinking, this means that the server must be restarted for the changes to take effect.
Step 7: Test the New Keystore
To test the new keystore, you simply need to try to log in to the remote portlet, as you did in Test the Log-in Portlet. Do the following:
- Stop (if necessary) and restart the server. Select Tools>WebLogic Server>Stop WebLogic Server (if the server is running). Select Tools>WebLogic Server>Start WebLogic Server to start the server.
Securing the WebLogic Administrator's Logon Information
A portal domain's portal application's META-INF directory contains the application-config.xml file. In newly created portal domains where the portal application is deployed, this file will contain unencrypted passwords. These passwords actually remain clear text until the portal administration tool's Service Administration page is used to edit and save attributes contained in this config file, or the application using the password accesses it. (And if the portal application is deployed as an ear file, this file cannot be edited and saved.)
Typically, in development, the administrator will use some sort of generic logon information (logon ID and password), such as weblogic/weblogic. For example, Listing 9-5 shows the WSRP element from application-config.xml on initial deployment:
Listing 9-5 Development Phase Clear Text Passwords in application-config.xml
<ConsumerSecurityAdminPassword="weblogic" AdminUserName="weblogic"CertAlias="wsrpConsumer" CertPrivateKeyPassword="wsrppassword"
ConsumerName="wsrpConsumer"
IdentityAssertionProviderClass="com.bea.wsrp.security.
DefaultIdentityAssertionProvider"
Keystore="wsrpKeystore.jks" KeystorePassword="password"
Name="ConsumerSecurity"/>
After the Service Administration tool is used to edit attributes, the file is saved and automatically passwords are encrypted, as shown in Listing 9-6:
Listing 9-6 .Encrypted Passwords in application-config.xml
<ConsumerSecurityAdminPassword="{3DES}3QrrUeIwN/DxlDI++1ixPw=="AdminUserName="weblogicc" CertAlias="wsrpConsumer"
CertPrivateKeyPassword="{3DES}g7h+VOSAsO9pSlvYSSB2iw=="ConsumerName="wsrpConsumer"
IdentityAssertionProviderClass="com.bea.wsrp.security.
DefaultIdentityAssertionProvider"
Keystore="wsrpKeystore.jks" KeystorePassword=
"{3DES}1OLYVirMWOo+3sEU80cMqw=="
Name="ConsumerSecurity" />
To ensure the security of passwords throughout the applications lifecycle, you need to use the EncryptDomainString command-line utility to generate an encrypted password and then place that encrypted password into the application-config.xml file while it is still in the development environment. Then you can build the EAR file for the application and deploy it as necessary.
Encrypting Passwords
To encrypt passwords, use this procedure:
- Open a command box (DOS shell) and navigate to
domain/portal/(wheredomainis the domain directory for the application) and runsetDomainEnv.cmd. dis the domain directory to which the portal application is being deployed; for example,sis the input password to encrypt-
java com.bea.p13n.util.EncryptDomainString -targetDomainDir \bea\weblogic81b\samples\domain\portal -inputString weblogic
In this example, the input string
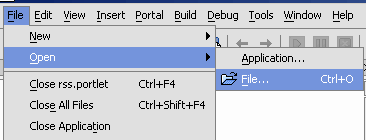
weblogicrepresents administrator's password (adminpassword=weblogic; see Listing 9-7). The command line utility prints a domain specific encrypted string. - Select File>Open>File (Figure 9-28).
java com.bea.p13n.util.EncryptDomainString -targetDomainDird-inputStrings
Figure 9-28 Opening a File in WebLogic Workshop
Listing 9-7 Clear text Passwords in application-config.xml
<ConsumerSecurityAdminPassword="weblogic"AdminUserName="weblogic"CertAlias="wsrpConsumer"CertPrivateKeyPassword="wsrppassword"ConsumerName="wsrpConsumer"
IdentityAssertionProviderClass="com.bea.wsrp.security.
DefaultIdentityAssertionProvider"
Keystore="wsrpKeystore.jks"KeystorePassword="password"Name="ConsumerSecurity"/>
- Replace the clear text passwords with those generated by the EncryptDomainString utility, as shown in Figure 9-8. You will need to run EncryptDomainString for each password in the
<ConsumerSecurity>(Listing 9-7)element; for example:
Listing 9-8 Encrypted Passwords Generated by EncryptDomainString Utility
<ConsumerSecurityAdminPassword="{3DES}3QrrUeIwN/DxlDI++1ixPw=="AdminUserName="weblogicc" CertAlias="wsrpConsumer"
CertPrivateKeyPassword="{3DES}g7h+VOSAsO9pSlvYSSB2iw=="ConsumerName="wsrpConsumer"
IdentityAssertionProviderClass="com.bea.wsrp.security.
DefaultIdentityAssertionProvider"
Keystore="wsrpKeystore.jks"KeystorePassword="{3DES}1OLYVirMWOo+3sEU80cMqw=="
Name="ConsumerSecurity" />
Now you can build the EAR file and deploy the application.
Note on Changing Passwords
If you need to change an administrator's password for any reason, simply changing the password will result in having to rebuild and redeploy the EAR. This is time-consuming and counterproductive. Instead, you can work around this problem by doing the following:
- Create a special user in the target system for a WSRP administrator. See Create a New User for more information on creating a user.
- Make that user a member of the administrator group. See Add a User to a Group for more information on adding a member to a group.
- Insert the new logon information (username and password) into the application's
application-config.xmlfile as described in Encrypting Passwords.
