10g (10.1.3.5.0)
Part Number E14293-01
Contents
Previous
Next
| Oracle Application Server Adapter for Oracle Applications User's Guide 10g (10.1.3.5.0) Part Number E14293-01 | Contents | Previous | Next |
This chapter covers the following topics:
A concurrent program is an instance of an execution file. Concurrent programs use a concurrent program executable to locate the correct execution file. Several concurrent programs may use the same execution file to perform their specific tasks, each having different parameter defaults. Concurrent manager runs in the background waiting for a concurrent program to be submitted. As soon as a concurrent program is submitted, it is put into an execution queue by concurrent manager. Concurrent manager also manages the concurrent execution of concurrent programs.
Concurrent programs associated with the Open Interface Table move the data from interface table to base tables. While other concurrent programs execute the business logic and application-level processing for Oracle E-Business Suite.
This section describes how to configure the OracleAS Adapter for Oracle Applications to use concurrent programs. It describes the tasks required to configure OracleAS Adapter for Oracle Applications using the Adapter Configuration Wizard in Oracle JDeveloper.
Prerequisites to Configuring Concurrent Programs
OracleAS Adapter for Oracle Applications is deployed using the BPEL Process Manager (PM) in Oracle JDeveloper. The BPEL PM creates the WSDL interfaces for the concurrent programs.
Populating Applications Context Header Variables
You need to populate certain variables in the SOA Suite to provide context information required in concurrent programs in order for an Oracle Applications user that has sufficient privileges to run the programs.
The context is set taking into account the values passed for the header parameters including Username, Responsibility, Responsibility Application, Security Group, and NLS Language. If the values for the new header parameters Responsibility Application, Security Group, and NLS Language are not passed, context information will be determined based on Username and Responsibility.
The default value for the Username is SYSADMIN, the default value for Responsibility is SYSTEM ADMINISTRATOR, the default Security Group Key is STANDARD, and the default NLS Language is US.
You can change the default values specified in the generated WSDL. This is a static way of changing the context information. These values would apply to all invocations of the deployed business process. However, if you need to provide different context information for different invocations of the business process, then you can dynamically populate the header values. The context information can be specified by configuring an Assign activity before the Invoke activity in the BPEL PM.
Detailed instructions on how to assign header variables, see Design-Time Tasks for Assigning Header Variables.
Following is a list of the procedures required to accomplish the design-time tasks.
To create a new BPEL project
Open JDeveloper BPEL Designer.
From the File menu, select New. The New Gallery dialog box appears.
Select All Items from the Filter By box. This displays a list of available categories.
Expand the General node, and then select Projects.
Select BPEL Process Project from the Items group.
Creating a New BPEL Process Project
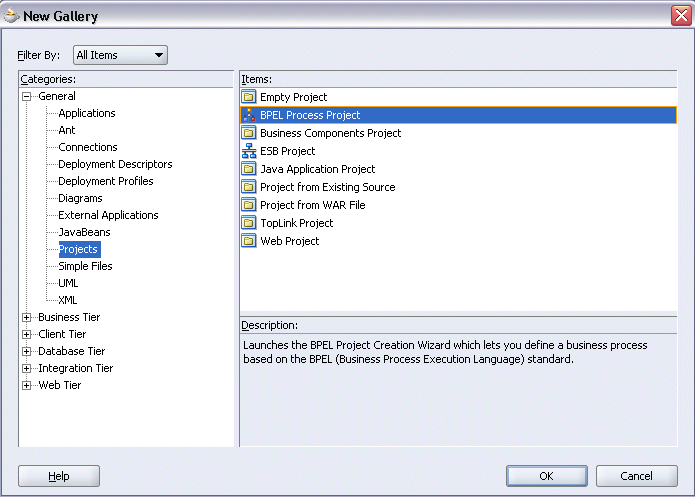
Click OK. The BPEL Project Creation Wizard - Project Settings dialog box appears.
In the BPEL Process Name field, enter a descriptive name. For example, enter InsertShipNotice.
Keep the default selection Use Default Project Settings unchanged.
Keep the default selection Template as the Type field. Select Asynchronous BPEL Process as the BPEL process type.
Specifying New BPEL Project Settings
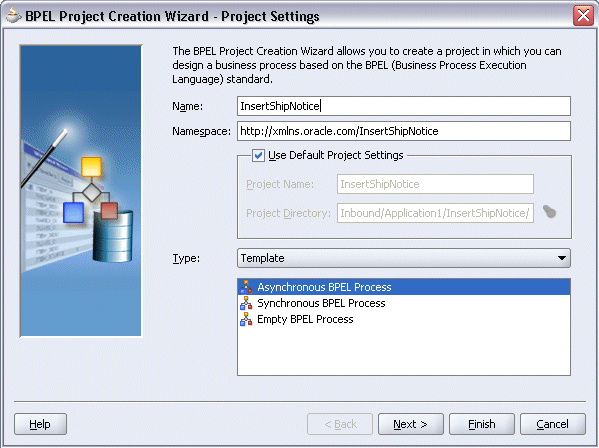
Click OK.
A new asynchronous BPEL process is created with the receiveInput and callbackClient activities.
The required source files including bpel.xml, InsertShipNotice.bpel, and InsertShipNotice.wsdl are also created.
The next task is to add a partner link to the BPEL process. A partner link defines the link name, type, and the role of the BPEL process that interacts with the partner service.
To add a partner link
In JDeveloper BPEL Designer, click Services in the Component palette.
Drag and drop Oracle Applications icon into the border area of the process diagram.
The Adapter Configuration Wizard appears.
Click Next and the Service Name dialog box appears.
Enter the following information:
In the Service Name field, enter a service name, such as ImportCP.
In the Description field, enter a description for the service. This is an optional field. Click Next.
Specifying the Service Name
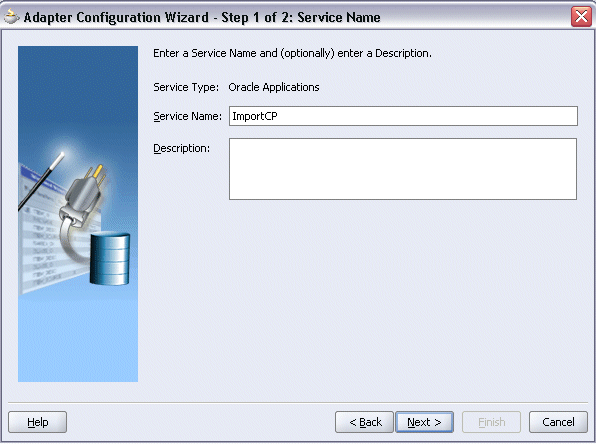
Click Next. The Service Connection dialog box appears.
You can perform either one of the following options for your database connection:
Note: You need to connect to the database where Oracle E-Business Suite is running.
You can create a new database connection by clicking the New icon.
Detailed instructions on how to create a new database connection, see Creating a New Database Connection.
Instead of creating a new database connection, you can select an existing connection that you have configured earlier from the Connection drop-down list.
The selected database connection information appears in the Service Connection dialog box. The JNDI (Java Naming and Directory Interface) name corresponding to the selected database connection also appears automatically in the Database Server JNDI Name field. Alternatively, you can specify a JNDI name.
Note: When you specify a JNDI name, the deployment descriptor of the Adapter for Oracle Applications must associate this JNDI name with configuration properties required by the adapter to access the database.
The JNDI name acts as a placeholder for the connection used when your service is deployed to the BPEL server. This enables you to use different databases for development and later for production.
Note: For more information about JNDI concepts, refer to Oracle Application Server Adapter Concepts.
Once you have created a new connection or selected an existing connection, you can add a concurrent program by browsing through the list of concurrent programs available in Oracle E-Business Suite.
Click Next in the Service Connection dialog box.
For Oracle E-Business Suite Release 12:
If you are connecting to Oracle E-Business Suite Release 12, then the IREP File not present dialog box appears indicating that OracleAS Adapter for Oracle Applications could not find the Oracle Integration Repository data file corresponding to the database you are connecting in your workspace. Absence of the data file would make browsing or searching of Integration Repository tree considerably slow. You can choose to extract the data file and create a local copy of the Integration Repository data file. Once it is created successfully, OracleAS Adapter for Oracle Applications will pick it up automatically next time and retrieve data from your local Integration Repository.
You can select one of the following options:
Click Yes to extract the Integration Repository data file.
Extracting Integration Repository Data File
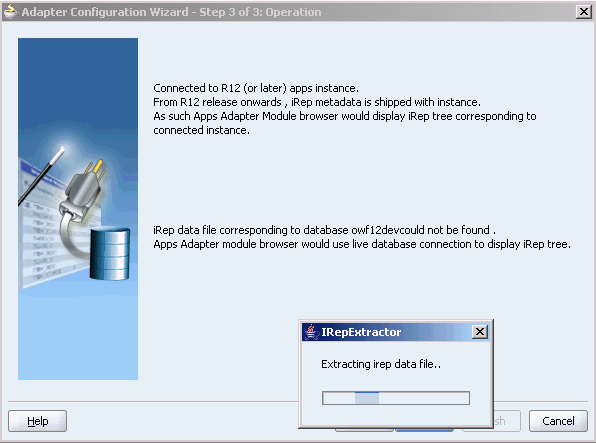
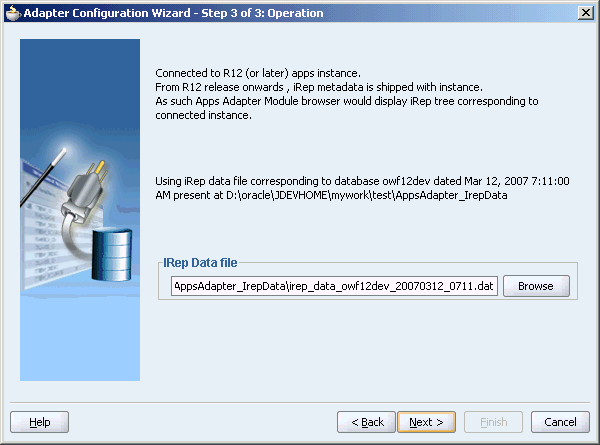
After the system successfully creates a local copy of the Integration Repository data file, next time when you connect to the database, you will find the IRep Data File field appears in the Operation dialog box indicating where your local copy exists with the creation date and time as part of the file name.
Using the Local Integration Repository Data File
Click No to query the Integration Repository data file from the live database you are connecting to display the Integration Repository tree.
Note: It is highly recommended that you create a local copy of the Integration Repository data file so that OracleAS Adapter for Oracle Applications will query the data next time from the local copy in your workspace to enhance the performance.
For Oracle E-Business Suite pre-Release 11.5.10:
If you are connecting to a pre-11.5.10 Oracle E-Business Suite instance, you must select the interface type in the Adapter Configuration Wizard. Select Tables/Views/APIs/Concurrent Programs to proceed.
Click Add to open the Oracle Applications Module Browser.
The Oracle Applications Module Browser combines interface data from Integration Repository with information about the additional interfaces supported by Adapter for Oracle Applications, organized in a tree hierarchy.
Specify a Concurrent Program
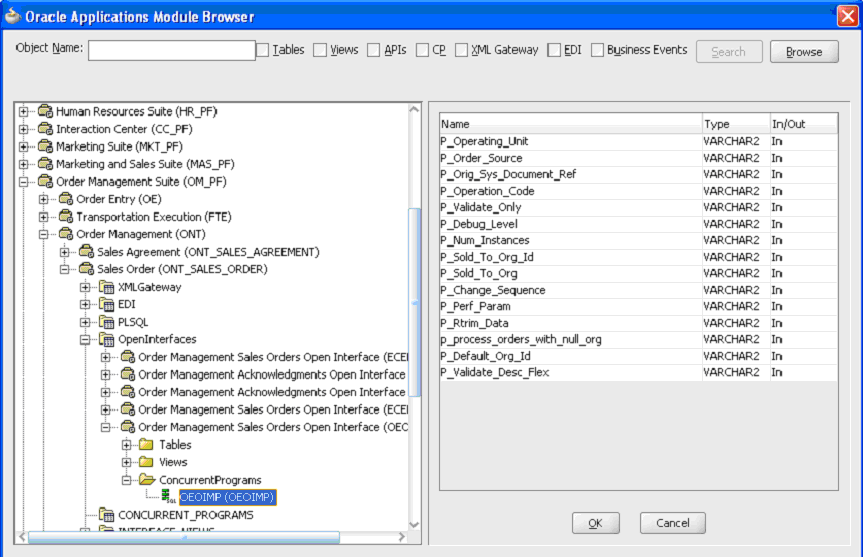
Navigate to Order Management Suite (OM_PF) >Order Management (ONT) > Sales Order (ONT_SALES_ORDER) > OpenInterfaces > Order Management Sales Orders Open Interface > ConcurrentPrograms to select a concurrent program OEOIMP (OEOIMP).
Note: You can also search for a concurrent program by entering the name of the program in the Object Name field. Select the CP check box, and then click Search.
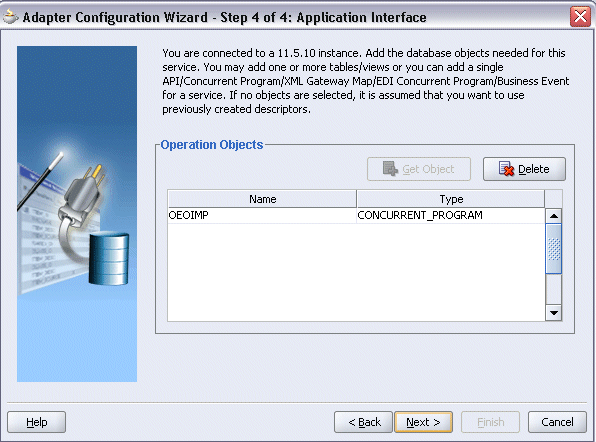
Click OK. The Application Interface page appears.
Application interface
Click Next and then click Finish to complete the process of configuring Adapter for Oracle Applications.
The wizard generates the WSDL file corresponding to the XML schema. This WSDL file is now available for the partner link.
Create Partner Link
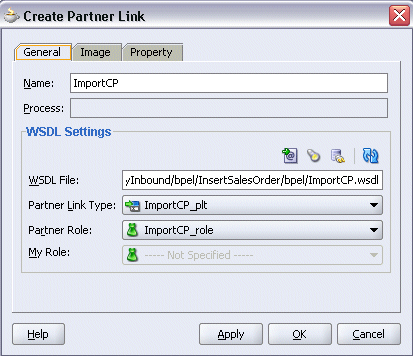
Click Apply and OK. The partner link is created with the required WSDL settings.
After adding and configuring the partner link, the next task is to configure the Invoke activity.
To configure the Invoke activity
Drag and drop the Invoke activity from the Component Palette into the process diagram.
Adding an Invoke Activity
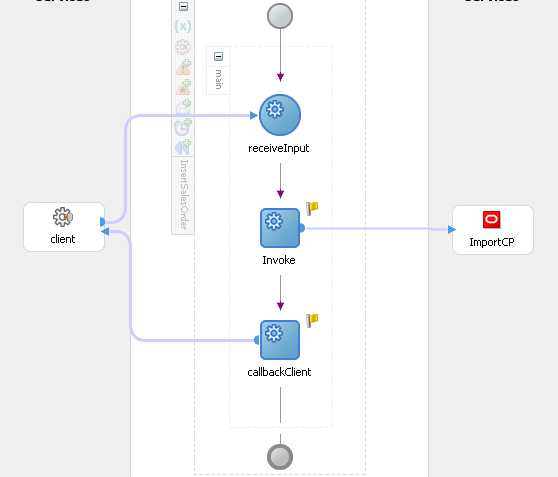
Link the Invoke activity to the ImportCP partner link. This opens the Invoke dialog box. The General tab is selected by default.
Notice that the Operation field is automatically selected with the concurrent program that you chose.
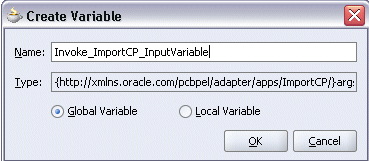
Click the Create icon next to the Input Variable field. Enter a descriptive name for the variable in the Create Variable dialog box that appears. You can also accept the default name.
Select Global Variable and click OK.
Creating the Input Variable
Click the Create icon next to the Output Variable field. Enter a descriptive name for the variable in the Create Variable dialog box that appears. You can also accept the default name.
Select Global Variable and click OK.
General Tab of the Invoke Activity
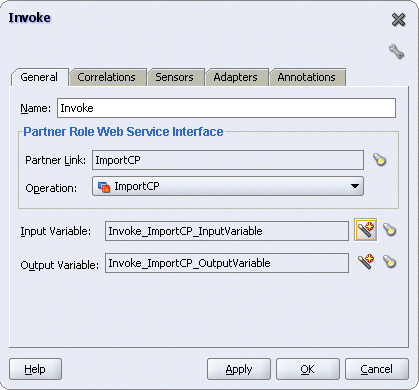
In the Invoke dialog box, click Apply and then OK.
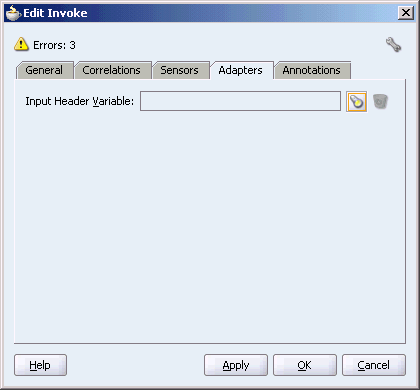
Note: You can define an Input Header Variable under the Adapters tab of the Invoke dialog box. This variable can be used to provide context information for Oracle Applications in supporting multiple languages and multiple organization setups.
To Create the Header Variable:
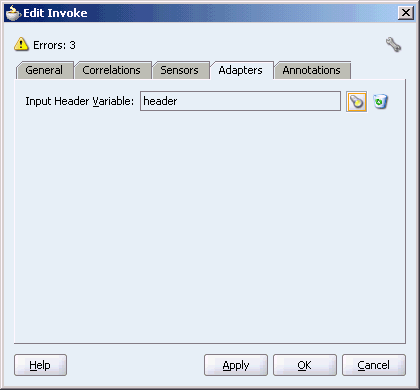
Click the Adapters tab in the Edit Invoke dialog box and click Browse Variable... icon for the Input Header Variable field.
Specifying Input Header Variable
In the Variable Chooser dialog box, right-click on the Variables node and select Create Variable option from the menu.
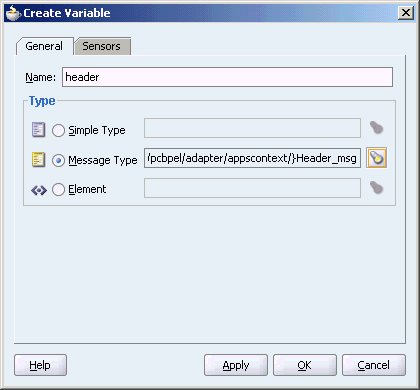
In the Create Variable dialog box, enter header in the Name field.
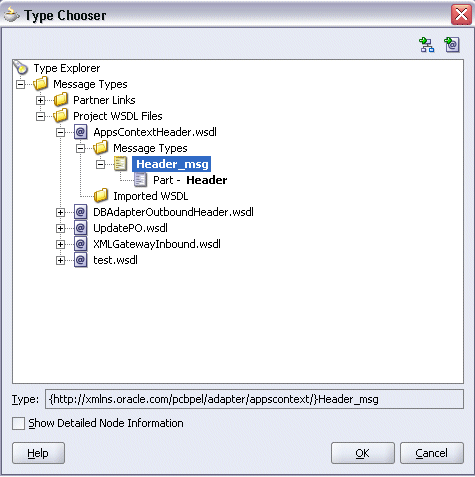
Select Message Type and click Browse Message Type... icon to open Type Chooser dialog box.
Expand the Partner Link node to locate the Header_msg node {http://xmlns.oracle.com/pcbpel/adapter/appscontext/}Header_msg for your partner link. The Header_msg node should be under the path, Your Partner Link WSDL > AppsContextHeader.wsdl > Message Types > Header_msg.
Declaring Header Variable
Click OK to return to the Create Variable dialog box with your selected message type populated.
Populating Selected Header Variable
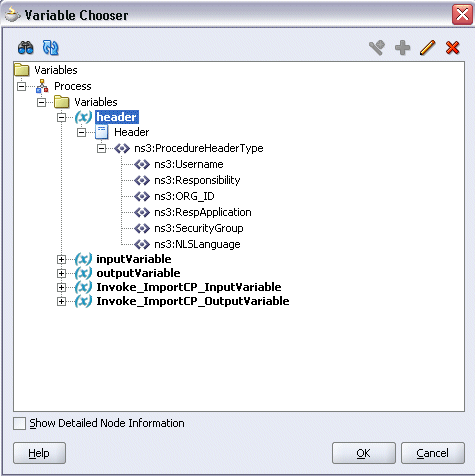
To view your header variable including Username, Responsibility, ORG_ID, Responsibility Application, Security Group, and NLS Language elements, click the Browse Message Type... icon to open Variable Chooser dialog box. Locate the header variable to view the variable hierarchical structure with these parameters needed for applications context.
Viewing Header Variable Structure
Click OK to return to the Edit Invoke dialog with the selected header variable populated for the Input Header Variable field. Click Apply to complete the header creation.
Populating Input Header Variable
This step is to configure two Assign activities in order to:
Set the applications context information.
Set the payload for the ImportCP service.
To add the first Assign activity to set applications context information:
In JDeveloper BPEL Designer, drag and drop the Assign activity from the Component Palette into the Activity box of the process diagram before the Invoke activity.
Adding an Assign Activity
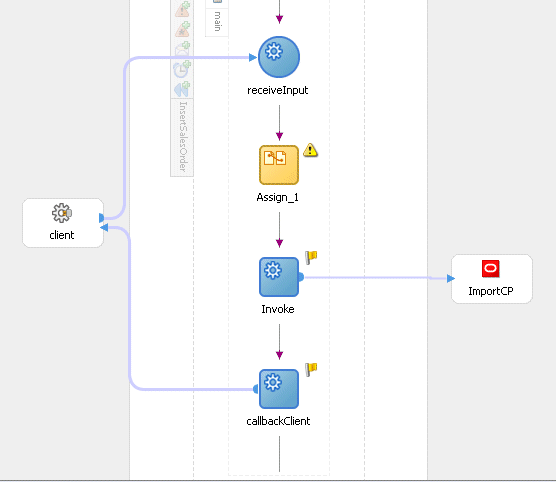
Double-click the Assign activity to access the Edit Assign dialog box.
Click the General tab to enter the name for the Assign activity, such as 'SetAppsContext'.
On the Copy Operation tab, click Create and then select Copy Operation from the menu. The Create Copy Operation window appears.
Enter the first pair of parameters:
In the From navigation tree, select type Expression and enter 'operations' in the Expression box.
In the To navigation tree, select type Variable. Navigate to Variable > Process > Variables > header > Header > ns3:ProcedureHeaderType and select ns3:Username. The XPath field should contain your selected entry.
Assign Username Parameter
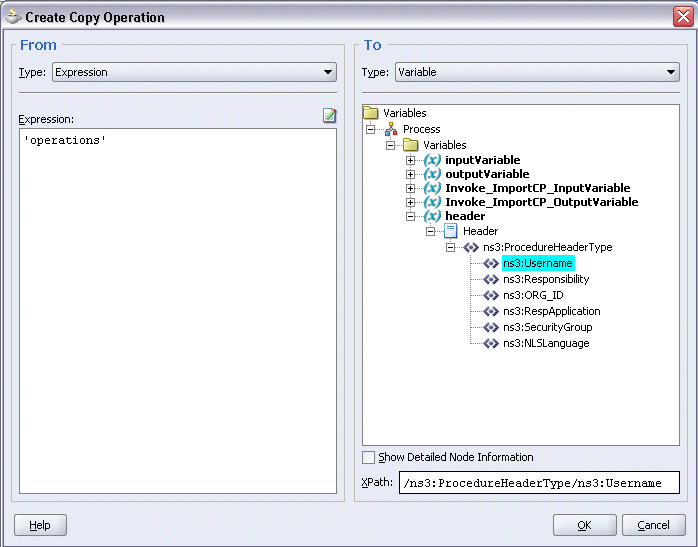
Click OK.
Enter the second pair of parameters:
On the Copy Operation tab, click Create and select Copy Operation from the menu. The Create Copy Operation window appears.
In the From navigation tree, select type Expression and enter 'Order Management Super User, Vision Operatins (USA)' in the Expression box.
In the To navigation tree, select type Variable. Navigate to Variable > Process > Variables > header > Header> ns3:ProcedureHeaderType and select ns3:Responsibility. The XPath field should contain your selected entry.
Assign Responsibility Parameter
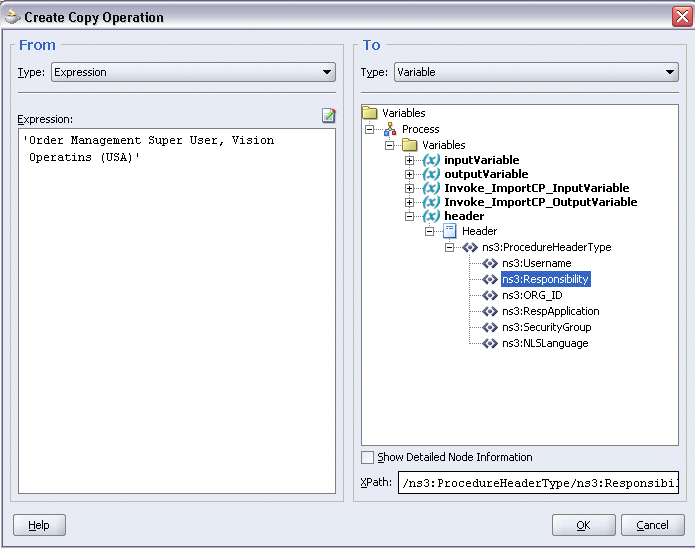
Click OK.
Enter the third pair of parameters:
On the Copy Operation tab, click Create and select Copy Operation from the menu. The Create Copy Operation window appears.
In the From navigation tree, select type Expression and enter '204' in the Expression box.
In the To navigation tree, select type Variable. Navigate to Variable > Process > Variables > header > Header> ns3:ProcedureHeaderType and select ns3:ORG_ID. The XPath field should contain your selected entry.
Click OK.
Enter the fourth pair of parameters:
On the Copy Operation tab, click Create and select Copy Operation from the menu. The Create Copy Operation window appears.
In the From navigation tree, select type Expression and enter 'ONT' in the Expression box.
In the To navigation tree, select type Variable. Navigate to Variable > Process > Variables > header > Header> ns3:ProcedureHeaderType and select ns3:RespApplication. The XPath field should contain your selected entry.
Click OK.
Enter the fifth pair of parameters:
On the Copy Operation tab, click Create and select Copy Operation from the menu. The Create Copy Operation window appears.
In the From navigation tree, select type Expression and enter 'Standard' in the Expression box.
In the To navigation tree, select type Variable. Navigate to Variable > Process > Variables > header > Header> ns3:ProcedureHeaderType and select ns3:SecurityGroup. The XPath field should contain your selected entry.
Click OK.
Enter the sixth pair of parameters:
On the Copy Operation tab, click Create and select Copy Operation from the menu. The Create Copy Operation window appears.
In the From navigation tree, select type Expression and enter 'US' in the Expression box.
In the To navigation tree, select type Variable. Navigate to Variable > Process > Variables > header > Header> ns3:ProcedureHeaderType and select ns3:NLSLanguage. The XPath field should contain your selected entry.
Click OK.
Assign Activity
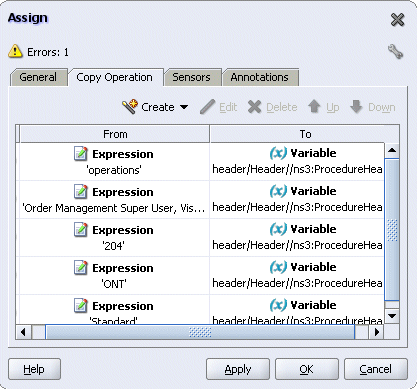
Click Apply and then OK to complete the configuration of the Assign activity.
To add the second Assign activity to set payload for the ImportCP service:
In JDeveloper BPEL Designer, drag and drop the Assign activity from the Component Palette into the Activity box of the process diagram after the first Assign activity.
Adding an Assign Activity
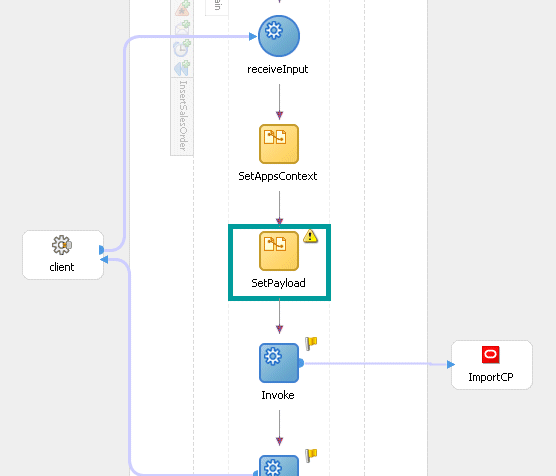
Double-click the Assign activity to access the Edit Assign dialog box.
Click the General tab to enter the name for the Assign activity, such as 'SetPayload'.
On the Copy Operation tab, click Create and select Copy Operation from the menu. The Create Copy Operation window appears.
Enter the following information to the Assign activity:
In the From navigation tree, select type Variable. Navigate to Variable > Process > Variables > outputVariable and select payload.
In the To navigation tree, select type Variable. Navigate to Variable > Process > Variables > Invoke_ImportCP_InputVariable > InputParameters and select ns4:InputParameters. The XPath field should contain your selected entry.
Assign InputParameters
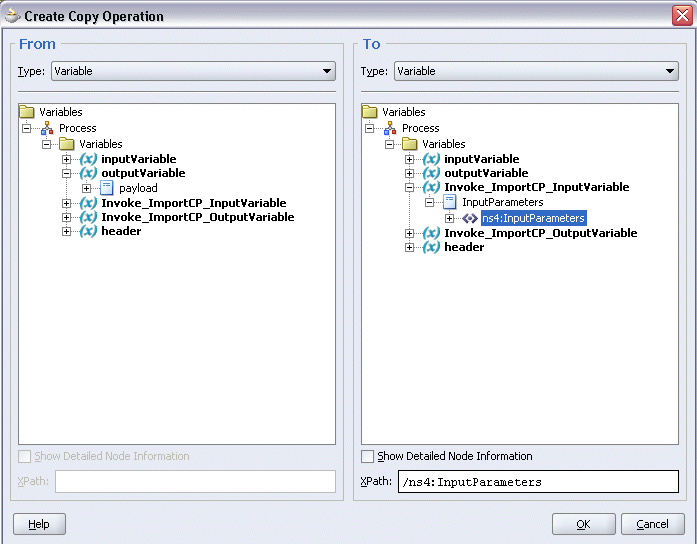
Click OK.
Click Apply and then OK to complete the configuration of the Assign activity.
After designing the BPEL process, the next step is to deploy, run and monitor it.
You must deploy the BPEL process before you can run it. The BPEL process is first compiled, and then deployed to the BPEL server.
To deploy the BPEL process
Select the BPEL project in the Applications window.
Right-click the project name, then select Deploy > [Server Connection] > Deploy to Default Domain from the menu that appears.
Deploying the BPEL Process
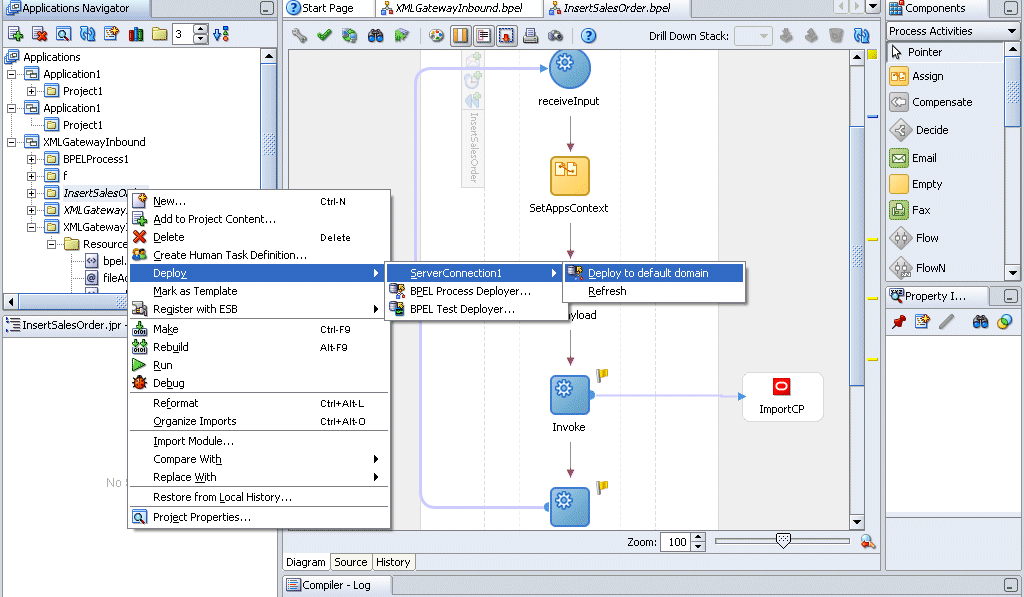
The BPEL process is compiled and deployed. You can check the progress in the Messages window.
Messages Window

Once the BPEL process is deployed, you can manage and monitor the process from the BPEL Console. You can also test the process and the integration interface by manually initiating the BPEL process.
To test the BPEL process
Navigate to Oracle Application Server 10g BPEL Console (http://<soaSuiteServerHostName>:<port>/BPELConsole).
The BPEL Console login page appears.
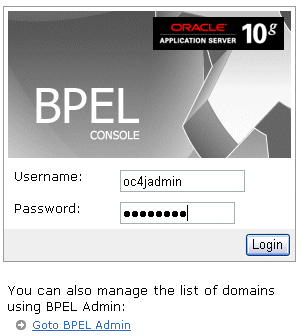
Enter the username and password and click Login.
The Oracle Enterprise Manager 10g BPEL Control appears. The list of deployed processes is shown under Deployed BPEL Processes.
Deployed BPEL Processes
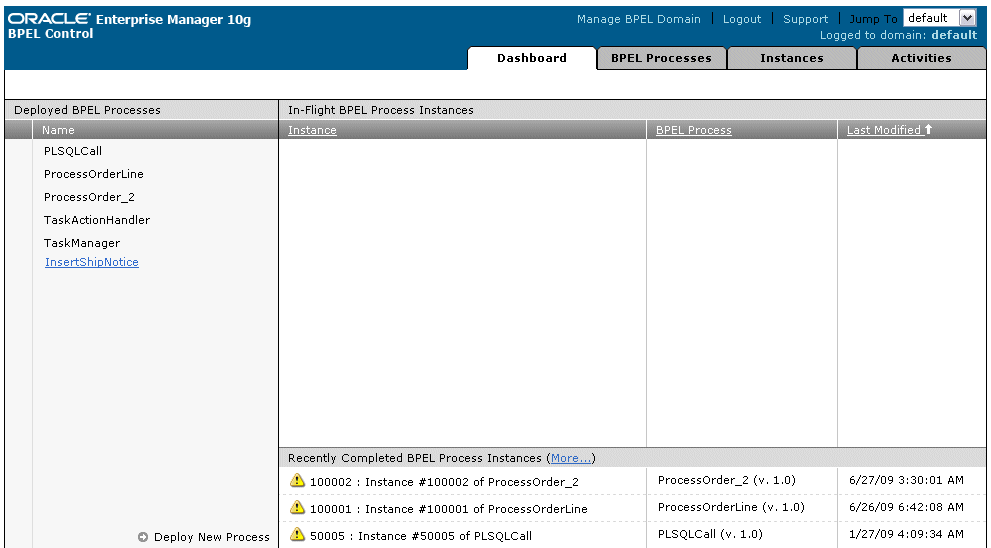
Click the BPEL process that you want to initiate. The Initiate page appears. Enter the input string required by the process.
Click Post XML Message to initiate the process.
The BPEL process is now initiated. You can check the process flow by clicking the Visual Flow icon.
BPEL Console Initiate Page
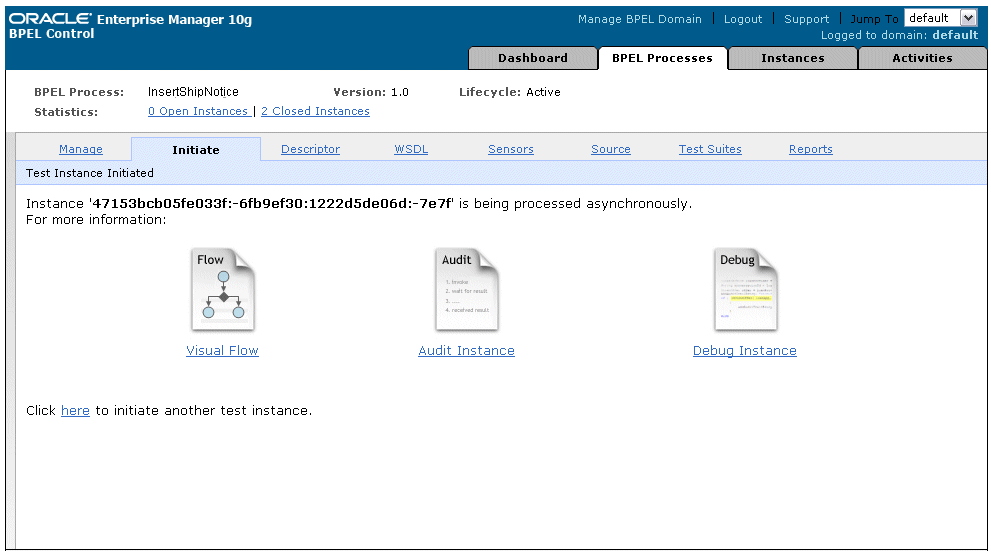
The audit trail provides information about the steps that have been executed. The audit trail also records the Request ID that is returned for the transaction. You can check the audit trail by clicking the Audit Instance icon.
To verify records in Oracle Applications
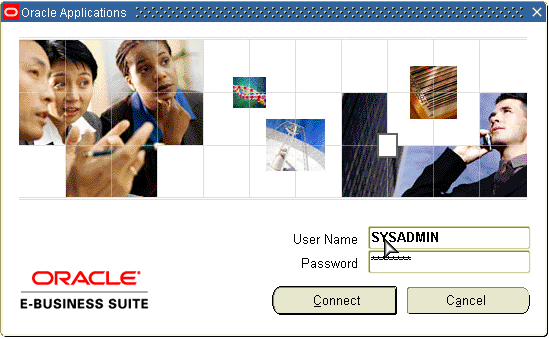
Log in to Oracle Applications as the System Administrator.
Oracle Applications Login Dialog Box
Select Requests from the View menu.
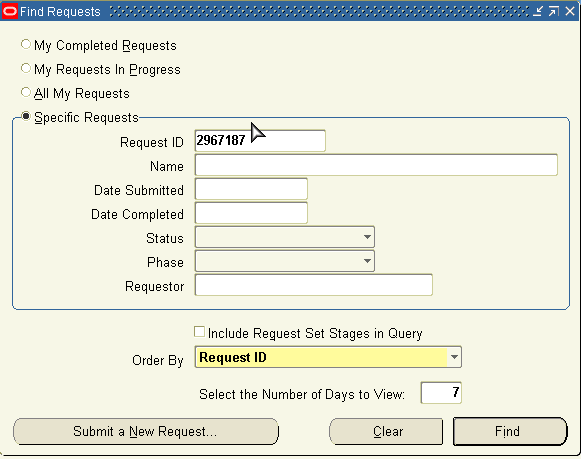
In the Find Requests form, search for the request by entering the Request ID that you got from the audit trail, and then click Find.
Find Requests Dialog Box
The Request details are displayed. You can check for details such as the Phase and Status of the request.
If the Status of the request is Complete, you can also query the appropriate table in Oracle Applications to search for the relevant records that have been inserted.
Querying Oracle Applications for a Record

If you experience problems with your concurrent program integration, you can take the following troubleshooting steps:
If you're using complex (that is, Boolean) datatypes, ensure that PL/SQL wrappers are applied on the target instance of the concurrent program.
Examine your transaction data in the Open Interface Tracking Form.
Check the status of the concurrent programs by Request ID.
If you still experience problems with your integration, you can enable debugging.
You can enable debugging using the BPEL Process Manager.
To enable debugging:
Log into your BPEL Process Manager domain.
Select yourdomain.collaxa.cube.ws
Select Debug.
Debugging information is output to the log file for your domain. To examine the log file in the BPEL Process Manager, navigate to Home > BPEL Domains > yourdomain > Logs. The log file is yourdomain.log.
![]()
Copyright © 2005, 2009, Oracle and/or its affiliates. All rights reserved.