Creating the Cloud Admin User
The Exalogic Systems Admin user creates the Cloud Admin user. To create the Cloud Admin user, complete the following steps:
- Ensure that the user exists as a local user on the virtual machine that hosts the Enterprise Controller component of Exalogic Control, as described in Before You Begin..
- Access the browser UI of Exalogic Control as described in Accessing the Exalogic Control Browser User Interface, and log in as the
ELAdminuser. - On the home page, click Administration in the navigation pane on the left.
- Under Enterprise Controller, click Local Users. The Local Users page is displayed.
- Under Users and Notification Profiles, click the Add User icon. Alternatively, click Add User on the Operate pane. The Add User screen is displayed.
- To create the Cloud Admin user, do the following:
-
In the User Name field, enter the user name. For example,
CloudAdmin. -
Select the
Cloud Adminrole and theUser Management Adminrole from the list of Available Roles, and move it to Selected Roles by clicking the right arrow.Note:
You are adding the
User Management Adminrole to allow the Cloud Admin user to manage users. -
Click Add User. The Cloud Admin user is created. The
CloudAdminuser is listed in the Users and Notification Profiles page.
-
- Select the
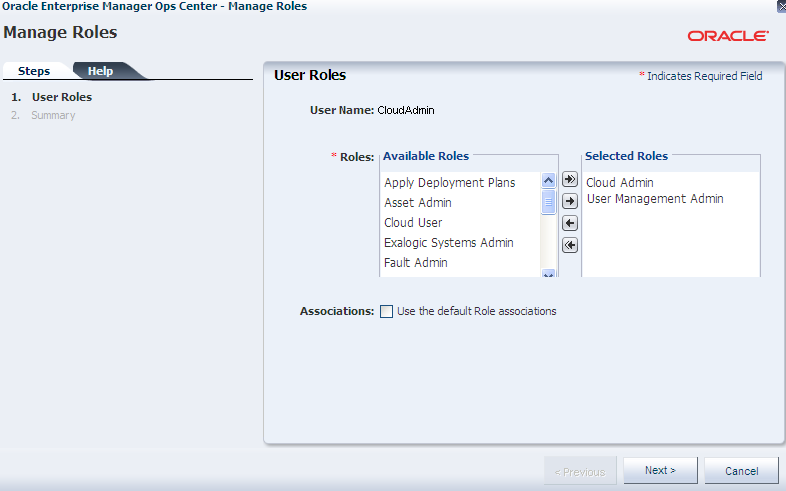
CloudAdminuser on the Users and Notification Profiles page, and click the Manage User Roles icon. The Manage Roles wizard is displayed, as shown in Figure 6-2.By default, the Associations option is selected. De-select this option.
- Click Next. The Specify Asset Privileges screen is displayed.
- Click Next. The Specify Library Privileges screen is displayed.
- Click Next. The Specify Network Privileges screen is displayed.
- Click Next. The Specify Plan Management Privileges screen is displayed.
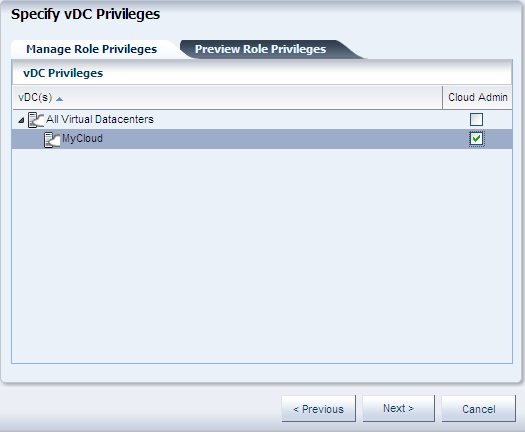
- Click Next. The Specify vDC Privileges screen is displayed, as shown in Figure 6-3.
- Expand All Virtual Datacenters.
The
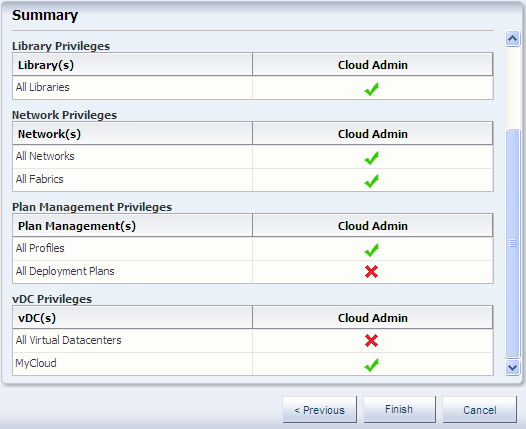
MyCloud(the default Exalogic vDC) is listed. Select the Cloud Admin option for this vDC. Click Next.The Summary screen is displayed, as shown in Figure 6-4.
The Summary screen provides a summary of Asset Privileges, Library Privileges, Network Privileges, Report Privileges, Plan Management Privileges, and vDC Privileges.
- Review the summary, and click Finish.


