32/104
Creating the Exalogic Systems Admin User
To create the Exalogic Systems Admin role in Exalogic Control, complete the following steps:
- Ensure that the user exists as a local user on the virtual machine that hosts the Enterprise Controller component of Exalogic Control, as described in Before You Begin..
- Access the browser UI of Exalogic Control as described in Accessing the Exalogic Control Browser User Interface, and log in as the
rootuser.If you do not know the password for the
rootuser, contact Oracle Support. - On the home page, click Administration in the navigation pane on the left.
- Under Enterprise Controller, click Local Users. The Local Users page is displayed.
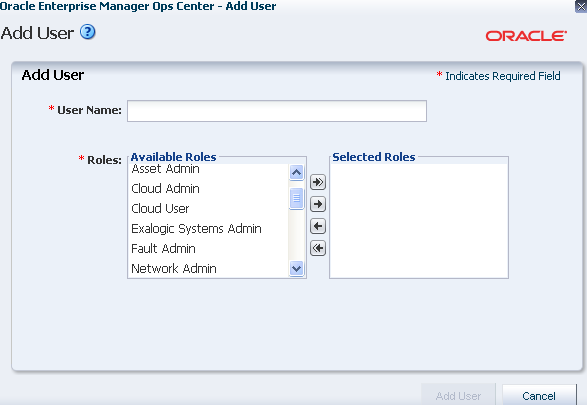
- Under Users and Notification Profiles, click the Add User icon. Alternatively, click Add User on the Operate pane. The Add User screen is displayed, as shown in Figure 6-1.
- In the User Name field, enter the user name, which was added to the OS environment. For example,
ELAdmin. - Select the
Exalogic Systems Adminrole, theRole Management Adminrole, and theUser Management Adminrole from the Available Roles list, and move them to the Selected Roles list by clicking the right arrow.Note:
You are adding the
User Management Adminrole to allow the Exalogic Systems Admin user to manage users. - Click Add User.
The Exalogic Systems Admin user is created.
Note:
Typically, only one or two users are created with the Exalogic Systems Admin role.
- Log out as the
rootuser.
