 Part 1:

 Read more...
In this part of the tutorial you create the List of Departments workbook, a basic workbook that contains a read-only table.
-
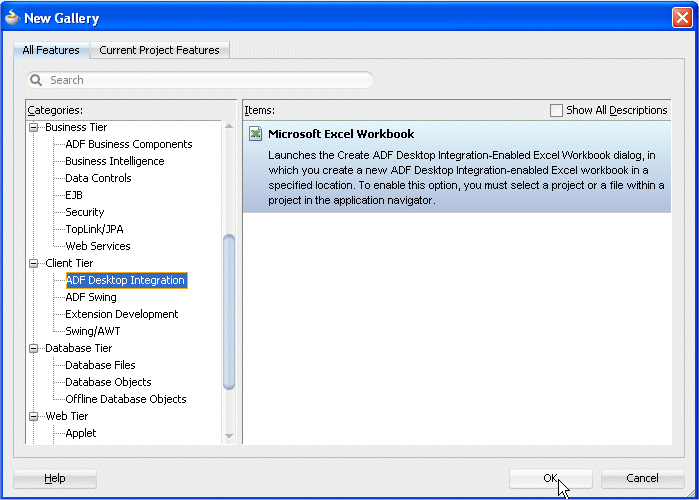
Right-click the ViewController project in the Navigator and select New... from the context menu. In the New Gallery, click the All Features tab, expand the Client Tier node if it is not already expanded, and select ADF Desktop Integration. Microsoft Excel Workbook should be automatically highlighted in the Items pane, so click OK to select it.
-
Name the workbook DepartmentsList_src.xlsx
The published version of the workbook must have a different name from that of the source file. It is a good idea to establish a standard naming convention to differentiate between the source and published workbooks.Read more...
For example you might add the suffix _src to the name of the source file - DepartmentsList_src.xlsx as here, and retain the more meaningful name for the published workbook - DepartmentsList.xlsx.
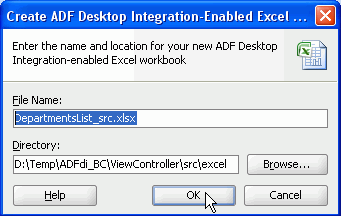
Click OK.
-
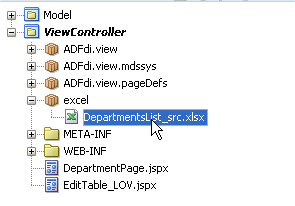
The new workbook appears in the Navigator.
You start adding content to it in the steps that follow.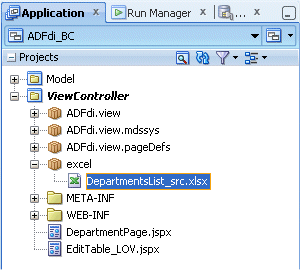
-
Double-click DepartmentsList_src.xlsx in the Navigator to open it with Microsoft Excel.
-
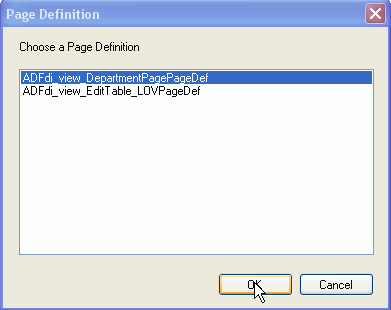
Excel opens, loading Oracle ADF Desktop Integration. In the Page Definition dialog, select the ADFdi_view_DepartmentPagePageDef page definition.
-
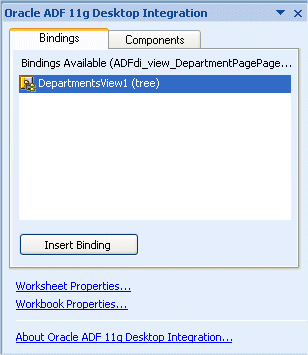
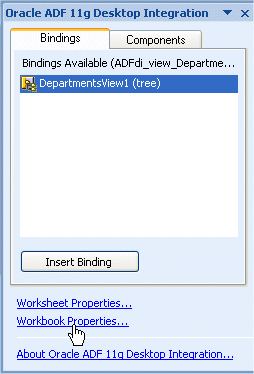
The Oracle ADF 11g Desktop Integration task pane appears in Excel, presenting the available bindings from the page definition.
You can learn more about the role of bindings in ADF here.
-
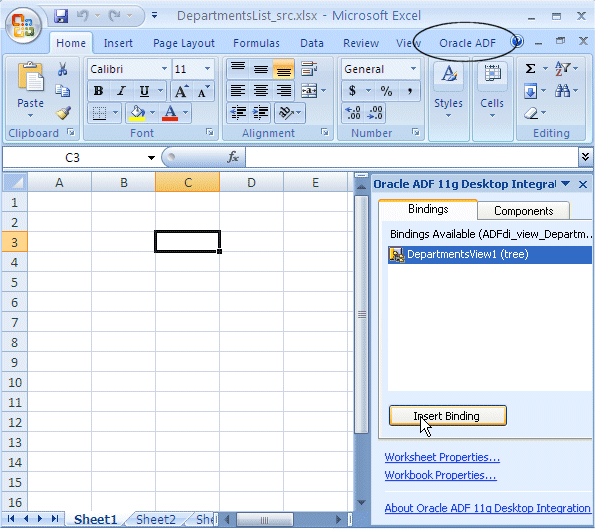
Select a cell in the worksheet, then in the Bindings tab, select DepartmentsView1 and click Insert Binding. Notice the new Oracle ADF menu option.
-
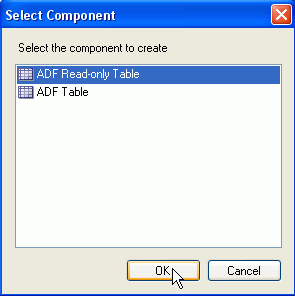
In the Select Component dialog, select ADF Read-only Table and click OK.
-
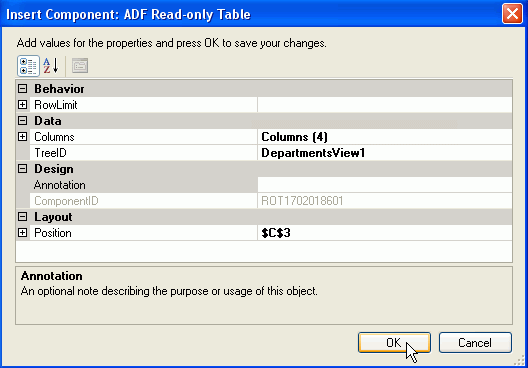
In the Insert Component: ADF Read-only Table dialog, click OK to accept default values.
-
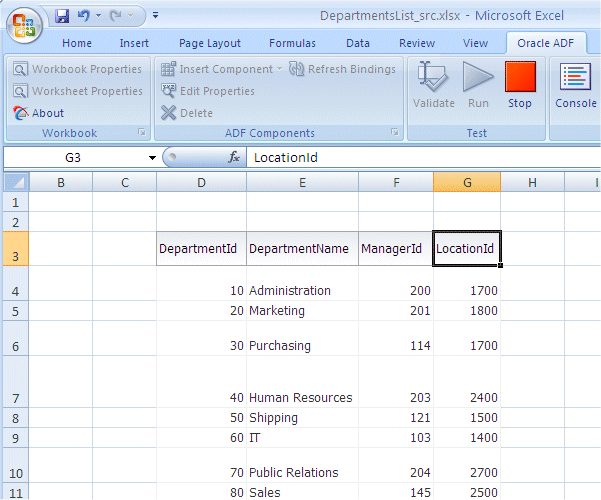
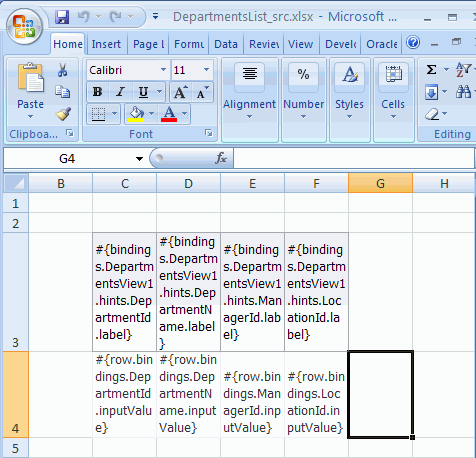
The Excel worksheet displays. Your worksheet should look like this:
-
Click the Save icon
 to save the worksheet.
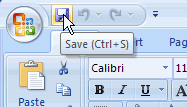
-
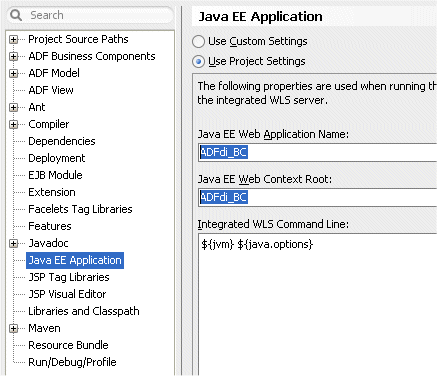
Back in JDeveloper, double-click the ViewController project and in the Project Properties dialog, select the Java EE Application node and check that the fields, Java EE Web Application Name and Java EE Web Context Root, are both set to ADFdi_BC. These values will be used by the integrated Weblogic server.
Click OK.
-
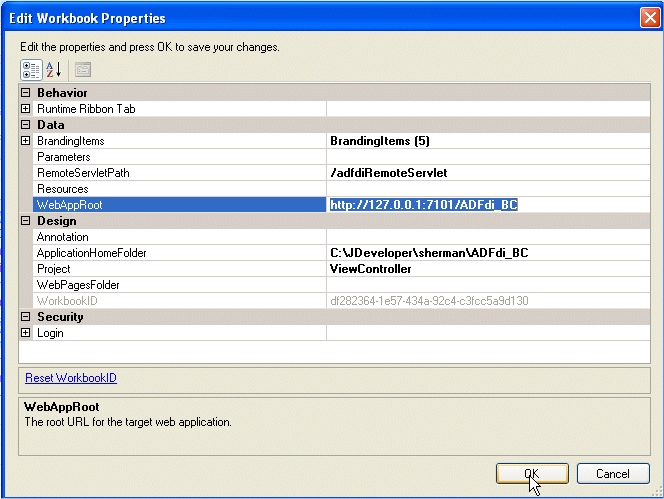
Return to Excel and click the Workbook Properties link in the Oracle ADF 11g Desktop Integration pane.
-
In the Edit Workbook Properties, next to the WebAppRoot field, enter http://127.0.0.1:7101/ADFdi_BC. This URL represents the URL of the Fusion Web application with which the workbook is integrated. Click OK.
-
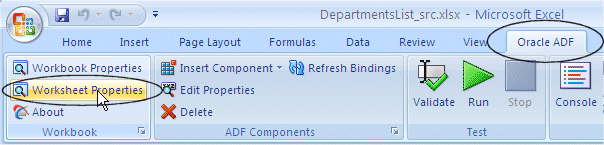
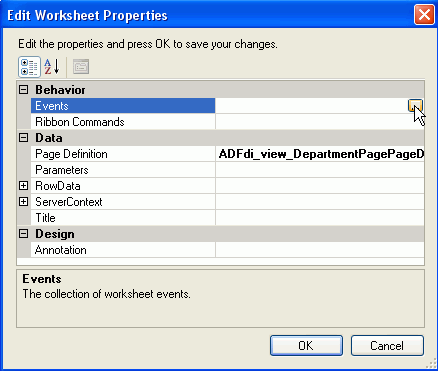
Click the Oracle ADF tab in the Excel ribbon, and then choose the Worksheet Properties menu item.
-
Click the Events field, and then click the more button
 .
. 
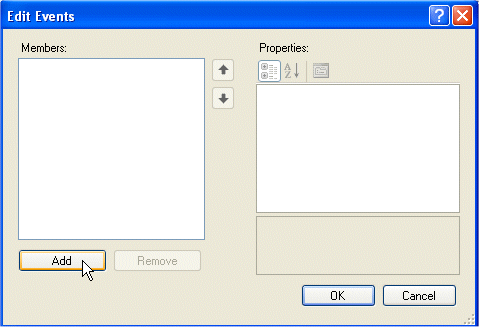
-
In the Edit Events dialog, click the Add button to add a Startup event.
-
Expand the ActionSet node and click the more button
next to the Actions field to open an Edit Actions dialog. 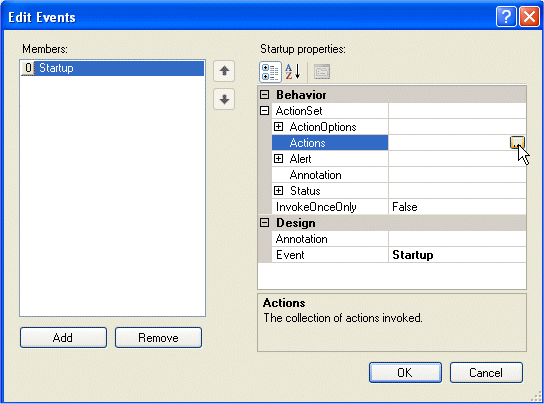
-
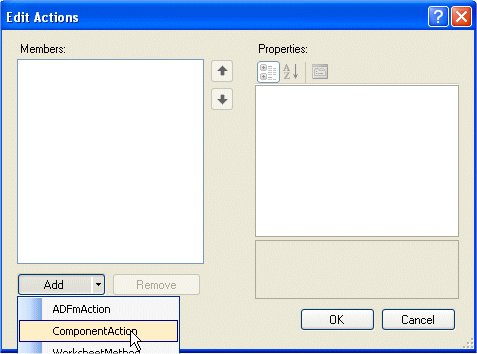
In the Edit Action dialog, click the Add button and select ComponentAction from the drop down list.
-
Click the more button
next to the Action field. 
-
In the Choose Component Action dialog, select Download. (Notice that the Table ID, ROT1522191937 will be different in your case).
Click OK.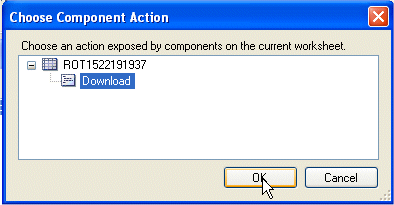
-
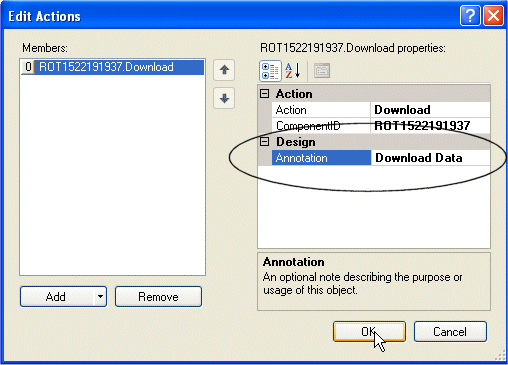
In the Edit Actions dialog, in the Design | Annotation field, type Download Data.
-
You have finished the design of this simple Desktop Integration-enabled worksheet. In the next step you will test it.
Read more...
This is the second paragraph of a note, which is initially hidden.
This is the third paragraph of a long note, which is initially hidden.
This is the fourth paragraph of a long note, which is initially hidden.
Read more... You define a separate page definition file for each Excel worksheet that you want to integrate with a Fusion Web application. The Page Definition dialog lists all available page definition files in the application. In this tutorial there are just two page definition files that were already created in the startup application.
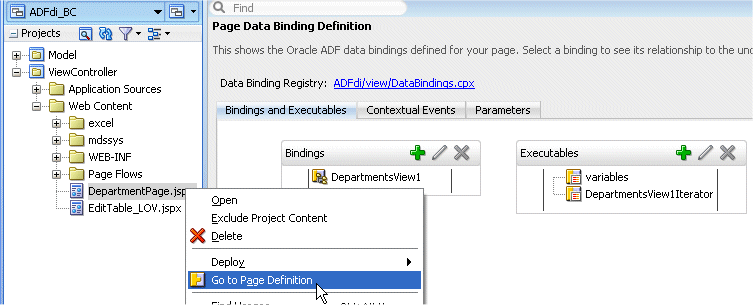
To view the data bindings in the ADFdi_view_DepartmentPagePageDef page definition right-click DepartmentPage.jspx in the Application Navigator and select Go to Page Definition from context.
 Read more...
 In this step you have added a Startup event, and in the steps that follow you go on to define the action set that the event should invoke i.e. what the worksheet should do when the Startup event occurs.
The ADF Read-only Table component and the ADF Table component in the Oracle ADF Desktop Integration add-in expose actions that are used to manage the transfer of data between Excel worksheets and an integrated Fusion web application.Read more...
The ADF Read-only Table component exposes only one component action, Download, while the ADF Table component exposes a number of other actions. In this part of the tutorial you added a read-only table to the worksheet, and so this is why Download is the only component action offered as available by the Choose Component Action dialog.
The Download component action causes the table to be automatically downloaded to the worksheet when the Startup event is triggered.
Read more... Comments you enter in the field have no effect on the behavior of the worksheet. They are the equivalent of code comments.
Click OK. Back in the Edit Events, click OK, and back in the Edit Worksheet Properties dialog, click OK.
-
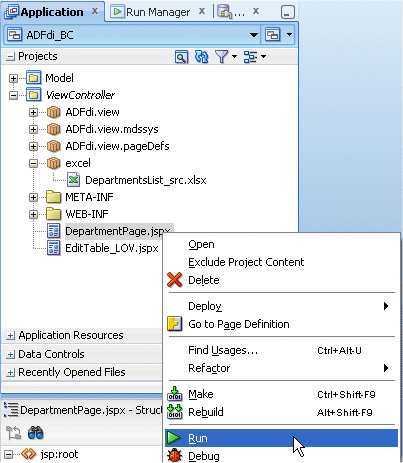
In JDeveloper right-click the DepartmentPage.jspx node and select Run from the context menu. (This step may take a while if WLS has not yet been set up on this computer.)
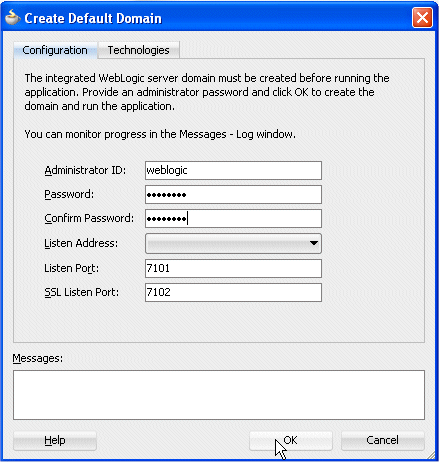
 Typing a weblogic password.Read more...
The first time you run a page after a fresh install of JDeveloper, you will be required to type a Passowrd for Weblogic server. Enter a value of your choice for the password and click OK.
-
The DepartmentPage loads, displaying department information.
-
Now that the page has been deployed in the Weblogic server, you can run the Excel workbook. In the Application Navigator double-click DepartmentsList_src.xlsx to open Microsoft Excel.
-
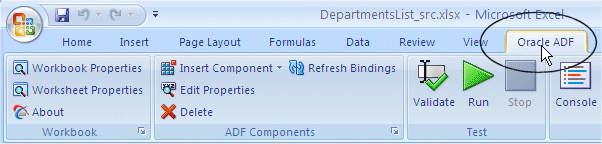
The workbook loads. Click the Oracle ADF tab in the Excel ribbon.
-
In the Test group, click the Validate button
 for validating the workbook. Click Close on positive validation.
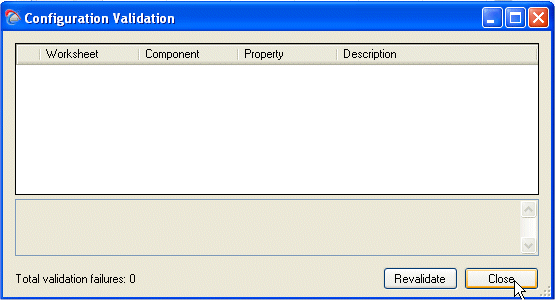
-
Click Run
 to start loading data.
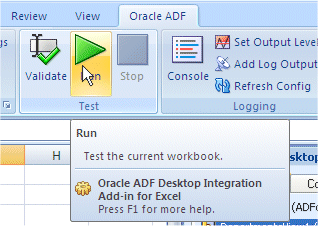
-
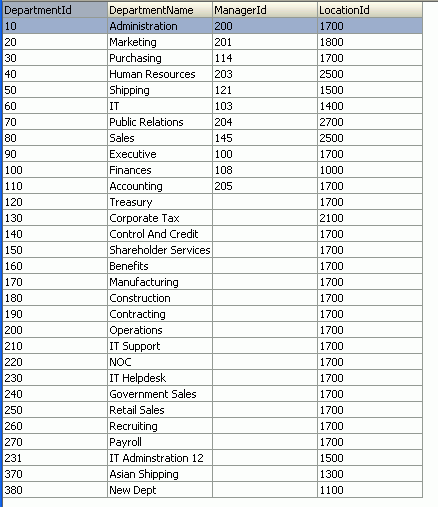
The list of departments is returned in the worksheet.

-
Adjust the columns widths to achieve the desired look.
-
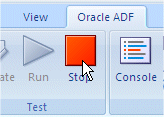
Click the Stop button in the Test group of the Oracle ADF tab in the Excel ribbon.
-
Close the Excel application without saving. You've successfully created a basic Excel workbook that is integrated with a Fusion Web application, and that automatically downloads data from a database table.