 Part 1: Creating a Logical UML Class Model

 Read more...
Class models can be used for logical and physical representation of your information system. Logical models can be transformed into physical model. Because different rules can be used for creating the physical model, the reverse transformation of a physical model into a logical model has only few chances if any to be returned to the original picture.
For this new graphical component you need to create the appropriate databound component. To create the View Object and add it as data control, perform the following steps:
-
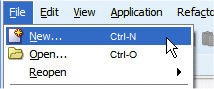
From the main menu, select File | New to open the New Gallery.
-
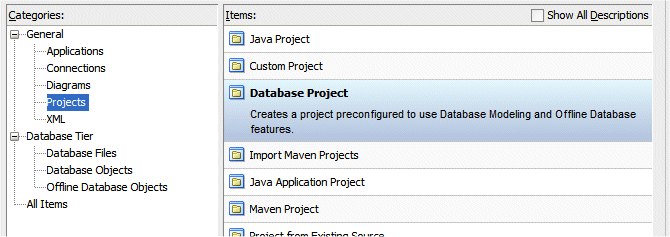
In the New Gallery dialog, select General | Projects and Database Project.
Click OK.
-
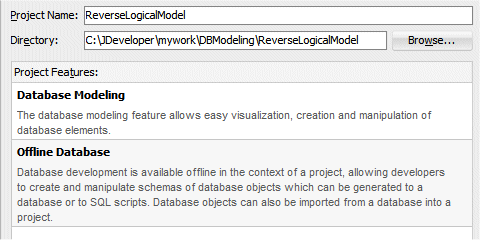
In the New Project window, type ReverseLogicalModel as the name.
Click OK.
-
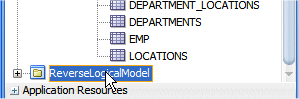
The new project is now in the application Navigator. Double-click the ReverseLogicalModel project to open its properties.
-
In the Project Properties dialog, select the Dependencies node and click the Edit button
 to create a new dependency.
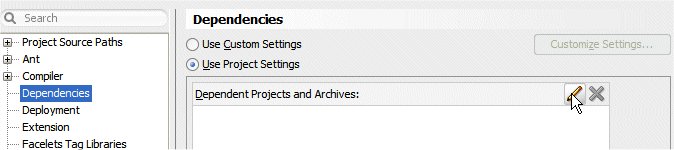
-
In the Edit Dependencies dialog, expand the PhysicalModel project and check the Build Output checkbox.
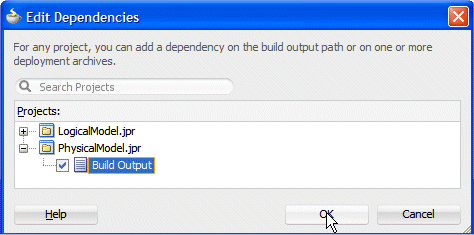
Click OK. Click OK again.
-
Click the Save All button
 to save your work.
 -
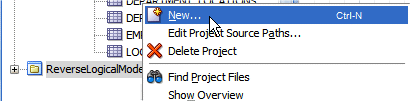
Right-click the ReverseLogicalModel node in the Application Navigator and select New from context..
-
In the New Gallery, select the General | Diagrams category, and then, Database Diagram.
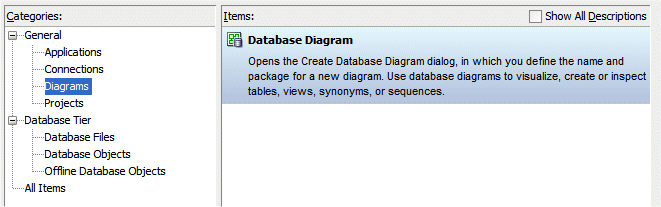
Click OK.
-
In the Create Database Diagram dialog, enter Database Diagram as the name.
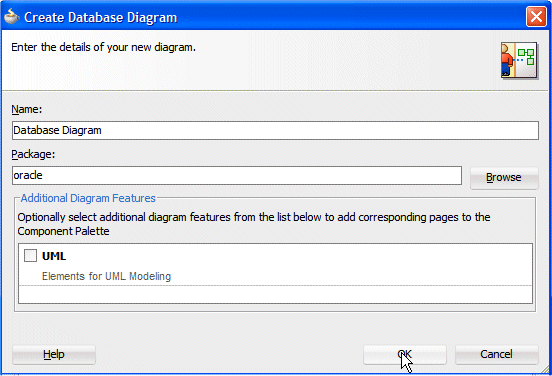
Click OK.
-
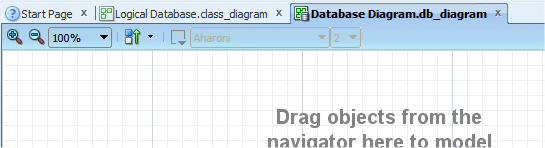
A new empty diagram opens in the edit pane.
-
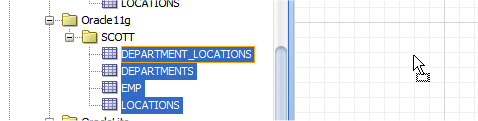
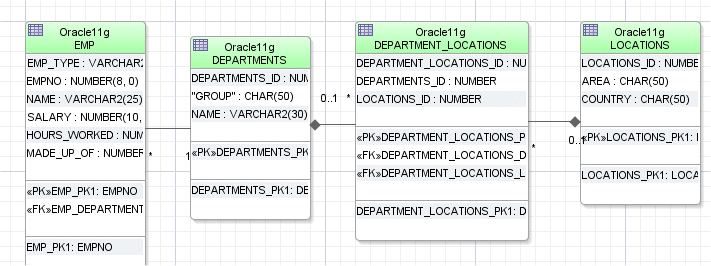
In the Application Navigator, expand the PhysicalModel | Database1 | SCOTT nodes, then multi-select department_locations, Departments, Emp, and Locations and drag the definitions onto the diagram.
-
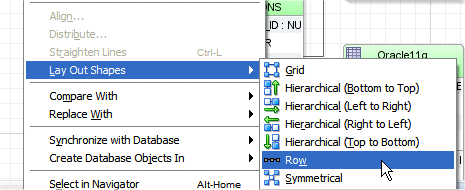
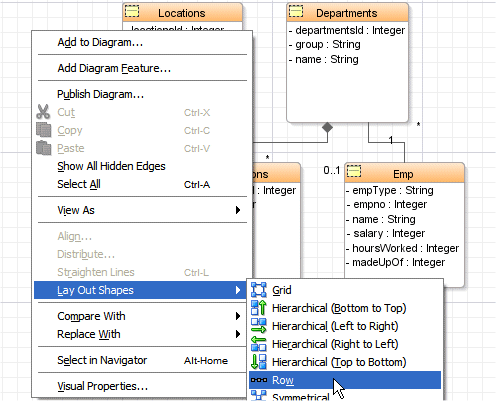
Reorganize the default layout of the database diagram. In the diagram, right-click and select Layout Shapes --> Row.
-
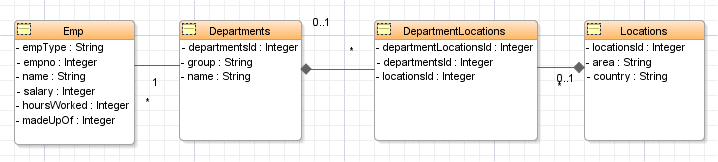
Adjust the model so that it looks like the following:
-
Click Save All
to save your work.
-
Back in the Database diagram, right-click and Select All.
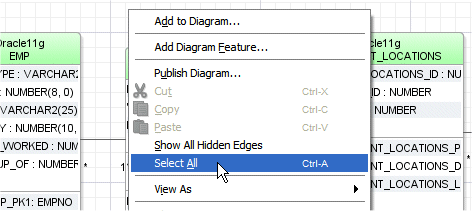
-
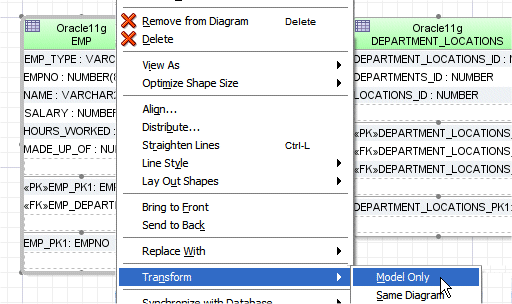
Right-click within any Table and select Transform --> Model Only.
-
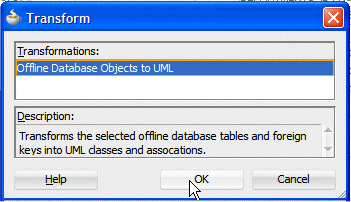
Click OK on the Transform dialog.
-
Click Save All
to save your work. -
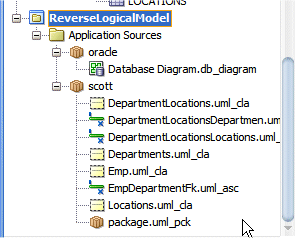
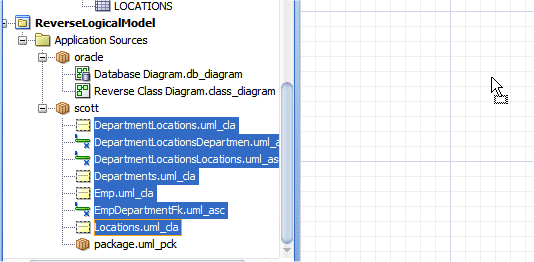
In the Application Navigator, expand the scott node. It should now look like the following:
-
Right-click the ReverseLogicalModel node in the Application Navigator and select New.
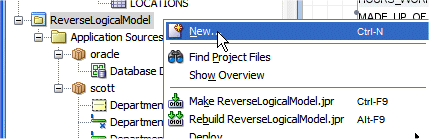
-
In the New Gallery dialog, select Diagrams as the category and then Class Diagram.
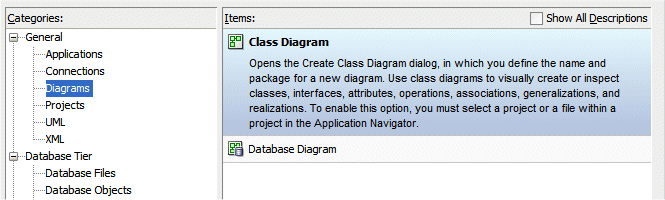
Click OK.
-
In the Create Class Diagram dialog, type Reverse Class Diagram as the name.
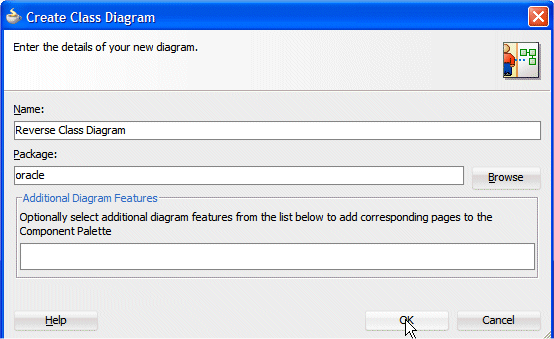
Click OK.
-
In the Application Navigator, under the scott package name, select all components except the package.uml_pck one. Drag the selection onto the new diagram.
-
Right-click within the diagram and select Lay Out Shapes --> Row to reorganize the diagram layout.
-
Arrange the layout so that it looks like the following:
-
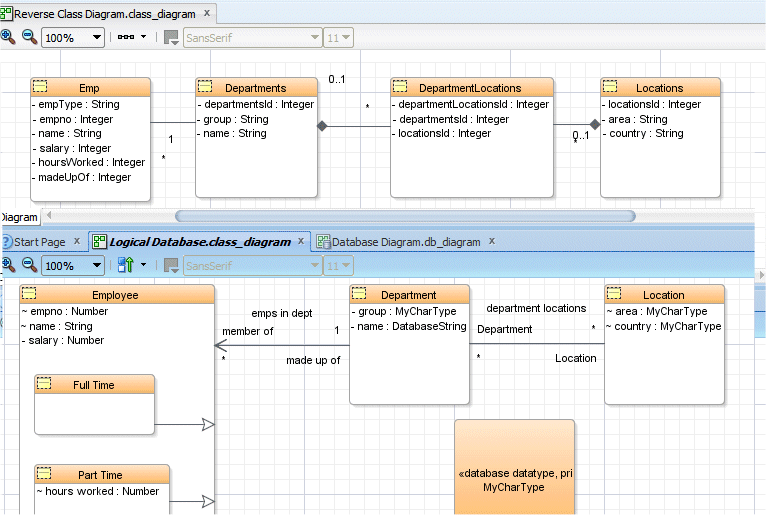
Select the Reverse Class Diagram tab and drag it onto the diagram so that the editor splits in two views.
-
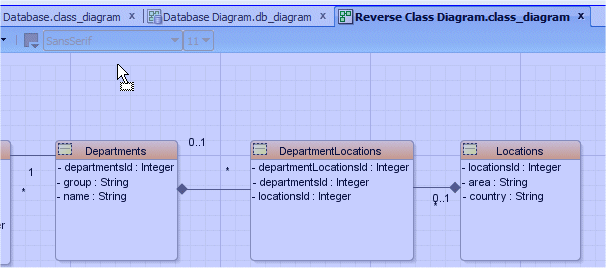
The editor pane is now splitted horizontally. Click the LogicalDatabase.class_diagram tab to open it in the split view and observe both schemas.
-
If needed, adjust the layout so that you can see both diagrams.
Notice now the differences between the original class diagram design and the reverse one.
The reversed class diagram is just a class representation of a database diagram. As such it misses some semantics that were in the original class diagram.
Examples of non reversible concepts:
- Many to many relationtionship can't be reversed from the DepartmentLocations table
- Sub-classes can't be reversed from the empType attribute
- Primary key attributes are reversed back as class attributes
- Foreign key attributes are reversed back as class attributes
- The meaning of associations is lost (emps in dept).
These are some examples of semantic information that the class diagram is not able to recreate from a reverse engineering operation. This class diagram shouldn't be reused for transformation again or you would end up with inconsistency.
You've successfully completed this tutorial.
- Create a Logical UML Class Model
- Transform the Logical Model into Database Physical Models
- Create a Database Diagram and Reverse it back into a Class Diagram
- Designing and Building Database Tables
- "Getting Started With Application Modeling" in User's Guide for Oracle JDeveloper
- "Getting Started with Working with Databases" in User's Guide for Oracle JDeveloper