Chapter 1 Starting the Administration GUI and Logging In
This manual provides the information and instructions for configuration and management of the SunScreen firewall. The main part of the manual relies on the administrative graphical user interface (GUI). Chapter 10, Using the Command Line Interface describes how to configure and manage the firewall using the command line interface (CLI). The various features and theory behind SunScreen are discussed in the SunScreen 3.2 Administrator's Overview.
This chapter provides basic information you will use throughout the book. It assumes that you have already installed the Administration Station and Screen software using the information in the SunScreen Installation Guide.
After a brief discussion of SunScreen terminology, this chapter reviews basic browser requirements and shows how to use the administration GUI to perform basic tasks.
Terms Used in This Book
To manage the SunScreen firewall effectively, you need to understand certain terms, a few of which are defined below. Other terms are defined when they are first used. All terms can be looked up in the Glossary at the back of this manual.
The system running the firewall software is called a Screen. An Administration Station is a system used to configure and administer the Screen. An Administration Station can be located:
-
At the local Screen
-
At a remote location on your network
-
At a remote location across the Internet
Use common objects to model your network configuration and topology. Common objects are the smallest units that you can define on a Screen. The addresses of networks and individual hosts, different services (network protocols), and the user names of people authorized to administer the Screen are examples of common objects.
Policy rules are the individual rules that implement a security policy. Policy rules describe the relationships between the common objects (for example, hosts that can communicate with each other). There are four types of policy rules:
-
Packet Filtering rules describe network traffic flow policy.
-
Administrative Access rules describe who can access the Screen and what they can do once they access it.
-
Network Address Translation (NAT) rules describe network address translations.
-
Virtual Private Network (VPN) rules describe the Screens that participate in a VPN and the hosts for which they provide the VPN.
A policy is a named set of policy rules. When you install SunScreen, an initial policy is created for you, based on the information you supply. The name of this policy is Initial.
New installations can be performed at three levels for routing mode (see "Deciding on Your Initial Security Level" in SunScreen Installation Guide). After a new "permissive" installation, the default policy rules leave everything "open"; in other words, there is no packet filtering or any other type of firewall activity until you specify it. New "secure" and "restricting" installations begin with different default levels of filtering in place.
For stealth mode, the installation comes up without any rules.
Administration GUI Browser Requirements
Using the Administration GUI, you can configure, administer, edit, and manage the Screen. You can use any browser that supports the JavaTM platform and is compliant with JDKTM 1.1.3. You can use Netscape NavigatorTM, the HotJavaTM browser, or Internet Explorer as long as the browser has the required Java support. The only restriction applies to accessing local system resources.
Note -
The Netscape Java Plug-In provided with the Solaris 8 software is not compatible with the Administartion GUI applet. To save log files and load certificates using a Netscape browser, you must install the required version of the Netscape Java Plug-In, as documented in the following sections.
Accessing Local System Resources
Because Netscape Navigator and Internet Explorer do not support the Java mechanism for applet signing, browser security mechanisms prevent the administration GUI from accessing your system's local resources.
The operations that require access to your local system resources are:
-
Exporting and importing IKE certificates
If you do not need to perform any of these operations, you can go to "To Log In to the Administration GUI". If you need to access local system resources, you should read the following sections.
To work around local access limitations, you can use the Java Plug-In or the HotJava browser version. You can find versions of the Netscape and HotJava browsers, as well as the required Java Plug-In, on the SunScreen CD-ROM.
Note -
The SunScreen Administration GUI requires a Java plugin that supports Java 1.1 features. This dependency creates interaction problems when the Java plugin 1.2 (or later) is already present on the system. The fix for this problem is to remove the Java 1.2 plugin from the system.
To Install the Java Plug-In on the Screen
The documentation for the Java Plugin is on the Sun Website at http://java.sun.com/products/plugin/1.1.3/readme.html.
-
Issue the following command to remove the Java 1.2 Plugin:
pkgrm SUNWj2pi
-
Make sure the SunScreen CD-ROM is still in the CD-ROM drive.
-
Become root, if you are not already root.
-
Install the Java Plug-In for use by a single screen, type the following:
# volcheck
$ cp /cdrom/cdrom0/javaplugins/* /usr/lib/sunscreen/admin/htdocs/plugin/plugins/.
If you plan on sharing the Java plugin with Administration Stations, use the following instructions:
-
Save the file identitydb.obj on a diskette (see below) and distribute it to all Administration Stations.
To Install on the Remote Administration Station.
-
Open a Web browser window on the remote Administration Station.
-
Download the plugin from the Screen using one of the following links.
-
Java plugin for SPARC system from http://localhost:3852//plugin/plugins/plugin-112i-solsparc.sh.
-
Java plugin for x86 system from http://localhost:3852//plugin/plugins/plugin-112i-solx86.sh.
-
Java plugin for Windows system from http://localhost:3852//plugin/plugins/plugin-112i-win32.exe.
-
-
On the remote administration station, execute the shell script.
To Save the identitydb.obj File
After you install the Java Plug-In, next you install the identitydb.obj file.
-
If administration is done from a Solaris operating environment (local or remote), place the /usr/lib/sunscreen/admin/htdocs/plugin/plugins/identitydb.obj file in the $HOME directory of the user on the machine they are using for administration.
-
If administration is done from a Windows system, Use the following procedure:
-
Obtain a DOS formatted diskette
-
Insert the DOS formatted diskette in the floppy drive on the Screen.
-
On the Screen, copy the file identitydb.obj to the diskette:
% volcheck
% cp /usr/lib/sunscreen/admin/htdocs/plugin/plugins/identitydb.obj /floppy/floppy0
-
Use the diskette you just created to copy the identitydb.obj file to the appropriate location:
-
C:\WINDOWS directory for Windows 95/98/2000 users
-
C:\WINDOWS\PROFILES\username for multiuser Windows 95/98/2000 systems
-
C:\WINNT\PROFILES\username for Windows NT systems
-
-
If the file identitydb.obj already exists in these locations, add SunScreen as one of the accepted signers to the file identitydb.obj.
Note -The SunScreen GUI can use a signed Java applet to provide access to functions that are normally restricted by a web browser. These functions include saving or loading SunScreen configurations and certificates to files on the local computer.
To verify the Java applet's signature, the web browser needs a copy of the certificate that was used to sign the applet. A copy of this certificate is installed with the SunScreen administration software in /usr/lib/sunscreen/etc/SunScreenEFS.x509. This is a file that you copy to your workstation or PC where the web browser will be run and add to your browser's list of trusted signers. Refer to your browser's documentation for detailed instructions on Java applet security.
-
To Use the HotJava 1.1 Browser
You can add the HotJava 1.1 browser from the SunScreen CD. The package name is SUNWdthj. If you use the HotJava 1.1 browser and want to access local system resources, the browser's preferences must allow medium security for unsigned applets. To set this level of security:
-
Go to the browser's Edit menu.
-
Choose Preferences.
-
Choose Applet Security.
-
Choose the Medium Security radio button from the Unsigned Applets column.
-
Choose Apply.
Using the Administration GUI
To Start the Administration GUI for Browsers Without the Java Plug-In
To connect to a Screen with local administration, type:
http://localhost:3852 |
To connect to a Screen with remote administration, type:
http://Screen_Name:3852 |
where Screen_Name is the name of the machine running the SunScreen software.
To Start the Administration GUI for Browsers With the Java Plug-In
To connect to a Screen with local administration, type:
http://localhost:3852/plugin |
To connect to a Screen with remote administration, type:
http://Screen_Name:3852/plugin |
where Screen_Name is the name of the machine running the SunScreen software.
Note -
HA Configurations Only: Use the name of the interface dedicated to high availability (HA) or to a dedicated Admin interface for all HA administration; otherwise, you will connect to the currently active HA host instead of the primary HA host.
To Log In to the Administration GUI
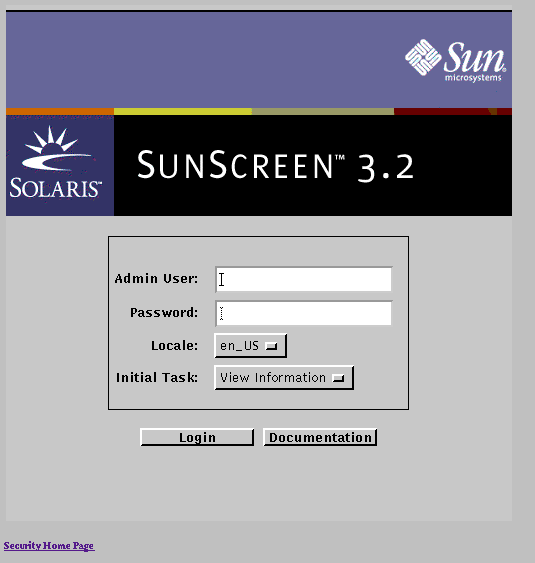
You must log in with a user name and password every time you start the administration GUI. The initial user name and password are both admin.
-
Type your Sunscreen Admin User name in the Admin User field.
The initial user name is admin. To change the Admin User, you can add another Authorized User and use that Authorized User name when you log into Sunscreen (see "To Add an Authorized User").
-
Type your Sunscreen Admin User password in the Password field.
The default user password is admin. Change the password for the default login account as soon as possible to prevent unauthorized access to the Screen's policies. For a description on how to change passwords, see "Changing the Admin User Password".
-
The default is en_US [English USA]. This also means that the libraries used to generate messages are in US English.
-
Select the initial task.
There are two choices for the initial task:
-
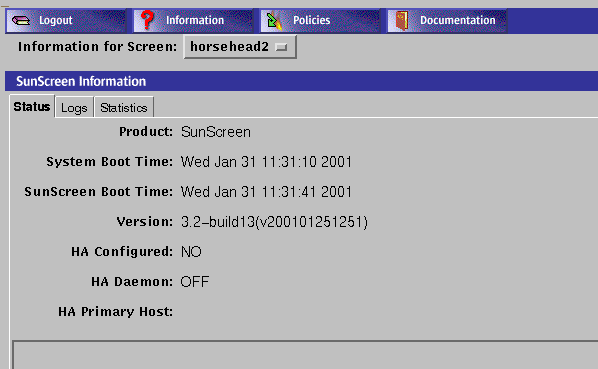
View Information
The information page shows the current status of the Screen, enables you to view and manage the logs, and shows interface statistics.
-
Manage Policies
The policies page enables you to create, edit, and manage SunScreen policies, policy rules, and common objects, including the Admin User IDs.
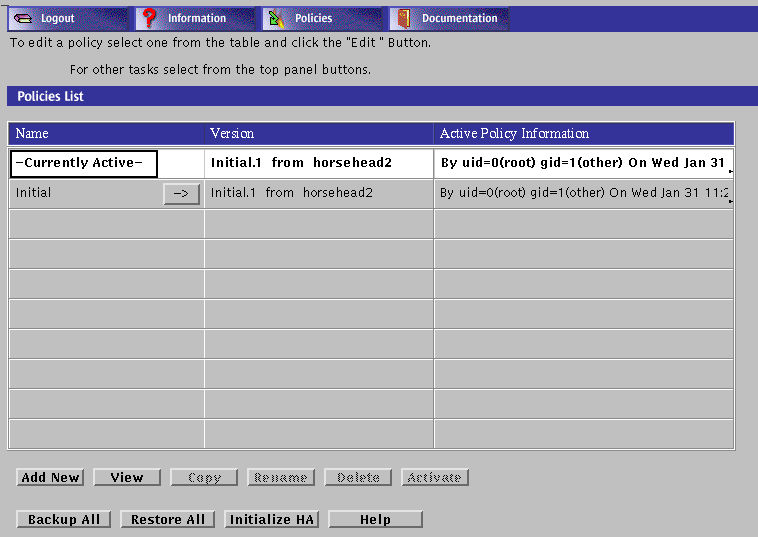
Once logged in, you can move between the Information and Policies pages by selecting the appropriate task from the administration GUI navigation buttons.
-
-
Click the Login button to log in.
Opens the page that you chose for the Select Task field after successful authentication.
-
(Optional) Click the Documentation button to display online documentation.
Click one of the links to open the appropriate documentation. You do not have to log in to look at the online documentation.
Administration GUI Navigation Bar and Buttons
The administration GUI navigation bar and navigation buttons, shown below, appear at the top of administration GUI pages. You should use these button for moving among the pages of the administration GUI.
If these buttons are missing from a page of the administration GUI, it means that you have unsaved changes from your editing session. Once you have saved your changes the buttons reappear.
The following table describes the administration GUI navigation buttons.
Table 1-1 Administration GUI Navigation Buttons
Changing the Admin User Password
The security of the network relies on restricting the ability to change SunScreen rules to authorized people only, so changing the password for the admin user is extremely important.
To Change the Admin User Password
-
Log in to the Screen using the default admin user name and password if you have not already done so.
-
Select Manage Policies as the initial task.
If you are already logged in, select Policies from the navigation buttons across the top of the page.
-
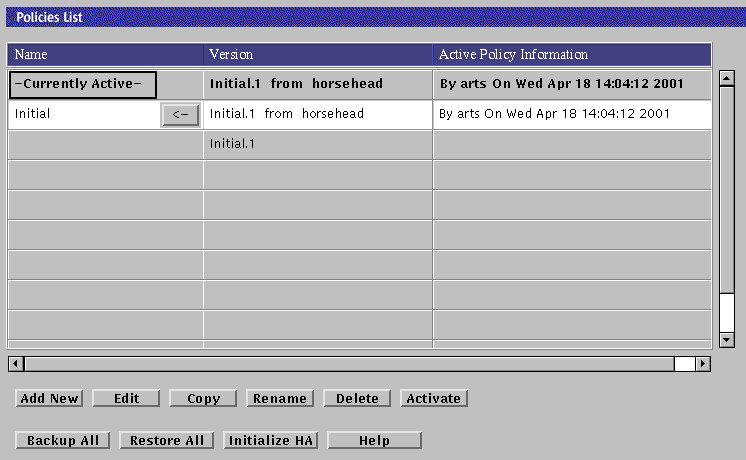
Select the policy named Initial from the Policies List panel of the Policies List page.
Note -Do not select the policy named Currently Active.
The Policy List page appears. The buttons below the policy list become active, and the Edit button changes from View to Edit.
-
Click the Edit Button.
A Please wait while the configuration loads... warning window appears while the Policy Rules page is loading.

-
In the Common Objects panel, set the following variables:
-
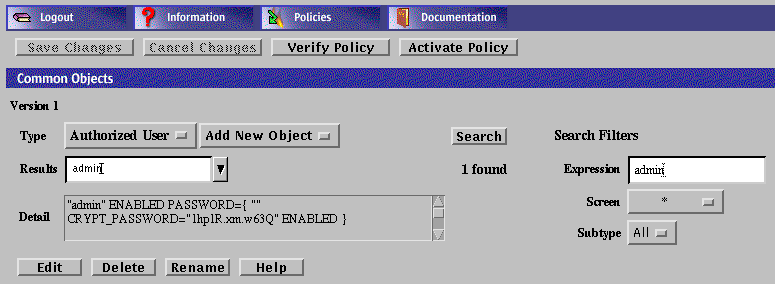
Click the Search button.
At the far right of the Results area, the text string 1 found appears.
-
Select admin in the Results area.
Note -You might have to scroll to see the admin setting in the Results area.
The Detail field displays the details of the admin, including the encrypted password.
-
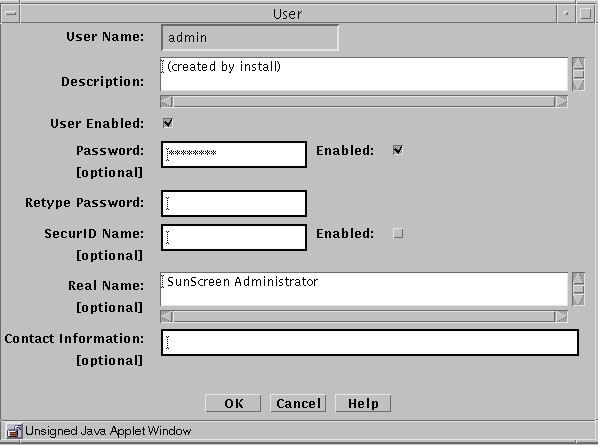
Click the Edit button at the bottom part of the Common Objects panel.
The User dialog box appears.
-
Deselect the User Enabled and Password Enabled check boxes, and type the new password twice.
If you do not deselect the check boxes, you will not be able to edit the password.
-
When you have finished typing and retyping the password, select the User Enabled and Password Enabled check boxes again, then click the OK button.
If you do not select User Enabled and Password Enabled at this point, the admin user will not be active on the policies.
-
Click Yes when asked to Activate the policy.
- © 2010, Oracle Corporation and/or its affiliates

