Certificate Groups
To Add a Certificate Group
After you have named certificate, you can group them into logical groups, so that you can use a group instead of single names in a policy rule..
There are two special predefined IKE certificate groups. See "To Work with IKE Certificate Groups" for the steps you need to follow to set up IKE certificate groups.
-
Execute the steps in "To Modify the Policies Associated with a Common Object".
-
Select Certificate in the Type list.

-
Select New Group from the Add New Object list.
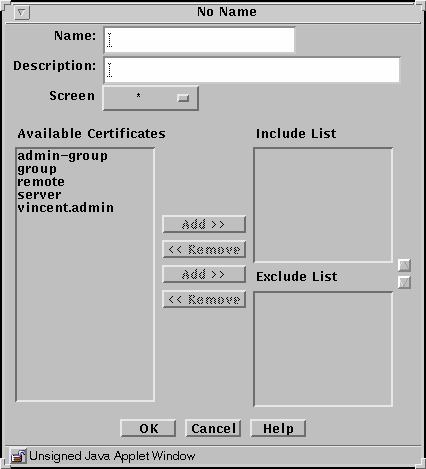
The Certificate dialog box appears.

The following table describes the controls in the Certificate dialog box for certificate group.
Table 2-13 Controls for Certificate Group Dialog BoxControl
Description
Name
Specifies the name of the certificate object.
Description
(Optional) Provides a brief description about the certificate object.
Screen
Specifies which Screen recognizes the certificate object.
Available Certificate List
Identifies the certificates that do not belong to the certificate group. Refer to "Services and State Engines" in SunScreen 3.2 Administrator's Overview for a description of services.
Include List
Identifies the certificates that are to be included in the certificate group.
Exclude List
Identifies certificates that are to be excluded from the certificate group.
Add Button
Moves the certificate selected in the Available Certificates List to the Include or Exclude list, making the certificate a member of the specified service group.
Remove Button
Moves the certificate selected in the Group Members list to the Include or Exclude list, removing the certificate from the specified certificate group.
OK Button
Stores the new or changed information and makes the Save Changes command button active.
Cancel Button
Cancels any new or changed information.
Help Button
Calls up the page of online help for this common object.
-
Type a name in the Name field.
-
(Optional) Type a description in the Description field.
-
(Optional) Select a Screen from the Screen list.
-
Select an certificate from the Available Certificates list.
-
Use the Add button to move the certificate to the Include list or the Exclude list.
Use the corresponding Remove button to remove certificates from the lists.
-
(Optional) Continue to build the intended certificate group by adding to the Include lists.
-
Click the OK button.
To Work with IKE Certificate Groups
There are two special predefined IKE certificate groups:
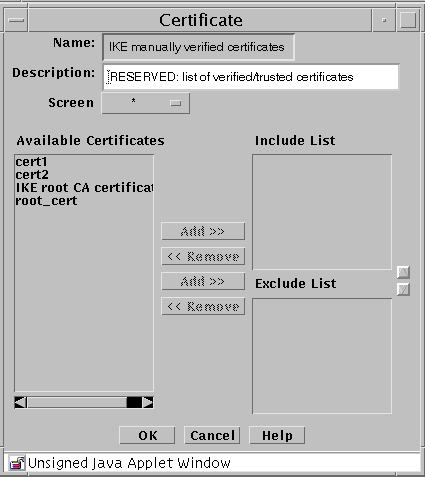
- IKE manually verified certificates that hold trusted certificates used by IKE
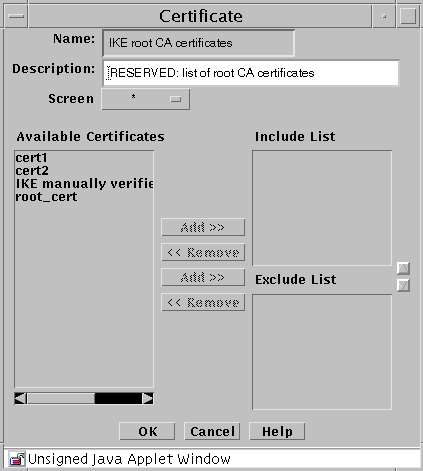
- IKE root CA certificates that hold root CA certificates used by IKE
-
Execute the steps in "To Modify the Policies Associated with a Common Object".
-
Select Certificate in the Type list.

-
Click the Search button.
-
Select either the IKE root CA certificate or the IKE manually verified certificate from the results field.
-
Click the Edit button.
-
(For IKE root CA certificate) The IKE root CA certificate panel appears.

-
(For IKE root CA certificate) Select the IKE root CA certificate from the Available Certificates and click the ADD button to add it to the Include List
-
(For IKE manually verified certificate) The IKE manually verified certificate panel appears.

-
(For IKE manually verified certificate) Individually select the certificates that have been manually verified and click the Add button for each to add them to the Include List
- © 2010, Oracle Corporation and/or its affiliates
