Chapter 7 Configuring Centralized Management Groups
This chapter describes how to configure centralized management groups (CMG) using the administration GUI. Centralized management enables you to administer configurations on a group of Screens remotely.
The following information describes how to use the administration GUI. For an example of a CMG setup, see the SunScreen 3.2 Configuration Examples manual.
The following table lists the procedures in this chapter.
Table 7-1 Procedures for Centralized Management
CMG Overview
A centralized management group is comprised of a primary Screen and a number of secondary Screens. The primary Screen, where all configuration objects reside, manages both itself and the centralized management group's secondary Screens. The primary Screen's function is to push policy configurations to the secondary Screens in the CMG. This capability enables you to manage many Screens effectively from one location.
To configure a centralized management group, you have to exchange certificate information between the CMG primary and secondary Screens, then add these certificates, along with the Admin IP address information and encryption algorithms for the respective Screens, to the Screen objects.
On the CMG primary Screen, you need to specify each interface present on any secondary Screen. These interface definitions should include the related Screen object to make them Screen-specific.
Finally, you must add packet filtering rules to both the primary and secondary Screens so the primary Screen can push its policy to the secondary Screens.
CMG Requirements
Many configurations require cluster members to pass through a firewall in order to communicate with the primary Screen. In these configurations, any firewall being traversed must contain packet filtering rules that allow certain traffic from the primary Screen to pass through its interfaces to the secondary Screen or Screens. These rules must include the following services:
Note -
Although SKIP and IPsec are different protocols and cannot interoperate (SKIP can communicate with any release of SKIP, but not with IPsec.) , you can have SKIP rules and IPsec rules on both machines as long as there is no host overlap. That is, you may set the secondary Screen up to use SKIP to encrypt all traffic between A and B and IPsec to encrypt all traffic between A and C. For this type of setup, the CMG primary Screen should have as its ADMIN_CERTIFICATE a certificate group containing one SKIP and one IKE certificate. Each secondary Screen will have as its ADMIN_CERTIFICATE either a SKIP or an IKE certificate and the appropriate encryption parameters.
CMG Configuration Tasks
The following steps outline the workflow in setting up a centralized management group (CMG). Detailed steps for each task are provided in the following sections.
-
Generate a certificate for the primary Screen (if needed.)
-
On the primary Screen, associate this Certificate with the primary Screen object.
-
Add the primary Screen certificate to the secondary Screen.
-
Add a Screen object for the primary Screen to the secondary Screen.
-
Generate a certificate for the secondary Screen (if needed.)
-
On the secondary Screen, modify the secondary Screen object.
-
Add new rules on the secondary Screen allowing it to be managed by the primary Screen, and activate the policy.
-
Add the secondary Screen certificate to the primary Screen.
-
Add a Screen object for the secondary Screen to the primary Screen.
-
Add a new address group on the primary Screen.
-
Define the secondary Screen's interfaces on the primary Screen.
-
Add new rules on the primary Screen allowing it to manage the secondary Screen.
-
On the primary Screen, activate the policy for the CMG.
Basic Centralized Management Procedure
To Generate an IKE or SKIP Certificate on the Primary Screen
If you selected remote administration during SunScreen installation, a certificate was automatically generated for the Screen, using the primary Screen's hostname with a .admin suffix. You can use this certificate to configure centralized management; you do not need to generate a new certificate.
If you did not select remote administration during SunScreen installation, perform the following steps on the primary Screen to generate a new certificate:
-
Execute the steps in "Basic Centralized Management Procedure".
-
Select Certificate from the Type list.

-
(SKIP only) Select Generate SKIP UDH from the Add New list.
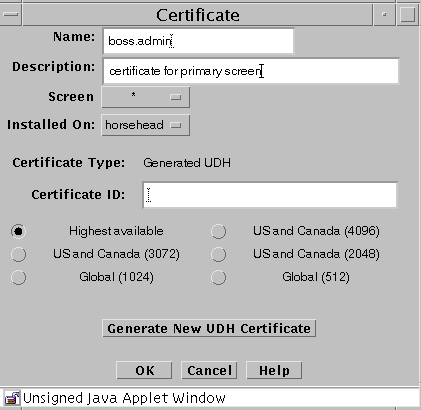
The certificate dialog box appears with options for the type of key to generate. The default value for the type is highest available.
-
(SKIP only) Type the name of the CMG's primary Screen (with the suffix .admin) in the Name field of the Certificate dialog box.
In this example, boss is the primary CMG Screen's host name.
-
(SKIP only) Click the Generate New UDH button.
Once generated, the Certificate ID field contains the Certificate Identifier for the CMG's primary Screen. You use the name of the Certificate Object (as specified in the Name field) to configure the secondary Screen.
-
(IKE only) Select Generate IKE Certificate from the Add New list.
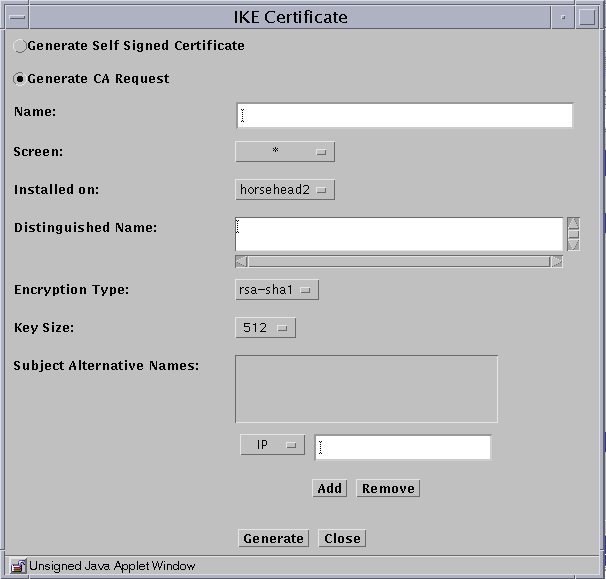
The certificate dialog box appears with options for the type of key to generate. The default value for the type is highest available.
-
(IKE only) Type the name of the CMG's primary Screen (with the suffix .admin) in the Name field of the Certificate dialog box.
In this example, boss is the primary CMG Screen's host name.
-
Fill in the remainder of the fields as called out in "To Generate an IKE Certificate".
-
(IKE only) Click the Generate button.
The IKE certificate is generated. You use the name of the Certificate Object (as specified in the Name field) to configure the secondary Screen.
-
Click the OK button.
To Associate the IKE or SKIP Primary Screen's Certificate with the Primary Screen Object
Perform the following steps on the primary Screen:
-
Execute the steps in "Basic Centralized Management Procedure".
-
Select Screen from the Type list.

-
Click the Search button.
The results area now contains the name of the CMG's primary Screen.
-
Select the name of the CMG's primary Screen in the Results area.
Information about the Screen appears in the Details field
-
Click the Edit button.
The Screen dialog box appears.

-
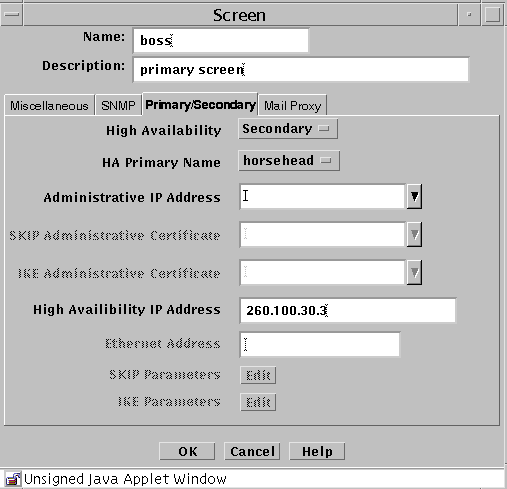
Click the Primary/Secondary tab.
Be sure the IP address of the primary Screen appears in the Administrative IP Address field. If it is not present, provide it now.
-
Type the name of the CMG Primary's Certificate name (the Primary name with the suffix .admin) in the Administration Certificate field of the Primary/Secondary page.
This action associates the certificate with the CMG's primary Screen.
-
Click the OK button.
To Put the IKE or SKIP Primary Screen's Certificate on the Secondary Screen
Perform the following steps on the secondary Screen:
-
Execute the steps in "Basic Centralized Management Procedure".
-
Select Certificate from the Type list.

-
(SKIP only) Select Associate SKIP Certificate from the Add New list.
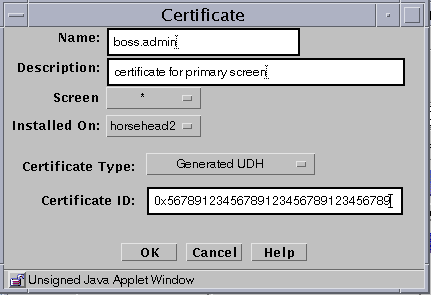
The Certificate dialog box appears.
-
(SKIP only) Type the primary Screen name (with .admin suffix) in the Name field.
-
(SKIP only) In the Certificate ID field, type the Certificate ID of the primary Screen.
-
(IKE only) Select Associate IKE Certificate from the Add New List.
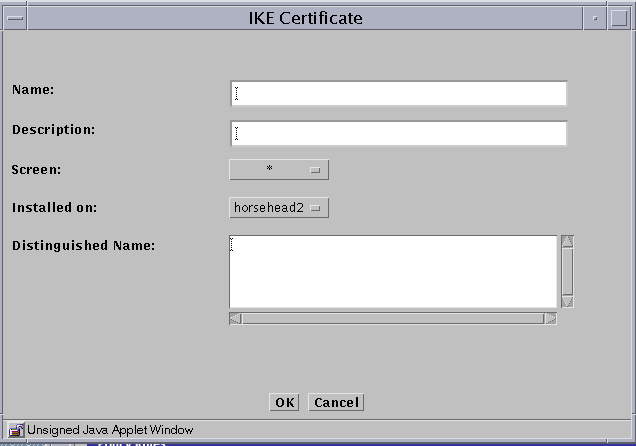
The certificate dialog box appears.
-
(IKE only) Type the primary Screen name (with .admin suffix) in the Name field.
-
(IKE only) In the Distinguished Name field, type the Distinguished Name of the primary Screen.
-
Click the OK button.
To Add the IKE or SKIP Primary Screen Object to the Secondary Screen
Perform the following steps on the secondary Screen:
-
Execute the steps in "Basic Centralized Management Procedure".
-
Select Screen from the Type list.

-
Click the Add New button.
The Screen dialog box appears with the Miscellaneous tab selected.

-
Type the name of the CMG's primary Screen in the Name field.
-
Click the Primary/Secondary tab.
Be sure the IP address of the primary Screen appears in the Administrative IP Address field. If it is not present, provide it now.
-
Type the name of the CMG Primary's Certificate name (the Primary name with the suffix .admin) in the IKE or SKIP Administration Certificate field of the Primary/Secondary page.
-
Click the OK button.
To Generate an IKE or SKIP Certificate for the Secondary Screen
Note -
If you selected Remote Administration during SunScreen installation, a certificate was automatically generated for the Screen. This certificate has a name containing the primary Screen's hostname with a .admin suffix. You can use this certificate to configure Centralized Management; you do not have to generate a new certificate.
Perform the following steps on the secondary Screen:
-
(IKE only) Follow the steps in "To Generate an IKE Certificate".
-
(SKIP only) Follow the steps in "To Generate SKIP UDHs Certificates".
To Modify the IKE or SKIP Secondary Screen Object
Perform the following steps on the secondary Screen:
-
Execute the steps in "Basic Centralized Management Procedure".
-
Select Screen from the Type list.

-
Click the Search button.
-
Select the name of the CMG's secondary Screen from the Results area.
-
Click the Edit button.
The Screen dialog box appears.
-
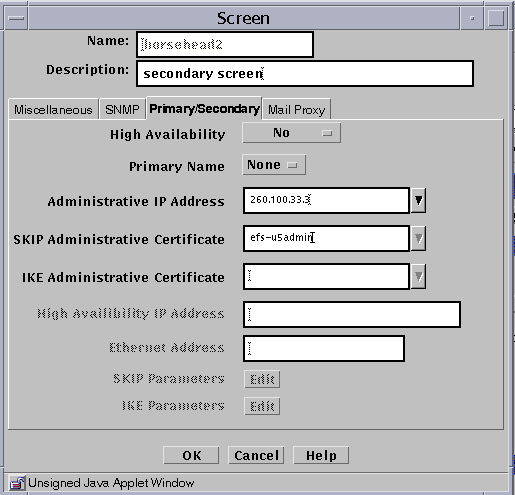
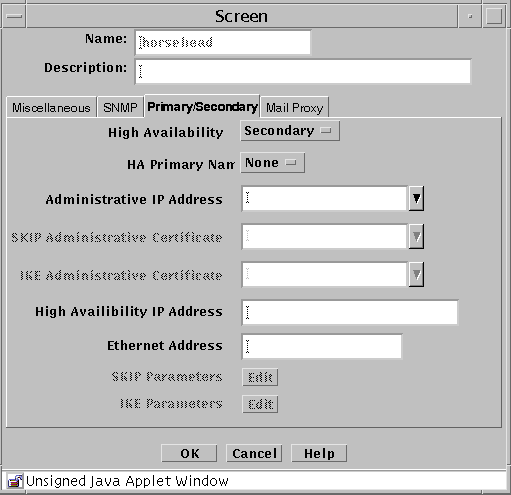
Select the Primary/Secondary tab in the Screen dialog box.
-
Select Secondary from the High Availability pulldown.
-
If not present, type the administration IP address of the CMG's secondary Screen in the Administration IP Address field.
-
(IKE only) Type the secondary Screen certificate name in the IKE Administration Certificate field.
In this example, the name is efs-u5.admin.
-
(SKIP only) Type the secondary Screen certificate name in the SKIP Administration Certificate field.
In this example, the name is efs-u5.admin.
-
Click the OK button.
To Configure the Secondary Screen for Management by the Primary Screen
Perform the following steps from the CMG secondary Screen.
Note -
The configuration changes in this step allow the primary Screen to download a policy to the secondary Screen. Once a policy is downloaded, the changes are no longer in effect. To download additional policies, see "To Configure the Primary Screen to Manage the Secondary Screens".
-
Execute the steps in "Basic Centralized Management Procedure".
-
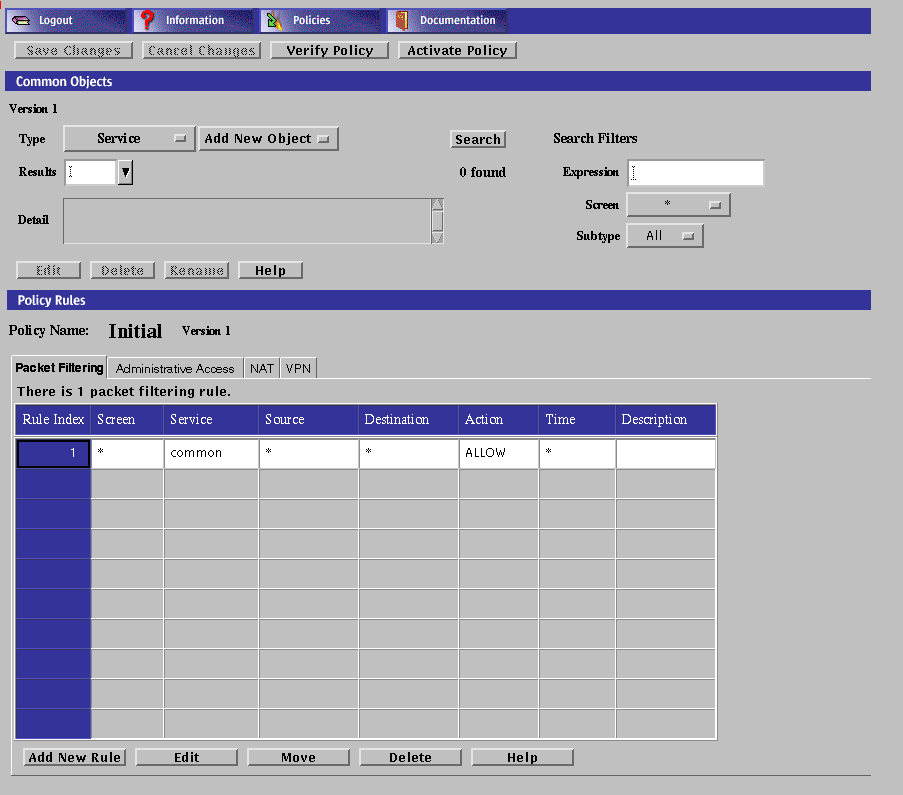
Click the Packet Filtering tab of the Policy Rules area.
The policy rules that are currently defined for this policy are displayed.
-
Click the Add New button in the Policy Rules area.
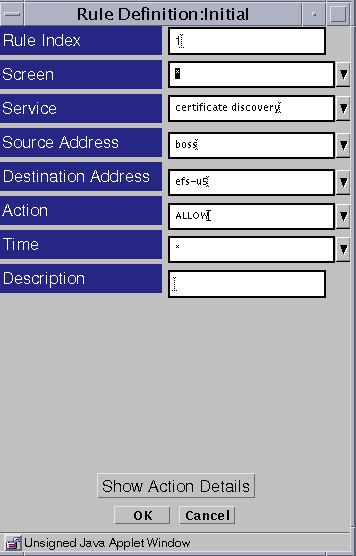
The Rule Definition dialog box appears.
-
Type 1 for the Rule Index.
This index will make the rule the first rule that gets enforced. You must place this rule before any other rule that could conflict with it. If you do not place it first, the primary Screen may not be able to manage the secondary Screen.
-
Fill in the following fields with real values for your configuration (values are provided for this example):
- Screen
-
efs-u5
- Service
-
certificate discovery (SKIP only)
- Source
-
boss
- Destination
-
efs-u5
- Action
-
ALLOW
You can leave default values in all the other fields.
-
Click the OK button.
-
(SKIP only) Repeat Steps 2 through 6 using a Service of skip instead of certificate discovery
-
Verify that the rule definitions are correct.
The packet filtering rules should look like those in the following figure:

-
Create address groups for each interface on the secondary Screen:
-
From the Type list in the Common Objects area, select Address.
-
Select New Group from the Add New list.
-
Type the name of the address group that you wish to use (bos_le0 for example).
-
Add the address objects to the Include and Exclude lists.
Note -If the objects you need to make the appropriate group are not present, you may press Cancel. Follow the instructions in "To Add a Group of Addresses" to create the necessary objects, then return to this section and start again at Step a.
-
Click the OK button.
-
-
Define each interface on the secondary Screen as follows:
To Add the Secondary Screen's Certificate ID to the Primary Screen
Perform the following steps on the primary Screen:
-
Execute the steps in "Basic Centralized Management Procedure".
-
Select Certificate from the Type list.

-
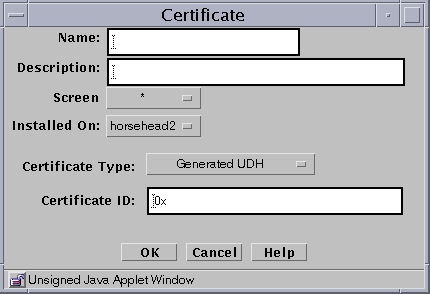
Select Associate SKIP Certificate from the Add New list.
The Certificate dialog box appears.
-
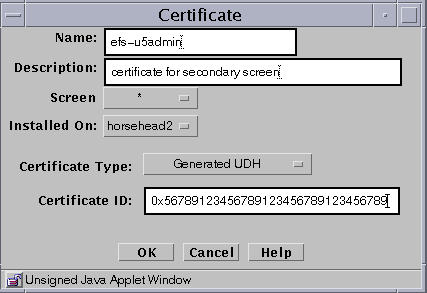
Type the secondary Screen name (with .admin suffix) in the Name field.
-
In the Certificate ID field, type the Certificate ID of the CMG's secondary Screen.
-
Click the OK button.
To Add a Secondary Screen Object to the Primary Screen
Although SunScreen EFS 3.0 and 3.1 primary Screens can push rules to 3.2 secondary Screens, they can only do so using the functionality of the primary Screen's software release. A SunScreen primary Screen, however, can manage SunScreen EFS Version 3.0 and 3.1 secondary Screens effectively. If in doubt, install the latest software release on the primary Screen.
Perform the following steps on the primary Screen:
-
Execute the steps in "Basic Centralized Management Procedure".
-
Select Screen from the Type list.

-
Click the New button.
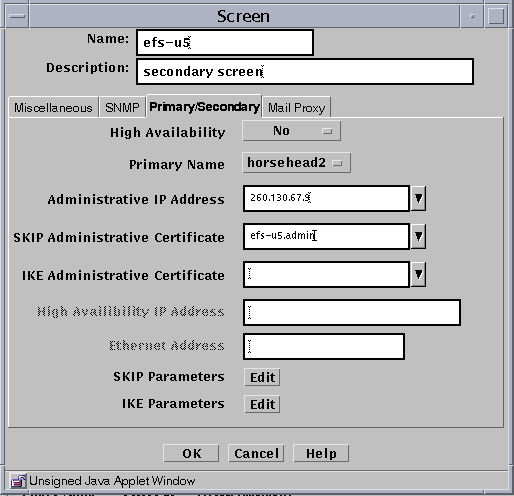
The Screen dialog box appears with the Miscellaneous tab selected.
-
Type the name of the CMG's secondary Screen in the Name field then click the Primary/Secondary tab.
-
Select the primary Screen object name by selecting it from the Primary Name list.
This action tells the secondary Screen the name of its primary Screen.
-
Be sure the IP address of the secondary Screen appears in the Administrative IP Address field.
-
Type the CMG secondary certificate name (the Secondary name with the suffix .admin) in the Administration Certificate field of the Primary/Secondary page.
-
To edit either the SKIP or IKE parameters, click the appropriate Edit button.
-
Click the OK button.
To Add a New Address Group to the Primary Screen
Perform the following steps on the primary Screen:
-
Execute the steps in "Basic Centralized Management Procedure".
-
Select Address from the Type list.

-
Select New Group from the Add New list.
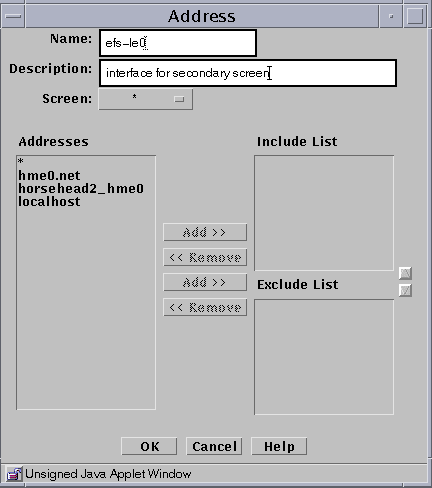
The Address dialog box appears.
-
Type the name of the Address Group.
In this example, you create the Address Group efs-u5_le0 to be used for the interface definition on the secondary Screen.
-
Select the name of the secondary Screen from the Screen list.
In this example, the Screen name is efs-u5.
-
Click the OK button.
Select the address objects to include and exclude from this address group. If the required object is not listed, click the Cancel button and follow the instructions in "To Add a Group of Addresses". After you create the required objects, return to this section and start again.
To Define the Secondary Screen's Interfaces on the Primary Screen
Perform the following steps on the primary Screen:
-
Execute the steps in "Basic Centralized Management Procedure".
-
Select Interface from the Type list.

-
Select New from the Add New list.
The Interface Definition dialog box appears.

-
Define the interfaces of the secondary Screen:
The interface definition for efs-u5_le0 is shown in this figure. You must define each of the secondary Screen's interfaces on the primary Screen as follows, and each definition must contain one of the following:
- Interface
-
The actual interface name on the secondary Screen
- Type
-
STEALTH, ROUTING, or ADMIN
- Screen
-
Screen name as defined in the Screen object
- Address Group
-
Valid addresses for this interface
The Interface Definition dialog box is now identical on both screens.
-
Click the OK button.
To Configure the Primary Screen to Manage the Secondary Screens
Perform this task on the CMG primary Screen. It adds policy rules to allow the primary Screen to pass management traffic through the secondary Screen's interfaces.
-
Execute the steps in "Basic Centralized Management Procedure".
-
Select the Packet Filtering tab of the Policy Rules area.
The policy rules that are currently defined for this policy are displayed.
-
Click the Add New Rule button in the Policy Rules area.
The Rule Definition dialog box appears.

-
Type 1 for the Rule Index.
Note -This index makes this rule the first rule that gets enforced. You must place this rule before any other rule that could conflict with it. If you do not place it first, the primary Screen may not be able to manage the secondary Screen.
-
Fill in the following fields with real values for your configuration (values are provided for this example):
- Screen
-
efs-u5
- Service
-
certificate discovery (SKIP only)
- Source
-
boss
- Destination
-
efs-u5
- Action
-
ALLOW
You can leave default values in all the other fields.
-
Click the OK button.
-
(SKIP only) Repeat Steps 1 through 5 using a service of skip instead of certificate discovery.
-
Verify that the rule definitions are correct.
The packet filtering rules should look like the following:

-
Create address groups for each interface on the secondary Screen using the instructions in "To Add a New Address Group to the Primary Screen".
-
Define each of the secondary Screens's interfaces using the instructions in "To Define the Secondary Screen's Interfaces on the Primary Screen".
-
From the primary Screen, activate the policy to push it to all the CMG secondary Screens.
Note -
Be sure to activate the policy on the secondary Screen first so it will be able to receive the pushed policy from the primary Screen.
- © 2010, Oracle Corporation and/or its affiliates

