Configuring Proxies for User Authentication
In Figure 8-1, telnet access is required to the hosts on the 10.0.3.0 network from unspecified hosts on the Internet. To give access to your trusted users only, implement user authentication.
Set Up Telnet User Authentication
This example shows six user names that need access to the 10.0.3.0 network: Mathew, Mark, Luke, and John.
-
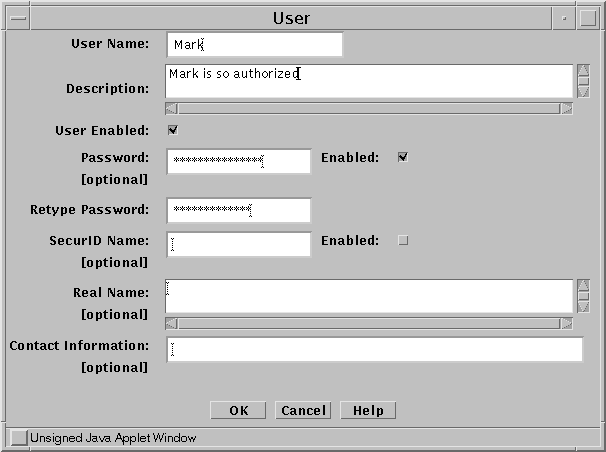
Define each of your users as an Authenticated User, as shown in the following figure:
Figure 8-2 Authenticated User Definition
-
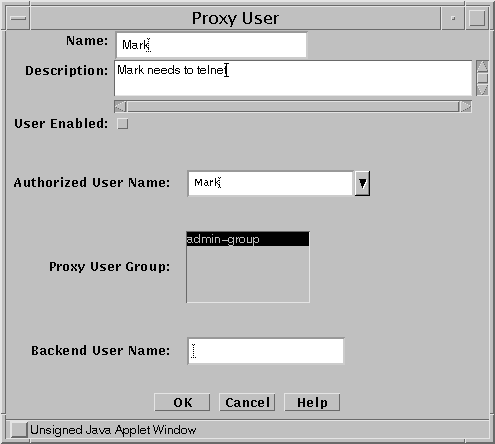
Define each of your users as a Proxy User, as shown in Figure 8-3.
Define only those users who are qualified to use the proxy for authentication.
Figure 8-3 Proxy User Definition
-
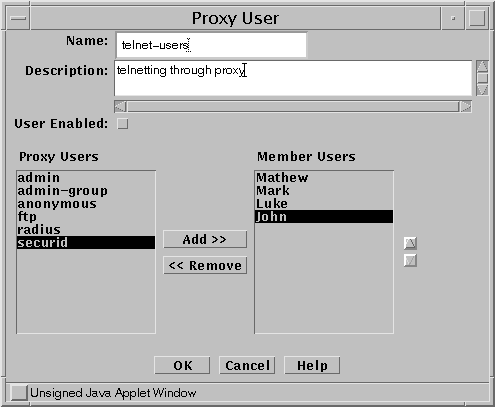
Create a rule to ALLOW proxy access that references either a single Proxy User, or, more usually, a GROUP of Proxy Users, as shown in the following figure.
Figure 8-4 Proxy User Name Used in the Rule
-
Define a Proxy User GROUP with all your users.
-
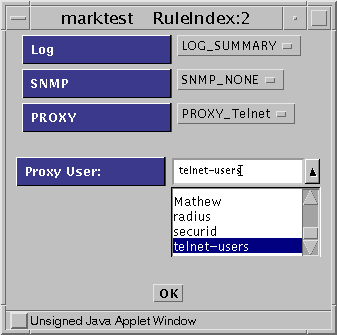
Add a rule to ALLOW telnet with Proxy AUTHENTICATION, as shown in the following figure.
Figure 8-5 ALLOW telnet Rule
-
Save and activate the configuration.
Set Up FTP Authentication
Another requirement is to ALLOW anonymous FTP to the server lon-host3 using the FTP Proxy. Because this is anonymous FTP, you do not have to create an Authenticated User. Use the predefined Proxy Users for ftp and anonymous for this purpose.
The advantage of using the FTP Proxy to ALLOW anonymous FTP access over a regular packet filter rule in this configuration is that the outside world does not need to know which system is the FTP server. Because the FTP connection is made from the firewall, only the firewall needs to know how to resolve the name ftp-server to an IP address. The firewall can use a simple alias in its hosts file and can be changed to another server without having to tell your users. In this example, the FTP server lon-host3 has an illegal IP address, which is enabled because the firewall can contact it.
Note -
Using NAT with a conventional packet filtering rule requires you to add a DNS entry for this host.
-
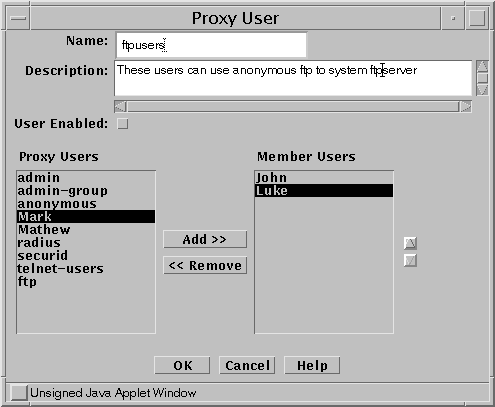
Define a Proxy User Group that contains the users who can use FTP, as shown in the following figure.
Figure 8-6 Proxy User Group Definition
-
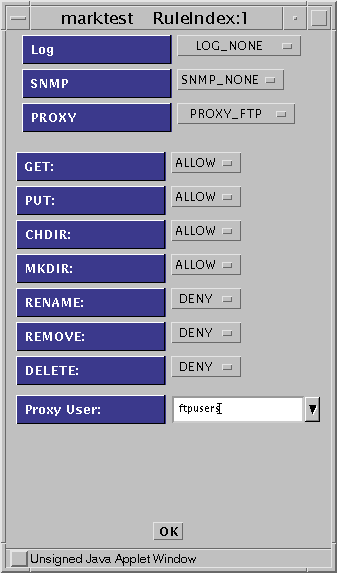
Define a rule to ALLOW FTP access, as shown in the following figure.
Figure 8-7 ALLOW FTP Access Rule Definition
-
Save and activate the policy.
Set Up HTTP the Proxy
Because the users behind the firewall have illegal IP addresses and NAT cannot be used in a mixed-mode configuration, the HTTP proxy can be used to provide Internet access for your internal users.
-
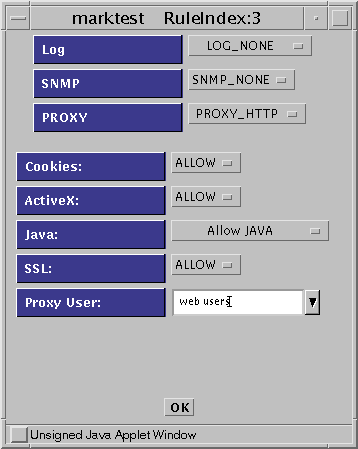
Add a rule to ALLOW Internet access, as shown in the following figure.
Figure 8-8 Rule Definition: Initial Window
-
Save and activate the policy.
The internal hosts must set the Proxy Address of their browsers to the internal IP address of the firewall (10.0.3.100 in this example).
Proxy Considerations
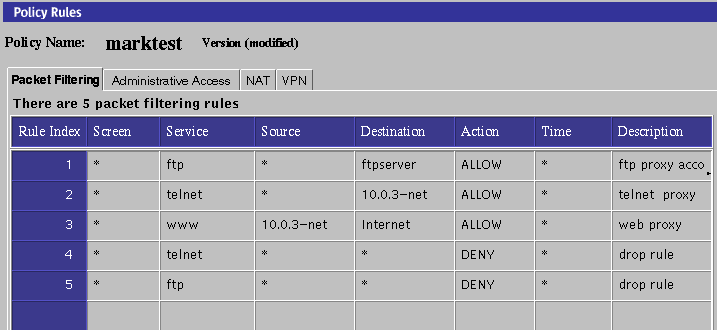
Ensure that the rules do not open a back door into the Intranet that bypasses the proxy rules (for example, a rule that enables telnet directly to a host).
Adding a rule that explicitly drops telnet/FTP after the proxy rules does this as shown in Figure 8-9.
Figure 8-9 Add a Rule to Drop telnet or FTP After the Proxy Rules
Your user must telnet/ FTP to the firewall to be authenticated. The proxy connects the user to the target system (even though the rule has the destination address as the target host).
After configuring a proxy rule, you may need to reboot or rule this script to start the proxy by typing:
# /etc/rc2.d/S79proxy start |
You can verify that the proxies are running by typing:
# ps -ef |
which gives results like those shown in the following table:
Table 8-2 Proxies|
root 4820 |
1 0 15:25:47? |
0:00 /opt/SUNWicg/SunScreen/proxies/ftpp |
|
root 4819 |
1 0 15:25:47? |
0:00 /opt/SUNWicg/SunScreen/proxies/telnetp |
|
root 4818 |
1 0 15:25:47? |
0:00 /opt/SUNWicg/SunScreen/proxies/httpp |
The common objects, authorized user, administrative user, and proxy user that appear in the administration GUI are automatically saved when they are edited or new objects are added. You do not need to save these objects. Changes made to them apply immediately and cannot be reversed; however, they do not take effect until a policy is activated. To install the new objects and to propagate these changes to secondary Screens, activate your system configuration.
Note -
The Save button is grayed out to show that it is inactive.
See the SunScreen 3.2 Administrators Overview for more information regarding authentication.
- © 2010, Oracle Corporation and/or its affiliates
