Fixing Build Errors
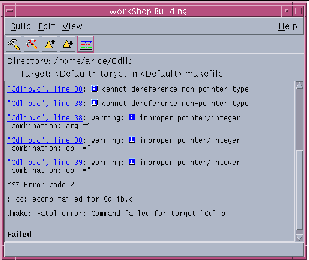
The process of fixing build errors is simplified by the integration of the text editor with the build process. When a build fails, the build errors are displayed in the Build Output display pane of the Building window, as shown in Figure 4-6. Build errors that have links to the source files containing the errors are highlighted and underscored. Unrecognized errors are displayed with the rest of the build output without highlighting or underscoring.
Note -
Do not run a build job and a fix (recompilation of edited source files) concurrently. The output for both jobs intermingles in the Build Output display pane in the Building window. It can be difficult to discern the output of one job from the other.
Figure 4-6 Build Errors in the Build Output Display Pane

Each error line gives the name of the file containing the error, the line number on which the error occurs, and the error message.
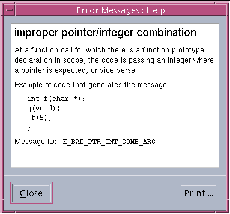
Error messages issued by the C compiler include an additional glyph (![]() ) in the build error message. Clicking on the glyph opens a pop-up window that defines the associated error message.
) in the build error message. Clicking on the glyph opens a pop-up window that defines the associated error message.
Figure 4-7 Error Message Pop-up Window

Note -
Only Sun compilers produce output that can be converted to hypertext links. If you use a build command that does not call Sun compilers, you will not have links to the source files from the build errors listed in the Building window.
Displaying the Source of an Error
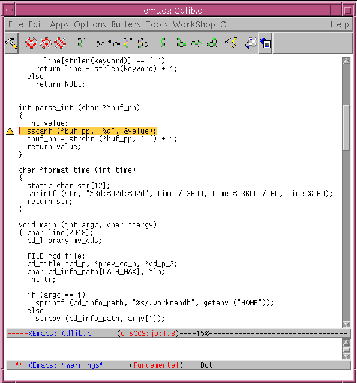
Clicking on the underscored error immediately starts a text editor that displays the source file containing the error. The source file is shown with the error line highlighted and an error glyph appears to the left of the line (see Figure 4-8).
Note -
By using the keyboard shortcuts F4 (next error) and Shift+F4 (previous error) to navigate through the build errors, you can keep focus on the text editor window.
Figure 4-8 Text Editor Window Displaying Source File With Error

Fixing an Error
The following steps show how you can use the Building window and the text editor to quickly fix build errors:
-
Click a highlighted error in the Build Output display pane.
The editor window opens, displaying the source file containing the error. You do not have to search for the line containing the error--the error line is highlighted in the editor and the cursor is already positioned at the line. The error message is repeated in the footer of the text editor.
-
In the text editor, make sure the source file can be edited.
If the file is under SCCS control, check it out using the appropriate menu commands in the text editor:
-
In the vi editor, choose Version > Checkout.
-
In the XEmacs editor, choose Tools > VC > Check out File file.
-
In the GNU Emacs editor, choose Tools > Version Control > Check Out.
-
-
Edit the source file containing the error.
-
In the Building window, click the Next Error button in the tool bar (or use the keyboard shortcut F4) to go to the location of the next build error in the text editor.
As you click Next Error, notice how each successive error in the build output is highlighted and how the corresponding source line in the text editor is also highlighted.
-
Save the edited file.
-
In the vi editor, choose File > Save.
-
In the XEmacs editor, choose File > Save file.
-
In the GNU Emacs editor, choose Files > Save buffer.
-
-
If the file is under SCCS control, check it in using the appropriate menu commands in the text editor:
-
In the vi editor, choose Version > Checkin.
-
In the XEmacs editor, choose Tools > VC > Check in File file.
-
In the GNU Emacs editor, choose Tools > Version Control > Check In.
-
-
Click the Build button in the text editor's tool bar to rebuild.
You can also build by clicking on the Build button in the Building window's tool bar or using the keyboard shortcut F3.
You can watch the Build Output display pane to follow the progress of the build.
- © 2010, Oracle Corporation and/or its affiliates
