| C H A P T E R 9 |
|
Configuring Printers |
This chapter describes how to configure printers. It contains the following topics:
You can associate printers with different functions. For example, you can use the following EXEC CICS commands to perform printing:
The default printer is CPRT. However, you can specify any 4-character ID that is defined in the Terminal Control Table (TCT) as a non-IBM 3270 printer.
|
1. Type CTBL on a blank transaction screen to directly access the Table Manager.
2. Press PF4 to select Standard Tables on the Table Manager menu.
3. Press PF8 to select the TCT.
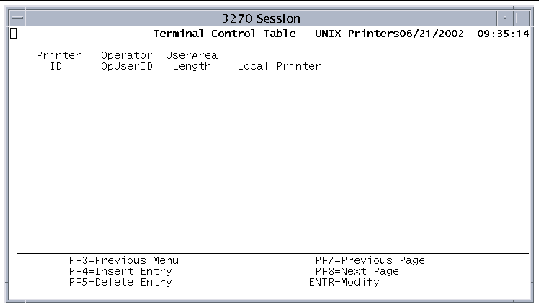
The TCT-Printers screen is displayed showing the defined terminal identifiers that can be used in CICS commands.
 [ D ]
[ D ]
5. To add new printer descriptions, press the PF4 key.
6. When the Insert screen is displayed, type values in the following required fields:
a. Type CPRT in the Printer ID field to identify the default printer.
b. In the Local Printer field, type a name, up to 14 characters, that is passed to kixprint in the -p parameter.
The other fields are optional.
7. Press Enter to insert and validate your entries.
8. Press PF3 to return to the TCT main menu.
9. Press PF2 to write your changes to disk.
10. Press PF3 to exit the TCT.
|
Note - You must restart the region to make the default printer available. |
To configure additional printers, follow the procedure in Configuring the Default Printer, substituting a unique 4-character printer ID for the CPRT identifier.
To associate printers with transient data queues (TDQs), you must define them in both the Destination Control Table (DCT) and the TCT.
|
1. Type CTBL on a blank transaction screen to open the Table Manager.
2. Press PF4 to select Standard Tables on the Table Manager menu.
3. Press PF4 again to open the DCT.
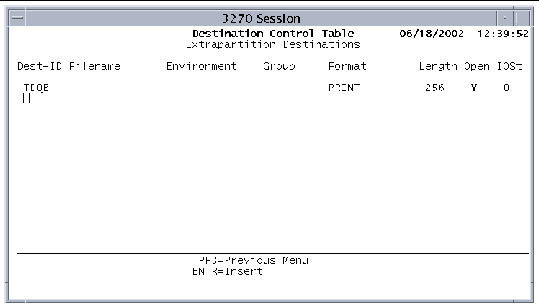
4. On the Destination Control Table menu, press PF9 to display the Extrapartition Destinations screen.
5. Press PF4 to display the Insert screen.
6. Type values in these fields for each printer:
a. In the Dest-ID field, type the 4-character name for the transient data queue.
This is the queue name used in the WRITEQ TD command.
b. In the Format field, type PRINT.
c. Type a number in the Length field; 256 is the recommended value.
The other fields are optional.
 [ D ]
[ D ]
7. Press Enter to validate your changes.
8. Press PF3 to return to the DCT main menu.
9. Press PF2 to write your changes to disk.
|
1. On the DCT main menu, press PF3 to return to the Table Manager-Standard Tables menu.
2. Press PF8 to select the Terminal Control Table.
3. Press PF8 to display the Terminal Control Table-Printers screen.
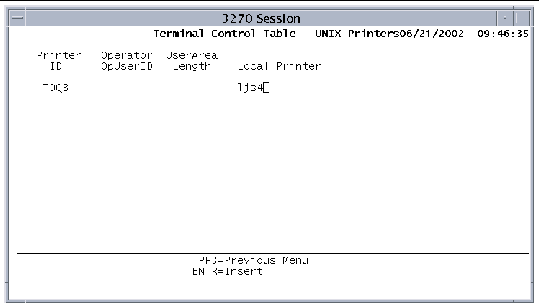
4. Press PF4 to display the TCT-Printers Insert screen. See FIGURE 9-3.
a. In the Printer ID field, type the same 4-character value as the Dest-ID field in the DCT.
b. In the Local Printer field, type the name (up to 14 characters) that is passed to kixprint in the -p parameter.
The other fields are optional.
 [ D ]
[ D ]
6. Press Enter to insert and validate your entries.
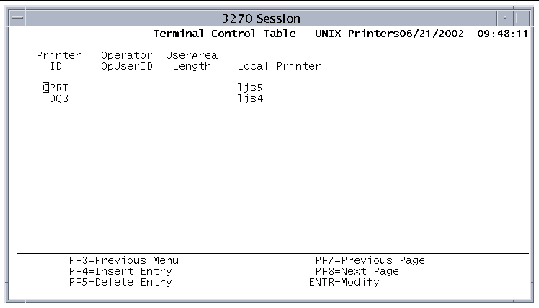
7. When the TCT-Printers screen is displayed, it shows your new entries.
 [ D ]
[ D ]
8. Press PF3 to return to the TCT main menu.
9. Press PF2 to save your changes.
10. Press PF3 until the Development System main menu or the CTBL termination screen is displayed.
11. You must shut down and restart the region for your configuration to take effect.
See Chapter 3 for instructions on starting and stopping Sun MTP.
The default printer size is 132 columns by 66 rows, but you can set environment variables to specify different rows and columns. The environment variable names are formed from the 4-character terminal definition in the TCT followed by the 4-character string ROWS or COLS.
For example, if CPRT is an 80-column printer with 24 rows, define and export the environment variables in a Bourne or Korn shell setup file as:
The kixprint shell script performs the primary printing functions for Sun MTP. During transaction execution, print output is collected on disk. When a syncpoint is issued, either explicitly by the SYNCPOINT command or implicitly by the end of the transaction, all spooled output is printed.
Normally, kixprint is called from the Sun MTP print server. Like all executables run by Sun MTP, kixprint is executed from $UNIKIX/local/bin, or $UNIKIX/bin or a directory specified with the -l option of unikixmain. The kixprint script executes with the current directory set to $KIXSYS.
In the kixprint shell script, the default print command is lp -s, which is associated with the default Sun MTP printer. You can change the default by setting the SPOOLER environment variable. If a printer ID is given, then add -d printerid or
-P printerid to the command for an AT&T or a BSD spooler, respectively.
To discard the output of kixprint, set the SPOOLER environment variable to /dev/null before starting Sun MTP, for example:
You can also modify the kixprint shell script to perform specific actions based on the printer ID. See Modifying the kixprint Shell Script.
After you configure the printer(s) in the DCT and TCT, modify kixprint to perform instructions specifically for your site. Type the changes in the special handling if printer id given section of the shell script.
CODE EXAMPLE 9-1 shows this section in its unmodified form.
The version of kixprint that ships with the software has only default handling of printer IDs. If a printer ID is passed to the script, the value of $SPOOLER is checked. Based on the value of $SPOOLER, $SPOOLCMD is assigned a value that handles the printer ID. To customize the handling of your printer IDs, add a new case statement before the $SPOOLER case statement.
Your network contains three physical printers and one logical printer, each having different formatting requirements. The printers are:
 laser printer that accepts only PostScript data
To accommodate all printers, insert the following case statement in the kixprint shell script.
In the case of Printer4, SPOOLER is set to cat. Because this case is not handled in the SPOOLER case statement, you must add an additional case. Add the following to the SPOOLER case statement before the final case, which is *)
Copyright © 2004, Sun Microsystems, Inc. All rights reserved.