Configuring a Single WAN Link
This section describes how to use the Link Editor in x25tool to configure a single dedicated WAN link for Solstice X.25. The configuration described in this chapter uses the default values provided with the product. It should work in the majority of situations, although it will not necessarily make the best possible use of the product's capacities.
No changes will be made to the Advanced Configuration settings in this example; however, once you have a link that works, you can use the Advanced Configuration options to fine-tune it. See Chapter 7, Parameter Reference for more information.
This example uses the SPARCTM version of the product. The process is almost identical for all versions of the product, but the device names change. Refer to Chapter 8, Example Configurations, for an example using the x86 version of the product.
The procedure for setting up a dial-up link is slightly different from that for setting up a leased line, and involves some extra considerations. Refer to Chapter 8, Example Configurations for an example.
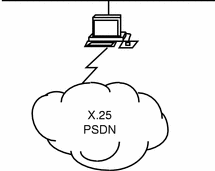
This section describes setting up the following configuration:
Figure 4-7 Configuring a Single WAN Link using x25tool

The onboard serial port of the workstation is connected to a modem using a straight-through cable. When you subscribe to a PSDN, your supplier almost always provides a modem. If not, contact the supplier to find out what kind of modem you need.
To configure Solstice X.25, you need to:
-
configure some information about the link
-
change the logical channel ranges used by the Solstice X.25 software to match those used by your PSDN
Before you start, make certain that your PSDN supplier has provided the following information:
-
the version of the X.25 Recommendation used on the PSDN
-
the logical channel ranges used by the PSDN
By default, there are two template links already configured, one WAN link and one LAN link.
In this example, you will configure a single WAN link:
-
In the x25tool main window, pull down the Edit menu, select Add Link and choose a template configuration.
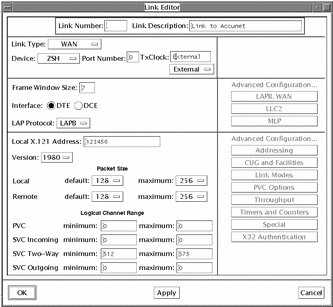
If you don't know what template configuration you need, choose Default. The Link Editor window appears:
Figure 4-8 The Link Editor Window

-
Set the Link Number.
This is a unique number that you assign to the link to identify it, both in x25tool and in the configuration files.
-
Type a link description (this is optional).
In the Link Description field, type in a description of the link. For example, Internal serial port.
-
Set the Link Type.
Pull down the Link Type menu and choose WAN.
-
Set the Device type and Port Number.
The example uses the default zsh0 device. If you are using a different device type, pull down the menu of available device types and select the relevant one, then type in the port number.
-
Make sure the Interface is set as DTE.
You only need to set the Interface as DCE if you are running two machines back-to-back, for example for testing.
-
Set the LAP Protocol to LAPB, unless you are sure your PSDN uses a different LAP Mode.
LAP and LAPBE are used very rarely.
-
Set the Local Address.
Type the port address in this field. This is the X.121 address assigned to you by your supplier. This address is often referred to as an X.25 address. Your service supplier should tell you this address.
Note -The Full Address and Extended Address parameters are not used when the product is in normal operation. You only need to enter these if you are using an application that expects to read them. In this case, your service provider will tell you what you need to enter here.
-
Select the Version.
Choose the version of the X.25 recommendation used by your PSDN.
-
Set the Logical Channel ranges:
Your PSDN will tell you which values to use here. If you are configuring a private network, all machines on the network must use the same logical channel ranges. In this case, you can choose any values you like as long as they comply with the X.25 Recommendations.
-
Click on OK.
This confirms your changes and closes the Link Editor window.
-
Click on File, then click on Save.
This makes sure your changes will be used next time you start X.25.
Note -For a default configuration, you do not need to configure the datalink layer parameters, the defaults should be adequate.
-
Start X.25 by pulling down the Network menu and clicking on Start X.25.
-
Check that the configuration is valid.
First, check the link status by clicking on Network, Link Status. The link status should be NORMAL.
-
Next, make a PAD call to yourself. To do this, enter the pad command at a command line, followed by your own X.121 address:
hostname% pad X.121 address
Once you have created a link that works, you can fine-tune it, or configure the application(s) you want to run over it.
Chapter 8, Example Configurations contains additional examples.
- © 2010, Oracle Corporation and/or its affiliates
