Table of Contents
This facility in MySQL Workbench provides the functionality that was formerly available in MySQL Query Browser.
MySQL Workbench now provides extensive facilities for working directly with SQL code. Before working directly with a live server a connection must be created. Once a connection is established it is the possible to execute SQL code directly on the server and manipulate the server using SQL code.
The starting point for embarking on SQL Development work is the SQL Development area of the Home screen, which has the following action items:
Open Connection to start Querying
Open Connection to start Querying (icon)
New Connection
Edit Table Data
Edit SQL Script
Manage Connections
Each of these action items is described in the following sections.
Clicking this action item launches the Connect to Database Wizard. From this wizard you can select a predefined connection. A new SQL Editor tab is launched where you
To read more about the SQL Editor, see Section 6.7, “SQL Editor”.
Open Connection to start Querying (icon)
If you already have created a connection to a database it will appear in this panel as an icon. Double-clicking the icon will directly launch a SQL Editor tab, and connect you to the database as defined by the connection.
To read more about the SQL Editor see Section 6.7, “SQL Editor”.
Clicking the New Connection action item launches the Manage DB Connections wizard. This wizard enables you to create a new connection. Note the wizard when launched from here does not display existing connections, it only enables you to create a new connection.
To read more about creating and managing connections see Section 6.6, “Manage DB Connections Dialog”.
This action item enables you to edit table data. When clicked the Edit Table Data wizard is launched. This is a two stage wizard. The first stage enables you to select a Stored Connection. The second stage enables you to select the Schema and Table you want to edit. Once the wizard is completed a SQL Editor tab is launched which displays a data grid that enables you to interactively edit table data as required.
To read more about the SQL Editor see Section 6.7, “SQL Editor”.
Clicking this action item launched the Edit SQL Script wizard. This is a two stage wizard. The first stage enables you to select a Stored Connection. The second stage enables you to select a SQL Script file, and optionally have the script executed after it is opened. Once the wizard is completed a SQL Editor tab will be launched, with the script displayed. If you optionally selected to run the script, the script will run and the results will be displayed.
Clicking this action item launches the Manage DB Connections wizard. This wizard also displays Stored Connections, which can be selected to change as required. New connections can also be created from this wizard.
To read more about managing connections see Section 6.6, “Manage DB Connections Dialog”.
MySQL Workbench provides a tool, the Manage DB Connections dialog, for creating and managing connections to servers. The connections created can then be used from the wizards that need to connect to a server, for example the wizard used to reverse engineer a live database. However, it is still possible to set connection parameters from these wizards if required, without invoking the Manage DB Connections dialog directly.
The Manage DB Connections dialog is invoked by selecting , from the main menu. It can also be invoked from any of the wizards requiring access to a live database. This is achieved by using the Manage Stored Connections item, found in the wizard's Stored Connection drop down list box.
Once the Manage DB Connections dialog is launched, you are presented with a dialog that enables you to create or delete connections:
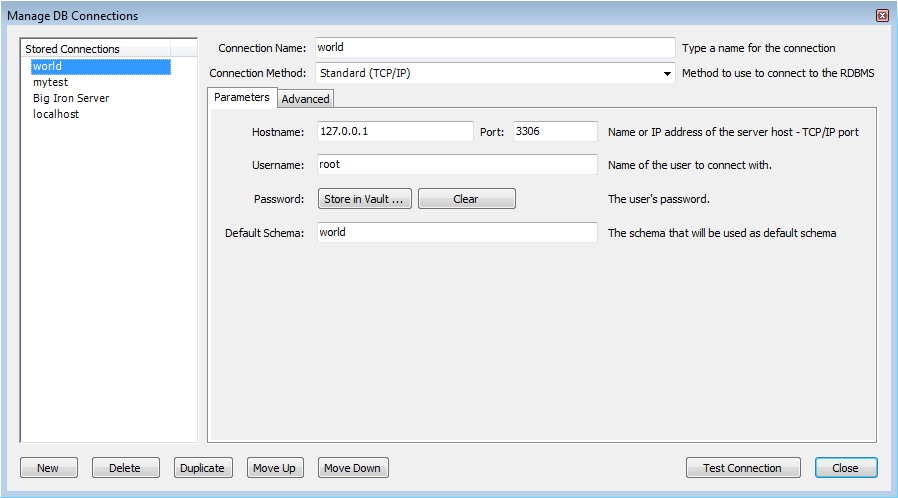
Click to create a new connection. Once created the connection can be selected from the Stored Connections list. You can then set various parameters for the connection, including the following:
Connection Name: The name to use to refer to this connection. This connection can then be selected from a dropdown listbox in other wizards requiring a connection.
Connection Method: The methods available are Standard TCP/IP, Local Socket/Pipe, and Standard TCP/IP over SSH.
Once you have selected a connection method, the textfields available in the Parameters tab and the Advanced tab of the dialog will change accordingly. More details of these options and paramaters are avalable in the following sections.
Once all parameters have been set as required you can click the button to test the connection to the live server. Once you are satisfied that the connection works as expected you can then close the wizard by clicking the button. You can then use the stored connection from any of the wizards requiring connection to a live server.
You can also duplicate an existing connection using the button.
This section discusses the settings on the Parameters and Advanced tabs for the Standard TCP/IP connection type.
Parameters tab
Hostname: The host name or IP address of the MySQL server.
Username: User account to use for the connection.
Password: Optional password for the account used. If you do not enter a password here you will be prompted to enter the password for the account to be used when MySQL Workbench attempts to establish the connection. MySQL Workbench also has the ability to store this password in a vault. On Linux, the vault is only implemented using the Gnome keyring facility - even on systems based on KDE.
Port: The TCP/IP port on which the MySQL server is listening (the default is 3306).
Default Schema: When the connection to the server is established this is the schema that will connected to by default. This becomes the default schema for use in other parts of MySQL Workbench.
Advanced tab
There are also more parameters that can be set for the connection using the Advanced tab:

The advanced options include checkboxes for:
Use compression protocol: If checked, the communication between the application and the MySQL server will be compressed, which may increase transfer rates. This corresponds to starting a MySQL command-line tool with the
--compressoption.Use SSL if available: This option turns on SSL encryption. The client library needs to support this option. Note: this feature is currently not supported.
Use ANSI quotes to quote identifiers: Treat “"” as an identifier quote character (like the “`” quote character) and not as a string quote character. You can still use “`” to quote identifiers with this mode enabled. With this option enabled, you cannot use double quotation marks to quote literal strings, because it is interpreted as an identifier. Note: if this option is selected, it overrides the server setting.
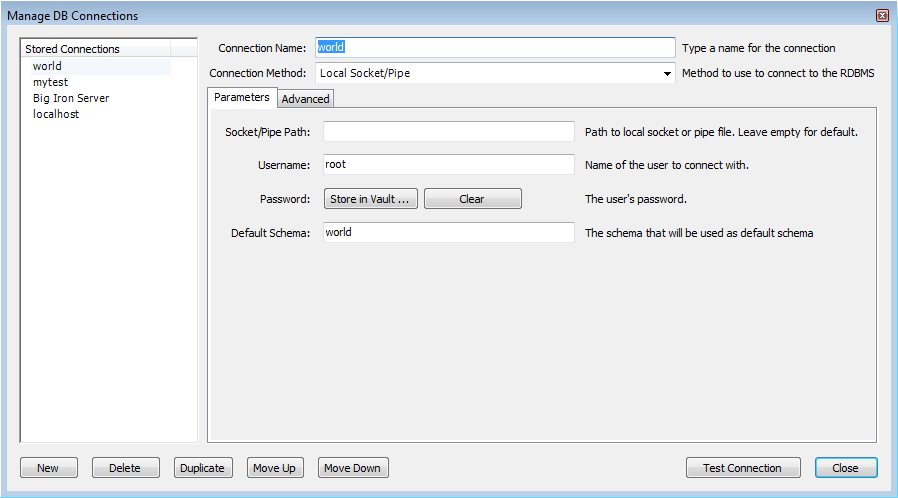
This connection type allows MySQL Workbench to connect to MySQL Server using a socket or pipe.
Parameters
The unique textfield here is Socket/Pipe
Path. The name of the socket or pipe is entered here.
If the textfield is left blank the default socket or pipe name is
used. The default pipe name on Microsoft Windows is
MySQL. On UNIX the default socket name is
/tmp/mysql.sock.
Ths option can be seen in the following screenshot:
Advanced
The only option available in this tab is Use ANSI quoutes to quote identifiers. This option was discussed in Section 6.6.1, “Standard TCP/IP Connection”.
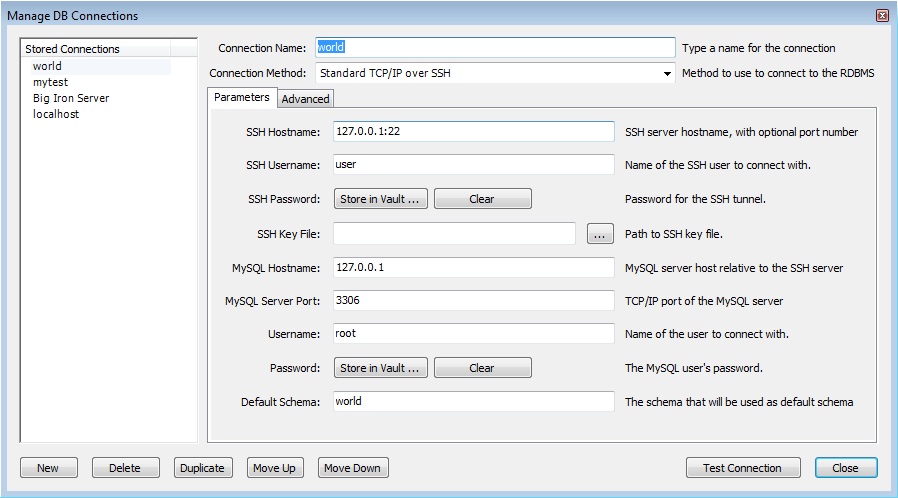
The connection type allows MySQL Workbench to connection to MySQL Server using TCP/IP over an SSH tunnel.
Parameters
In addition to a number of parameters that are in common with Standard TCP/IP connections, this connection method features a number of specialized parameters. These are listed here:
SSH Hostname: This is the name of the SSH server. An optional port number can also be provided.
SSH Username: This is the name of the SSH username to connect with.
SSH Password: The SSH password. It is recommended that an SSH key file is also used.
SSH Key File: A path to the SSH key file. Note, only key files in OpenSSH format are currently supported.
These are shown in the following screenshot:
Advanced
The options here are the same as for the Standard TCP/IP connection, details of which can be found in Section 6.6.1, “Standard TCP/IP Connection”.
MySQL Workbench 5.2 introduced the SQL Editor facility. The SQL Editor
can be launched using various action items on the Home screen. It
can also be launched by selecting ,
from the main menu, or by using
the keyboard shortcut Ctrl+U on
Windows, or Cmd+U on Mac OS X.
At this point you will be asked to select either a stored
connection or enter the details for a new connection. Once a
connection has been made to the server a new tab called
SQL Editor
(schema) is displayed:
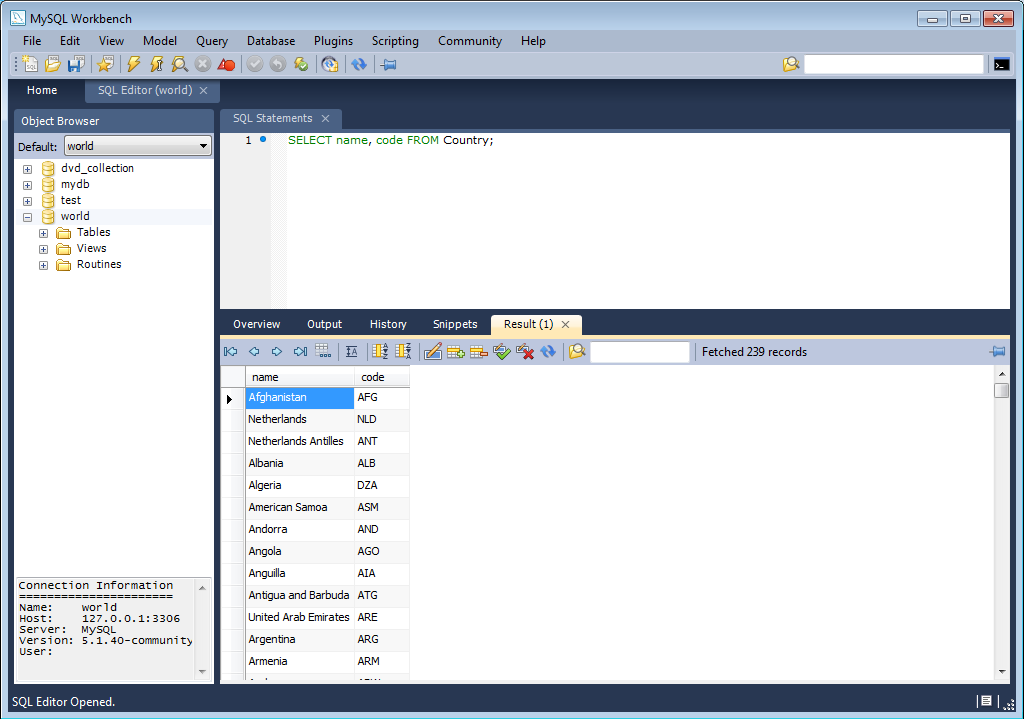
The main elements of the SQL Editor user interface are:
The Main Menu
Toolbar
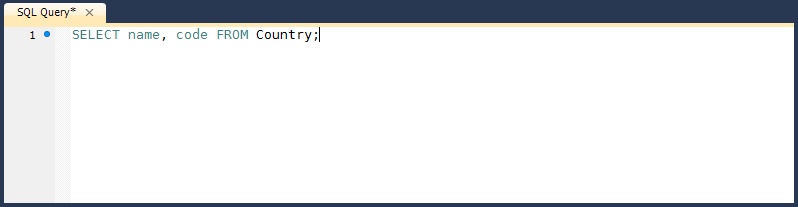
SQL Query Panel
Main Tabsheets (Overview, Output, History, Snippets, Results)
Sidebar
Each of these are described in more detail in the following sections.
When a SQL Editor tab is selected the most important item on the main menu bar is . The Query item features the following menu items:
: Causes all statements in the SQL Query area to be executed, or only the statements selected.
: Causes the current SQL statement to be executed.
: Describes all statements, or the selected statement.
: Describes the current statement.
: Stop execution of the currently running script.
: Reconnect to the MySQL server.
: Creates a duplicate of the current SQL Editor tab.
: Commits a database transaction.
: Rolls back a database transaction.
: Synchronizes with the live server and refreshes views such as the live Overview tabsheet.
: Commits any changes you have made to the server.
: Discards any changes you have made.
: This enables you to export result sets to a file. Selecting this option displays the Export Query Results to File dialog. The dialog enables you to select which result set you wish to export, the file format (CSV, HTML, XML) and the name and location of the output file. Then click to export the data.
The toolbar features ten buttons, as shown in the following screenshot:
From left to right these are:
Create a New SQL Script File: Creates a new SQL Script tab where SQL code can be entered.
Open a SQL Script File: Cicking this button allows any saved SQL script to be loaded ready for execution. The script will be displayed in the SQL Query area.
Save SQL Script to File: Clicking this button allows the currently loaded SQL script to be saved to a file specified by the user.
Save SQL to Snippets List: SQL code snippets saved here can be given a name. They will appear in the SQL Snippets palette in the SQL Editor sidebar.
Execute SQL Script in Connected Server: Executes the currently loaded SQL script. Results are displayed in one or more Results tabs.
Execute Current SQL Statement in Connected Server: Executes the current SQL statement. Results are displayed in one or more Results tabs.
Explain (All or Selection): Explain SQL statements, or the currently selected one.
Stop the query being executed: Halts execution of the currently executing SQL script. This restarts the connection to the database server.
Toggle whether execution of SQL script should continue after failed statements: If the red 'breakpoint' circle is displayed the script will finish on a statement that fails. If the button is depressed so that the green arrow is displayed, then execution will continue past the failed code, possibly generating additional result sets. Any error generated from attempting to execute the faulty statement will be recorded in either case in the Output tabsheet.
Commit: Commits a transaction.
Rollback: Rolls back a transaction.
Toggle Auto-Commit Mode: If selected, transactions will automatically be committed.
Reconnect to DBMS: Re-establishes the database connection.
Refresh state of database structures: Refreshes the view of Schemata, Tables, Views and Routines that appears in the Live Overview Schema tabsheet. For example, if a SQL script creates a new table, it will not appear in the Overview tab until the refresh toolbar button is pressed.
Toggle whether query result tabs should be kept between queries by default: Normally when a script is executed any results generated from previous executions of the script are lost, and the new results displayed in the results tab. If this toggle button is pressed, so that the pin appears inserted, results will be retained between executions. Each execution of the script will create a new Results tab containing the result set.
In this area you can enter SQL statements directly.
The statements entered can be saved to a file for later use. At any point you can also execute the statements you have entered.
To save a snippet of code entered into the SQL Query panel, click the , enter a name, and click . The snippet can be inserted into the SQL Query panel at any time by double-clicking the named snippet in the SQL Snippets Palette.
There is a quick way to enter the names of tables, views and columns. Simply double-click the item in the Schemata Palette and the name of the item clicked will be inserted into the SQL Query panel.
The main tabsheets area contains several tabs:
Live Schema Overview Tabsheet
Output Tabsheet
History Tabsheet
Results Tabsheets
Live Editing Tabsheet
Each of these is described in more detail in the following sections.
This tabsheet provides an overview of the schema. The schema objects Tables, Views and Routines are displayed for the current schema.
The Output tabsheet displays a summary of the communication between the script and the server. The messages displayed can be information or errors. Each message displays the time, the action that was carried out, and the response from the server. This is useful for troubleshooting scripts.
The History tabsheet provides a history of SQL operations carried out. Both the time of the SQL operation and the SQL code itself is recorded. To view the SQL executed, click the time, and the SQL code executed will be displayed in the SQL column.
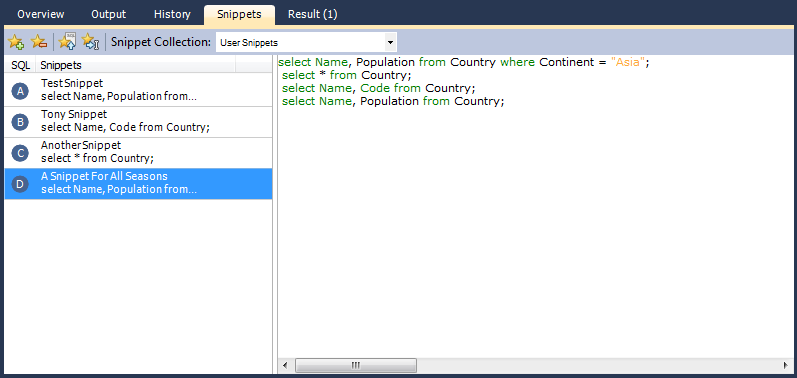
When you enter SQL code into the SQL Query area, you can use the Save SQL to Snippets List toolbar button to save your SQL code. At the time of saving you will be asked to specify a name. These named snippets can be viewed from the SQL Snippets Tab. You can load any SQL snippet into the SQL Query area by double-clicking the desired snippet in the Snippets Palette.
The results area of the screen shows the results from any queries that have been executed. If the script contains multiple queries then multiple result tabs will be generated, one for each query that returns results.
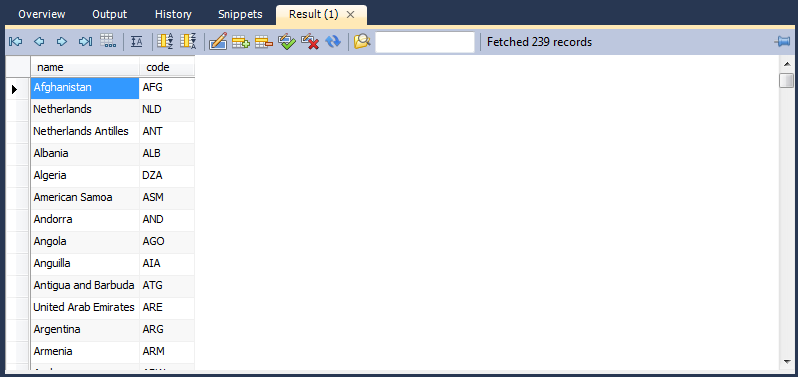
Controls are provided to allow you to easily move over the results. These are shown in the following screenshot:
There are a number of controls available. The controls from left to right are:
Move to first row: Highlights the first record in the current result set.
Move to previous row: Highlights the previous record.
Move to next row: Highlights the next record.
Move to last row: Highlights the last record in the current result set.
Toggle wrapping of cell contents: The data in the cell can either be truncated or wrapped. This button enables you to toggle between these options.
Sort Ascending: Sorts selected column in ascending order.
Sort Descending: Sorts column in descending order.
Export record set to an external file: Outputs record set to a CSV, HTML, or XML file as required.
Refresh Data from Data Source: Refreshes the current result set from the data source.
Search for substring within data: Search data for the string entered in the search box.
It is possible to edit data in real time using the Live Editing tabsheets. In the Overview tab, if a table is double-clicked, a live editing tab will be launched, allowing you to edit the data maintained in that table. Field data can be edited by clicking a field and entering the required data, or editing existing data. In addition to the controls offered by the Results tabsheet, the Live Editor tab features some additional controls. These controls are highlighted in the following screenshot:
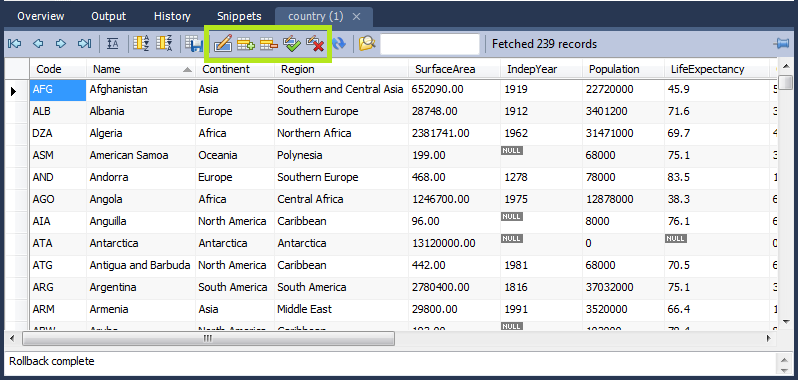
From left to right the highlighted controls are:
Edit current row: Enters edit mode for the currently selected record.
Insert new row: Inserts a new row and enables you to enter data. Your changes will not be reflected on the live server until you click .
Delete selected rows: Removes the selected rows. Your changes will not be reflected on the live server until you click .
Apply changes to data: Applies any changes that may have been made to the data fields to the live server.
Discard changes to data: Discards any changes that may have been made to the data fields, and does not apply them to the live server.
These additional controls allow you to apply or discard any changes you may have made to the field data. If changes are applied, the data will then be synchronized with the live server. If changes are discarded the live server will not be affected.
It is possible to enter a function, or other expression,
into a field. If doing so, the prefix
\func should be used, to prevent
MySQL Workbench from escaping quotation marks. For example, if
entering the expression md5('fred')
MySQL Workbench would generate the code
md5(\'fred\'). To prevent this enter the
expression as \func md5('fred'). This
will ensure that the quoting is not escaped.
See also Section 7.7.1.3.9, “The Inserts Tab”.
The Sidebar contains several panels. These are:
Connection Information Panel
Object Browser
Each of these is described in more detail in the following sections.
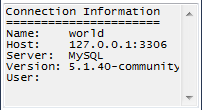
This section provides a summary of the current connection to the server.
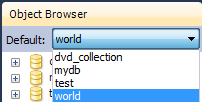
The Object Browser contains a drop down listbox and a schemata explorer control.
Default Schema Listbox
The drop down listbox lists the schema that are available on the currently connected server. It is possible to select a schema to become the currently active schema using this facility.
This selector executes a USE
statement. Once set,
subsequent statements without schema qualifiers will be
executed against this default schema. Note that this will only
be set for the query session. If you wish to set a default
schema for multiple MySQL Workbench sessions, you will need to set
the default schema for the stored connection. To do this from
the Home screen click Manage Connections,
then in the Manage DB Connection dialog
set the desired default schema on the
Parameters tab.
DB
Schemata Explorer
This area enables you to explore the schemata available on the currently connected server.
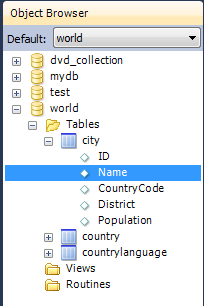
A useful feature that was introduced in MySQL Workbench 5.2.9 is the ability to rapidly enter the names of columns, tables and views into the SQL Statement area. Double-clicking views, tables, and column names in the schemata explorer will insert the corresponding name into the SQL Query area. This reduces typing significantly when entering SQL statements containing several tables, columns or views.
The Object Browser also features a context menu which can be displayed by right-clicking, for example, a table. Right-clicking a table would display the following menu items:
: Pulls up to 1000 records of table data from the live server into a Results tabsheet.
: Pulls table data from the live server into a named tabsheet, and allows editing. Data can be saved directly to the live server.
: There are various sub-menus:
Name (short): Copies the table name to the clipboard.
Name (long): Copies the table name to the clipboard in the form
`schema`.`table`.Column Names: Copies the column names to the clipboard in the form
`table`.`column1`, `table`.`column2`,....Select All Statement: Copies a SELECT all columns statement to the clipboard in the form:
SELECT
`table`.`column1`,
`table`.`column2`,
...
FROM `schema`.`table`;
Insert Statement: Copies an INSERT all columns statement to the clipboard.
Update Statement: Copies an UPDATE all columns statement to the clipboard.
Delete Statement: Copies a DELETE statement to the clipboard in the form
DELETE FROM
                    `world`.`country` WHERE
                    <where_condition>;
.
: Provides similar functionality to Copy to Clipboard. However, this options inserts the SQL code directly into the SQL Query panel, where it can be edited further as required.
: Displays the table editor loaded with the details of the table clicked on.
: Launches a dialog to allow you to create a new table.
: Drops a table. All data will be lost if this operation is carried out.
: Refreshes all schemata in the explorer by resynching with the server.
Right-clicking an empty area inside the object browser displays the following menu options:
: This enables you to create a new schema on the connected server. You can apply your changes to synchronize with the live server by clicking the button.
: Simply synchronizes with the live server so that information with the schemata explorer is updated.