Complete Contents
Chapter 1 Getting Started With Netscape Messaging Server
Chapter 2 Configuring IMAP and POP Services
Chapter 3 Configuring SMTP Services
Chapter 4 Managing Mail Users and Mailing Lists
Chapter 5 Managing the Message Store
Chapter 6 Security and Access Control
Chapter 7 Working With SMTP Plugins
Chapter 8 Filtering Unsolicited Bulk Email
Chapter 9 Message Routing
Chapter 10 Monitoring and Maintaining Your Server
Chapter 11 Logging and Log Analysis
Appendix A Command Line Utilities
Appendix B Program Delivery
Appendix C sendmail Migration and Compatibility
Appendix D SNMP MIB
Glossary
Messaging Server Administrator's Guide: Managing Mail Users and Mailing Lists
Previous Next Contents Index Bookshelf


Chapter 4 Managing Mail Users and Mailing Lists

This chapter explains how mail accounts and mailing lists are implemented in Messaging Server 4.0, and it describes how to use the Netscape Console interface to create and manage your users' mail accounts and mailing lists.

This chapter contains the following sections:


About Users and Groups for Messaging
Messaging Server 4.0 requires close integration with an LDAP directory service such as Netscape Directory Server. One reflection of this close integration is the manner in which mail accounts and mailing lists are implemented.

Users and Mail Accounts

An LDAP user directory can contain a wide range of information about an organization's employees, members, clients, or other types of individuals that on one way or another "belong" to the organization. These individuals constitute the users of the organization. In the LDAP directory, the information about users is structured for efficient searching, with each user entry identified by a set of attributes. Directory attributes associated with a user can include name and other identification, division membership, job classification, physical location, name of manager and direct reports, access permission to various parts of the organization, preferences of various kinds, and so on.

In an organization with electronic messaging services, many if not all users hold mail accounts. For Messaging Server 4.0, mail-account information is not stored locally on the server; it is part of the LDAP user directory. The information for each mail account is stored as a particular set of attributes attached to a user's entry in the directory. To retrieve or modify information for a specific user's mail account, an administrator uses the Messaging Server interface to access that user's mail attributes in the directory.

Groups and Mailing Lists

An LDAP user directory also can contain entries that represent collections of users. These directory groups can consist of a specific set of users or they can be rule-based, with membership defined by job classification or any other user attributes.

Groups can exist for a wide variety of purposes, and they have their own sets of attributes in the user directory. Groups may be used for information sharing in departments or on projects, for providing selective access to sensitive data, for discussion on shared interests, for disseminating company or division policy, and so on.

Messaging Server 4.0 provides support for mailing lists, which can be thought of as group addresses (similar to sendmail aliases) with additional associated information (such as a set of access permissions for posting to the list). As with mail-account information, Messaging Server stores mailing-list information in the LDAP user directory rather than locally. The information is stored as a set of attributes belonging to a particular group. To retrieve or modify information for a specific mailing list, an administrator uses the Netscape Console interface to access the appropriate group's attributes in the user directory.

A mailing list can exist as its own group in the directory, or mailing-list capability can be added to any existing directory group.

Mail-Administration Features

You use the mail-administration portion of the Netscape Console interface to configure and administer the mail accounts and mailing lists hosted by your Messaging Server. These are the general tasks you can perform:

For any user in your user directory, you can

For any group in your user directory, you can

Subsequent sections in this chapter give detailed discussions of these administrative tasks. Before you can perform them, however, you must first enable the mail-administration interface, as described in the next section.

Note: For entry or manipulation of large numbers of mail accounts, it may be more efficient to use bulk methods than to use the Netscape Console interface described here. For more information, see the discussion on migration tools in Appendix A, Command-line Utilities, and Appendix C, sendmail Migration and Compatibility.


Managing Mail Users
Accessing Mail Users

This section describes how to get to the mail administration interface for your users. Because Messaging Server mail accounts are stored as attributes of user entries in an your enterprise's central LDAP user directory, managing mail accounts means accessing and modifying user entries in that directory.

Creating a New User

To create a new mail account, you create a new user in the directory. You must also install a mail account for that user; if you do not install the mail account, the mail-administration portion of Netscape Console is not available. (The full process of creating a user and specifying other kinds of user information is described in more detail in Managing Servers with Netscape Console).

To create a new mail user:

  1. In the Netscape Console main window, click the Users and Groups tab. The Users and Groups window opens.
  2. Select New User and click Create. After you select an organizational unit for the user, the Create User window opens (see Figure 4.1).
  3. Enter at least the required information to create the user entry, as noted in the Users and Groups chapter of Managing Servers with Netscape Console.
  4. Before closing the Create User window, click the Account tab. A list of installable products for the new user's account appears in the right pane (see Figure 4.2).
  5. Click the Mail Account Install box. The Mail tab becomes visible in the Create User window.
  6. Click on the Mail tab in the Create User window, then click the appropriate tab in the right pane to go to the desired form (see Figure 4.3).
  7. (These are the forms described in this chapter.)

  8. Enter your changes, then click OK at the bottom of the Create User window. This submits your entries and dismisses the Create User window.
  9. Note. Clicking OK at the bottom of any mail administration form submits all of the current mail configuration information entered into all of the mail administration forms. Make sure you complete all setup procedures in the relevant forms before clicking OK.

Figure 4.1 Create User window (without Mail tab)

Figure 4.2 Create User window with Install Mail Account option

Figure 4.3 Create User window with mail account installed (Mail tab selected)

Accessing an Existing User

To modify an existing mail account or to add a mail capabilities to an existing user, you access the appropriate user in the user directory and then add or modify that user's mail-account attributes.

To access mail information for an existing user:

  1. In the Netscape Console main window, click the Users and Groups tab.
  2. In the Users and Groups main window, Click Search or Advanced Search.
  3. Enter your search criteria (such as the user's last name) in the Search window, and perform the search of the user directory.
  4. Back in the Users and Groups main window, select a user from the search results and click Edit. The Edit Entry window opens.
  5. If the Mail tab is not visible in the Edit Entry window, do this:
  6. Click the Mail tab in the Edit Entry window, then click the appropriate tab in the right pane to go to the desired form.
  7. (These are the forms described in this chapter; they are identical to those you access through Create User window.)

  8. Enter your changes, then click OK at the bottom of the Edit Entry window. This submits your modifications and dismisses the Edit Entry window.
Specifying User Email Addresses

Before mail can be delivered successfully to a user, you must specify the mail addressing information for that user. This consists of the Messaging Server host name, the user's primary address, and any alternate addresses. The host name and primary address information is mandatory; alternate address information is optional.

To specify a user's mail addressing information:

  1. In Netscape Console, access the Create User or Edit Entry window, as described in Accessing Mail Users.
  2. Click the Mail tab.
  3. Click the Settings tab, if it is not already frontmost. The Settings form is displayed.
  4. (Required) Enter the Messaging Server hostname.
  5. This is the machine hosting the Messaging Server that will process this user's mail. This must be the fully-qualified domain name (FQDN) known to the Messaging Server on that machine.

  6. (Required) Enter the user's primary email address.
  7. This is the publicized address to which this user's mail is to be sent. There can be only one primary address for a user, which must be a valid, correctly formatted SMTP address conforming to RFC 821 specifications.

    If you want to implement hostname hiding (the host name in the user's address is not to be shown in the outgoing mail header) do not specify the host name in the Primary email address field.

  8. (Optional) If you want to add an address to the Alternate Address list, click Add to go to the Add Alternate Address window.
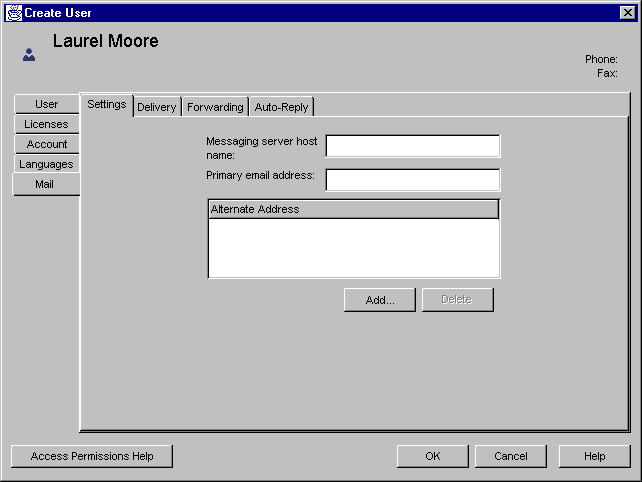
  9. An alternate address is essentially an alias for the user's primary address. You can use this feature, for example, to ensure proper delivery of frequently misspelled addresses (e.g., "Smith" as an alias for "Smythe"), or for host name hiding in outgoing mail headers. You can specify any number of alternate addresses for a particular user, as long as each address is unique. Messages arriving for any of these aliases are directed to the primary address.

    Enter the user's alternate address in the address field (you cannot enter more than one address each time you open this window).

    Click OK to add the address and dismiss the Add Alternate Address window.

    (See Add Alternate Address Window for a complete description of the contents of this window.)

  10. Click OK in the Settings form if this action completes all changes that you wish to make to this user's mail information. Otherwise, click other tabs to continue making entries in other forms.
See Mail Settings Tab for a complete description of the contents of this form.

Configuring Delivery Options

The Messaging Server supports three principal mail-delivery options that you can enable and configure, in any combination, for each user. You can provide regular POP/IMAP delivery, program delivery, and Unix delivery (for clients of a Unix Messaging Server host).

Messaging Server also provides an end-user HTML interface through which users can themselves enable and configure these options. The Netscape Console (administrator) interface and the HTML (user) interface both manipulate the same directory attributes; when opened, each shows the current settings, whether they were set by the administrator or by the user.

To configure delivery options for a user:

  1. In Netscape Console, access the Create User or Edit Entry window, as described in Accessing Mail Users.
  2. Click the Mail tab.
  3. Click the Delivery tab. The Delivery Options form is displayed.
  4. Select the delivery method or methods you want to enable for this user:
  5. Click OK in the Delivery Options form if this action completes all changes that you wish to make to this user's mail information. Otherwise, click other tabs to continue making entries in other forms.
See Delivery Options Tab for a complete description of the contents of this form.

Specifying POP/IMAP Delivery

Specifying this option enables mail delivery to the user's regular POP3 or IMAP4 mailboxes. To enable POP/IMAP delivery for this user:

  1. Access the Delivery Options form.
  2. Check the POP/IMAP box, and click the Properties button to open the POP/IMAP Delivery window.
  3. Enter the nickname of message-store partition to which the user's messages are to be delivered and stored for processing. If you leave this field blank, the current primary partition is used. See Chapter 5, Managing the Message Store, for more information.
  4. Enter the storage limit, or disk quota, to be allotted to the user. The quota can be either unlimited (no maximum storage limit), or you can specify a limit (KB or MB). Unlimited is the default.
  5. Note the contents of the Access domain field. Access domains are domains from which this user is permitted to retrieve mail. If no access domains are specified in the Access domain field, this user can retrieve mail from any domain. Entries in this field can be either domain names or IP addresses.
  6. If you want to specify access domains, click Add next to the Access Domains field. The Add Access Domains window opens.

  7. Enter a domain name in the Access domain name field.
  8. You must enter only a single domain name each time you access the Add Access Domains window. You can enter either a regular domain name or an IP address. If you specify a domain that does not exist, or enter none, then you effectively block access for this user.

    See Add Access Domain Window for a complete description of the contents of this window.

  9. Click OK to add the domain to the list and dismiss the Add Access Domain window.
See POP/IMAP Delivery Window for a complete description of the contents of this window.

Specifying Program Delivery

Specifying this option provides a mechanism for forwarding messages to an external application for processing before delivery to the user.

Note: This section describes only how to make the program delivery option available to an individual user. You must first enable the program delivery module as a whole, which requires performing several other administrative tasks. See Appendix B, Program Delivery, for details.

To enable program delivery for this user:

  1. Access the Delivery Options form.
  2. Check the Program delivery box, and click the Properties button to open the Program Delivery window.
  3. Enter the external application command(s) to be used for processing this user's mail.
  4. Click OK to submit your entry and dismiss the Program Delivery window.
See Program Delivery Window for a complete description of the contents of this window.

Specifying Unix Delivery

Specifying this option selects Unix delivery for this user. The Unix delivery feature allows messages to be delivered to the user's designated Unix mailbox. Unix delivery is available only to users whose Messaging Server runs on a Unix host machine.

To enable Unix delivery for this user:

  1. Access the Delivery Options form.
  2. Check the Unix delivery box.
  3. Note: Beyond the steps shown here, providing Unix delivery to Messaging Server users naturally requires you to perform normal Unix mail administrative tasks.

Specifying Forwarding Addresses

The mail-forwarding feature of Messaging Server 4.0 enables a user's mail to be forwarded to another address instead of or in addition to the primary address for that user.

Messaging Server also provides an end-user HTML interface through which users can themselves specify forwarding addresses. The Netscape Console (administrator) interface and the HTML (user) interface both manipulate the same directory attributes; when opened, each shows the current settings, whether they were set by the administrator or by the user.

To specify forwarding-address information for a user:

  1. In Netscape Console, access the Create User or Edit Entry window, as described in Accessing Mail Users.
  2. Click the Mail tab.
  3. Click the Forwarding tab. The Mail Forwarding form is displayed.
  4. The Forwarding Address field in the form shows the current set of forwarding addresses, if any, for the user.

  5. To add a forwarding address, Click Add. The Add Forwarding Address window opens.
  6. Enter a forwarding address in the Forwarding address field.
  7. Click OK to add the address to the Forwarding address field in the Mail Forwarding form and dismiss the Add Forwarding Address window.
  8. (See Add Forwarding Address Window for a complete description of the contents of this window.)

  9. Click OK in the Forwarding Address form if this action completes all changes that you wish to make to this user's mail information. Otherwise, click other tabs to continue making entries in other forms.
See Mail Forwarding Tab for a complete description of the contents of this form.

Configuring Auto-Reply Settings

The auto-reply feature of Messaging Server 4.0 allows you to specify an automatic response to incoming mail for a user. You can specify three different auto-reply modes: echo mode, vacation mode, and auto-reply mode.

Messaging Server also provides an end-user HTML interface through which users can themselves enable and configure auto-reply settings. The Netscape Console (administrator) interface and the HTML (user) interface both manipulate the same directory attributes; when opened, each shows the current settings, whether they were set by the administrator or by the user.

To enable an auto-reply service for a user:

  1. In Netscape Console, access the Create User or Edit Entry window, as described in Accessing Mail Users.
  2. Click the Mail tab.
  3. Click the Auto-Reply tab. The Auto-reply form is displayed.
  4. Select one of the auto-reply modes:
  5. Off: Disables auto-reply for this user.

    Echo: An automatic reply is sent for each received message and the received message appended as a MIME attachment to the reply. If you select this mode, you can enter a reply message in the Message field.

    Vacation: The first message received by this user from a given sender generates an automatic response; subsequent messages from that sender do not generate a response. If you select this mode, you can enter a reply message in the Message field.

    Auto-reply: Every incoming message received by the user generates the specified automatic response. (The received message is not attached to the reply.) If you select this mode, you can enter a reply message in the message field.

  6. If you have selected echo, vacation, or auto-reply mode, you can (optionally) specify the reply message to be returned to the sender.You can crate one message in each of several available languages (specified in the popup menu above the field).
  7. Click OK in the Auto-Reply form if this action completes all changes that you wish to make to this user's mail information. Otherwise, click other tabs to continue making entries in other forms.
See Auto-Reply Tab for a complete description of the contents of this form.


Managing Mailing Lists
Accessing Mailing Lists

This section describes how to get to the administration interface for your mailing lists. Because Messaging Server mailing lists are stored as attributes of group entries in an your enterprise's central LDAP user directory, managing mailing lists means accessing and modifying directory groups.

Creating a New Group

To create a new mailing list, you create a new group in the directory. You must also install a mail account for that group; if you do not install the mail account, the mail-administration portion of Netscape Console is not available. (The full process of creating a directory group and specifying other kinds of group information is described in more detail in Managing Servers with Netscape Console).

To create a new mailing list:

  1. In the Netscape Console main window, click the Users and Groups tab. The Users and Groups window opens.
  2. Select New Group and click Create. After you select an organizational unit for the group, the Create Group window opens (see Figure 4.4).
  3. Enter at least the required information to create the group entry, as noted in the Users and Groups chapter of Managing Servers with Netscape Console.
  4. Note: For mailing-list purposes, you do not have to add members through the Members tab of the Users and Groups interface:

  5. Before closing the Create Group window, click the Account tab. A list of installable products for the group account appears in the right pane.
  6. Click the Mail Account Install box. The Mail tab becomes visible in the Create Group window.
  7. Click on the Mail tab in the Create Group window, then click the appropriate tab in the right pane to go to the desired form (see Figure 4.5).
  8. (These are the forms described in this chapter.)

  9. Enter your changes, then click OK at the bottom of the Create Group window. This submits your entries and dismisses the Create Group window.
  10. Note. Clicking OK at the bottom of any mail administration form submits all of the current mail configuration information entered into all of the mail administration forms. Make sure you complete all setup procedures in the relevant forms before clicking OK.

Figure 4.4 Create Group window (without Mail tab)

Figure 4.5 Create Group window with mail account installed (Mail tab selected)

Accessing an Existing Group

To modify an existing mailing list, or to add a mailing-list capabilities to an existing group, you access the appropriate group in the user directory and then add or modify it's mail-account attributes.

To access mailing-list information for an existing group:

  1. In the Netscape Console main window, click the Users and Groups tab.
  2. In the Users and Groups main window, Click Search or Advanced Search.
  3. Enter your search criteria (such as the group's name) in the Search window, and perform the search of the user directory.
  4. Back in the Users and Groups main window, select a group from the search results and click Edit. The Edit Entry window opens.
  5. If the Mail tab is not visible in the Edit Entry window, do this:
  6. Click the Mail tab in the Edit Entry window, then click the appropriate tab in the right pane to go to the desired form.
  7. (These are the forms described in this chapter; they are identical to those you access through Create Group window.)

  8. Enter your changes, then click OK at the bottom of the Edit Entry window. This submits your modifications and dismisses the Edit Entry window.
Specifying General List Information

Before mail can be delivered successfully to your mailing list, you must specify its mail-addressing information. This consists of the primary address for the group, any alternate addresses you want to accept as aliases to the primary address, plus optional descriptive information about the purpose, attributes, members, and so on, for the mailing list. This description is for informational purposes only; it is not used by the Messaging Server.

To specify general mailing-list information:

  1. In Netscape Console, access the Create Group or Edit Entry window, as described in Accessing Mailing Lists.
  2. Click the Mail tab.
  3. Click the General tab, if it is not already frontmost. The Mail General form is displayed.
  4. (Required) Enter the mailing list's primary email address.
  5. This is the publicized address to which this list's mail is to be delivered. There can be only one primary address for a list. It must be a correctly- formatted SMTP address that conforms to RFC 821 specifications.

  6. (Optional) Click Add below the "Alternative email addresses" field to specify an alternate address for the mailing list. The Add Alternate Address window opens.
  7. (Optional) Enter the email address of a person, if any, to whom errors in posting messages to the list should be sent.
  8. (Optional) Click Add below the "Mail list owners" field to specify one or more owners of this list.
  9. The Add List Owners window opens. Click either DN or email address, enter the information in the window, then click OK to add the owner to the list and dismiss the window.

  10. (Optional) Enter the host name of the machine hosting this mailing list.
  11. If the Primary email address field for this mailing list includes a host name, you can leave this field blank. If you implement host-name hiding by having no host name in the primary email address, specify the host name in this field.

  12. (Optional) Enter a text description of the purpose or nature of the mailing list.
  13. (Optional) Enter a URL to an HTML page providing additional information about the mailing list. This is for informational purposes only; the URL is not used by Messaging Server.
  14. Click OK in the Mail General form if this action completes all changes that you wish to make to this mailing list. Otherwise, click other tabs to continue making entries in other forms.
See Mail General Tab for a complete description of the contents of this window.

Specifying List Members

You can add members to your mailing list by using one or both of the following methods:

The mailing-list members described here are called email-only members in the Users and Groups interface of Netscape Console, because they have group privileges limited to those provided by the mailing-list component of the group. "Regular" group members, which you add using a different part of the interface (described in Managing Servers with Netscape Console), may have additional privileges or responsibilities beyond those of mailing-list members.

Defining Dynamic Membership Criteria

Dynamic criteria consist of LDAP Search URLs that are used as filters in searching the user directory for determining membership. This mechanism is dynamic in that, when a message arrives for the group, the individuals that receive it are determined by a directory search rather than by consulting a static list of names. You can thus create and maintain very large or complex groups without having to track each member explicitly.

LDAP Search filters must be formatted in LDAP URL syntax. For more detailed information on constructing LDAP filters, see the users and groups chapter of Managing Servers with Netscape Console. See also the Directory Server documentation and RFC 1959.

An LDAP URL has the following syntax:

ldap://hostname:port/base_dn?attributes?scope?filter

where the elements of the URL have the following meanings:

Element
Description
hostname
Hostname of the Directory Server.
port
Port number for the LDAP server. If no port is specified, the standard LDAP port (389) is used.
base_dn
Distinguished name of an entry in the directory, to be used as the search base. This component is required.
attributes
The attributes to be returned. If no attributes are specified, all attributes are returned.
scope
Scope of search:
filter
Search filter to apply to entries within specified scope of search. If no filter is specified, (objectclass=*) is used.

The following is an example of an LDAP Search URL that filters for users who have sunnyvale as their mail host:

ldap:///o=Airius Corp,c=US??sub?(&(mailHost=sunnyvale.ace.com)\ 
(objectClass=inetOrgPerson))
This URL filters for users who are members of the organization (o) of Airius, have the country (c) attribute of US, and a mail host (mailHost) of sunnyvale. The objectClass attribute defines the type of entry for which to search, in this case inetOrgPerson.

Note that, by default, group names found by a search are ignored; that is, their members are not considered to be part the group defined by the search.

As noted in the next section, Netscape Console provides a template window (the Construct LDAP Search URL window) that you can use as an aid in building a search URL.

Adding Mailing-List Members

To add (email-only) members to a mailing list:

  1. In Netscape Console, access the Create Group or Edit Entry window, as described in Accessing Mailing Lists.
  2. Click the Mail tab.
  3. Click the Mail List Members tab. The Mail List Members form is displayed.
  4. (Optional) To specify an LDAP Search URL for determining membership, click Add below the "Dynamic criteria for email-only membership" field. The Add Dynamic Criterion window opens.
  5. (Optional) To explicitly add an individual member to the mailing list, click Add below the "Members with Email Only Membership" field. The Add Email-Only Member window opens.
  6. Click OK in the Mail List Members form if this action completes all changes that you wish to make to this mailing list. Otherwise, click other tabs to continue making entries in other forms.
See Mail List Members Tab for a complete description of the contents of this form.

Defining Message-Posting Restrictions

You can impose various kinds of restrictions on messages sent to a mailing list. You can define the set of people allowed to post messages, you can require authentication of senders, you can restrict where posted messages can come from, and you can limit the size of a posted message. Messages that violate the restrictions are rejected.

Note: Although these restrictions are useful for controlling several aspects of the incoming messages for a group, they are not intended to provide high-security access control.

To define message-posting restrictions for a group:

  1. In Netscape Console, access the Create Group or Edit Entry window, as described in Accessing Mailing Lists.
  2. Click the Mail tab.
  3. Click the Message Restrictions tab. The Message Restrictions form is displayed.
  4. (Optional) Define the allowed senders. Make one of the following choices:
  5. (Optional) Define the sender authentication policy. Make one of these choices:
  6. (Optional) Define the allowed sender domains, to restrict where senders can post messages from. Click Add below the Allowed sender domains field. The Add Allowed Sender Domain window opens. Enter a domain name, and click OK to add the domain to the list and dismiss the Add Allowed Sender Domain window.
  7. (See Add/Edit Allowed Sender Domain Window for a complete description of the contents of this window.)

  8. (Optional) Define the maximum permitted message size. Enter the size (in bytes) into the field.
  9. Click OK in the Message Restrictions form if this action completes all changes that you wish to make to this mailing list. Otherwise, click other tabs to continue making entries in other forms.
See Message Restrictions Tab for a complete description of the contents of this form.

Defining Message-Rejection Actions

You can specify that Messaging Server automatically execute certain notification actions when messages to your mailing list are rejected because they violate the list's message-posting restrictions.

This feature lets you to define the action to be executed upon rejection of a mail message, and to specify group moderators. The actions that the server can take include notification to a moderator and reply to the sender (with or without appending the original message).

To define message-rejection actions for a mailing list:

  1. In Netscape Console, access the Create Group or Edit Entry window, as described in Accessing Mailing Lists.
  2. Click the Mail tab.
  3. Click the Message Reject Actions tab. The Message Reject Actions form is displayed.
  4. (Optional) To automatically forward rejected messages to moderators, check the "Send message to the moderator(s)" box.
  5. The moderator or moderators then decides how to process the message. That may include approving the message and forwarding it back to the list (perhaps with a password). By checking this box you can thus institute a fully moderated mailing list.

  6. (Optional) To automatically reply to rejected messages, check the "Send the following reply to the sender" box.
  7. Click OK in the Message Reject Actions form if this action completes all changes that you wish to make to this mailing list. Otherwise, click other tabs to continue making entries in other forms.
See Message Reject Actions Tab for a complete description of the contents of that form.


Interface Reference: Managing Mail Users
This section describes the Netscape Console interface elements that allow you to configure and manage the mail-related components of the user information stored in the LDAP user directory. See Managing Servers With Netscape Console for general information on using Netscape Console to manage Messaging Server and other servers. See Directory Server Administrator's Guide for information on LDAP, the user directory, and other user information stored in the directory.


Mail Settings Tab
You use the form accessed through this tab to define a user's Messaging Server host machine and email addresses.

For more information, see also Specifying User Email Addresses.

The Mail Settings form contains the following elements:

Messaging Server host name. In this field, enter the name of the Messaging Server that hosts this user's mail services. The host name you enter must be a fully-qualified domain name (FQDN). If the server has multiple host names, this must be the FQDN known to the Messaging Server on that machine.

Primary email address. in this field, enter the primary email address for this user. The primary address is the publicized address, the one displayed by address-book applications. Each user can have only one primary address.

The address you enter in this field must be a correctly-formatted, valid SMTP address conforming to RFC 821 specifications. Case is not significant; all characters that you enter in this field are forced to lower case.

Note. If you want to implement host name hiding (the host name in the user's address is not to be shown in the outgoing mail header) do not specify the host name in the Primary email address field.

Alternate address. This field displays a list of this user's alternate email addresses, or aliases to the primary email address. Click the Add or Delete buttons to modify the information in this field.

Add. Click this button to open a window (see Add Alternate Address Window) that lets you add an address to the Alternate address field.

Delete. Click this button, after selecting an address in the Alternate address field, to remove that address from the user's list of alternate email addresses.

Action Buttons

OK. Click this button to commit your entries and dismiss this window.

Cancel. Click this button to dismiss the window without submitting your entries.

Help. Click this button to display online help (this document) that describes the Mail Settings form.


Add Alternate Address Window
You use the Add Alternate Address window to define an alternate email address for a user and add it to the Alternate Address field in the Mail Settings form.

For more information, see also Specifying User Email Addresses.

The Add Alternate Address window contains the following elements:

Alternate email address for this user. In this field, enter the address to be added to the user's list of alternate email addresses.

Action Buttons

OK. Click this button to commit your changes and close the window.

Cancel. Click this button to dismiss the window without submitting your entries.

Help. Click this button to display online help (this document) that describes the Add Alternate Address window.


Delivery Options Tab
You use the form accessed through this tab to configure the mail-delivery options available for a user.

For more information, see also

The Delivery Options form contains the following elements:

POP/IMAP Delivery

Enable POP/IMAP delivery. Check this box to enable delivery to this user's regular POP3 or IMAP4 mailboxes. When the box is checked, the associated Properties button is active. Uncheck this box to disable POP/IMAP delivery.

Properties. If the "Enable POP/IMAP delivery" box is checked, click this button to open a window (see POP/IMAP Delivery Window) that lets you define various settings for POP/IMAP delivery for this user.

Program Delivery

Program delivery. Check this box to enable program delivery for this user. Program delivery can redirect the user's incoming mail to specified external commands, or applications. When this box is checked, the associated Properties button is active. Uncheck this box to disable program delivery for this user.

Checking this box makes program delivery available to the user only if it first has been enabled on your server. See Appendix B, Program Delivery, for details.

Properties. If the Program delivery box is checked, click this button to go a window (see Program Delivery Window) that lets you define the commands to be executed by this user's program delivery service.

Unix Delivery

Unix delivery. Check this box to enable standard Unix mail delivery as a delivery option for this user. When Unix delivery is activated for a user hosted by a Messaging Server running on a Unix host, incoming mail for the user is stored in the user's designated Unix mail file. Uncheck this box to disable Unix delivery.

Action Buttons

OK. Click this button to submit your entries and dismiss this window.

Cancel. Click this button to dismiss the window without submitting your entries.

Help. Click this button to display online help (this document) that describes the Delivery Options form.


POP/IMAP Delivery Window
You use this window to configure delivery and access to an individual user's POP or IMAP mailboxes.

For more information, see also Specifying POP/IMAP Delivery

The POP/IMAP Delivery window contains the following elements:

Message store name. In this field, enter the name (nickname, not pathname) of the message store partition to which the user's incoming mail should be delivered, if other than the current default primary partition. The name must represent an existing partition. For information on the message store and instructions fore creating partition nicknames, see Chapter 5, Managing the Message Store.

Mail storage limit

Buttons in this area allow you to assign a disk quota, or allocated storage limit, specific to this user alone.

Use default. Click this button to set no specific limit on the amount of space in the message store allocated to this user.

Note: If this button is selected, the user's storage limit is whatever is specified as the default disk quota for all users. For instructions on setting the default disk quota for the message store, see Configuring User Disk Quotas.

Limit to. Click this button to specify a disk quota for this user. Enter a number in the field and select the appropriate unit (KB or MB).

List of domains accessible to user for mail

Access domains. This field displays the list of domains from which the user can connect to the server to retrieve mail. Note these special cases:

Use the Add button to add entries to this field; use the Delete button to delete entries.

Add. Click this button to open a window (see Add Access Domain Window) that lets you add an access domain to the Access domains field.

Delete. Click this button, after selecting an item in the Access domains field, to remove the item from this user's list of access domains.

Action Buttons

OK. Click this button to submit your entries and dismiss this window.

Cancel. Click this button to dismiss the window without submitting your entries.

Help. Click this button to display online help (this document) that describes the POP/IMAP Delivery window.


Add Access Domain Window
You use the Add Access Domain window to add a domain to the Access domain field in the POP/IMAP Delivery window.

For more information, see also Specifying POP/IMAP Delivery.

The Add Access Domain window contains the following elements:

Access domain name. In this field, enter the name of a domain from which this user has permission to access messages. The name you enter here is added to the list of domains in the Access domains field of the POP/IMAP Delivery window. You can enter either a regular domain name or an IP address.

Action Buttons

OK. Click this button to submit your entries and dismiss this window.

Cancel. Click this button to dismiss the window without submitting your entries.

Help. Click this button to display online help (this document) that describes the Add Access Domain window.


Program Delivery Window
You use the Program Delivery window to define the commands to be executed for Program Delivery services.

For more information, see also

The Program Delivery window contains the following elements:

Program delivery command(s). Enter the command to be executed for program delivery services for this user.

Action Buttons

OK. Click this button to submit your entries and dismiss this window.

Cancel. Click this button to dismiss the window without submitting your entries.

Help. Click this button to display online help (this document) that describes the Program Delivery window.


Mail Forwarding Tab
You use the form accessed through this tab to define forwarding addresses for a user.

For more information, see also Specifying Forwarding Addresses.

The Mail Forwarding form contains the following elements:

Forwarding address. This field displays the list of addresses to which the user's mail should be redirected when forwarding is enabled. Use the Add button to add addresses to this field; use the Delete button to remove addresses.

Add. Click this button to open a window (see Add Forwarding Address Window) that lets you add a forwarding address to the list of forwarding addresses for this user.

Delete. Click this button, after selecting an address in the Forwarding address field, to remove the selected item from the user's list of forwarding addresses.

Action Buttons

OK. Click this button to submit your entries and dismiss this window.

Cancel. Click this button to dismiss the window without submitting your entries.

Help. Click this button to display online help (this document) that describes the Mail Forwarding form.


Add Forwarding Address Window
You use the Add Forwarding Address window to add a mail forwarding address to the Forwarding address list in the Mail Forwarding form.

For more information, see also Specifying Forwarding Addresses.

The Add Forwarding Address window contains the following elements:

Forwarding address. In this field, enter the forwarding address you want to add to the user's list of mail-forwarding addresses.

Action Buttons

OK. Click this button to submit your entries and dismiss this window.

Cancel. Click this button to dismiss the window without submitting your entries.

Help. Click this button to display online help (this document) that describes the Add Forwarding Address window.


Auto-Reply Tab
You use the form accessed through this tab to enable or disable several kinds of automatic mail reply for a user, and to specify the contents of the response message.

For more information, see also Configuring Auto-Reply Settings.

The Auto-Reply form contains the following elements:

Auto-Reply Mode

Off . Click this button to disable all auto-reply modes for this user.

Echo. Click this button to enable echo mode. In echo mode, an automatic reply is sent for each received message, with the received message appended as a MIME attachment. If you select this mode, you can enter a reply message in the Reply text field.

Vacation. Click this button to enable vacation mode. In vacation mode, the first message received by this user from a given sender generates an automatic response; subsequent messages from that sender do not generate a response. If you select this mode, you can enter a reply message in the Reply text field.

Autoreply. Click this button to enable basic auto-reply mode. In auto-reply mode, every incoming message received by the user generates the specified automatic response. (The received message is not attached to the reply.) If you select this mode, you can enter a reply message in the Reply text field.

Reply text. If you have selected the Echo, Vacation, or Autoreply buttons, you can use this filed to specify a reply message to be automatically returned to senders of messages to this user.

First specify the language in the language popup menu, then write the message in the text field. You can create more than one message; each language can have its own message.

Action Buttons

OK. Click this button to submit your entries and dismiss this window.

Cancel. Click this button to dismiss the window without submitting your entries.

Help. Click this button to display online help (this document) that describes the Mail Auto-Reply form.


Interface Reference: Managing Mailing Lists
This section describes the Netscape Console interface elements that allow you to configure and manage the mail-related components of the groups defined in the LDAP user directory. See Managing Servers With Netscape Console for information on using Netscape Console to manage Messaging Server and other servers. See Directory Server Administrator's Guide for information on LDAP, the user directory, and other group information stored in the directory.


Mail General Tab
You use the form accessed through this tab to specify basic information---such as the email addresses, mailing-list owners, and descriptive comments--for the mailing-list portion of a group.

For more information, see also

The Mail General form contains the following elements:

Primary Address

Primary email address. In this field, enter the primary email address for this mailing list. The primary address is the publicized address, the one displayed by address-book applications. Each mailing list can have only one primary address. This information is required.

The address you enter in this field must be a correctly-formatted, valid SMTP address conforming to RFC 821 specifications.

Note. If you want to implement host name hiding (the host name in the group's address is not to be shown in the outgoing mail header) do not specify the host name in the Primary email address field.

Alternate Addresses

Alternative email addresses. *This field displays a list of alternate email addresses for this mailing list. You can use this, for example, to ensure proper delivery of misaddressed mail (e.g., to correct for common misspellings) or to implement group host name hiding for outgoing message headers. You can add as many alternate addresses to the list as you like, provided each is unique.

Click the Add, Edit, or Delete buttons to modify the information in this field.

Add. Click this button to open a window (see Add/Edit Alternate Address Window) that lets you add an address to the Alternate email addresses field.

Edit. After selecting an address in the Alternative email addresses field, click this button to open a window (see Add/Edit Alternate Address Window) that lets you edit that alternate address.

Delete. After selecting an address in the Alternative email addresses field, click this button to remove the selected address from the field.

Error Address

Errors to. In this field, enter the email address of the person, possibly a list owner or system administrator, to whom error messages should be sent when mail sent to the list bounces.

List Owners

Mail list owners. This field contains the distinguished names (DNs) of the owners of this mailing list. The list owner (or owners) typically created the mailing list, and has administrative privileges for adding or removing users, modifying configuration settings, or deleting the list.

Click the Add, Edit, Delete, or Search buttons to modify the information in this field.

Add. Click this button to open a window (see Add/Edit List Owner Window) that lets you add the distinguished name (DN) of an owner to the Mail list owners field.

Edit. After selecting an item in the Mail list owners field, click this button to open a window (see Add/Edit List Owner Window) that lets you edit that owner's DN.

Delete. After selecting a DN in the Mail list owners field, click this button to remove the selected owner from the field.

Search. Click this button to open the Search Users and Groups window, which lets you search the user directory for an owner that you can add to the Mail list owners field. (User and Group searching is described in Managing Servers with Netscape Console.)

Host

Messaging Server host name. In this field, enter the name of the Messaging Server that handles mail for this mailing list. The host name you enter must be a fully-qualified domain name (FQDN). If the server has multiple host names, this must be the FQDN known to the Messaging Server on that machine.

Leave this field blank if you want to allow any Messaging Server host to handle mail for the mailing list.

Information

Descriptive comments. In this field, enter any comments or descriptive notes pertaining to the mailing list.

URL for additional information. If you have created an HTML page or pages that give more information about this mailing list, enter the URL to that page here.

Action Buttons

OK. Click this button to submit your entries and dismiss this window.

Cancel. Click this button to dismiss the window without submitting your entries.

Help. Click this button to display online help (this document) that describes the Mail General form.


Add/Edit Alternate Address Window
You use the Add/Edit Alternate Address window to add an address to, or edit an address in, the Alternate email addresses field in the Mail General form.

For more information, see also Specifying General List Information.

The Add/Edit Alternate Address window contains the following elements:

Enter alternative email address for the mailing list. Enter the address that you want to add, or edit the displayed address.

Action Buttons

OK. Click this button to submit your entry and dismiss this window.

Cancel. Click this button to dismiss the window without submitting your entry.

Help. Click this button to display online help (this document) that describes the Add/Edit Alternate Address window.


Add/Edit List Owner Window
You use the Add/Edit List Owner window to add or edit the distinguished name (DN) of a mailing list owner in the Mail list owners field in the Mail General form.

For more information, see also Specifying General List Information.

The Add/Edit List Owner window contains the following elements:

Enter list owner's DN. Enter the DN that you want to add, or edit the displayed DN. Note that you can use the Search button in the Mail General form to get the DN of an owner by searching the user directory.

Action Buttons

OK. Click this button to submit your entry and dismiss this window.

Cancel. Click this button to dismiss the window without submitting your entry.

Help. Click this button to display online help (this document) that describes the Add/Edit Alternate Address window.


Mail List Members Tab
You use the form accessed through this tab to view and modify the (email-only) membership of this mailing list. You can specify dynamic criteria for list membership, and you can also specify individual members by email address.

Important: Mailing-list members defined here (email-only members) are different from other members of the directory group that this mailing list is part of. Group members entered through the Users and Groups interface (that is, through the Members tab rather than the Mail tab) are mailing-list members as well, but in addition have whatever other privileges the group (apart from its mailing list) may define.

For more information, see also Specifying List Members.

The Mail List Members form contains the following elements:

Dynamic criteria for email-only membership. This field displays the dynamic criteria, if any, that are used to define mailing-list membership. Dynamic criteria consist of LDAP search URLs, and could include specific user attributes such as organizational unit (for example, all employees in the Marketing organization) or Messaging Server host (for example, all users of the server airiuspost1). All users in the user directory matching any criteria defined here are considered members of this mailing list. Applying dynamic membership criteria saves you the effort of specifying each member explicitly when creating a mailing list.

Click the Add, Edit, or Delete buttons to modify the information in this field.

Add. Click this button to open a window (see Add/Edit Dynamic Criterion Window) that lets you add a dynamic membership criterion (in the form of an LDAP URL) to the "Dynamic criteria for email-only membership" field.

Edit. After selecting a criterion (LDAP URL) in the "Dynamic criteria for email-only membership" field, click this button to open a window (see Add/Edit Dynamic Criterion Window) that lets you edit the URL.

Delete. After selecting a criterion (LDAP URL) in the "Dynamic criteria for email-only membership" field, click this button to remove the criterion from the field.

Members with email-only membership. This field lists the email address of individual mailing-list members. You can specify members explicitly by placing their addresses in this field, instead of (or in addition to) defining membership with dynamic criteria. Group members that are not email-only members do not need to be listed in this field.

Note: Because only an emil address is required, you can use this field to add members to the mailing list that do not appear in the LDAP user directory.

Click the Add, Edit, or Delete buttons to modify the information in this field.

Add. Click this button to open a window (see Add/Edit Email-Only Member Window) that lets you add a user to the "Members with email-only membership" field.

Edit. After selecting an item in the "Members with email-only membership" field, click this button to open a window (see Add/Edit Email-Only Member Window) that lets you edit that member's address.

Delete. After selecting an item in the "Members with email-only membership" field, click this button to remove the selected member from the list.

Action Buttons

OK. Click this button to submit your entries and dismiss this window.

Cancel. Click this button to dismiss the window without submitting your entries.

Help. Click this button to display online help (this document) that describes the Mail List Members form.


Add/Edit Dynamic Criterion Window
You use the Add/Edit Dynamic Criterion window to specify an LDAP Search URL that can be used as a filter for dynamically defining mailing-list membership.

For more information, see also

The Add/Edit Dynamic Criterion window contains the following elements:

Enter an LDAP search URL. In this field, enter the LDAP filter you want to add to the "Dynamic criteria for email-only membership" field of the Mail List Members form (or edit the existing filter that appears here). The result of your entry or edit must be a single, complete filter.

Construct. Click this button to open the Construct LDAP URL window, which provides a template you can use to construct your search filter. (The LDAP URL window is described in Managing Servers with Netscape Console.)

Action Buttons

OK. Click this button to submit your entry and dismiss this window.

Cancel. Click this button to dismiss the window without submitting your entry.

Help. Click this button to display online help (this document) that describes the Add/Edit Dynamic Criterion window.


Add/Edit Email-Only Member Window
You use the Add/Edit Email-Only Member window to add a user to the "Members with email only membership" field in the Mail List Members form.

For more information, see also Specifying List Members.

The Add/Edit Email-Only Member window contains the following elements:

Enter User's Email Address. In this field, enter the email address of the user you want to add to the "Members with email only membership" field in the Mail List Members form (or edit the existing address that appears here). The address you enter in this field must be a correctly-formatted, valid SMTP address conforming to RFC 821 specifications.

Action Buttons

OK. Click this button to submit your entry and dismiss this window.

Cancel. Click this button to dismiss the window without submitting your entry.

Help. Click this button to display online help (this document) that describes the Add/Edit Email-Only Member window.


Message Restrictions Tab
You use the form accessed through this tab to implement policies that govern who is allowed to send messages to this mailing list and how large the messages can be.

For more information, see also

The Message Restrictions form contains the following elements:

Allowed Senders

Select one of the following three choices to specify who is allowed to post messages to the mailing list. (The default is "Anyone.")

Anyone. Click this button to remove all restrictions on senders.

Anyone in the mailing list. Click this button to restrict message-posters to mailing-list members only. (Group members that aren't email-only members will also be allowed to post.)

Anyone in the following list.. Click this button to allow only those users that appear in the following field (Allowed Senders field) to be able to post messages to the mailing list.

The field contains either the email address or the distinguished name (DN) of a user. The field must contain at least one entry for this button to be selected.

Note: If you want all list members plus other individuals to be allowed to post messages, put the DN or email address of the mailing list itself into this field, plus whatever other individuals you want to have posting permission.

Click the Add, Edit, Delete, or Search buttons to modify the content of this field.

Add. Click this button to open a window (see Add/Edit Allowed Sender Window) that lets you add a new user to the Allowed Senders field.

Edit. After selecting an item in the Allowed Senders field, click this button to open a window (see Add/Edit Allowed Sender Window) that lets you edit that sender's DN or email address.

Delete. After selecting an item the Allowed Senders field, click this button to remove the sender from the field.

Search. Click this button to open the Search Users and Groups window, which lets you search the user directory for a user that you can add to the Allowed Senders field. (User and Group searching is described in Managing Servers with Netscape Console.)

Sender Policy

Select one of the following three sender-authentication policies. (The default is "No special requirement.")

No special requirement. Click this button to require no authentication from senders.

Only allow senders with SMTP authentication. Click this button to accept messages from only those senders that have authenticated to their SMTP server. See SMTP Password Login for information on authenticated SMTP.

Only allow messages with the following password. *Click this button, and enter a password into the following fields, to define a password specific to this mailing list. Only messages whose headers include that password will be accepted.

If you select this option, you must enter a password.

Password. Enter the sender password for this mailing list.

Password. Re-enter the password for verification.

Sender Domains

Allowed sender domains. This fields displays the list of domains from which messages will be accepted for posting to this mailing list. If none is specified, there is no sender-domain restriction.

Click the Add, Edit, or Delete buttons to modify the information in this field.

Add. Click this button to open a window (see Add/Edit Allowed Sender Domain Window) that lets you add a domain to the Allowed Sender Domains field.

Edit. After selecting an item in the Allowed Sender Domains field, click this button to open a window (see Add/Edit Allowed Sender Domain Window) that lets you edit the domain specification.

Delete. After selecting an item in the Allowed Sender Domains field, click this button to remove the selected member from the field.

Maximum Message Size

Maximum message size (in bytes). Enter the maximum permitted size (in bytes) for messages to be posted to this mailing list.

Action Buttons

OK. Click this button to submit your entries and dismiss this window.

Cancel. Click this button to dismiss the window without submitting your entries.

Help. Click this button to display online help (this document) that describes the Message Restrictions form.


Add/Edit Allowed Sender Window
You use the Add/Edit Allowed Sender window to add users to the Allowed Sender list in the Message Restrictions form, or to edit the information about an existing allowed sender. An allowed sender is a user with permission to post messages to a particular mail group.

For more information, see also Defining Message-Posting Restrictions.

The Add/Edit Allowed Sender window contains the following elements:

DN. Click this button if you are entering a distinguished name.

Email address. Click this button if you are entering an email address.

Enter sender's email address or DN. In this field, enter the email address or distinguished name of the user you want to add to the Allowed Sender list in the Message Restrictions form.

Note: You can enter the DN or email address of a group in this field. If you do so, all members of that group become allowed senders.

Action Buttons

OK. Click this button to submit your entry and dismiss this window.

Cancel. Click this button to dismiss the window without submitting your entry.

Help. Click this button to display online help (this document) that describes the Add/Edit Allowed Sender window.


Add/Edit Allowed Sender Domain Window
You use the Add /Edit Allowed Sender Domain window to add a domain to the Allowed sender domains field of the Message Restrictions form, or to edit the specification of an existing allowed domain. An allowed domain is a domain from which incoming messages can be accepted for posting to this mailing list.

For more information, see also Defining Message-Posting Restrictions.

The Add/Edit Allowed User Domain window contains the following elements:

Enter a domain name. In this field, enter (or edit) the name of the domain you want to allow posting from. The result of your entry is placed in the Allowed sender domains field of the Message Restrictions form.

Action Buttons

OK. Click this button to submit your entry and dismiss this window.

Cancel. Click this button to dismiss the window without submitting your entry.

Help. Click this button to display online help (this document) that describes the Add Allowed Sender Domain window.


Message Reject Actions Tab
You use the form accessed through this tab to define the action to be executed automatically upon rejection of mail messages that do not meet the message-restriction criteria defined in the Message Restrictions form.

For more information, see also

The Message Reject Actions window contains the following elements:

Message to Moderators

Send message to the moderator(s). Check this box to automatically forward rejected messages to the mailing-list moderator or moderators for further action. (Specifying this option does not preclude you from also specifying an automatic reply to the sender.) If you check this box, you must make at least one entry in the List moderators field.

List moderators. This field displays the list of moderators for this group. A moderator is specified either by email address or by distinguished name (DN). Click the Add, Edit, Delete, or Search buttons to modify the content of this field.

Add. Click this button to open a window (see Add/Edit Moderator Window) that lets you add a new moderator for this mailing list to the List moderators field.

Edit. After selecting an item in the List moderators field, click this button to open a window (see Add/Edit Moderator Window) that lets you edit the moderator's DN or email address.

Delete. After selecting an item the List moderators field, click this button to remove the moderator from the field.

Search. Click this button to open the Search Users and Groups window, which lets you search the user directory for a user that you can add to the List moderators field. (User and Group searching is described in Managing Servers with Netscape Console.)

Reply to Sender

Send the following reply to the sender. Check this box to automatically send a reply to the sender of any rejected message. (Specifying this option does not preclude you from also specifying that the list moderators be notified.)

This option is the default: if neither this box nor the "Send message to the moderator(s)" box is checked, Messaging Server behaves is if this box were checked.

Include original message with reply. If the "Send the following reply to the sender" box is checked, you can check this box to append the original rejected message as a MIME attachment to the automatic reply. Uncheck this box to send the reply only, without appending the original message.

Reply text. First select a language in the popup menu, then enter in this field the text to be used for the reply message. You can create a separate message for each language, so that senders can receive replies in their preferred language.

Messaging Server provides an initial default reply text string in the Reply text field. If you delete all text in that field, the server nevertheless includes a brief default message in the reply.

Action Buttons

OK. Click this button to submit your entries and dismiss this window.

Cancel. Click this button to dismiss the window without submitting your entries.

Help. Click this button to display online help (this document) that describes the Message Reject Actions form.


Add/Edit Moderator Window
You use the Add/Edit Moderator window to add a user to the List moderators field in the Message Reject Actions form.

For more information, see also Defining Message-Rejection Actions.

The Add/Edit Moderator window contains the following elements:

DN. Click this button if you are entering a distinguished name.

Email address. Click this button if you are entering an email address.

Enter moderator's DN or email address. In this field, enter the email address or distinguished name of the user you want to add to the list of moderators for the mailing list (or edit the information for an existing moderator).

Action Buttons

OK. Click this button to submit your entry and dismiss this window.

Cancel. Click this button to dismiss the window without submitting your entry.

Help. Click this button to display online help (this document) that describes the Add/Edit Moderator window.


© Copyright 1998 Netscape Communications Corporation