2.14 How to Remove the System From the Rack
You must remove the system from the rack when removing and replacing the main logic board. You can perform all other procedures while the system is still attached to the rails extended from the rack. If you want to remove the system from the rack for any other reason, follow the instructions in this section.
Unless the rack is bolted to the floor, you must extend the cabinet's anti-tip legs and adjust their stabilizing feet to the floor. Level and secure the cabinet to provide a safe working environment.
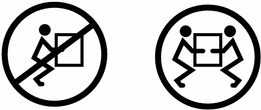
The chassis is heavy. Two people are required to remove the system from the rack enclosure in the following procedure.

2.14.1 Before You Begin
Complete these tasks:
-
Identify a helper to assist you in removing the system
Discuss the task and verify that your helper can safely lift and carry 34 lbs (17 kg), which is approximately half the weight of a fully-equipped system.
Review the steps in the next section with your helper beforehand and discuss how to coordinate your efforts to ensure your mutual safety.
When completing a two-person procedure, always communicate your intentions clearly before, during, and after each step to minimize confusion.
2.14.2 What to Do
-
Position one person on each side of the system, facing the system glides.
When you are both in position, verify that your helper understands what to do with the system after you remove it. Also agree on a route to follow, and visually inspect it for potential safety hazards (for example, cables on the floor, other people working in the vicinity, and so on).
-
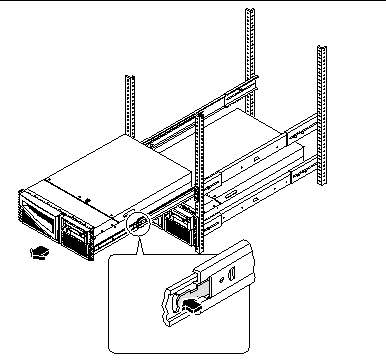
Locate the flat spring catches on the inner glides.
Each person should visually locate one of the two flat spring catches that release the system from the rack glide. One catch is attached to each inner glide, as shown in the following figure.

-
Prepare to remove the system.
Each person should place one hand on the flat spring catch and their other hand beneath the chassis, palm up, ready to support the weight of the chassis.
-
Simultaneously press in on both flat spring catches and slide the system out of the glides.
Each person presses one spring catch and helps slide the system free of the outer glide, supporting the weight of the system as it slides free of the glides.
-
Set the system on a workbench or other stable surface.
-
Slide the empty rack slides back into their protective outer glides.
-
Reattach, close, and lock the rack doors as appropriate.
2.14.3 What Next
For information about placing the system into the rack glides, see:
- © 2010, Oracle Corporation and/or its affiliates
