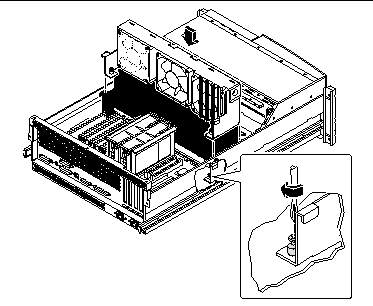
6.4 How to Replace the Fan Tray Assembly
6.4.1 Before You Begin
Complete this task:
6.4.2 What to Do
-
Position the fan tray approximately 2 inches (5 centimeters) over its final location in the system chassis.
-
Route the UltraSCSI disk data cable flat under the tab on the side of the fan tray assembly.
-
Route the main power and keyswitch/power button/LED cables under the right notch on the fan tray assembly.
For information about cable locations, see "5.5 How to Connect the System Cables".
-
Route the I/O power cableunder the left notch on the fan tray assembly.
-
Lower the fan tray into place in the system chassis.
Align the tabs on the fan tray assembly with the notches on the chassis. Make sure that you keep the UltraSCSI data cable flat against the side of the fan tray assembly.

Note -As you lower the fan tray assembly, ensure that the cables remain properly routed under their notches on the fan tray assembly.
-
Tighten the two captive Phillips screws securing the fan tray assembly to the chassis.
6.4.3 What Next
To reassemble the system, complete this task:
- © 2010, Oracle Corporation and/or its affiliates
