6.6 How to Replace the DC-to-DC Converter
6.6.1 Before You Begin
Complete this task:
Note -
The DC-to-DC converter on this system is an assembly consisting of two parts, part numbers 375-0094 and 300-1455. Be sure you have both parts when your are replacing the DC-to-DC converter.
6.6.2 What to Do
-
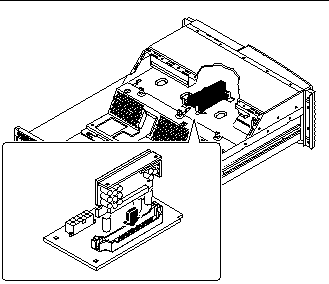
Insert the replacement VRM DC-to-DC card into the replacement DC-to-DC converter board.

-
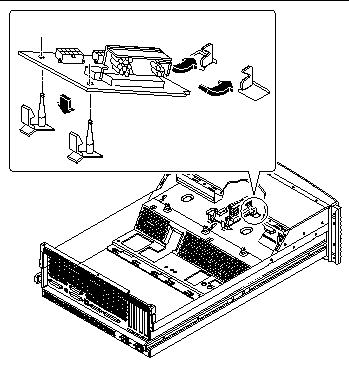
Insert the cutout end of the DC-to-DC converter board into the slots on the metal tabs in the chassis.
Insert the DC-to-DC board into the metal slots at an angle so that the post holes on the back of the converter board align with the plastic retaining clip posts.

-
Lower the DC-to-DC converter onto the plastic retaining clips.
Ensure that the other end of the DC-to-DC converter board remains in place in the metal tabs.
-
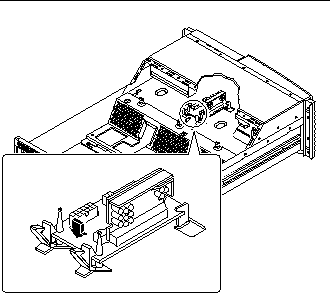
Secure the DC-to-DC converter board in place.
Push down on the board until the plastic tabs secure the board in place.

-
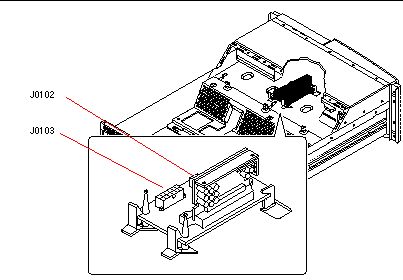
Connect the CPU core voltage power cable to connector J0103 on the DC-to-DC converter board.
The connector is keyed so that it installs in only one way.
-
Connect the CPU core voltage power sense cable to connector J0102 on the DC-to-DC converter board.
The connector is keyed so that it installs in only one way.

6.6.3 What Next
Complete this task to reassemble the system:
- © 2010, Oracle Corporation and/or its affiliates
