 How To Access the Account Information
Steps
-
From the Main screen, click Account in the Navigation Bar
-
On the Account screen, click Account Information.
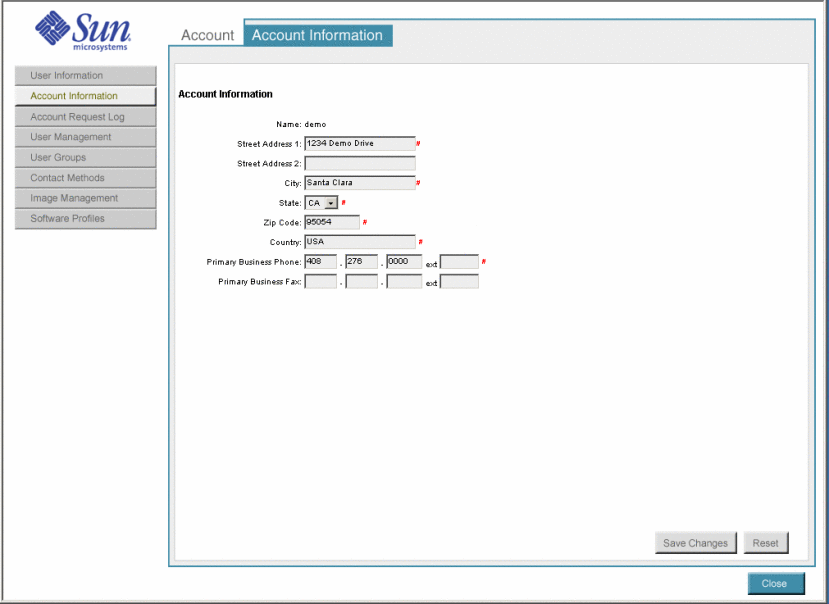
The Account Information screen appears.
Figure 3–3 Account Information Screen

-
Type new or updated account information into the appropriate fields.
The following table describes all the fields on the Account Information screen.
Field Name
Required/Optional/Display
Description
Name
Display
Display only. Shows the account name.
Street Address 1
Optional
Type the company street address—a maximum of 200 characters.
Street Address 2
Optional
Type a second street address, such as, a department for a large company or an alternative address, such as a post office box—maximum of 200 characters.
City
Optional
Type city name—a maximum of 30 characters.
State
Optional
Select a state from the drop-down list.
Zip Code
Optional
Type a zip code.
Country
Optional
Type the country name.
Primary Business Phone
Optional
Type a valid US telephone number as the company's business phone.
Note –The extension is optional.
Primary Business Fax
Optional
Type a valid US telephone number as the company's business fax.
Note –The fax and extension is optional.
-
Click the Save Changes button.
The new account information is saved.
- © 2010, Oracle Corporation and/or its affiliates
